From: http://blog.csdn.net/u011325787/article/details/51423424
mycat is a distribution invented by a popular Chinese recently data base Middleware, which is developed on the basis of Ali's cobar
We need to configure it before we build it. MySQL Master-slave duplication, this process is very long, I do not write here, interested can see this article I wrote.
Construction of master-slave replication environment for mysql database under linux centos
The role of mycat in applications can be seen in the following figure

mycat allows programmers to only care about the writing of business code, without worrying about the load balance of back-end database cluster, the separation of reading and writing, the compilation of data fragmentation logic of sub-database and sub-table, as long as they connect mycat directly.
First we prepare a clean centos machine and install jdk

Unzip the installation package of mycat to / user/local / below

Setting environment variables for mycat
- vi /etc/profile

Make the configuration file take effect immediately
- source /etc/profile
Enter mycat's configuration file directory
- cd /usr/local/mycat/conf/
This configuration file is mainly used to configure database nodes, logical tables, and so on.
- vi schema.xml
Next, configure user privileges, system variables
- <?xml version="1.0"?>
- <!DOCTYPE mycat:schema SYSTEM "schema.dtd">
- <mycat:schema xmlns:mycat="http://org.opencloudb/">
- <!-- Definition MyCat Logic library -->
- <schema name="pcx_schema" checkSQLschema="false" sqlMaxLimit="100" dataNode="pcxNode"></schema>
- <!-- Definition MyCat Data Node -->
- <dataNode name="pcxNode" dataHost="dtHost" database="pcx" />
- <!-- Define data host dtHost,connection to MySQL Read-Write Separation Cluster ,schema Each of them dataHost Medium host Attribute values must be unique-->
- <!-- dataHost In fact, the configuration is the database cluster in the background, one datahost Represents a database cluster -->
- <!-- balance="1",All-out readHost and stand by writeHost participate in select Statement load balancing-->
- <!-- writeType="0",All write operations are sent to the first configuration writeHost,This is ours. hostmaster,The first hung until the second survived. writeHost-->
- <dataHost name="dtHost" maxCon="500" minCon="20" balance="1"
- writeType="0" dbType="mysql" dbDriver="native" switchType="2" slaveThreshold="100">
- <!--runtastic Heart Rate PRO -->
- <heartbeat>show slave status</heartbeat>
- <!--Configuring the background database IP Address and port number, and account password -->
- <writeHost host="hostMaster" url="192.168.1.6:3306" user="root" password="root" />
- <writeHost host="hostSlave" url="192.168.1.7:3306" user="root" password="root" />
- </dataHost>
- </mycat:schema>
- vi server.xml
Modify the firewall to allow mycat ports to be accessed from outside
- <?xml version="1.0" encoding="UTF-8"?>
- <!-- - - Licensed under the Apache License, Version 2.0 (the "License");
- - you may not use this file except in compliance with the License. - You
- may obtain a copy of the License at - - http://www.apache.org/licenses/LICENSE-2.0
- - - Unless required by applicable law or agreed to in writing, software -
- distributed under the License is distributed on an "AS IS" BASIS, - WITHOUT
- WARRANTIES OR CONDITIONS OF ANY KIND, either express or implied. - See the
- License for the specific language governing permissions and - limitations
- under the License. -->
- <!DOCTYPE mycat:server SYSTEM "server.dtd">
- <mycat:server xmlns:mycat="http://org.opencloudb/">
- <system>
- <!-- Here are some system attributes that you can view by yourself. mycat File -->
- <property name="defaultSqlParser">druidparser</property>
- <property name="charset">utf8mb4</property>
- </system>
- <!-- User 1, corresponding MyCat Host-slave replication cluster corresponding to data nodes connected by logical database -->
- <user name="user1">
- <property name="password">root</property>
- <property name="schemas">pcx_schema</property>
- </user>
- <!-- User 2, read-only permission-->
- <user name="user2">
- <property name="password">root</property>
- <property name="schemas">pcx_schema</property>
- <property name="readOnly">true</property>
- </user>
- </mycat:server>
- vi /etc/sysconfig/iptables
- -A INPUT -m state --state NEW -m tcp -p tcp --dport 8066 -j ACCEPT
- -A INPUT -m state --state NEW -m tcp -p tcp --dport 9066 -j ACCEPT
Then restart the firewall
- service iptables restart
- cd /usr/local/mycat/bin/
Enter mycat's script directory
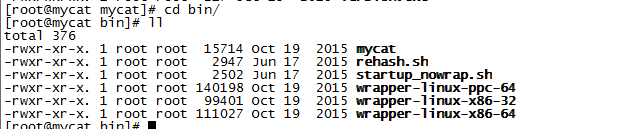
Run Start Command
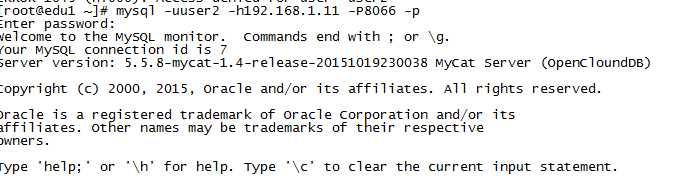
We can use mysql client connection or navicat to connect mycat
- ./mycat start
Next we go test Read-write separation
Enter mycat's log directory
- cd /usr/local/mycat/logs/

First test the read operation
Let's connect to mycat and send a select * command.
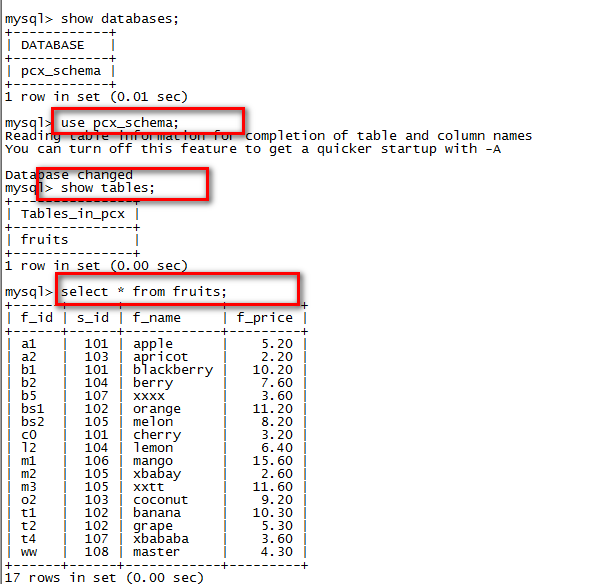

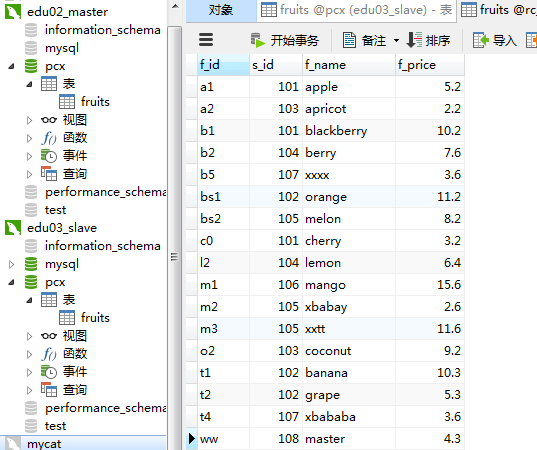
You can see that the select operation is routed to 192.168.1.7, our slave node.
So let's do it many times.
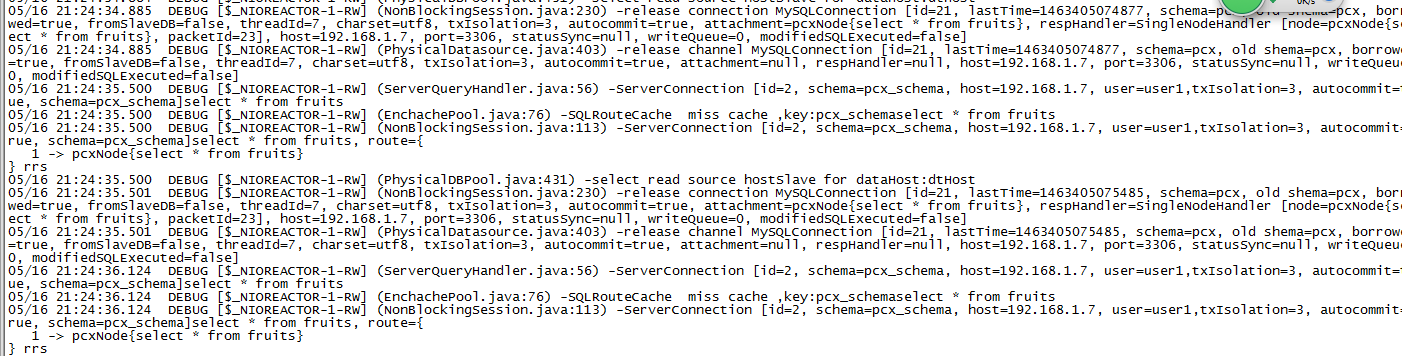
The result is still routed to the read node
Next, let's test the write operation.


Visible inserts are routed to master nodes
Finally, let's see if master's data is synchronized to slave
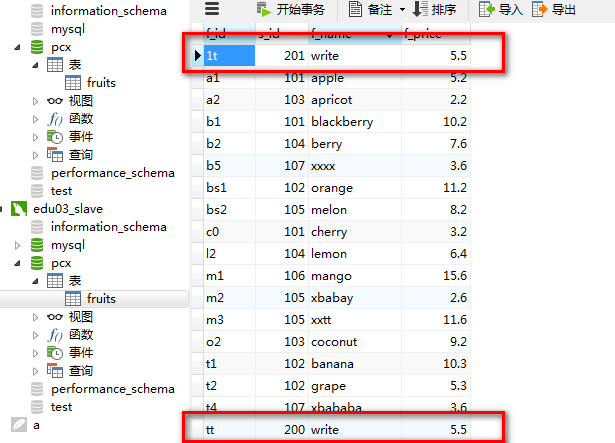
The successful synchronization of records shows that the separation of reading and writing is successful.