MySQL Installation Collection
Install MySQL on Linux
Install using yum mode
The yum installation method is taken from the novice bird tutorial. http://www.runoob.com/mysql/mysql-install.html)
RPM packages are recommended for installing Mysql on Linux platforms, and MySQL AB provides download addresses for the following RPM packages:
- MySQL - MySQL server.You need this option unless you only want to connect to a MySQL server running on another machine.
- MySQL-client - MySQL client program for connecting to and operating Mysql servers.
- MySQL-devel-library and include files, you need to install the RPM package if you want to compile other MySQL clients, such as the Perl module.
- MySQL-shared - This package contains shared libraries (libmysqlclient.so*) that some languages and applications need to load dynamically, using MySQL.
- MySQL-bench - Benchmarking and performance testing tool for MySQL database servers.
Installation preparation
Before installation, we can check if MySQL is installed on the system itself:
rpm -qa | grep mysql
If your system is installed, you can choose to uninstall it:
rpm -e mysql  // Normal Delete Mode
rpm -e --nodeps mysql  // Force Delete mode, which can be used to force deletion of other files if they are prompted to depend on when deleted using the command above
Start Installation
Next, we use the yum command to install MySQL on the Centos7 system. It is important to note that the MySQL database in the version of CentOS 7 has been removed from the default program list, so before installing, we need to download the Yum resource pack from the official website at the following address: https://dev.mysql.com/downloads/repo/yum/

wget https://dev.mysql.com/get/mysql57-community-release-el7-9.noarch.rpm
rpm -ivh mysql57-community-release-el7-9.noarch.rpm
yum install mysql-server
Initialize MySQL:
mysqld --initializeStart MySQL:
systemctl start mysqldView MySQL running status:
systemctl status mysqld
Note: If we are starting the mysql service for the first time, the mysql server will be initially configured.
Verify Installation
After successful installation of Mysql, the default root user password is empty. You can use the following command to create the root user password:
[root@host]# mysqladmin -u root password "new_password"Now you can connect to the Mysql server with the following commands:
[root@host]# mysql -u root -p
Enter password:*******
Unzip installation using tar package
Installation preparation
First on the official website https://dev.mysql.com/downloads/mysql/5.7.html#downloads Download MySQL Community Server from
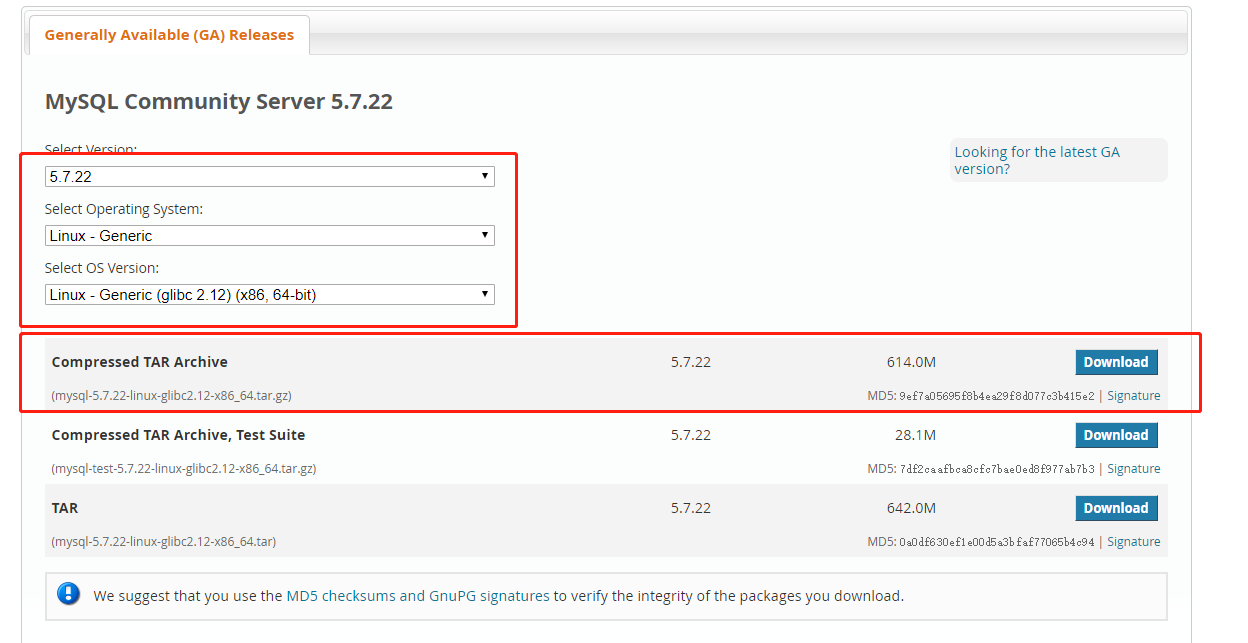
weget https://cdn.mysql.com//Downloads/MySQL-5.7/mysql-5.7.22-linux-glibc2.12-x86_64.tar.gzStart Installation
[root@localhost home]# tar -zvxf mysql-5.7.22-linux-glibc2.12-x86_64.tar.gz
[root@localhost home]# mv mysql-5.7.22-linux-glibc2.12-x86_64 /usr/local/mysql
cd /usr/local/mysql/
During the installation process, I installed mysql in the / usr/local/mysql directory, but you can also customize your installation location
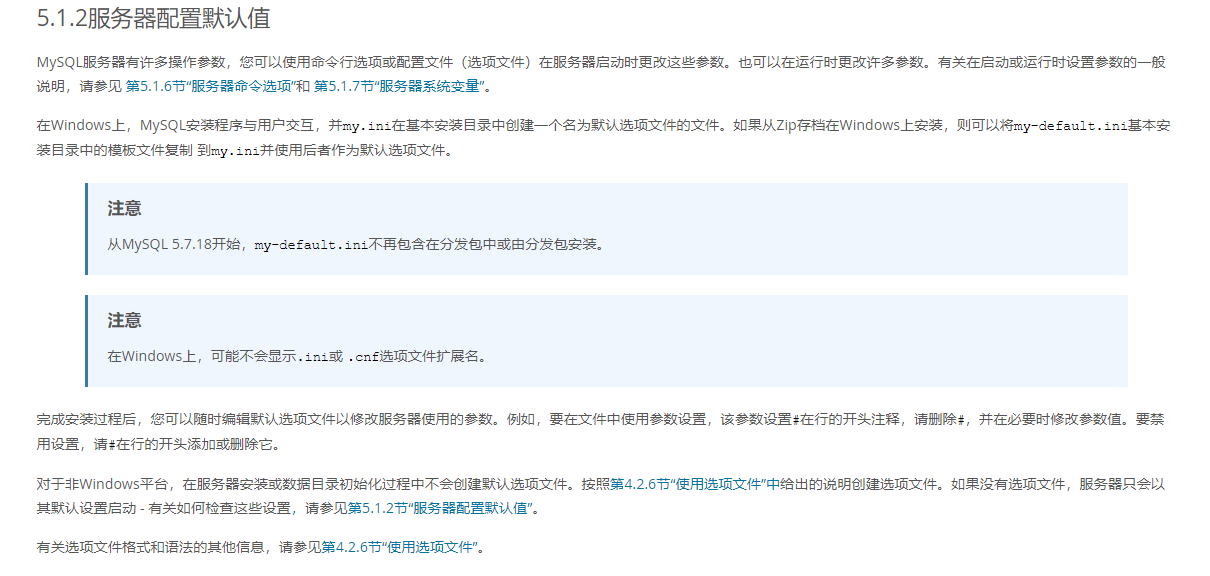
There is usually a my-default.cnf in mysql/support-files at this point.If your version is higher than 5.7.18, then there is no my-default.cnf file and you need to create one yourself.
The official website is described as follows:
https://dev.mysql.com/doc/refman/5.7/en/server-configuration-defaults.html
my-default.cnf is as follows:
# For advice on how to change settings please see
# http://dev.mysql.com/doc/refman/5.7/en/server-configuration-defaults.html
# *** DO NOT EDIT THIS FILE. It's a template which will be copied to the
# *** default location during install, and will be replaced if you
# *** upgrade to a newer version of MySQL.

[mysqld]
sql_mode=NO_ENGINE_SUBSTITUTION,STRICT_TRANS_TABLES

# General configuration options
basedir = /usr/local/mysql
datadir = /usr/local/mysql/data
port = 3306
socket = /var/lib/mysql/mysqld.sock
character-set-server=utf8

back_log = 300
max_connections = 3000
max_connect_errors = 50
table_open_cache = 4096
max_allowed_packet = 32M
#binlog_cache_size = 4M

max_heap_table_size = 128M
read_rnd_buffer_size = 16M
sort_buffer_size = 16M
join_buffer_size = 16M
thread_cache_size = 16
query_cache_size = 128M
query_cache_limit = 4M
ft_min_word_len = 8

thread_stack = 512K
transaction_isolation = REPEATABLE-READ
tmp_table_size = 128M
#log-bin=mysql-bin
long_query_time = 6

server_id=1

innodb_buffer_pool_size = 1G
innodb_thread_concurrency = 16
innodb_log_buffer_size = 16M

innodb_log_file_size = 512M
innodb_log_files_in_group = 3
innodb_max_dirty_pages_pct = 90
innodb_lock_wait_timeout = 120
innodb_file_per_table = on

[mysqldump]
quick

max_allowed_packet = 32M

[mysql]
no-auto-rehash
default-character-set=utf8
safe-updates

[myisamchk]
key_buffer = 16M
sort_buffer_size = 16M
read_buffer = 8M
write_buffer = 8M

[mysqlhotcopy]
interactive-timeout

[mysqld_safe]
open-files-limit = 8192

[client]
socket = /var/lib/mysql/mysqld.sock
Copy my-default.cnf to the etc directory
[root@localhost mysql]# cp support-files/my-default.cnf /etc/my.cnfIn my.cnf, we need to modify something as follows:
- Specify database address
- Set Characters
# General configuration options
basedir = /usr/local/mysql
datadir = /usr/local/mysql/data
port = 3306
socket = /var/run/mysqld/mysqld.sock
character-set-server=utf8
Note that if you modify the socket under mysql, you should also modify the socket under client
Initialize the database:
When you do this, you can either create a new user or use root.
[root@localhost mysql]# useradd mysql
[root@localhost mysql]# chown -R mysql .
[root@localhost mysql]# pwd
/usr/local/mysql
[root@localhost mysql]# ./bin/mysqld --user=mysql --initialize
After initialization, the console prints the following sentence:
2018-07-22T09:47:53.807466Z 1 [Note] A temporary password is generated for root@localhost: !qfyPBhX.2%lThis is the default password for the MySQL root account. Of course, if you forget it, we can change the password for the root account. See below for additional instructions.
Verify Installation
mysql start
[root@localhost mysql]# sudo ./bin/mysqld --user=rootThe first boot may report the following error:
2018-07-22T10:01:40.700536Z 0 [ERROR] Could not create unix socket lock file /var/lib/mysql/mysqld.sock.lock.
2018-07-22T10:01:40.700538Z 0 [ERROR] Unable to setup unix socket lock file.
2018-07-22T10:01:40.700540Z 0 [ERROR] Aborting
This error is usually caused by a directory that does not exist or has insufficient permissions, so we create the directory manually:
[root@localhost mysql]# mkdir /var/lib/mysqlConnect mysql
[root@localhost mysql]# ./bin/mysql -uroot -p
Enter password:
mysql>
It's also worth mentioning that if you're logging in for the first time, mysql will prompt you to change your password using alter:
mysql> use mysql;
ERROR 1820 (HY000): You must reset your password using ALTER USER statement before executing this statement.
Solution:
mysql> set password = password('123456');
Query OK, 0 rows affected, 1 warning (0.00 sec)

mysql> alter user root@localhost password expire never;
Query OK, 0 rows affected (0.00 sec)

mysql> flush privileges;
Query OK, 0 rows affected (0.00 sec)
After that, launch and re-login.
Install under Windows
There are two main ways to install Windows, one using the official installation package and the other installing the green version.
Official installation package download address: https://dev.mysql.com/downloads/mysql/
The green version installs in much the same way as tar installs in linux. No further details will be included here.
Supplementary Instructions
MySQL configuration file read order
On Unix and Unix-like systems, the MySQL program reads the startup options from the files shown in the table below in the order specified (the files listed first read, the files read later take precedence).
| File Path | Explain |
|---|---|
| /etc/my.cnf | Global Selection |
| /etc/mysql/my.cnf | Global Selection |
| SYSCONFDIR/my.cnf | Global Selection |
| $MYSQL_HOME/my.cnf | Specific Server Selection |
| defaults-extra-file | Specially specified file |
| ~/.my.cnf | User Specific Options |
| ~/.mylogin.cnf | User-specific login Path Options (client-only) |
Where ~denotes the current user's home directory (i.e. $HOME)
SYSCONFDIR represents the directory specified by SYSCONFDIR using the CMake option when building MySQL.By default, this is the directory where etc is located in the compiled installation directory.
MYSQL_HOME is an environment variable that contains the path to the directory where the server-specific my.cnf file resides.If MYSQL_HOME is not set and the server is started using the mysqld_safe program, mysqld_safe sets BASEDIR as the basic installation directory for MySQL.
MySQL password modification
Edit user table directly using UPDATE
Log in to MySQL first
mysql> use mysql;
mysql> update user set password=password('123') where user='root' and host='localhost';
mysql> flush privileges;
The above modifications are for 5.6 and below, and if you are version 5.7, you will get an error like this
ERROR 1054 (42S22): Unknown column 'passsword' in 'field list'This is because the MySQL 5.7 password field has been deleted from the mysql.user table and the new field name is "authenticalion_string".
update user set authentication_string=password('123456') where user="root";Use the SET PASSWORD command
mysql> set password for User name@localhost = password('New password');
mysql> alter user root@localhost password expire never;
mysql> flush privileges;
Use the mysqladmin command
mysql> mysqladmin -uUser name -pOld password password New password
mysql> flush privileges;
Forget MySQL login password
Shut down MySQL service first
Execute command:
[root@localhost mysql]#./mysqld_safe --skip-grant-tables &mysql will restart automatically after executing this command, if not, start it manually
[root@localhost mysql]#./mysql
mysql> flush privileges;
mysql> SET PASSWORD FOR 'root'@'localhost' = PASSWORD('Your new password');