MySql database installation network has more than N, following the blogger's personal test installation and steps are as follows. This article mainly uses non-compiled single instance installation.
1. Check and clear the original mysql in the system
[root@localhost~] # rpm-qa | grep mysql checks mysql in the system
&nbps;&nbps; mysql-libs-5.1.73-7.el6.x86_64
mysql-5.1.73-7.el6.x86_64
[root@localhost~] # rpm-e mysql, using this command to uninstall the original MySQL in the system
[root@localhost~] # rpm-e mysql-libs-5.1.73-7.el6.x86_64, continue uninstalling mysql-libs
[root@localhost ~]# rpm-qa | grep MySQL Check again that the system is uninstalled clean
Note: If you can't uninstall with rpm-e, you can use rpm-e xx-nodeps to uninstall.
2. Creating Users and Groups
1) Check if there is any in the system mysql Users or mysql group
[root@localhost local]# Cat/etc/group | grep MySQL -> Check for MySQL groups
[root@localhost local]# Cat/etc/passwd | grep MySQL -> Check for MySQL users2) Establish mysql Group and mysql user
[root@localhost local]# Groupadd-g 500 MySQL -> Specify gid=500 or define it yourself
[root@localhost ~]# useradd -g mysql -G mysql mysql
[root@localhost local]# id mysql
uid=500(mysql) gid=500(mysql) groups=500(mysql)
[root@localhost ~]# passwd mysql -> Modify mysql user password
3. Download the installation package from the official website
The official download address is: http://dev.mysql.com/downloads/mysql/
Download: mysql-5.7.18-linux-glibc2.5-x86_64.tar.gz 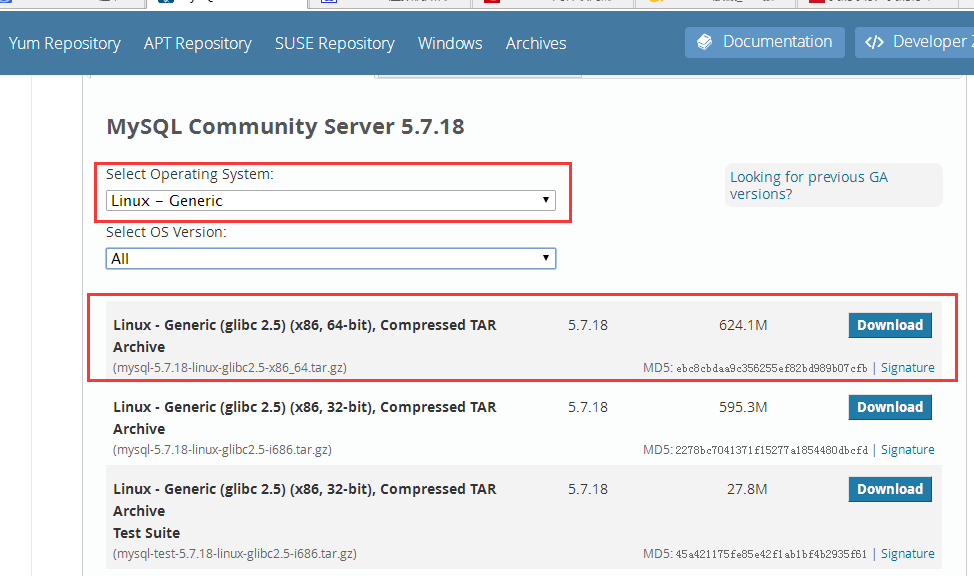
4. Create a directory and unzip the installation package
1) Upload installation package tar.gz to / usr/local / and decompress
[root@localhost local]# tar -xzvf mysql-5.7.18-linux-glibc2.5-x86_64.tar.gz
Unzipped folder --> mysql-5.7.18-linux-glibc2.5-x86_64
2) Change the folder mysql-5.7.18-linux-glibc2.5-x86_64- > MySQL
[root@localhost local]# mv ./mysql-5.7.18-linux-glibc2.5-x86_64 ./mysql
3) Change the owner of the mysql folder to mysql
[root@localhost local]# chown -R mysql:mysql /etc/local/mysql
5. Create a directory and unzip the installation package
1) Create / home/mysql/data directory with mysql user
[mysql@localhost ~]$ mkdir /home/mysql/data
2) Initialize MySQL data with root user execution command/usr/local/mysql/bin/mysqld
[root@localhost mysql]# ./bin/mysqld –user=mysql –basedir=/usr/local/mysql –datadir=/home/mysql/data –initialize
Three parameters should be noted:
** user is the owner of mysql
** basedir is mysql database management system
** datadir is where data is stored
After initializing the data, remember the root password of the last line of mysql, because the root password of MySQL will be changed later.
As follows: 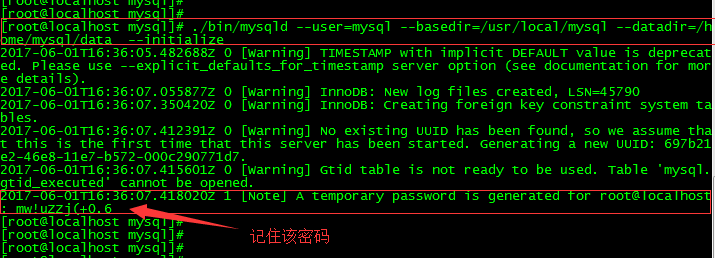
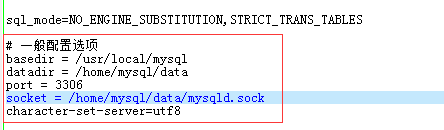
6. Edit my_default.cnf file and detect mysql startup
1) This installation and use mysql.5.7.18, Official from 5.7.5 No more later my-default.cnf Documents, need to prepare their own configuration, see the appendix for details.
* Code my_default.cnf See Final Appendix
* The code that needs to be modified is as follows.
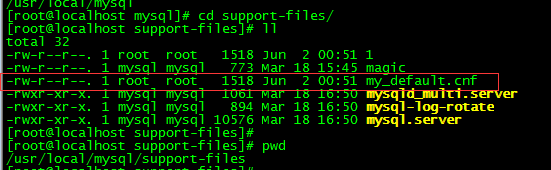
//Save it as my-default.cnf file and upload it to / etc/local/mysql/support-files/2) Reproduce the above my_default.cnf and mysql.server Configuration file to etc Directory, replication my_default.cnfmy.cnf,Previously copied the file to etc Catalog, if prompted here to overwrite, enter Y Coverage.
[root@localhost support-files]# cp my_default.cnf /etc/my.cnf
[root@localhost support-files]# cp mysql.server /etc/3) start-up mysql
[root@localhost mysql]# ./support-files/mysql.server start
Starting MySQL.Logging to '/home/mysql/data/localhost.localdomain.err'.
..................... SUCCESS!4)Testing mysql
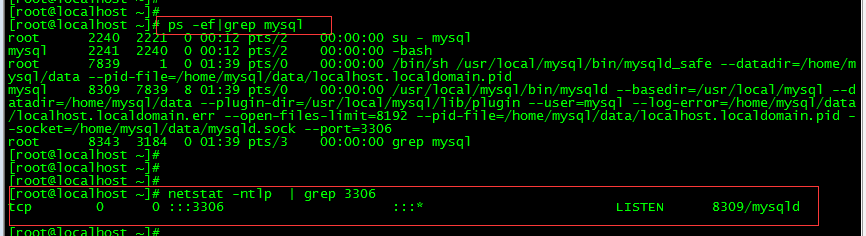
[root@localhost ~]# netstat -ntlp | grep 3306
[root@localhost ~]# ps -ef|grep mysql5)Close mysql
[root@localhost mysql]# /etc/mysql.server stop
Shutting down MySQL.. SUCCESS!
7. Log in to mysql and change the root password
1) Because the password given during data initialization is messy, the following errors will occur when mysqladmin is used to change the password. 
Change the root password directly as follows.
2) Use database to change root password
[root@localhost mysql]# ./bin/mysql -uroot –p
After entering the database, change the password and refresh it.
mysql> set password=password('123456');
mysql> FLUSH PRIVILEGES; 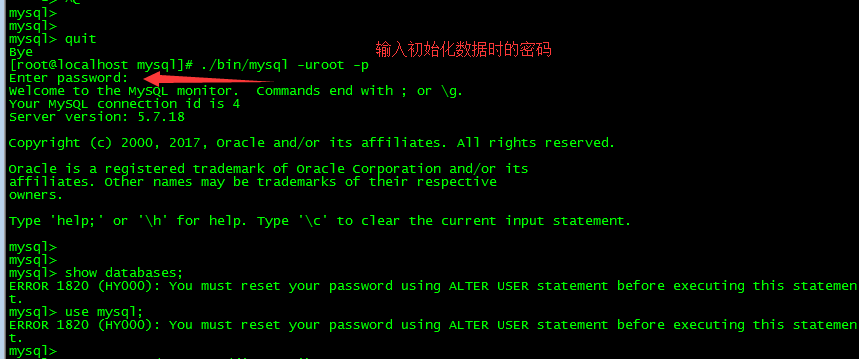
After modification, the new password 123456 was successfully logged in. 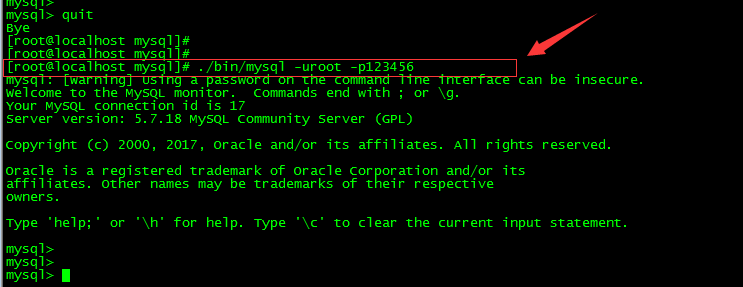
8. Create soft links
1) Create mysql soft links with root
[root@localhost mysql]# ln -s /usr/local/mysql/bin/mysql /usr/bin/mysql
Once created, mysql users can log in to the database with the mysql command.
9. Start mysql self-startup
1) Copy the startup file to / etc/init.d / and repeat the command as mysqld
[root@localhost mysql]# cp ./support-files/mysql.server /etc/init.d/mysqld
2) Increase execution authority, chkconfig add mysqld, set boot startup l
# Chmod 755/etc/init.d/mysqld_Increases execution privileges
# Check that there is no mysqld in the list of self-startup items.
# chkconfig add mysqld_ if not add mysqld
# With this command, chkconfig mysqld on sets the boot start:
As follows: 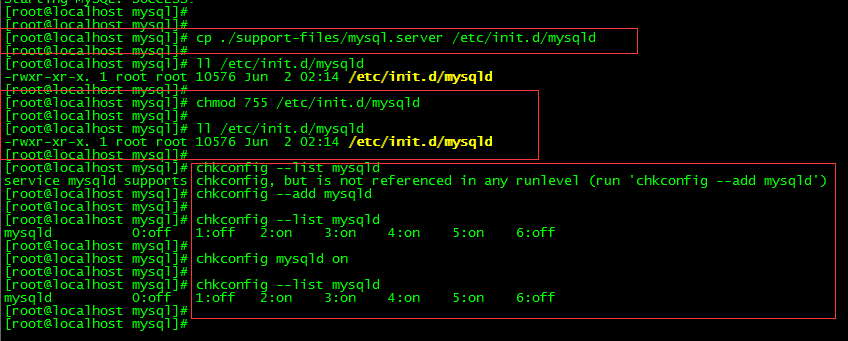
10. Start/Restart/Stop of Mysql Service
# service mysqld status
# service mysqld start
# service mysqld restart
# service mysqld stop
As follows: 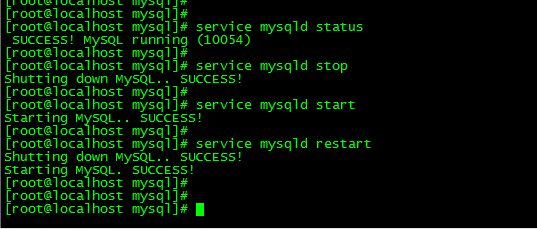
So far, mysql has been installed.
Appendix: my-default.cnf
# For advice on how to change settings please see
# http://dev.mysql.com/doc/refman/5.7/en/server-configuration-defaults.html
# *** DO NOT EDIT THIS FILE. It's a template which will be copied to the
# *** default location during install, and will be replaced if you
# *** upgrade to a newer version of MySQL.

[mysqld]

sql_mode=NO_ENGINE_SUBSTITUTION,STRICT_TRANS_TABLES


# Base Parameter
basedir = /usr/local/mysql
datadir = /home/mysql/data
port = 3306
socket = /home/mysql/data/mysqld.sock
character-set-server=utf8

#Option Parameter
max_connect_errors = 50
table_open_cache = 4096
max_allowed_packet = 32M
#binlog_cache_size = 4M

max_heap_table_size = 128M
read_rnd_buffer_size = 16M
sort_buffer_size = 16M
join_buffer_size = 16M
thread_cache_size = 16
query_cache_size = 128M
query_cache_limit = 4M
ft_min_word_len = 8

thread_stack = 512K
transaction_isolation = REPEATABLE-READ
tmp_table_size = 128M
#log-bin=mysql-bin
long_query_time = 6


server_id=1

innodb_buffer_pool_size = 1G
innodb_thread_concurrency = 16
innodb_log_buffer_size = 16M

innodb_log_file_size = 512M
innodb_log_files_in_group = 3
innodb_max_dirty_pages_pct = 90
innodb_lock_wait_timeout = 120
innodb_file_per_table = on

[mysqldump]
quick

max_allowed_packet = 32M

[mysql]
no-auto-rehash
default-character-set=utf8
safe-updates
socket = /home/mysql/data/mysqld.sock


[myisamchk]
key_buffer = 16M
sort_buffer_size = 16M
read_buffer = 8M
write_buffer = 8M

[mysqlhotcopy]
interactive-timeout

[mysqld_safe]
open-files-limit = 8192

[client]
default-character-set=utf8

[root@localhost mysql]#