The previous article introduced the logical backup tool mysqldump. This article will demonstrate the second part of data backup and recovery by using xtrabackup, a more popular physical backup tool.
1. Installation of xtrabackup tool
1.1 installation dependency package
/*  xtrabackup You need to install the related dependency package to use the */
yum install -y rsync perl l perl-Digest-MD5 perl perl-devel libaio libaio-devel perl-Time-HiRes perl-DBD-MySQL
1.2 download and installation
Download the corresponding version of the installation package https://www.percona.com/downloads on the percona official website. Because the corresponding database version of each version is different, you need to select the corresponding xtrabackup installation package according to the database version

The current test database is MySQL 5.7, so download version 2.4 https://www.percona.com/downloads/Percona-XtraBackup-2.4/LATEST/
In addition, in 2.4.10 and later versions, libgcrypt is differentiated. Therefore, you need to query the libgcrypt version of your server, and then select the corresponding installation package
To view the libgcrypt method:
[root@testdb ~]# yum list installed|grep libgcrypt
libgcrypt.x86_64                     1.5.3-14.el7                      @anaconda
Then download the corresponding package
/* Binary package */
wget https://www.percona.com/downloads/Percona-XtraBackup-2.4/Percona-XtraBackup-2.4.18/binary/tarball/percona-xtrabackup-2.4.18-Linux-x86_64.libgcrypt153.tar.gz
/*  rpm package */
wget https://www.percona.com/downloads/Percona-XtraBackup-2.4/Percona-XtraBackup-2.4.18/binary/redhat/7/x86_64/Percona-XtraBackup-2.4.18-r29b4ca5-el7-x86_64-bundle.tar
After the binary package is decompressed, it can be used. After the rpm package is downloaded and decompressed, rpm - ivh can be installed. The operation is very simple, skip here
xtrabackup usually uses the innobackupex command. You can use the innobackupex -- help command to view parameters and descriptions.
The common parameters and descriptions are as follows:
--Defaults file configuration file of mysql instance to be backed up
 --user=USER backup user. The default is the current system user. It is recommended to use the backup special account
 --password=PASSWD backup user password
 --port=PORT database port, 3306 by default
 --host=HOST IP of the database to be backed up
 --Apply log roll forward, roll back log, use before recovery
 --Database specifies the database to be backed up. Multiple databases are separated by spaces
 --Copy back copy the backup data to the target path
 --Incremental incremental backup, followed by the parameter value is the path of the specified incremental backup
 --Incremental basedir = directory is used to point to the directory of the last incremental backup
 --Incremental dir = directory is used to merge the incremental backup to the full volume and specify the full backup path
 --Redo only merge incremental backups
 --rsync accelerates local file transfer and is suitable for non InnoDB database engine. Not shared with -- stream
 --The backup file generated by no timestamp is not in the directory of timestamp
1.3 create backup account
It is recommended to create the backup account separately and grant relevant permissions
mysql> CREATE USER 'backup'@'localhost' IDENTIFIED BY 'Backup@123.com';
mysql> GRANT SUPER,RELOAD, LOCK TABLES, PROCESS, REPLICATION CLIENT ON *.* TO 'backup'@'localhost';
mysql> FLUSH PRIVILEGES;
2. Full backup
2.1 local full backup, uncompressed
Incremental backup will be conducted based on this in the future
/* Create a directory of backup results. This step can also be omitted */
mkdir  all_backup

/*   Start full backup  */

/root/xtrabackup/bin/innobackupex  --defaults-file=/app/data/mysql3306/etc/my.cnf     --socket=/app/data/mysql3306/tmp/mysql.sock  --port=3306 --user=backup --password='Backup@123.com' --no-timestamp    all_backup
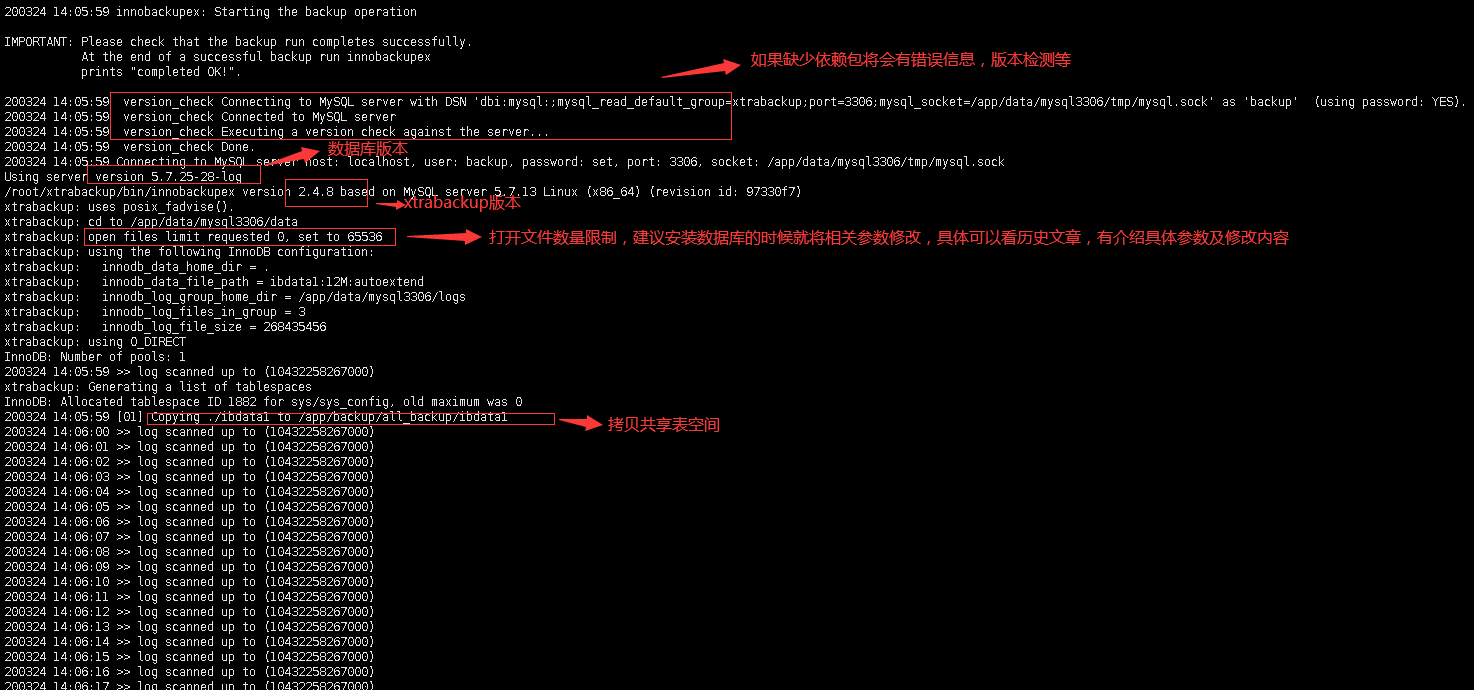
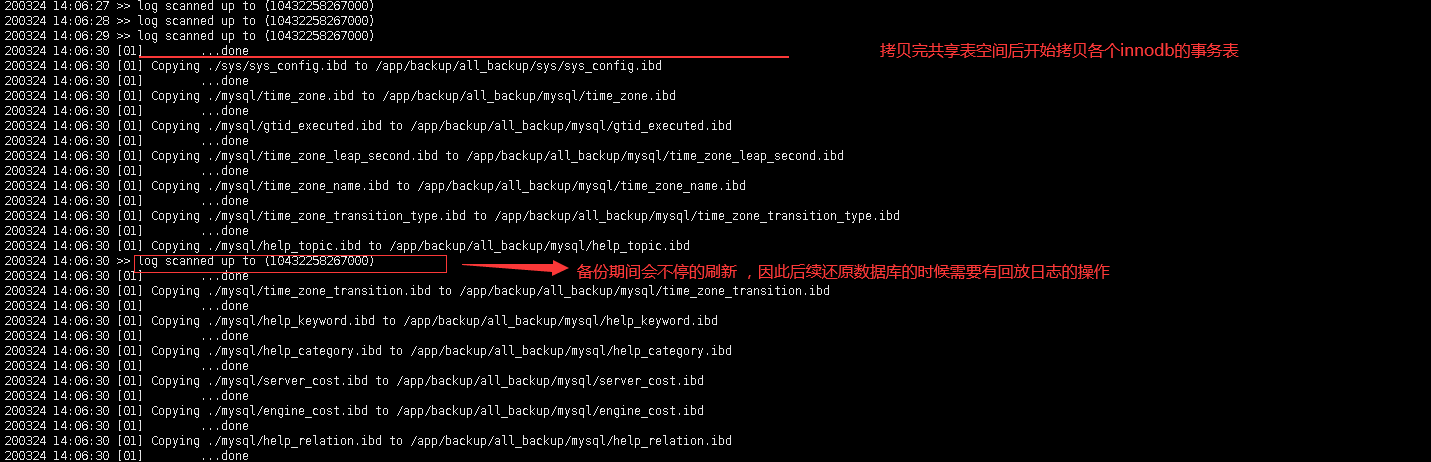
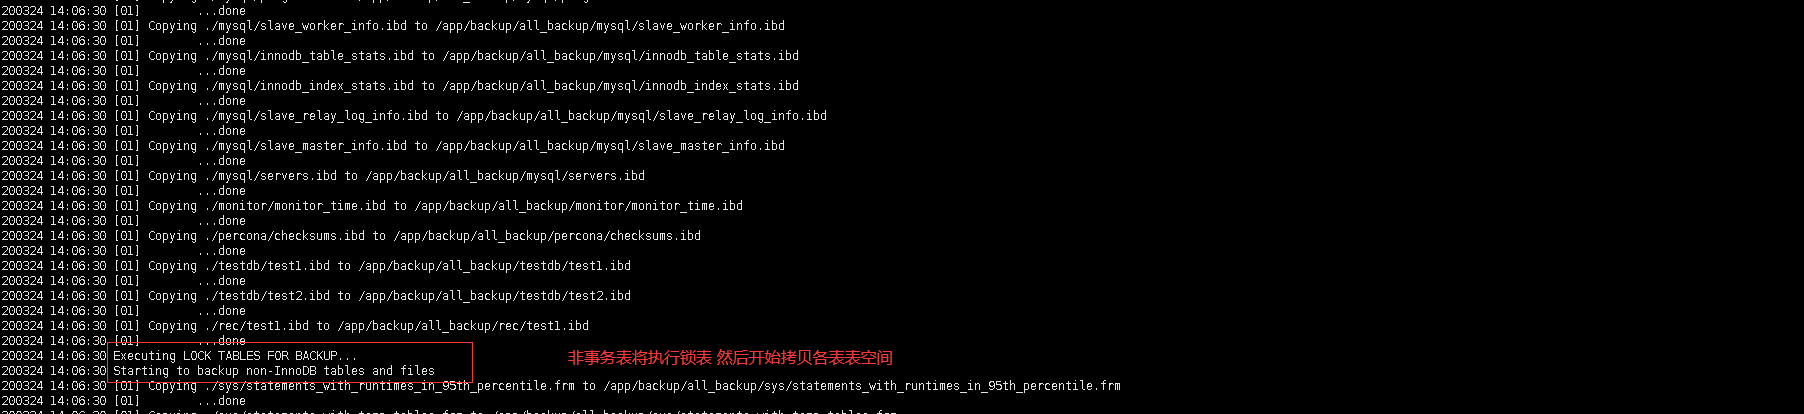
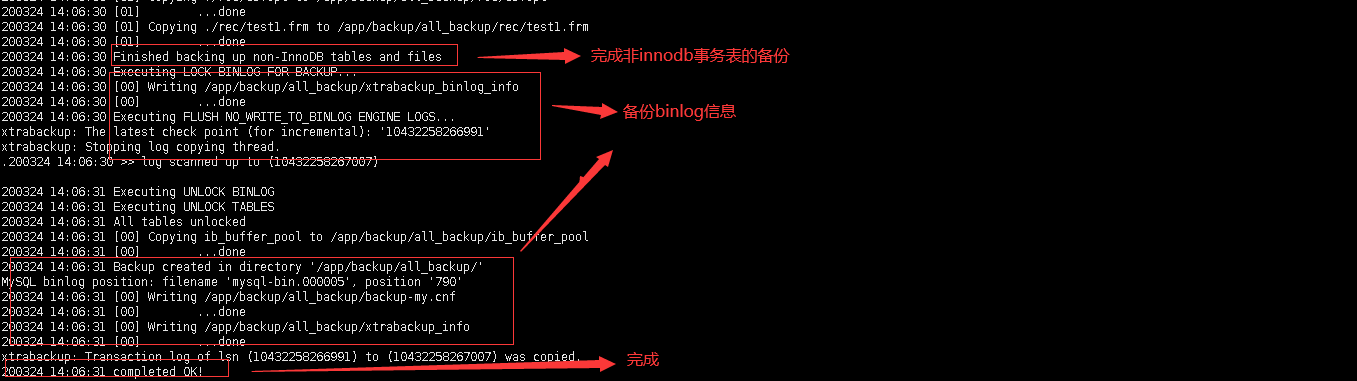
The backup results are stored in the specified directory all backup, as follows:

2.2 local tar compression backup
Sometimes, in order to consider the problem of disk space, it will be compressed directly during backup to save disk space or solve the problem of insufficient disk space to store a full amount of non compressed files.
/* gzip Mode compression */
/root/xtrabackup/bin/innobackupex  --defaults-file=/app/data/mysql3306/etc/my.cnf     --socket=/tmp/mysql.sock  --port=3306 --user=backup --password='Backup@123.com' --stream=tar /tmp |gzip >all_backup.tar.gz
Omission of intermediate process
The backup result is a compressed file. After comparison, the compressed data is about 20% of the uncompressed data, and the compression ratio is still relatively high.
However, the way of compressing backup is relatively slow and consumes CPU. This influence factor needs to be taken into consideration and whether to compress or not depends on the situation.
Note: if a single table is too large and / tmp path space is insufficient, an error may be reported during the backup process, so other directories with large space can be specified
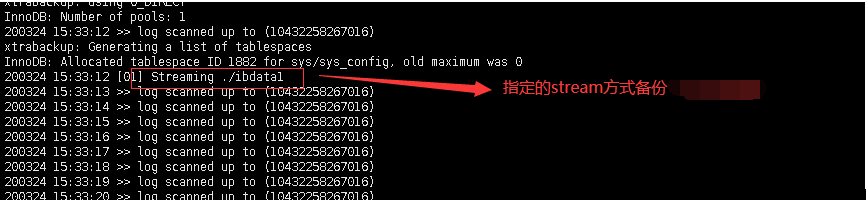
2.3 local xbstream compression backup
There may be bug s in gzip compression backup (cases can be found by yourself), as follows:
xtrabackup: error: The transaction log file is corrupted.
xtrabackup: error: The log was not applied to the intended LSN!
Therefore, xbstream can be used for backup. The backup command is as follows:
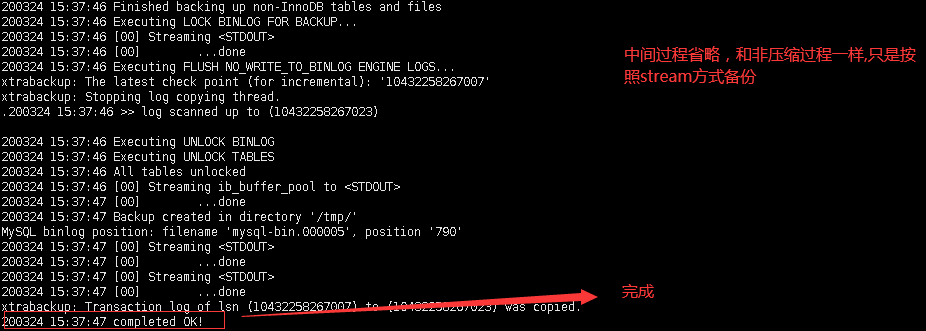
/root/xtrabackup/bin/innobackupex --defaults-file=/app/data/mysql3306/etc/my.cnf --socket=/tmp/mysql.sock --port=3306 --user=backup --password='Backup@123.com' /app/backup --tmpdir=/app/backup --stream=xbstream|gzip - > all_backup.xbstream.gz
xbstream compressed backup process is the same as tar, so it will not be explained any more.
2.4 remote backup to other machines
Compared with local backup, remote backup requires additional configuration of remote host's password free login rights
/*  Configure the password free connection to the target host under the host of the backup user */
ssh-keygen
ssh-copy-id -i user@'target_ip'
You can then send the backup results to a remote machine in a mode similar to local backup
/root/xtrabackup/bin/innobackupex --defaults-file=/app/data/mysql3306/etc/my.cnf --socket=/tmp/mysql.sock --port=3306 --user=backup --password='Backup@123.com' --stream=tar /tmp --no-timestamp | ssh user@'target_ip' "cat - > /app/backup/remote_backup.tar"
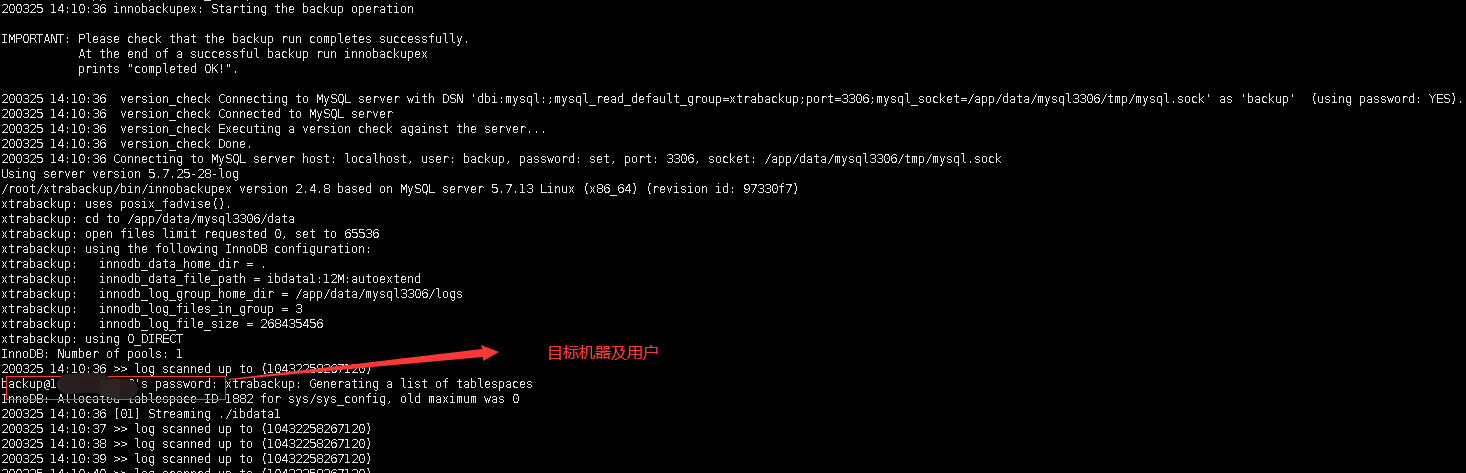
During the backup process, you can see the corresponding backup files on the target machine, as follows

Note:
- Remote backup directory requires write permission
- In addition, like backup backup, the / tmp directory is not recommended when there are large tables or large transactions
3. Incremental backup
3.1 first incremental backup
You can perform incremental backup based on the local full backup of 2.1. The first incremental backup script is as follows:
/root/xtrabackup/bin/innobackupex --defaults-file=/app/data/mysql3306/etc/my.cnf --socket=/tmp/mysql.sock --port=3306 --user=backup --password='Backup@123.com' --incremental /app/backup/ --incremental-basedir=/app/backup/all_backup
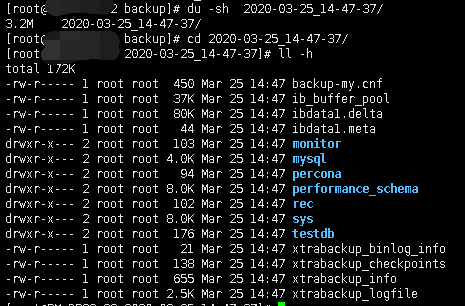
At this time, the backup results are placed in the / app/backup directory. Since the no timestamp parameter is not specified, the backup results exist in the directory that has been named for three periods of time:

The process of backup is similar to full backup, but the result is different
The results are as follows
Note: incremental backup can only be applied to transaction tables such as InnoDB or XtraDB tables. For MyISAM tables, full backup is still performed when incremental backup is performed
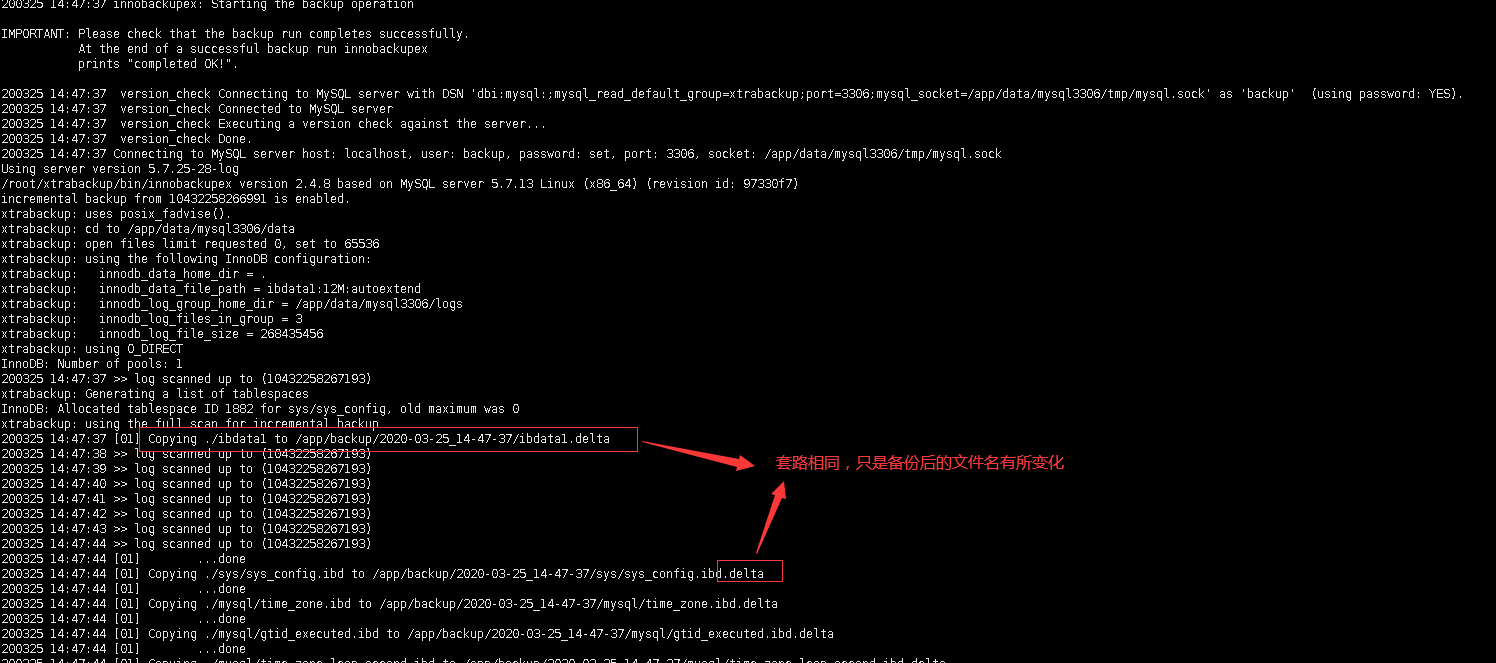
3.2 second incremental backup
The second incremental backup is based on the first incremental backup, so the content of the incremental basedir parameter is specified as the directory of the last incremental backup
/root/xtrabackup/bin/innobackupex --defaults-file=/app/data/mysql3306/etc/my.cnf --socket=/tmp/mysql.sock --port=3306 --user=backup --password='Backup@123.com' --incremental /app/backup/ --incremental-basedir=/app/backup/2020-03-25_14-47-37
Generate a new directory when finished

4. recovery
4.1 recovery based on full backup
4.1.1 playback log
The backed up files can not be used for recovery directly, but also need to use apply log to roll forward and roll back first
/root/xtrabackup/bin/innobackupex --defaults-file=./backup-my.cnf --apply-log /app/backup/all_backup
Note: when playing back the logs, select the default file in the backup directory
4.2.2 restore to target instance
This time, you need to restore to a new instance (if you want to restore to an existing instance, you need to close the target instance first, and delete the data directory and the directory of related log storage. It is not recommended to restore to the existing instance directly, unless it is actually needed.)
/*  Create a related directory for a new instance */
 mkdir -p /app/data/mysql3307/{data,logs,tmp,etc}

/* Production configuration file. Directly copy the configuration file of other instances to modify the corresponding port, etc*/
cp /app/data/mysql3306/etc/my.cnf  /app/data/mysql3307/etc/

sed -i "s#3306#3307#g"  my.cnf

/*  Create error log */
touch   /app/data/mysql3307/logs/mysqld.log
Then copy to the new instance
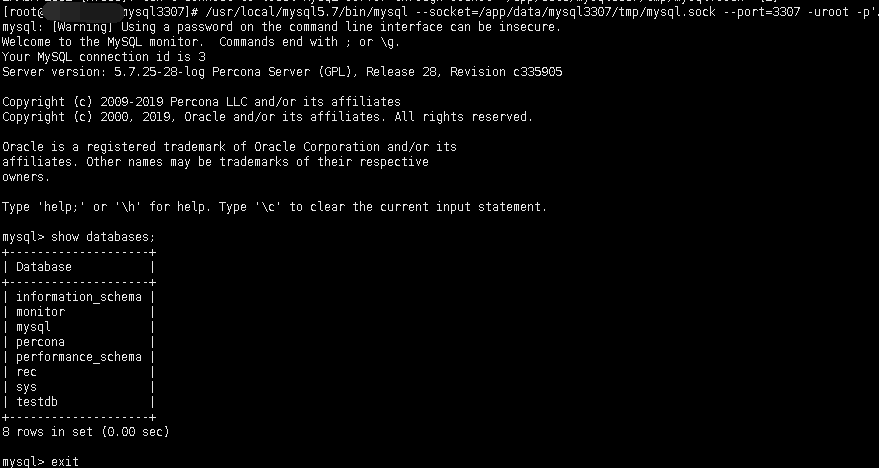
/root/xtrabackup/bin/innobackupex --defaults-file=/app/data/mysql3307/etc/my.cnf --copy-back /app/backup/all_backup
Modify the permission of the directory related to the target instance
chown -R mysql:mysql /app/data/mysql3307
Start a new instance
/usr/local/mysql5.7/bin/mysqld_safe --defaults-file=/app/data/mysql3307/etc/my.cnf &
Completion of recovery
4.2 incremental backup based recovery
If the recovery is based on the first incremental backup, the operation is as follows
/* Use the method of merging incremental backup to play back the logs, and merge the full backup of advanced lines */
/root/xtrabackup/bin/innobackupex  --apply-log --redo-only /app/backup/all_backup
/* Merge the first incremental backup again */
 /root/xtrabackup/bin/innobackupex  --apply-log --redo-only /app/backup/all_backup --incremental-dir=/app/backup/2020-03-25_14-47-37
If the recovery is based on multiple incremental backups, continue to merge the subsequent backups based on the full backup and the first incremental backup
/*  Merging based on the second incremental backup */
/root/xtrabackup/bin/innobackupex  --apply-log --redo-only /app/backup/all_backup --incremental-dir=/app/backup/2020-03-25_15-06-28
The operation after that is the same as the recovery of full backup.
5. summary
The main methods and process of backing up MySQL 5.7 database based on xtrabackup version 2.4 have been demonstrated, and the main advantages of xtrabackup are summarized at the end:
- Physical backup, fast backup
- Hot backup, no downtime
- Fast recovery
- Automatic verification of backup files
This article only introduces the common operations, but there are still many things not introduced, such as data backup and restore on rds. Please explore by yourself or discuss with me.