Title:
Article content output source: Lago education Java high salary training camp.
This article is part of the notes in the MySQL learning course.
This post explains in detail how to build MySQL with high availability and provides a solution to solve the problem that the common master-slave replication delay is not ideal. Finally, the master-slave automatic switch is realized with the help of MHA.
1. Download MySQL
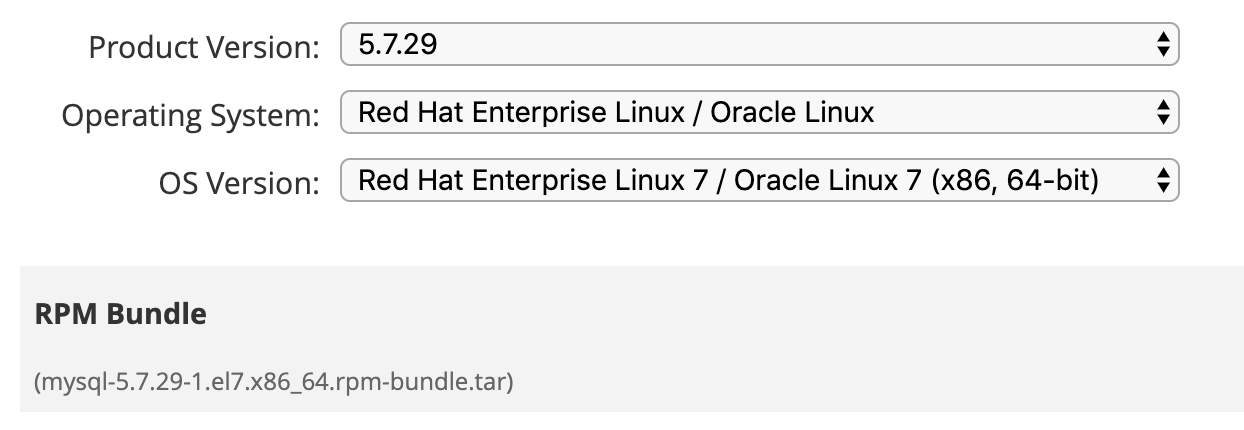
Official download address of MySQL: https://downloads.mysql.com/archives/community/
Operating system: CentOS 7
MySQL: mysql-5.7.29
Select the operating system and corresponding version on this page, as shown in the following figure:
In CentOS, only use wget command to download, and decompress after downloading:
> wget https://downloads.mysql.com/archives/get/p/23/file/mysql-5.7.29-1.el7.x86_64.rpm-bundle.tar
> tar -xvf mysql-5.7.29-1.el7.x86_64.rpm-bundle.tar
mysql-community-embedded-devel-5.7.29-1.el7.x86_64.rpm
mysql-community-test-5.7.29-1.el7.x86_64.rpm
mysql-community-embedded-5.7.29-1.el7.x86_64.rpm
mysql-community-embedded-compat-5.7.29-1.el7.x86_64.rpm
mysql-community-libs-5.7.29-1.el7.x86_64.rpm
mysql-community-client-5.7.29-1.el7.x86_64.rpm
mysql-community-server-5.7.29-1.el7.x86_64.rpm
mysql-community-devel-5.7.29-1.el7.x86_64.rpm
mysql-community-libs-compat-5.7.29-1.el7.x86_64.rpm
mysql-community-common-5.7.29-1.el7.x86_64.rpm
2 installation
Before you start the installation, you need to make sure that there is no MySQL or related products in the system. If you use the operating system installed with CentOS image, it will bring a MariaDB by default. If you use the virtual machine, it is not generally used, but you also need to check:
> rpm -qa | grep mariadb
> rpm -e mariadb-libs-5.5.41-2.el7_0.x86_64 --nodeps     # Remove in this way, if any
There are many components in the MySQL installation package after decompression. Generally, you don't need to install them all. You can select several commonly used installation packages, and pay attention to the installation sequence:
> rpm -ivh mysql-community-common-5.7.29-1.el7.x86_64.rpm
> rpm -ivh mysql-community-libs-5.7.29-1.el7.x86_64.rpm
> rpm -ivh mysql-community-libs-compat-5.7.29-1.el7.x86_64.rpm
> rpm -ivh mysql-community-client-5.7.29-1.el7.x86_64.rpm
> rpm -ivh mysql-community-server-5.7.29-1.el7.x86_64.rpm
> rpm -ivh mysql-community-devel-5.7.29-1.el7.x86_64.rpm
After the installation of the above components, it is enough for daily use.
3 initialization
Use the following command to initialize:
> mysqld --initialize --user=mysql # --User is an optional parameter, which means to create a user named mysql
After initialization, mysql will create a temporary login password for root user, and then modify the password of root user after login. The default path of the temporary password is / var / log in mysql log/ mysqld.log In the last line, it is similar to the following:
A temporary password is generated for root@localhost: hSQ&zl/3m?oF
Log in later using the temporary password above.
Start mysql in system mode, and add mysql to the system self startup list:
> systemctl start mysqld.service
> systemctl status mysqld.service     # Check whether the startup is successful
Then use the temporary password in the above log to log in, and modify the password after logging in, otherwise no operation can be done:
> mysql -uroot -p
....
> set password=password('your_new_password');
In order to make each database node in the cluster communicate normally, it is necessary to close the firewall or release the 3306 port in the firewall. Here it is stopped directly:
> systemctl stop iptables      # iptables firewall
> systemctl stop firewalld     # firewalld firewall, CentOS
> systemctl disable firewalld.service   # Completely disable it from Startup
4 configure master and slave
4.1 configure the main database
Modify the configuration file of the main library / etc/my.cnf , add the following configuration:
# log_bin
server-id=1                          # Set the server ID. each database cannot be duplicate. You must
log_bin=mysql-bin                    # Specify the name of bin log, which is equivalent to turning on bin log. You must
sync-binlog=1                        # Start to refresh the bin log to the disk. Every time there is an update transaction, it must be refreshed to the disk immediately after completion
binlog-ignore-db=performance_schema  # Libraries ignored in binlog
binlog-ignore-db=information_schema
binlog-ignore-db=sys

#binlog-do-db=lagou                   # You can use this parameter to specify which library to synchronize only
After saving and exiting, restart the database:
> systemctl restart mysqld
After starting the bin log, you need to set the permissions of the master database to set which ip slave can synchronize the binlog from this master.
Log in to mysql to perform some authorization operations:
grant replication slave on *.* to 'root'@'%' identified by 'root';    # Replication authorization
grant all privileges on *.* to 'root'@'%' identified by 'root';
flush privileges;                                                     # Refresh permissions
Check the status of the database as the master
mysql> show master status;
+------------------+----------+--------------+-------------------------------------------+-------------------+
| File             | Position | Binlog_Do_DB | Binlog_Ignore_DB                          | Executed_Gtid_Set |
+------------------+----------+--------------+-------------------------------------------+-------------------+
| mysql-bin.000001 |      869 |              | performance_schema,information_schema,sys |                   |
+------------------+----------+--------------+-------------------------------------------+-------------------
Focus on the current bin log file name and the write location of bin log.
4.2 configuration slave
Modify / etc of each slave Library/ my.cnf , add the following:
server-id=3   # Note that IDS in a cluster environment cannot conflict
relay_log=mysql-relay-bin

# read_only=1    # Read only on
Restart the database and log in to mysql to make some configuration:
> show slave status;      # Check the salve status. If it is already open, stop the slave first. After modifying the configuration, start the slave;
# Set the bin log information of the main database (using the file name of the current bin log in the main database and the current write location)
> change master to master_host='172.17.42.6',master_port=3306,master_user='root',master_password='root',master_log_file='mysql-bin.000001',master_log_pos=869;
> show slave status;    # View the slave database status. For the first configuration, the status of the connection master should be No
> start slave;          # Turn on salve mode
After the above steps, the newly built database and DDL operation in the main database can be synchronized to the salve database.
5 configure semi synchronous replication
One disadvantage of the master-slave structure of MySQL is the master-slave synchronization delay. After 5.7, MySQL provides semi synchronous replication and parallel replication to reduce the synchronization delay. In fact, it is to execute the bin log playback thread concurrently.
Main database configuration
Check whether the current version supports plug-ins:
> select @@have_dynamic_loading;
+------------------------+
| @@have_dynamic_loading |
+------------------------+
| YES                    |
+------------------------+
To view the currently installed plug-ins:
> show plugins;
The default should be no RPL_ semi_ For the sync plug-in, you need to install:
> install plugin rpl_semi_sync_master soname 'semisync_master.so'; # soname is followed by an alias
After installation, adjust the parameters (turn on rpl and adjust the timeout):
mysql> show variables like '%semi%';
+-------------------------------------------+------------+
| Variable_name                             | Value      |
+-------------------------------------------+------------+
| rpl_semi_sync_master_enabled              | OFF        |
| rpl_semi_sync_master_timeout              | 10000      |
| rpl_semi_sync_master_trace_level          | 32         |
| rpl_semi_sync_master_wait_for_slave_count | 1          |
| rpl_semi_sync_master_wait_no_slave        | ON         |
| rpl_semi_sync_master_wait_point           | AFTER_SYNC |
+-------------------------------------------+------------+

mysql> set global rpl_semi_sync_master_enabled=1;
Query OK, 0 rows affected (0.00 sec)

mysql> set global rpl_semi_sync_master_timeout=1000;
Query OK, 0 rows affected (0.00 sec)

mysql> show variables like '%semi%';
+-------------------------------------------+------------+
| Variable_name                             | Value      |
+-------------------------------------------+------------+
| rpl_semi_sync_master_enabled              | ON         |
| rpl_semi_sync_master_timeout              | 1000       |
| rpl_semi_sync_master_trace_level          | 32         |
| rpl_semi_sync_master_wait_for_slave_count | 1          |
| rpl_semi_sync_master_wait_no_slave        | ON         |
| rpl_semi_sync_master_wait_point           | AFTER_SYNC |
+-------------------------------------------+------------+
6 rows in set (0.00 sec)
Configuration from library
RPL also needs to be installed_ The semi plug-in is slightly different from that installed in the main library. The suffix of the main library plug-in is master, and the suffix of the slave library is slave
> install plugin rpl_semi_sync_slave soname 'semisync_slave.so';
You also need to turn on rpl:
mysql> show variables like '%semi%';
+---------------------------------+-------+
| Variable_name                   | Value |
+---------------------------------+-------+
| rpl_semi_sync_slave_enabled     | OFF   |
| rpl_semi_sync_slave_trace_level | 32    |
+---------------------------------+-------+
2 rows in set (0.00 sec)

mysql> set global rpl_semi_sync_slave_enabled=1;
Query OK, 0 rows affected (0.00 sec)

mysql> show variables like '%semi%';
+---------------------------------+-------+
| Variable_name                   | Value |
+---------------------------------+-------+
| rpl_semi_sync_slave_enabled     | ON    |
| rpl_semi_sync_slave_trace_level | 32    |
+---------------------------------+-------+
Then restart the slave mode to load the new configuration:
mysql> stop slave;
mysql> start slave;
6 configure parallel replication
The group commit mode of parallel replication is configured here:
Main database parameters
mysql> show variables like '%binlog_group%';
+-----------------------------------------+-------+
| Variable_name                           | Value |
+-----------------------------------------+-------+
| binlog_group_commit_sync_delay          | 0     |
| binlog_group_commit_sync_no_delay_count | 0     |
+-----------------------------------------+-------+
2 rows in set (0.00 sec)

mysql> set global binlog_group_commit_sync_delay=1000;     # Group commit delay time
Query OK, 0 rows affected (0.00 sec)

mysql> set global binlog_group_commit_sync_no_delay_count=100;  # Maximum number of transactions in the group
Query OK, 0 rows affected (0.00 sec)
Configuration from library
Because some parameters are read-only in the msyql console, you need to my.cnf Modified in
slave-parallel-type=LOGICAL_CLOCK
slave-parallel-workers=8
master_info_repository=TABLE
relay_log_info_repository=TABLE
relay_log_recovery=1
After saving, restart the database, and then log in to view the parameters:
mysql> show variables like '%slave_parallel%';
+------------------------+---------------+
| Variable_name          | Value         |
+------------------------+---------------+
| slave_parallel_type    | LOGICAL_CLOCK |
| slave_parallel_workers | 8             |
+------------------------+---------------+

mysql> show variables like '%relay_log%';
+---------------------------+--------------------------------------+
| Variable_name             | Value                                |
+---------------------------+--------------------------------------+
| max_relay_log_size        | 0                                    |
| relay_log                 | mysql-relay-bin                      |
| relay_log_basename        | /var/lib/mysql/mysql-relay-bin       |
| relay_log_index           | /var/lib/mysql/mysql-relay-bin.index |
| relay_log_info_file       | relay-log.info                       |
| relay_log_info_repository | TABLE                                |
| relay_log_purge           | ON                                   |
| relay_log_recovery        | ON                                   |
| relay_log_space_limit     | 0                                    |
| sync_relay_log            | 10000                                |
| sync_relay_log_info       | 10000                                |
+---------------------------+--------------------------------------+
Configuration complete.
verification
-
Do the DDL operation or insert / delete operation in the main database
-
View slave library synchronized successfully
-
There are 8 threads to query the thread information about replication from the Library:
mysql> use performance_schema;
mysql> select * from replication_applier_status_by_worker;
+--------------+-----------+-----------+---------------+-----------------------+-------------------+--------------------+----------------------+
| CHANNEL_NAME | WORKER_ID | THREAD_ID | SERVICE_STATE | LAST_SEEN_TRANSACTION | LAST_ERROR_NUMBER | LAST_ERROR_MESSAGE | LAST_ERROR_TIMESTAMP |
+--------------+-----------+-----------+---------------+-----------------------+-------------------+--------------------+----------------------+
|              |         1 |        27 | ON            | ANONYMOUS             |                 0 |                    | 0000-00-00 00:00:00  |
|              |         2 |        28 | ON            |                       |                 0 |                    | 0000-00-00 00:00:00  |
|              |         3 |        29 | ON            |                       |                 0 |                    | 0000-00-00 00:00:00  |
|              |         4 |        30 | ON            |                       |                 0 |                    | 0000-00-00 00:00:00  |
|              |         5 |        31 | ON            |                       |                 0 |                    | 0000-00-00 00:00:00  |
|              |         6 |        32 | ON            |                       |                 0 |                    | 0000-00-00 00:00:00  |
|              |         7 |        33 | ON            |                       |                 0 |                    | 0000-00-00 00:00:00  |
|              |         8 |        34 | ON            |                       |                 0 |                    | 0000-00-00 00:00:00  |
+--------------+-----------+-----------+---------------+-----------------------+-------------------+--------------------+----------------------+
7 configure MHA
The function of MHA is to monitor the operation status of the master node in the master-slave cluster, and automatically select a new master from the available slaves after the master is hung up.
MHA requires at least one master, two slaves and three databases in the cluster environment.
The cluster list of this operation is as follows:
| host name | IP | Initial master-slave role | MHA role |
|---|---|---|---|
| mysql-master | master | MHA Node | |
| ysql-slave-1 | slave | MHA Node | |
| mysql-slave-2 | slave | MHA Node | |
| mha-manager | MHA Manager |
According to the host name, configure the host of other machines in / etc/hosts of their respective machines.
Basic installation dependencies
All database servers and servers to be MHA Manager are installed:
# Install an epel source
wget -O /etc/yum.repos.d/epel-7.repo http://mirrors.aliyun.com/repo/epel-7.repo

# Use yum to install dependency package (CentOS 8 can install Perl DBD MySQL)
yum install perl-DBD-MySQL perl-Config-Tiny perl-Log-Dispatch perl-Parallel-ForkManager perl-Time-HiRes -y
Configure SSH password free login
Configure SSH free login between all machines. For example, in the MHA manager machine, you can copy the public key to the other three machines by creating a symmetric secret key:
> ssh-keygen -t rsa     # All the way back, use the default values
> ssh-copy-id -i /root/.ssh/id_rsa.pub mysql-slave-1
> ssh-copy-id -i /root/.ssh/id_rsa.pub mysql-slave-2
> ssh-copy-id -i /root/.ssh/id_rsa.pub mysql-master
The other three machines copy the public key generated by the machine to the other three machines according to the above procedure.
Modify configuration from library
Relay from library_ Log cannot be deleted automatically:
relay_log_purge = 0       # Do not automatically delete relay log
log_bin=mysql-bin         # Also turn on bin log

# Because bin log library filtering is configured in the main library, the same library filtering must be configured in the slave library
binlog-ignore-db=performance_schema
binlog-ignore-db=information_schema
binlog-ignore-db=sys
Install MHA Node
All database nodes need to install MHA nodes from https://github.com/yoshinorim/mha4mysql-manager/wiki/Downloads Download MHA Node 0.56 rpm RHEL6 in. You may need to manually download it in the upload to server node.
> rpm -ivh mha4mysql-node-0.56-0.el6.noarch.rpm # Install MHA Node
After installation, the following script file appears in the / usr/bin directory:
[root@mysql-slave-2 ~]# ll /usr/bin | grep 'logs'
-rwxr-xr-x  1 root root      16367 Apr  1  2014 apply_diff_relay_logs
-rwxr-xr-x  1 root root       1465 Jun 10  2014 dbilogstrip
-rwxr-xr-x  1 root root       8261 Apr  1  2014 purge_relay_logs
-rwxr-xr-x  1 root root       7525 Apr  1  2014 save_binary_logs
These scripting tools are usually triggered by MHA Manager's scripts and do not require human action.
mha authorization
Authorize the mha database role on all database nodes:
> grant all on *.* to 'mha'@'%' identified by 'mha'; # This is the same user as the configuration file in the manager below
All slave configurations are read-only:
> set global read_only=1;
Install MHA Manager
Install in machine MHA manager.
Manager also depends on MHA Node, so install MHA Node first
From https://github.com/yoshinorim/mha4mysql-manager/wiki/Downloads Download [MHA Manager 0.56 rpm RHEL6], install:
[root@MHA-Manager ~]# rpm -ivh mha4mysql-node-0.56-0.el6.noarch.rpm
[root@MHA-Manager ~]# rpm -ivh mha4mysql-manager-0.56-0.el6.noarch.rpm
Configure manager
First create the mha working directory and configuration file
> mkdir -p /etc/mha
> touch /etc/mha/app1.cnf
> vim /etc/mha/app1.cnf
Profile content (basic content):
[server default]
#MHA log name
manager_log=/etc/mha/manager.log
#MHA's working directory
manager_workdir=/etc/mha
#The storage path of database bin log. If the directory of bin log is customized in the master database, you need to configure it here
#master_binlog_dir=/var/logs/

#mha manages the user's user name, which has been authorized in all databases
user=root
#mha manage user's password
password=root

#Monitor heartbeat every 2 seconds (default is 3 seconds)
ping_interval=2

#ssh Remote Connection user
ssh_user=root

[server1]
hostname=172.17.42.6
port=3306
[server2]
hostname=172.17.42.8
port=3306
[server3]
hostname=172.17.42.10
port=3306
test
> masterha_check_ssh --conf=/etc/mha/app1.cnf    # Test ssh password free login

> masterha_check_repl --conf=/etc/mha/app1.cnf   # Test master-slave replication status
These two tests have problems, and repair according to the output prompts.
start-up
Start manager in the background
> nohup masterha_manager --conf=/etc/mha/app1.cnf --remove_dead_master_conf --ignore_last_failover < /dev/null > /etc/mha/manager.log 2>&1 &
Description of some parameters above:
- remove_dead_master_conf: delete the master information in the configuration file
- ignore_ last_ Failover: last failover
To view the operation status:
> masterha_check_status --conf=/etc/mha/app1.cnf
app1 (pid:13778) is running(0:PING_OK), master:172.17.42.6
Test main library automatic switch
- Use the above command to check the Running status of mha manager and keep it Running.
- Stop mysqld in systemctl stop
- Wait 5-10 seconds, check the slave status of two slave databases show slave status, and you will find that one slave has become a master (show slave status; returns null, and queries the master status).
Restore the main library stopped in the previous step
Now you can only recover from the role of the library first. If you need to switch to the main library, you can switch manually.
-
Start the database systemctl start mysqld in the original main database
-
In the MHA Manager machine, check the MHA log and find the following:
> grep -i 'change master to' /etc/mha/manager.log
Wed May 27 11:00:30 2020 - [info]  All other slaves should start replication from here. Statement should be: CHANGE MASTER TO MASTER_HOST='172.17.42.8', MASTER_PORT=3306, MASTER_LOG_FILE='mysql-bin.000002', MASTER_LOG_POS=154, MASTER_USER='root', MASTER_PASSWORD='xxx';
-
Log in to the original master database, execute the change master command in the log, note that the password part needs to be adjusted, then start slave, and check the slave status:
mysql> CHANGE MASTER TO MASTER_HOST='172.17.42.8', MASTER_PORT=3306, MASTER_LOG_FILE='mysql-bin.000002', MASTER_LOG_POS=154, MASTER_USER='root', MASTER_PASSWORD='root';
Query OK, 0 rows affected, 2 warnings (0.02 sec)

mysql> start slave;
Query OK, 0 rows affected (0.00 sec)

mysql> show slave status \G;
-
Repair the MHA Manager configuration file again, because after a switch, the MHA will automatically remove the failed master database information from the configuration file and exit automatically, so you need to supplement the above repaired database information to the MHA configuration file, and then restart the MHA Manager.
Manual hot switch main library
The above method is to trigger the automatic switching of MHA after the master library is manually stopped. If you want to switch the master and slave under the normal operation of the master and slave, you can use the following command:
> masterha_master_switch --conf=/etc/mha/app1.cnf --master_state=alive --new_master_host=172.17.42.6 --new_master_port=3306 --orig_master_is_new_slave --running_updates_limit=10000
During the operation, there will be interaction. After reading the prompts carefully, proceed to the next step.
attach
Prompt for lack of libssl and other libraries
If you are prompted during installation that there is no dependency:
error: Failed dependencies:
	libcrypto.so.10()(64bit) is needed by mysql-community-libs-compat-5.7.29-1.el7.x86_64
	libcrypto.so.10(libcrypto.so.10)(64bit) is needed by mysql-community-libs-compat-5.7.29-1.el7.x86_64
	libssl.so.10()(64bit) is needed by mysql-community-libs-compat-5.7.29-1.el7.x86_64
	libssl.so.10(libssl.so.10)(64bit) is needed by mysql-community-libs-compat-5.7.29-1.el7.x86_64
Download and install one openssl-libs-1.0.2k-19.el7.x86_64.rpm (source website: rpmfind)
Force install after download:
> rpm -ivh openssl-libs-1.0.2k-19.el7.x86_64.rpm --force
Prompt missing libaio.so
Download: wget http://mirror.centos.org/centos/6/os/x86_64/Packages/libaio-0.3.107-10.el6.x86_64.rpm
Installation:
> rpm -ivh libaio-0.3.107-10.el6.x86_64.rpm
Reason analysis of MySQL startup failure
There are many reasons for startup failure, such as / var/log/mysqld.log You can view the specific reasons in. The most common reason is that there is no permission for data file writing or binlog writing. For example, the default mysql data directory is / var/lib/mysql. If you prompt The innodb_system data file 'ibdata1' must be writable generally means that this data directory does not have permission. Just add the write permission:
> chmod -R 777 /var/lib/mysql
Or put mysql users in the root group.
MHA Manager error
No active server
First, check whether the firewall port is not released, and then check whether mysql can accept remote connection.
Reference link: https://blog.51cto.com/16769017/1878451
Write at the end
After working for N years, I always feel that I know a lot of things, but when it comes to actual scenes or problems, I don't have much useful experience. Especially when I come to senior posts or senior posts, I carry out technical selection and architecture design. If I don't have systematic knowledge map, I can't design excellent project architecture with high probability.
Last year, I have been thinking about taking part in the study of some online framework course systems. I have referred to many large training institutions, including the post factory Institute of technology, the opening bar, and so on. The advanced courses of these institutions look really high, but there is a disadvantage, they are very expensive, and they often pay 30000 or 40000 tuition fees, which is prohibitive....
In fact, if I didn't meet the first stage of the hook training camp, I would probably choose one of the above courses due to massive bleeding. Fortunately, I met this if.
I have been studying in the training camp for half a year. I have gained a lot and played a great role in my work. My tutor and sister are very responsible. They can let a group of iron and steel yards learn voluntarily until 4 a.m....
In order to avoid too much advertising, I don't write too much. I just want to see this blog. If I happen to want to learn the Java common framework, source code and other common components in depth, the hook training camp is a good choice, and the tuition fee is only 1/N of the above mentioned institutions