Article Directory
Preface
Building MPC5748G Development Environment
MPC5748G S32_SDK_PA_RTM_3.0.0 GPIO Debugging Emulation Settings
MPC5748G SDK timer timing_pal
MPC5748G UART uart_pal
MPC5748G Note CAN can_pal
MPC5748G Note Ethernet LwIP
Previous articles talked about the construction of development environment, GPIO read and write operation, debugging simulation settings, use of timer, use of serial port, CAN transceiver, Ethernet, etc. This article is easy to see the use of PWM.
Introduction to eMIOS
The full name of eMIOS is Configurable Enhanced Modular IO Subsystem. Unlike other MCU s, which use timers for PWM, MPC5748G uses eMIOS. It seems that it is a bit professional and can not be understood. Knowing this, you can do PWM.
MPC5748G has three eMIOS modules, each of which has 32 channels, enabling PWM: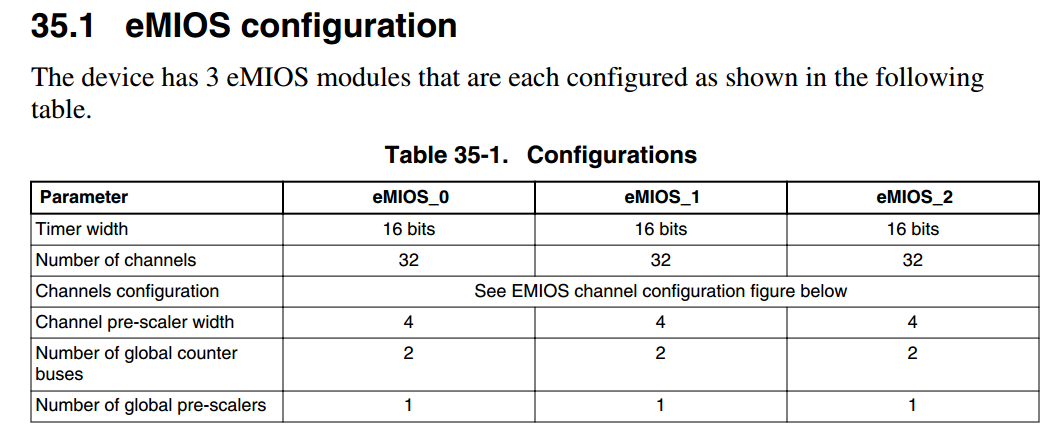
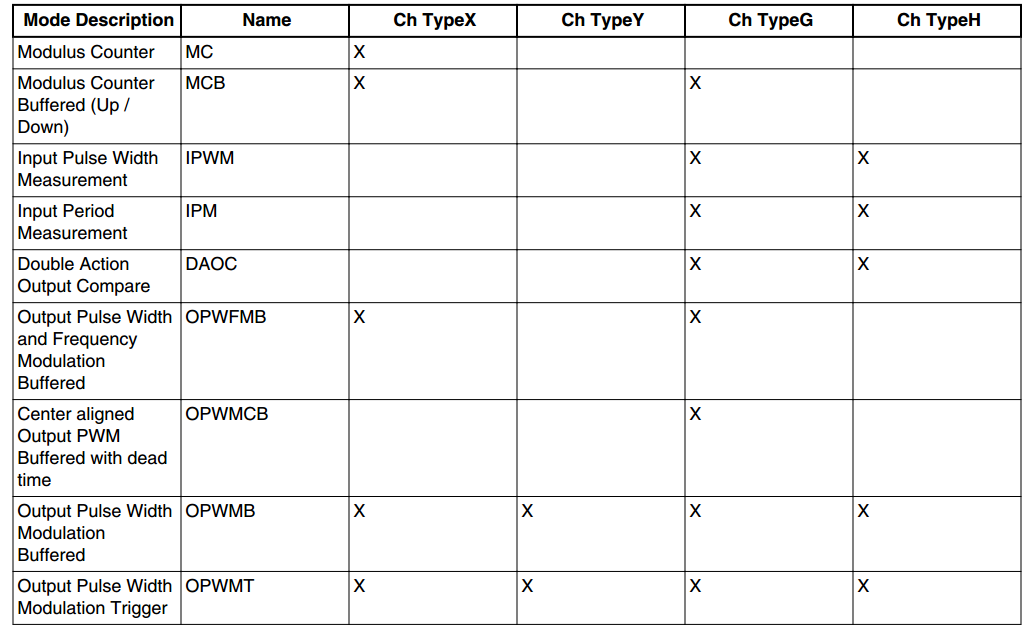
There are four channel types (X, Y, G, H):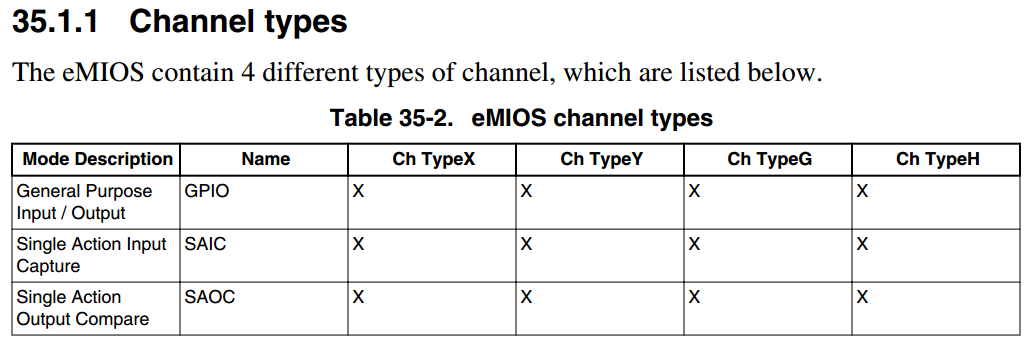
Map of channels and types: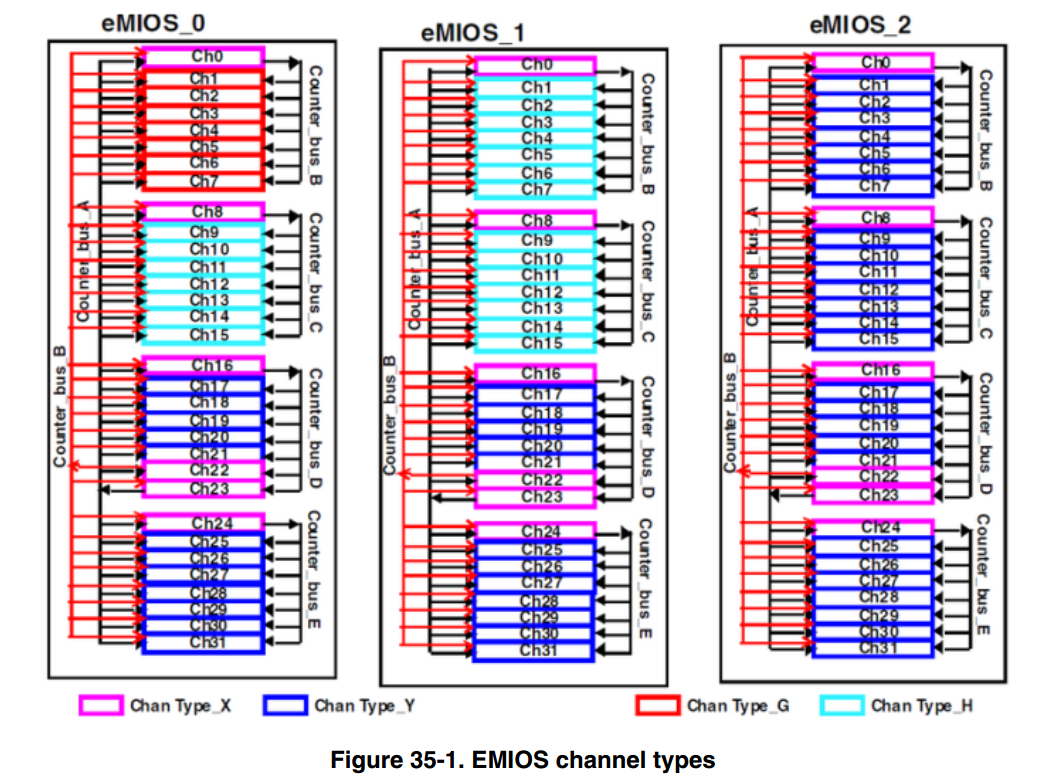
So what each channel can achieve, just look at the ModeDescription types available, several types can output PWM, X and G have internal counters.
The pwm_pal routine demonstrates PWM using the LED s of the board's PA0. This article also takes this example: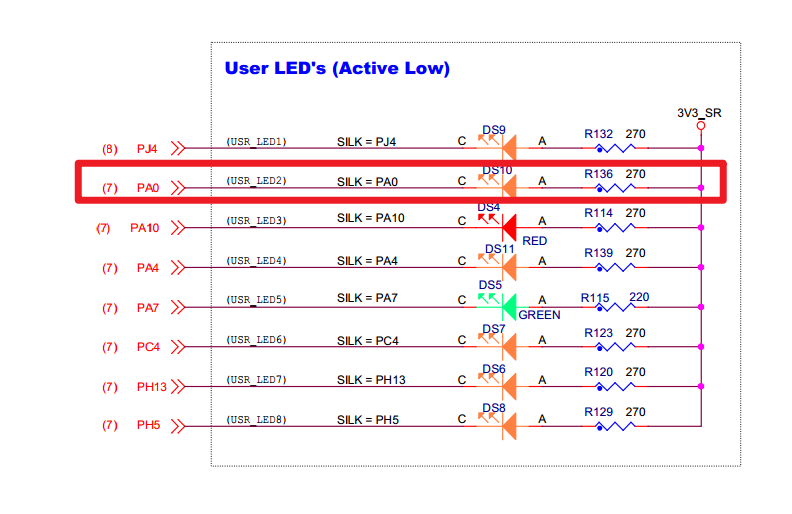
New Project
The steps are as follows:
- Open S32, File -> New -> S32DS Application Project
- Select MCU: MPC5748G, fill in the project name
- By default, all three cores are checked. Remove the checks for Z4_1 and Z2_2, keep only Z4_0, select SDK: MPC5748G_SDK_Z4_0 3.0.0, and click Finish to finish.
PE Configuration
eMIOS configuration: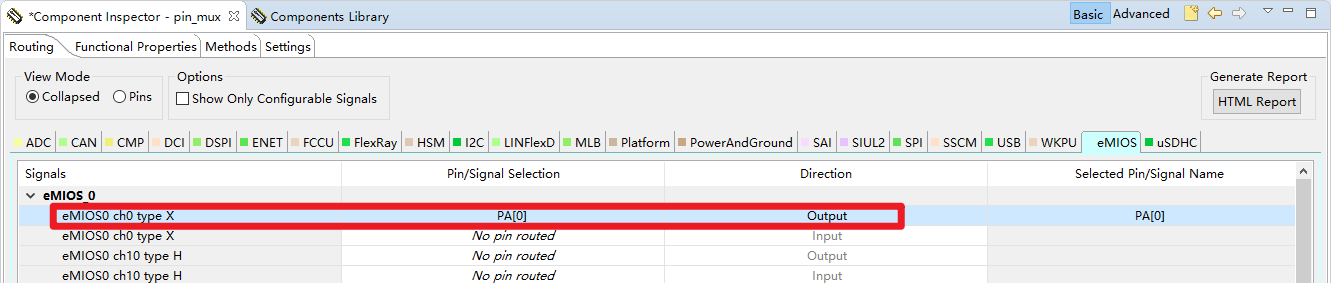
Or select directly from the pins: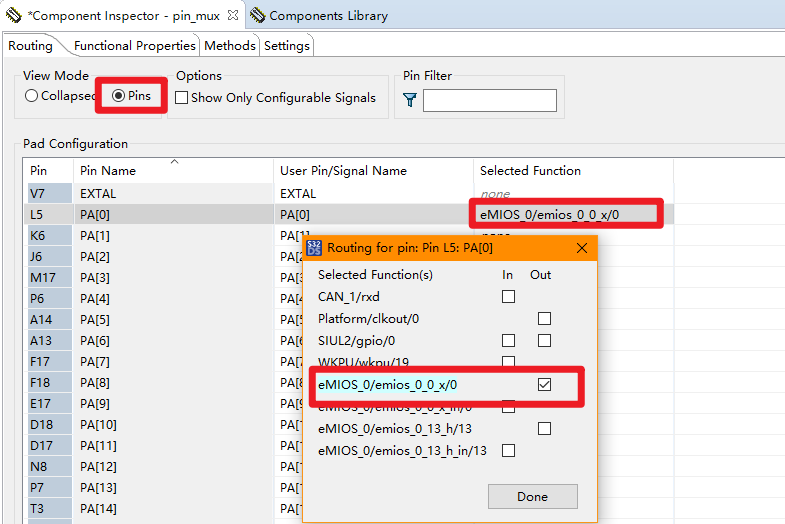
Components Library adds the pwm_pal component: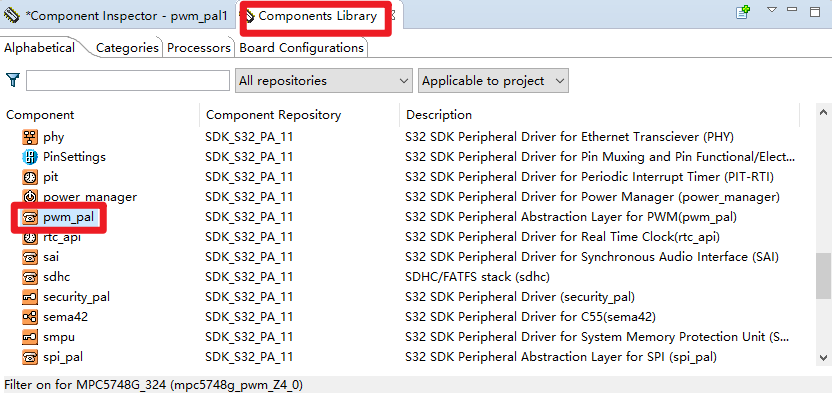
The pwm_pal configuration is shown below, leaving the default: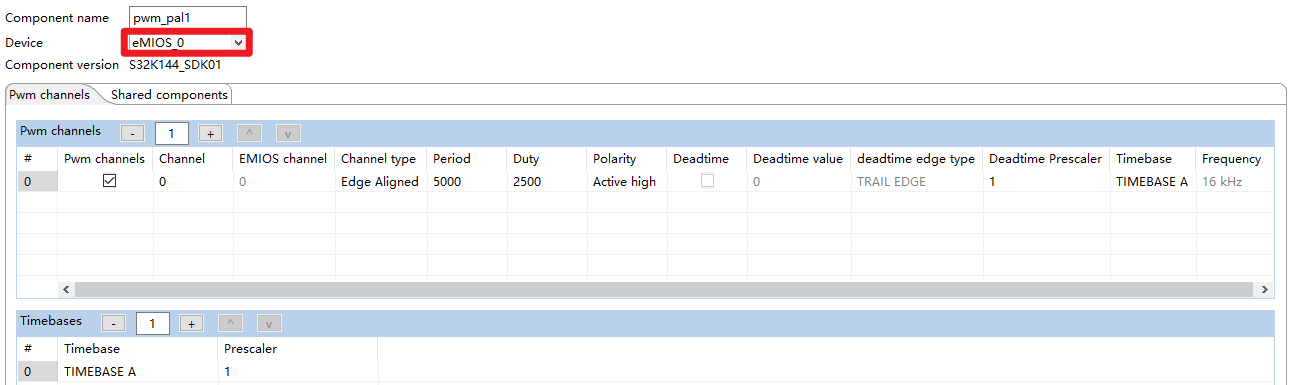
The time base should be 80MHz, 1 crossover, Period setting 5000, i.e. PWM frequency is 16kHz, Duty/Perios=2500/5000=50% is the duty cycle.
Click Generate Code: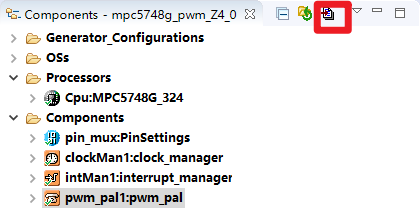
Complete Code
main.c:
/* Including necessary module. Cpu.h contains other modules needed for compiling.*/
#include "Cpu.h"

  volatile int exit_code = 0;
/* User includes (#include below this line is not maintained by Processor Expert) */
  void delay(volatile int cycles) {
	  while(cycles--);
 }
/*!
  \brief The main function for the project.
  \details The startup initialization sequence is the following:
 * - startup asm routine
 * - main()
*/
int main(void)
{
  /* Write your local variable definition here */
	uint32_t duty = 0;
  /*** Processor Expert internal initialization. DON'T REMOVE THIS CODE!!! ***/
  #ifdef PEX_RTOS_INIT
    PEX_RTOS_INIT();                   /* Initialization of the selected RTOS. Macro is defined by the RTOS component. */
  #endif
  /*** End of Processor Expert internal initialization.                    ***/

  /* Write your code here */
  /* For example: for(;;) { } */
    CLOCK_SYS_Init(g_clockManConfigsArr, CLOCK_MANAGER_CONFIG_CNT,
                	g_clockManCallbacksArr, CLOCK_MANAGER_CALLBACK_CNT);
    CLOCK_SYS_UpdateConfiguration(0U, CLOCK_MANAGER_POLICY_AGREEMENT);
    PINS_DRV_Init(NUM_OF_CONFIGURED_PINS, g_pin_mux_InitConfigArr);

    PWM_Init(&pwm_pal1Instance,&pwm_pal1Configs);

    while(1) {
    	PWM_UpdateDuty(&pwm_pal1Instance, 0, duty);	//channel 0
    	if (duty == 5000U) {
    		duty = 0;
    	}
    	delay(1000);
    	duty++;
    }


  /*** Don't write any code pass this line, or it will be deleted during code generation. ***/
  /*** RTOS startup code. Macro PEX_RTOS_START is defined by the RTOS component. DON'T MODIFY THIS CODE!!! ***/
  #ifdef PEX_RTOS_START
    PEX_RTOS_START();                  /* Startup of the selected RTOS. Macro is defined by the RTOS component. */
  #endif
  /*** End of RTOS startup code.  ***/
  /*** Processor Expert end of main routine. DON'T MODIFY THIS CODE!!! ***/
  for(;;) {
    if(exit_code != 0) {
      break;
    }
  }
  return exit_code;
  /*** Processor Expert end of main routine. DON'T WRITE CODE BELOW!!! ***/
} /*** End of main routine. DO NOT MODIFY THIS TEXT!!! ***/

/* END main */
There are only a few functions of PWM that can change the duty cycle (PWM), frequency (PFM?), etc.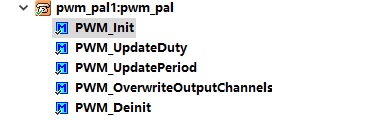
Debugging and running, you can clearly see the brightness and darkness of the LED, as expected, as for frequency/duty ratio and so on, there is an oscilloscope to measure.
WeChat Public Number
Welcome to scan my WeChat Public Number for the latest articles: