I. ZABBIX server installation
Environment: linux 7.3 host ip: 172.25.17.11
1. Prepare the installation package: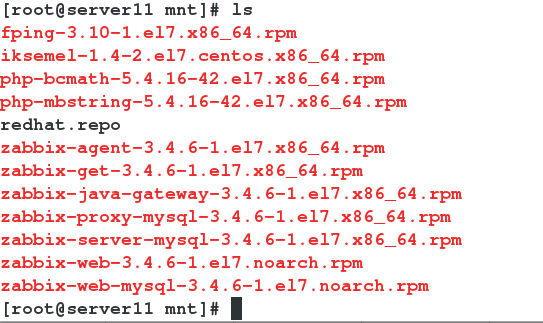
Install all:
[root@server11 mnt]# yum install * -y2. Install the database and open the service to set the database password:
[root@server11 mnt]# yum install mariadb-server -y
[root@server11 mnt]# systemctl start mariadb
[root@server11 mnt]# mysql_secure_installation
Enter database to create database and authorized user zabbix:
MariaDB [(none)]> create database zabbix character set utf8 collate utf8_bin;
Query OK, 1 row affected (0.00 sec)

MariaDB [(none)]> grant all privileges on zabbix.* to zabbix@localhost identified by 'westos';
Query OK, 0 rows affected (0.00 sec)
3. Enter the zabbix installation directory and execute the following instructions. After entering the password, it will stop for a period of time, but it's not stuck. Just wait for the operation to finish.
[root@server11 mnt]# cd /usr/share/doc/zabbix-server-mysql-3.4.6/
[root@server11 zabbix-server-mysql-3.4.6]# ls
AUTHORS  ChangeLog  COPYING  create.sql.gz  NEWS  README
[root@server11 zabbix-server-mysql-3.4.6]# zcat create.sql.gz | mysql -u zabbix -p zabbix
Enter password:
4. Configure zabbix server:
Edit profile:
[root@server11 zabbix-server-mysql-3.4.6]# vim /etc/zabbix/zabbix_server.conf Set in the configuration file:
DBHost=localhost
DBName=zabbix
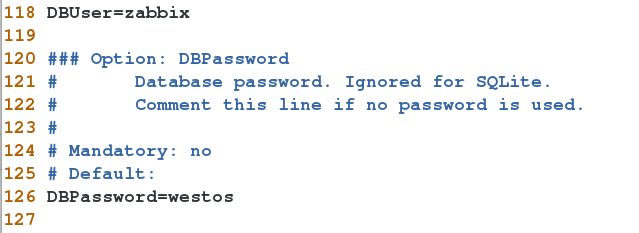
DBUser=zabbix
DBPassword=westos 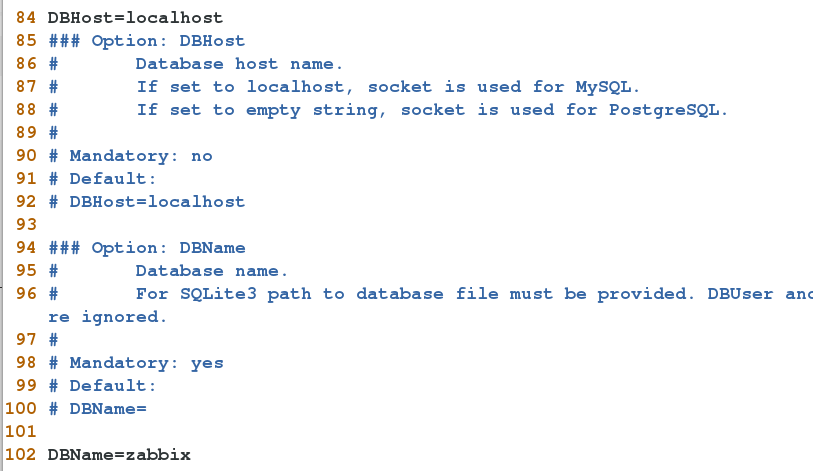
5. configure php:
[root@server11 ~]# vim /etc/httpd/conf.d/zabbix.conf Set time zone:
  7 <Directory "/usr/share/zabbix">
  8     Options FollowSymLinks
  9     AllowOverride None
 10     Require all granted
 11
 12     <IfModule mod_php5.c>
 13         php_value max_execution_time 300
 14         php_value memory_limit 128M
 15         php_value post_max_size 16M
 16         php_value upload_max_filesize 2M
 17         php_value max_input_time 300
 18         php_value always_populate_raw_post_data -1
 19         php_value date.timezone Asia/Shanghai
 20     </IfModule>
 21 </Directory>
6. Start service:
[root@server11 ~]# systemctl start zabbix-server
[root@server11 ~]# systemctl start zabbix-agent
[root@server11 ~]# systemctl start httpd
7. Visit zabbix in the browser and click next: 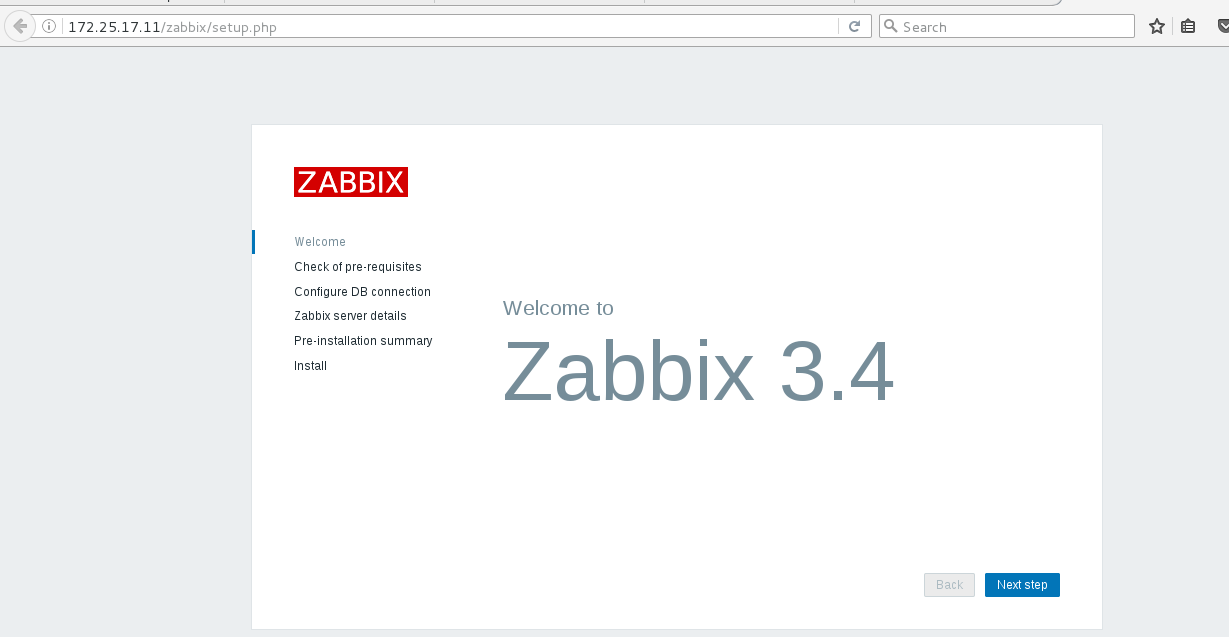
Continue next: 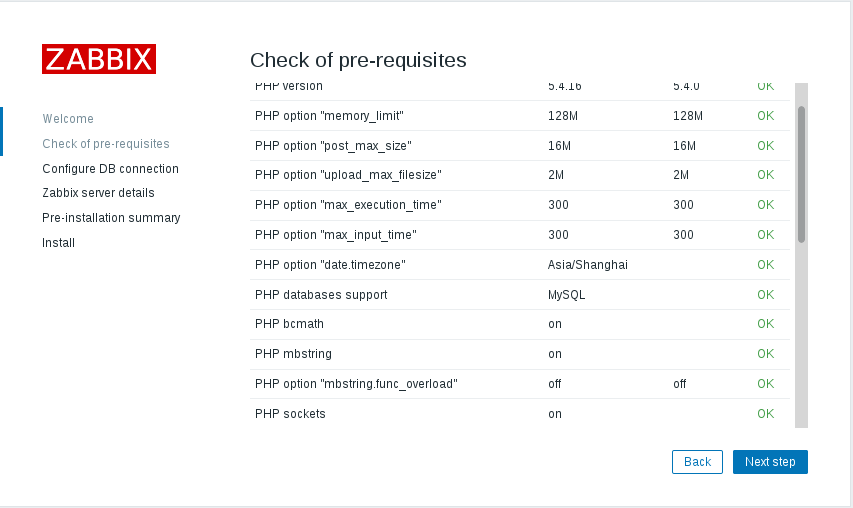
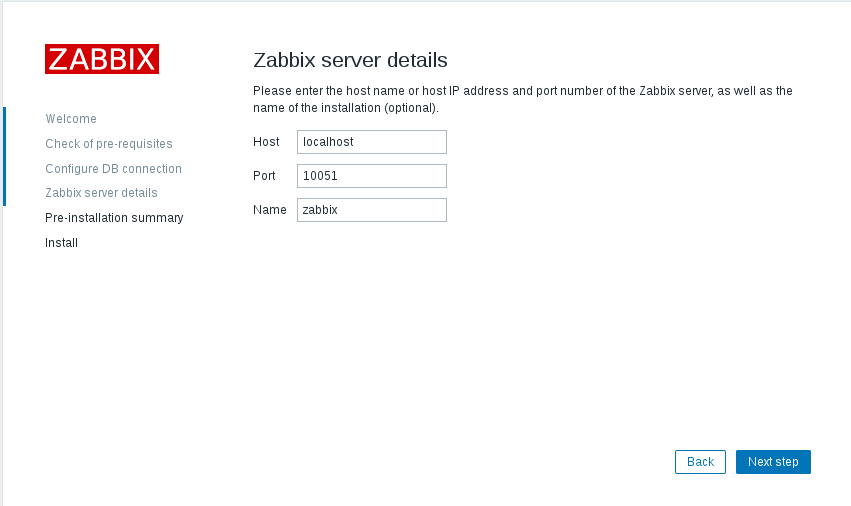
Set port, user and password: 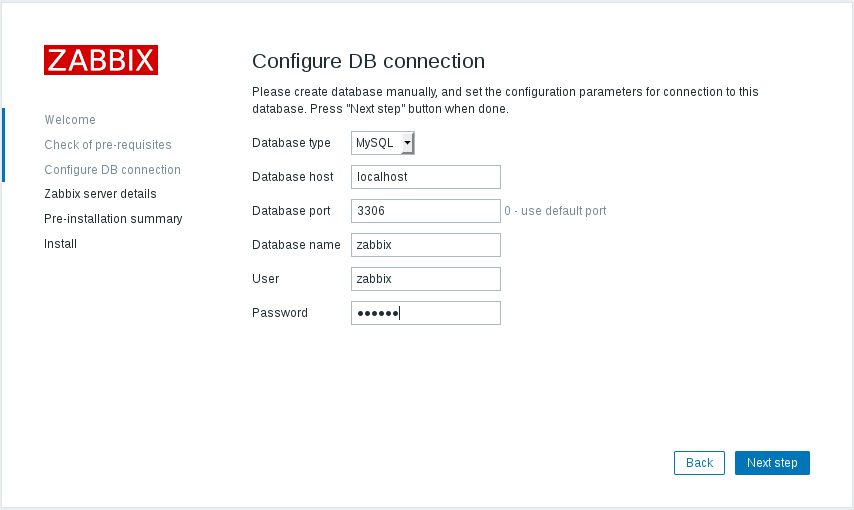
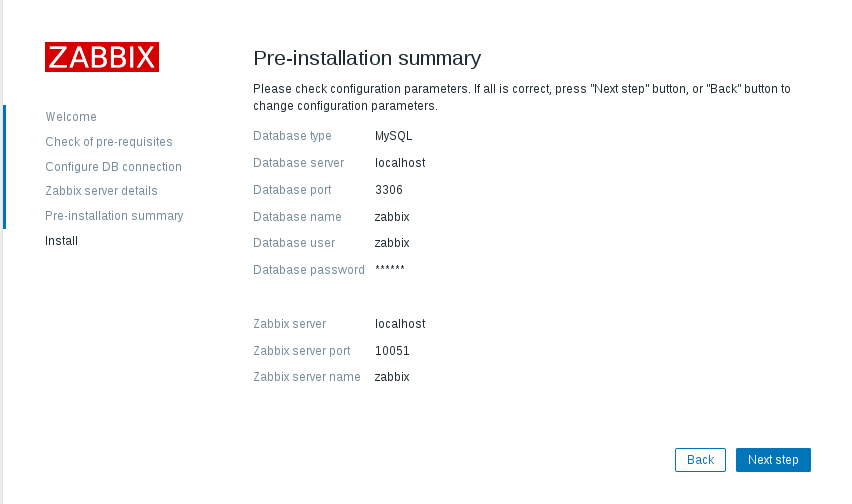
Installation complete: 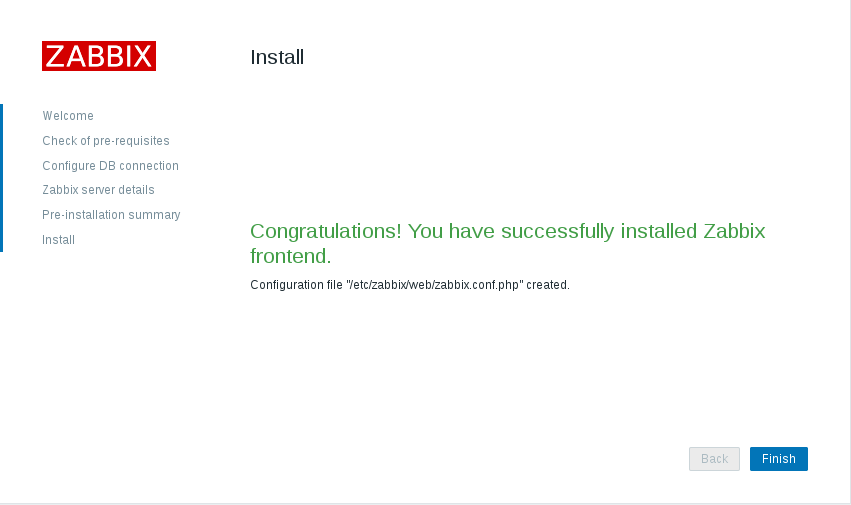
Login: user name is Admin: 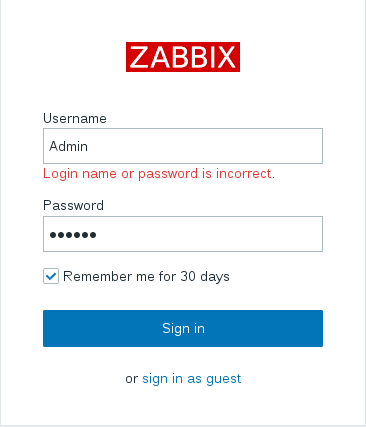
Two
1. Create a 6.5 version linux virtual machine subdisk and create a virtual machine:
[root@foundation17 images]# qemu-img create -f qcow2 -b base.qcow2 test2
Formatting 'test2', fmt=qcow2 size=21474836480 backing_file='base.qcow2' encryption=off cluster_size=65536 lazy_refcounts=off
2. Install ZABBIX agent on the server 2 side of the new virtual machine:
[root@server2 mnt]# rpm -ivh zabbix-agent-3.4.6-1.el6.x86_64.rpm
warning: zabbix-agent-3.4.6-1.el6.x86_64.rpm: Header V4 RSA/SHA512 Signature, key ID a14fe591: NOKEY
Preparing...                ########################################### [100%]
   1:zabbix-agent           ########################################### [100%]
Edit profile:
[root@server2 mnt]# vim /etc/zabbix/zabbix_agentd.confSet the server: 
Set ServerActive and Hostname: 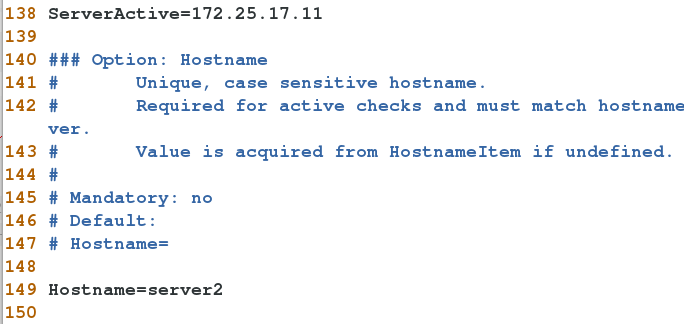
3. Start service:
[root@server2 mnt]# /etc/init.d/zabbix-agent start
Starting Zabbix agent: [ OK ]
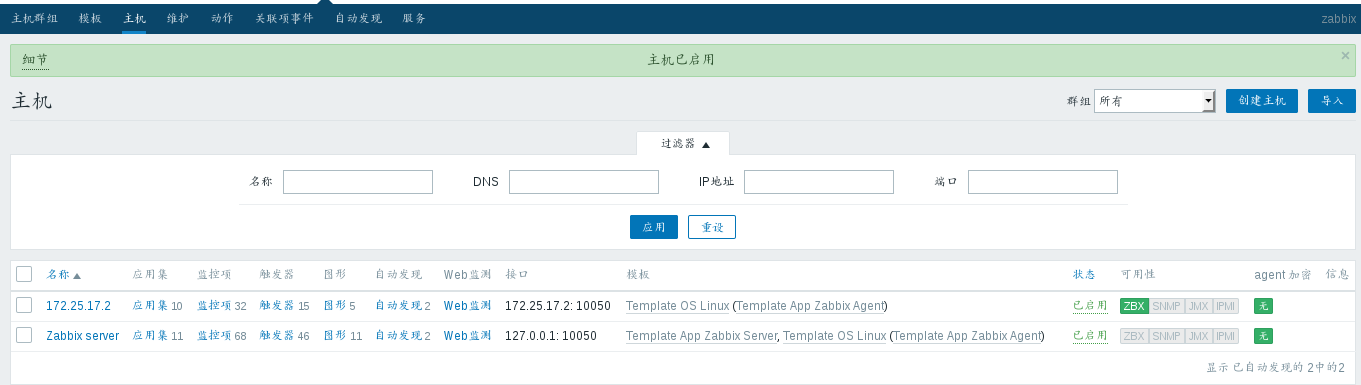
[root@server2 mnt]# 4. In the main menu of the browser management interface of zabbix, select "action", select "auto discovery" for the event source and activate the group device: 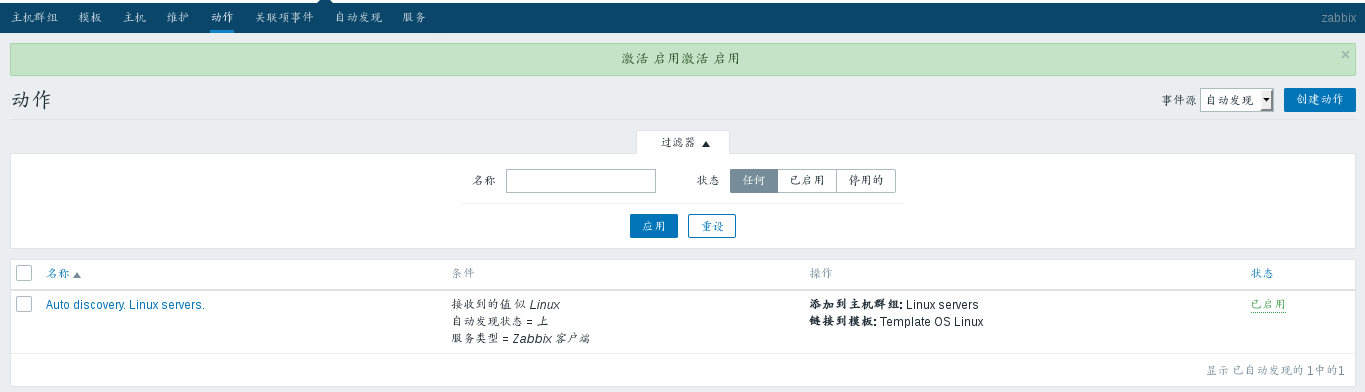
In the auto discovery column, click Local network to change the auto discovery rule: 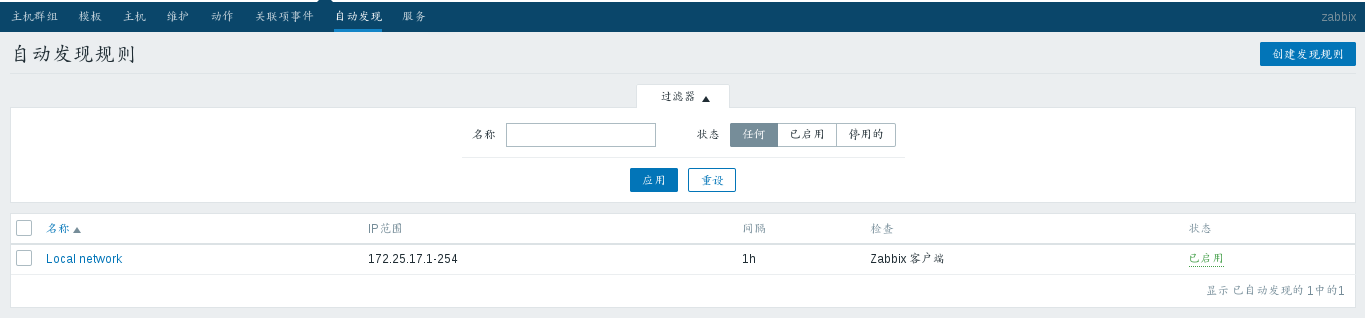
Set to 172.25.17 network segment: 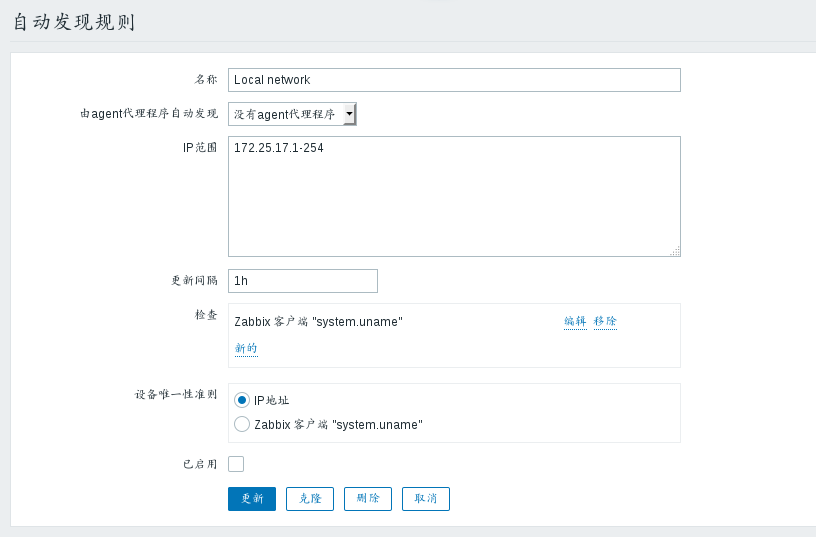
Then click Update, select the auto discovery rule and click apply to find the new device server2 in the host menu bar