Migrate the TensorFlow trained model to Android APP (TensorFlowLite)
1. Write in front
Recently, I'm working on an APP for digital gesture recognition (for this project, I'll write another blog about it, blog address: Step by Step Make a Digital Gesture Recognition APP The source code is already available on github. Chinese-number-gestures-recognition To put the model trained on PC on Android APP, Google released TensorFlow Lite to migrate the model trained on TensorFlow to Android APP, Baidu also released mobile-deep-learning framework (MDL), which should be the mobile version of paddle addle, without knowing the details. Because I am a little familiar with TensorFlow, I decided to use TensorFlow to do it.
See the blog for information on how to process data and training models on the PC side. Step by Step Make a Digital Gesture Recognition APP The code is already available on github with instructions and APP demonstrations. This blog only describes how to migrate the TensorFlow trained model to Android Studio for APP development.
2. Notices for Model Training
_The first step is to save the model as. pb model when training the model on the pc side. It is very important to save the model as. pb model. It is very important that you use which parameters in Android studio later. Then when you save the pb model, you will give which parameters a name and save it. Otherwise, it's hard to get this parameter out of Android studio because the fetch() function of TensorFlow Lite looks for it based on the name stored in the pb model. (If you've trained the model, and you don't want to train the model any more, you can try the following method to find the default name of the variable you need to use, see the code below):
#Output saved parameter names and corresponding values in the model
with tf.gfile.GFile('model_50_200_c3//./digital_gesture.pb', "rb") as f:  #Read model data
    graph_def = tf.GraphDef()
    graph_def.ParseFromString(f.read()) #The calculation diagram and data in the model are obtained.
with tf.Graph().as_default() as graph:  # Here's Graph() with parentheses, or you'll report TypeError
    tf.import_graph_def(graph_def, name="")  #Import the graph in the model to the new computational graph. If no name is specified, import is the default.
    for op in graph.get_operations():  # Print out the node information in the graph
        print(op.name, op.values())
The name of the variable typed in this code and the corresponding value.
Ordinarily, you should give the parameter a specified name when you save the parameter, as follows (specify the variable name by name parameter). For the complete code for training CNN, see the next blog or github:
X = tf.placeholder(tf.float32, [None, 64, 64, 3], name="input_x")
y = tf.placeholder(tf.float32, [None, 11], name="input_y")
kp = tf.placeholder_with_default(1.0, shape=(), name="keep_prob")
lam = tf.placeholder(tf.float32, name="lamda")
#Skip some code in the middle
z_fc2 = tf.add(tf.matmul(z_fc1_drop, W_fc2),b_fc2, name="outlayer")
prob = tf.nn.softmax(z_fc2, name="probability")
pred = tf.argmax(prob, 1, output_type="int32", name="predict")
3. Configuration in Android Studio
The second step is to transplant the pb model to Android Studio. Most of the information on the Internet is to recompile the model with bazel to generate dependencies. This method is too difficult. Actually, we don't have to do this. As the official example of TensorFlow Lite shows, we only need two files: libandroid_tensorflow_inference_java.jar and libtensorflow_inference.so. These two files have already been put on github. You can download and use them by yourselves. Download address: libandroid_tensorflow_inference_java.jar,libtensorflow_inference.so.
Note: Inspection says that it's okay to rely directly on aar, which I haven't tried. If you are interested, try it.
Preparations have been completed, and the configuration in Android Studio is now officially started.
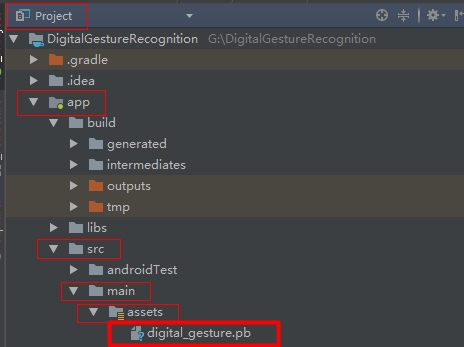
Firstly, the trained pb model is put under app/src/main/assets in Android project. If there is no assets directory, a new one is created by oneself. As shown in the figure:
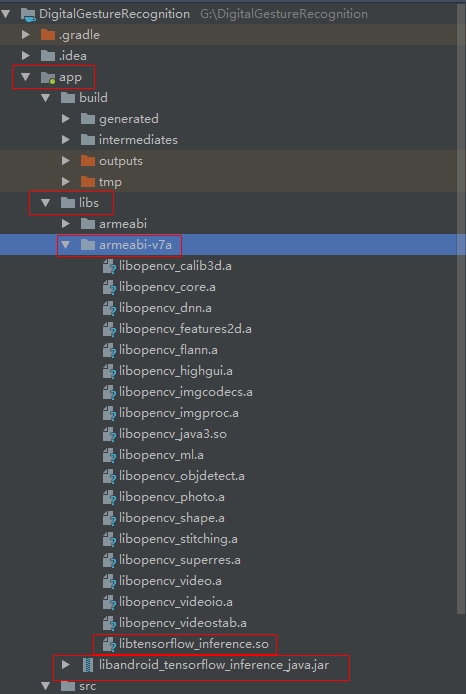
Secondly, put the libandroid_tensorflow_inference_java.jar file just downloaded under app/libs, and put libtensorflow_inference.so under app/libs/armeabi-v7a directory, as shown below:
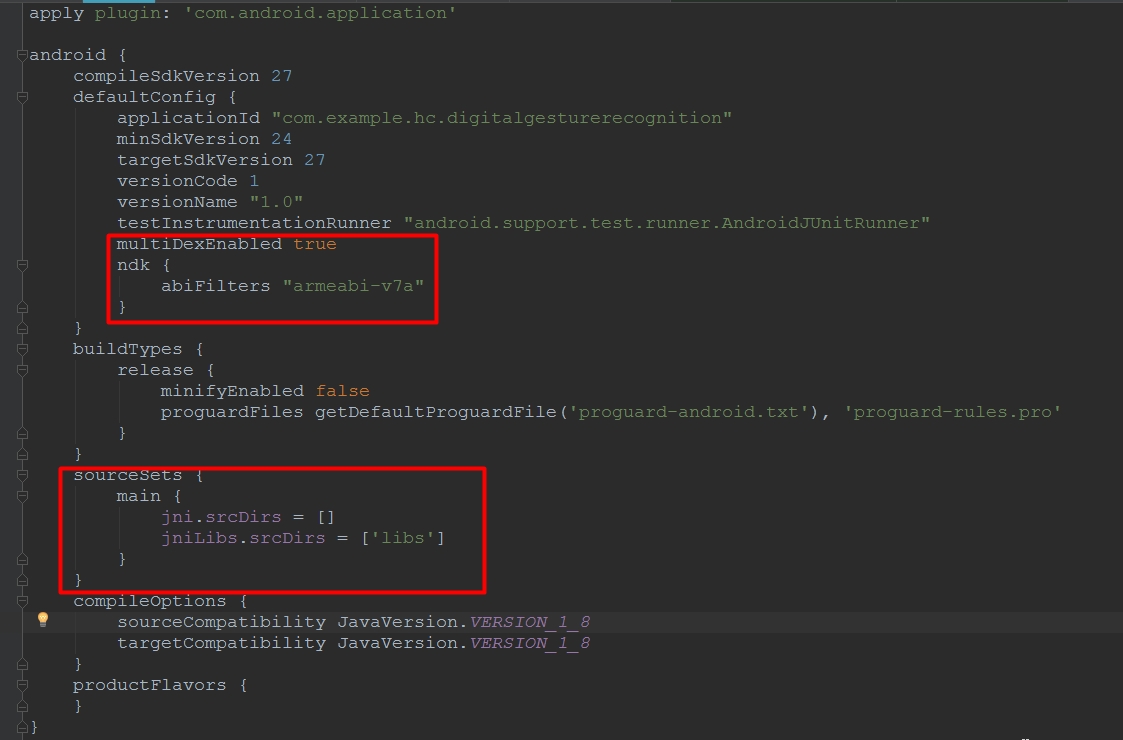
Then configure it in app/build.gradle as follows:
_is added to defaultConfig
multiDexEnabled true
        ndk {
            abiFilters "armeabi-v7a"
        }
_Added to android
 sourceSets {
        main {
            jni.srcDirs = []
            jniLibs.srcDirs = ['libs']
        }
    }
As shown in the figure:
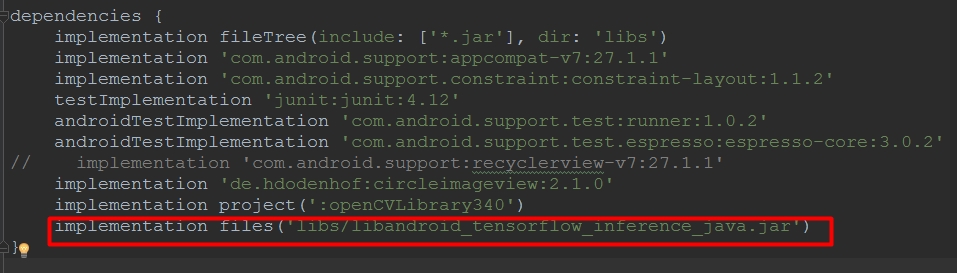
_. Add libandroid_tensorflow_inference_java.jar to dependencies, that is:
implementation files('libs/libandroid_tensorflow_inference_java.jar')As shown in the figure:
So far, all the configurations have been completed. Here is the model call.
4. Call the model in Android Studio
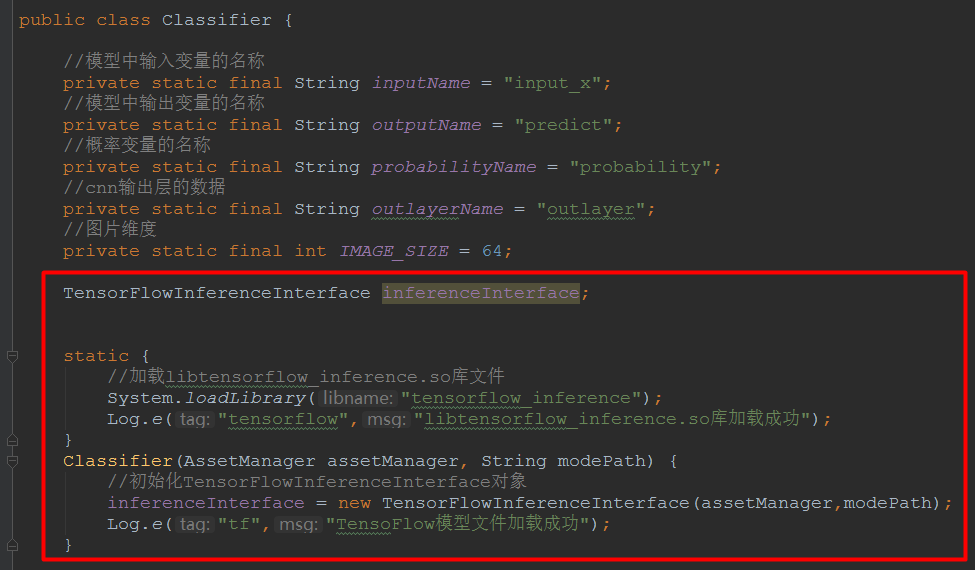
Where you want to use the model, you first load the libtensorflow_inference.so library and initialize the TensorFlowInferenceInterface object with the code:
TensorFlowInferenceInterface inferenceInterface;

    static {
        //Load libtensorflow_inference.so library file
        System.loadLibrary("tensorflow_inference");
        Log.e("tensorflow","libtensorflow_inference.so Library Loading Successfully");
    }
    Classifier(AssetManager assetManager, String modePath) {
        //Initialize the TensorFlowInferenceInterface object
        inferenceInterface = new TensorFlowInferenceInterface(assetManager,modePath);
        Log.e("tf","TensoFlow Model file loaded successfully");
    }
As shown in the figure:
Let's take a look at what interfaces TensorFlow Lite provides, the official address: Here's what a typical Inference Library sequence looks like on Android.
// Load the model from disk.
TensorFlowInferenceInterface inferenceInterface =
new TensorFlowInferenceInterface(assetManager, modelFilename);

// Copy the input data into TensorFlow.
inferenceInterface.feed(inputName, floatValues, 1, inputSize, inputSize, 3);

// Run the inference call.
inferenceInterface.run(outputNames, logStats);

// Copy the output Tensor back into the output array.
inferenceInterface.fetch(outputName, outputs);
Now you can use the model happily. Let's put a piece of code that I call the model for your reference.
public ArrayList predict(Bitmap bitmap)
{
ArrayList<String> list = new ArrayList<>();
float[] inputdata = getPixels(bitmap);
for(int i = 0; i <30; ++i)
{
Log.d("matrix",inputdata[i] + "");
}
inferenceInterface.feed(inputName, inputdata, 1, IMAGE_SIZE, IMAGE_SIZE, 3);
//Running model, run parameter must be String []type
String[] outputNames = new String[]{outputName,probabilityName,outlayerName};
inferenceInterface.run(outputNames);
//Get results
int[] labels = new int[1];
inferenceInterface.fetch(outputName,labels);
int label = labels[0];
float[] prob = new float[11];
inferenceInterface.fetch(probabilityName, prob);
// float[] outlayer = new float[11];
// inferenceInterface.fetch(outlayerName, outlayer);
// for(int i = 0; i <11; ++i)
// {
// Log.d("matrix",outlayer[i] + "");
// }
for(int i = 0; i <11; ++i)
{
Log.d("matrix",prob[i] + "");
}
DecimalFormat df = new DecimalFormat("0.000000");
float label_prob = prob[label];
//Return value
list.add(Integer.toString(label));
list.add(df.format(label_prob));
return list;
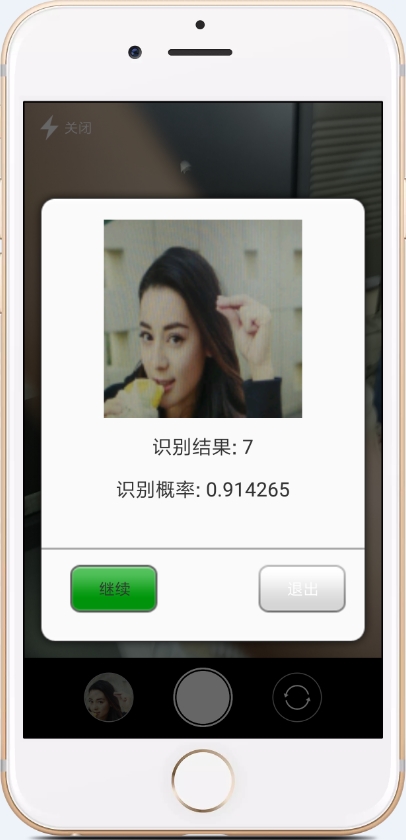
}Finally, put a digital gesture to recognize the effect of APP. All the code will be open source on github. Welcome star.
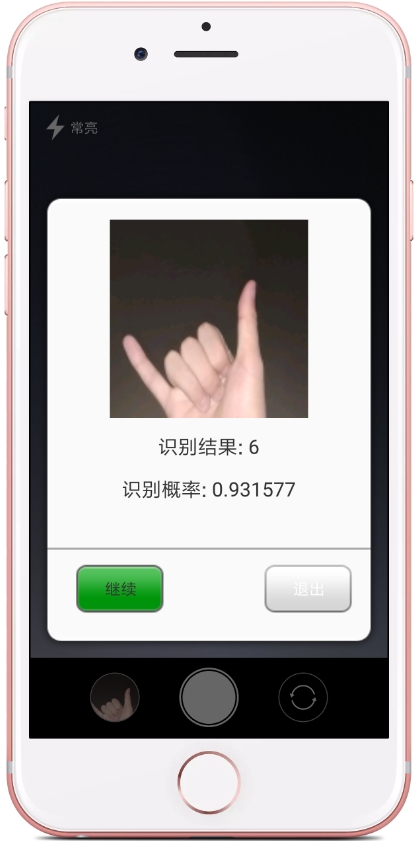
Place another chance recognition result: