Maven and Nexus3
What is Maven?
For details on the principle of maven, see: https://my.oschina.net/adailinux/blog/2247017
Installation and configuration
Install Maven
Installing Maven on centos7 system is very simple. You can install it directly with yum, but before installing maven, you need to configure the JDK (java) environment of the system. Spring Rain is deployed using ansible, and the corresponding role s are maven .
playbook:
$ cat maven.yml
---
- hosts: ucloud
  gather_facts: False
  roles:
    - role: maven
Usage method:
$ ansible-playbook maven.yml
Install Nexus
Official recommendation Server hardware configuration:
- CPU: > 4 Cores
- memory: ≥4G (do not set max heap size larger than 4GB)
- fd: 65536
Installation dependency
- Java 8
- maven
- npm
Java and maven have been installed in the above process, then only need to install npm, the steps are as follows:
# Create the corresponding directory before installing
$ mkdir /home/node
$ cd /home/node

# Managing npm with nodejs
$ wget https://nodejs.org/dist/v8.12.0/node-v8.12.0-linux-x64.tar.xz

# decompression
$ tar Jxvf node-v8.12.0-linux-x64.tar.xz
$ mv node-v8.12.0-linux-x64 nodejs

# Join the System Environment
$ ln -s /home/node/nodejs/bin/node /usr/bin/node
$ ln -s /home/node/nodejs/bin/npm /usr/bin/npm

# Upgrade npm
$ npm install npm@latest -g
Install Nexus3
# Create installation directory
$ mkdir /home/sonatype
$ cd /home/sonatype
$ wget https://download.sonatype.com/nexus/3/latest-unix.tar.gz
$ tar zxvf latest-unix.tar.gz

$ [root@host1 sonatype]# ls
nexus-3.13.0-01  sonatype-work

## nexus-3.13.0-01 Application File Directory
## sonatype-work data file directory

# Enter the Application File Directory
$ cd /home/sonatype/nexus-3.13.0-01

# Running sonatype
$ ./bin/nexus run
## Output Started Sonatype Nexus indicates successful startup!
## systemd management will be added later
After successful startup, access the browser (localhost:8081): http://192.168.228.128:8081/ Enter the web interface
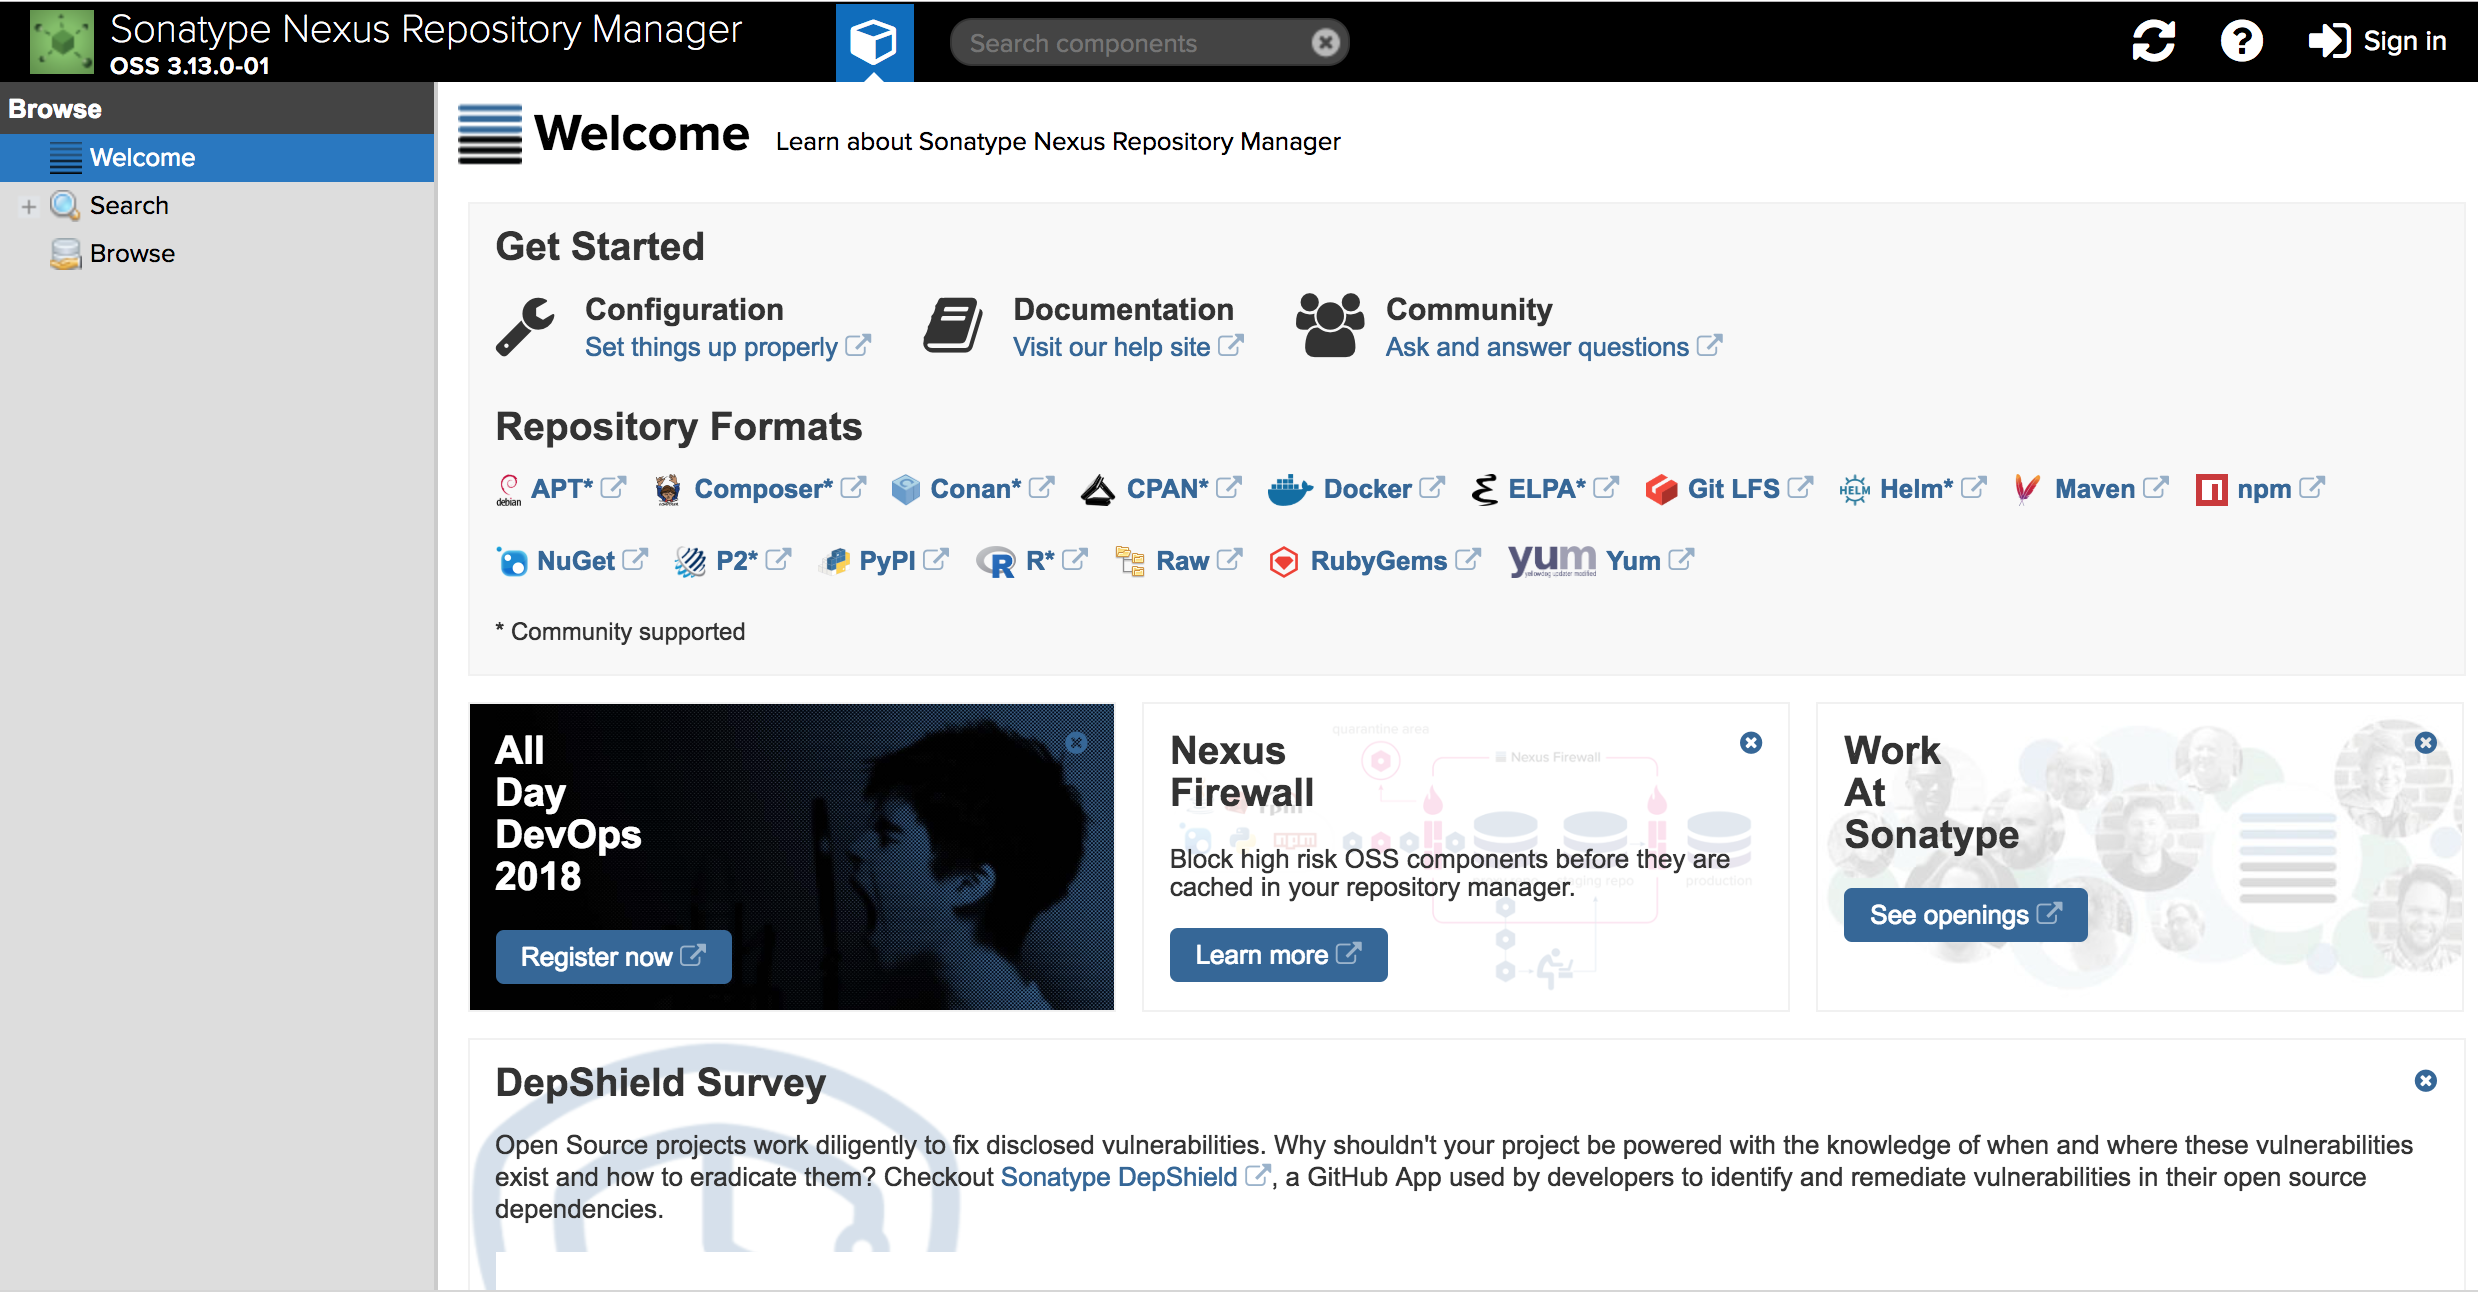
Use administrator user login, account: admin password: admin123. If you use sonatype to manage users and passwords, you can change passwords by setting - change password. If you integrate ldap users, you cannot change passwords by this method.
-
System optimization:
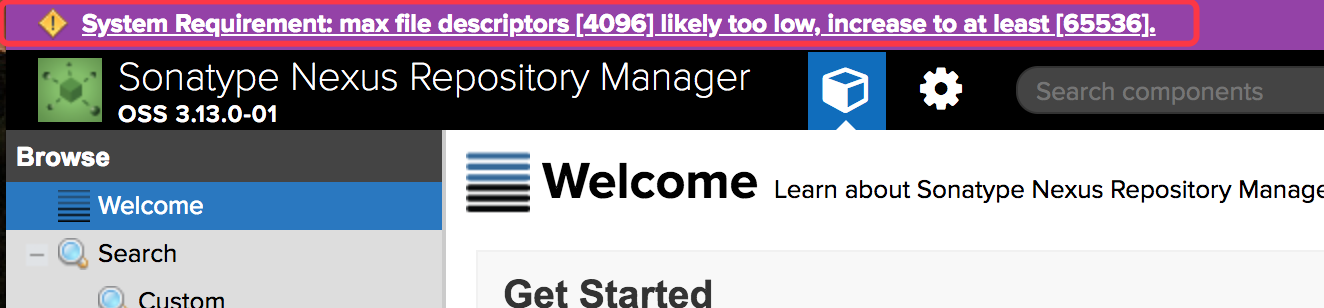
sonatype needs to configure the number of system file descriptors to 65536. The configuration method is as follows:
# View the number of open file descriptors on the current system
$ ulimit -n

# Modify the number of file descriptors
## Temporary modification
$ ulimit -n 65535
## Permanent modification
$ vim /etc/security/limits.conf
nexus - nofile 65536
If system D is added to manage nexus, the above method will not work. The configuration method is as follows:
$ vim /usr/lib/systemd/system/nexus.service
[Unit]
Description=nexus service
After=network.target

[Service]
Type=forking
LimitNOFILE=65536
ExecStart=/home/sonatype/nexus-3.13.0-01/bin/nexus start
ExecStop=/home/sonatype/nexus-3.13.0-01/bin/nexus stop
User=nexus
Restart=on-abort

[Install]
WantedBy=multi-user.target

$ systemctl daemon-reload
$ useradd nexus
$ chown -R nexus:nexus /home/sonatype
$ systemctl start nexus
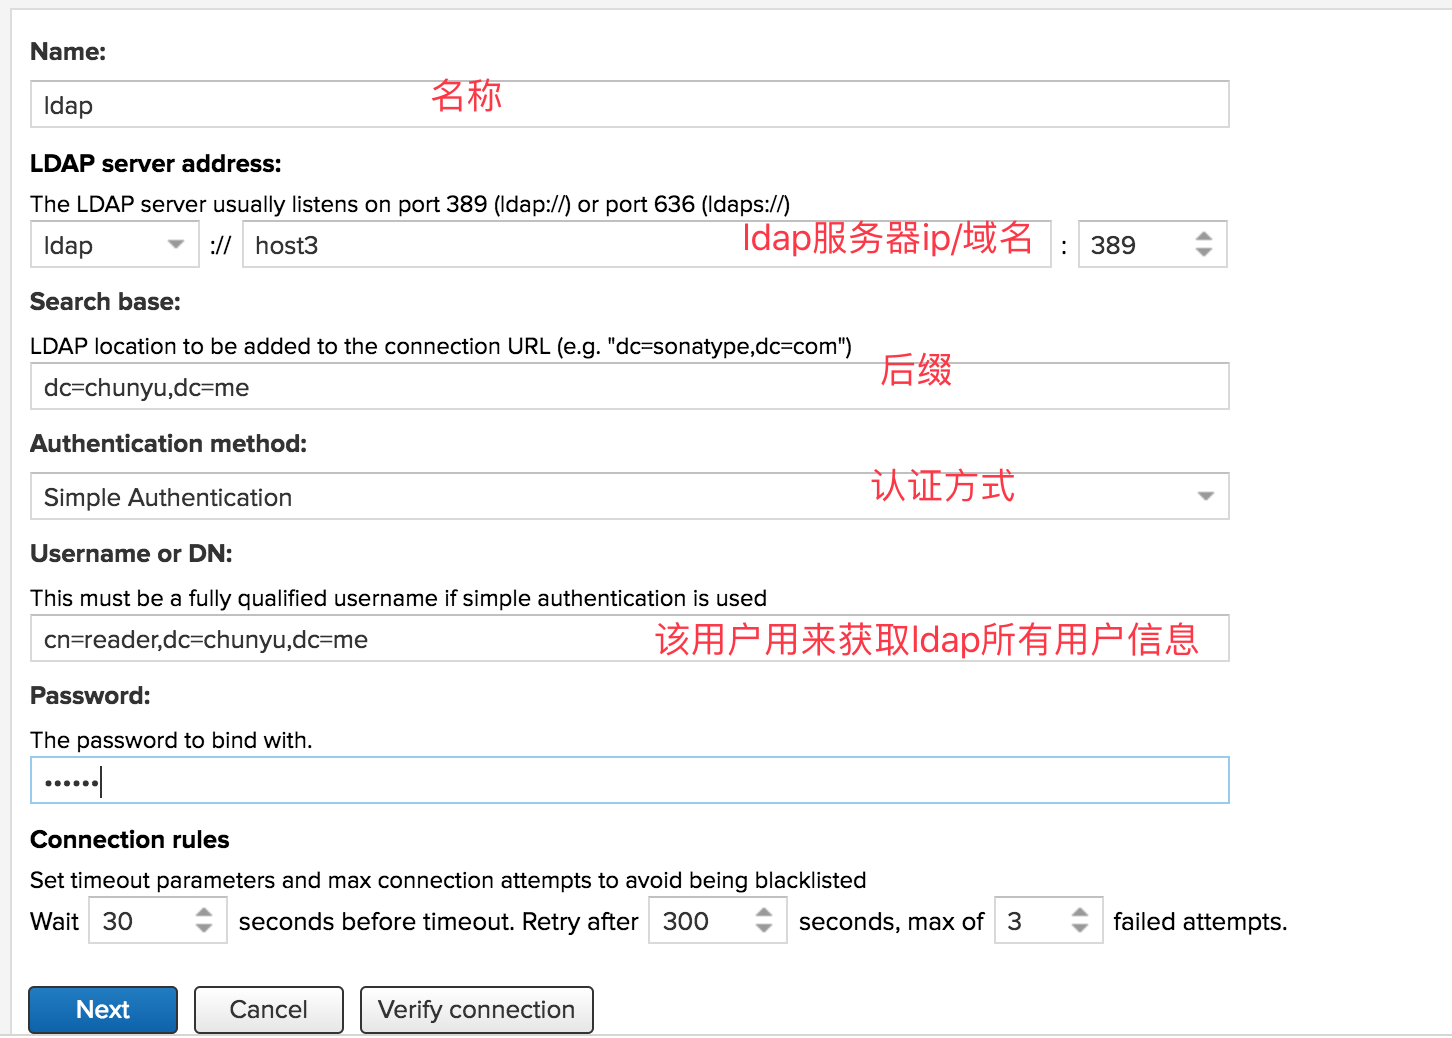
Integrated ldap

configuration information
Proxy maven and npm components
Configure maven-proxy
-
Change maven configuration Edit maven's settings.xml file and change the contents of mirror, profile and activeProfiles module as follows:
$ vim /etc/maven/settings.xml <settings> <mirrors> <mirror> <!--This sends everything else to /public --> <id>nexus</id> <mirrorOf>*</mirrorOf> <url>http://localhost:8081/repository/maven-proxy/</url> </mirror> </mirrors> <profiles> <profile> <id>nexus</id> <!--Enable snapshots for the built in central repo to direct --> <!--all requests to nexus via the mirror --> <repositories> <repository> <id>central</id> <url>http://central</url> <releases><enabled>true</enabled></releases> <snapshots><enabled>true</enabled></snapshots> </repository> </repositories> <pluginRepositories> <pluginRepository> <id>central</id> <url>http://central</url> <releases><enabled>true</enabled></releases> <snapshots><enabled>true</enabled></snapshots> </pluginRepository> </pluginRepositories> </profile> </profiles> <activeProfiles> <!--make the profile active all the time --> <activeProfile>nexus</activeProfile> </activeProfiles> </settings> -
Configure Nexus to the web side:
-
Configure repository:
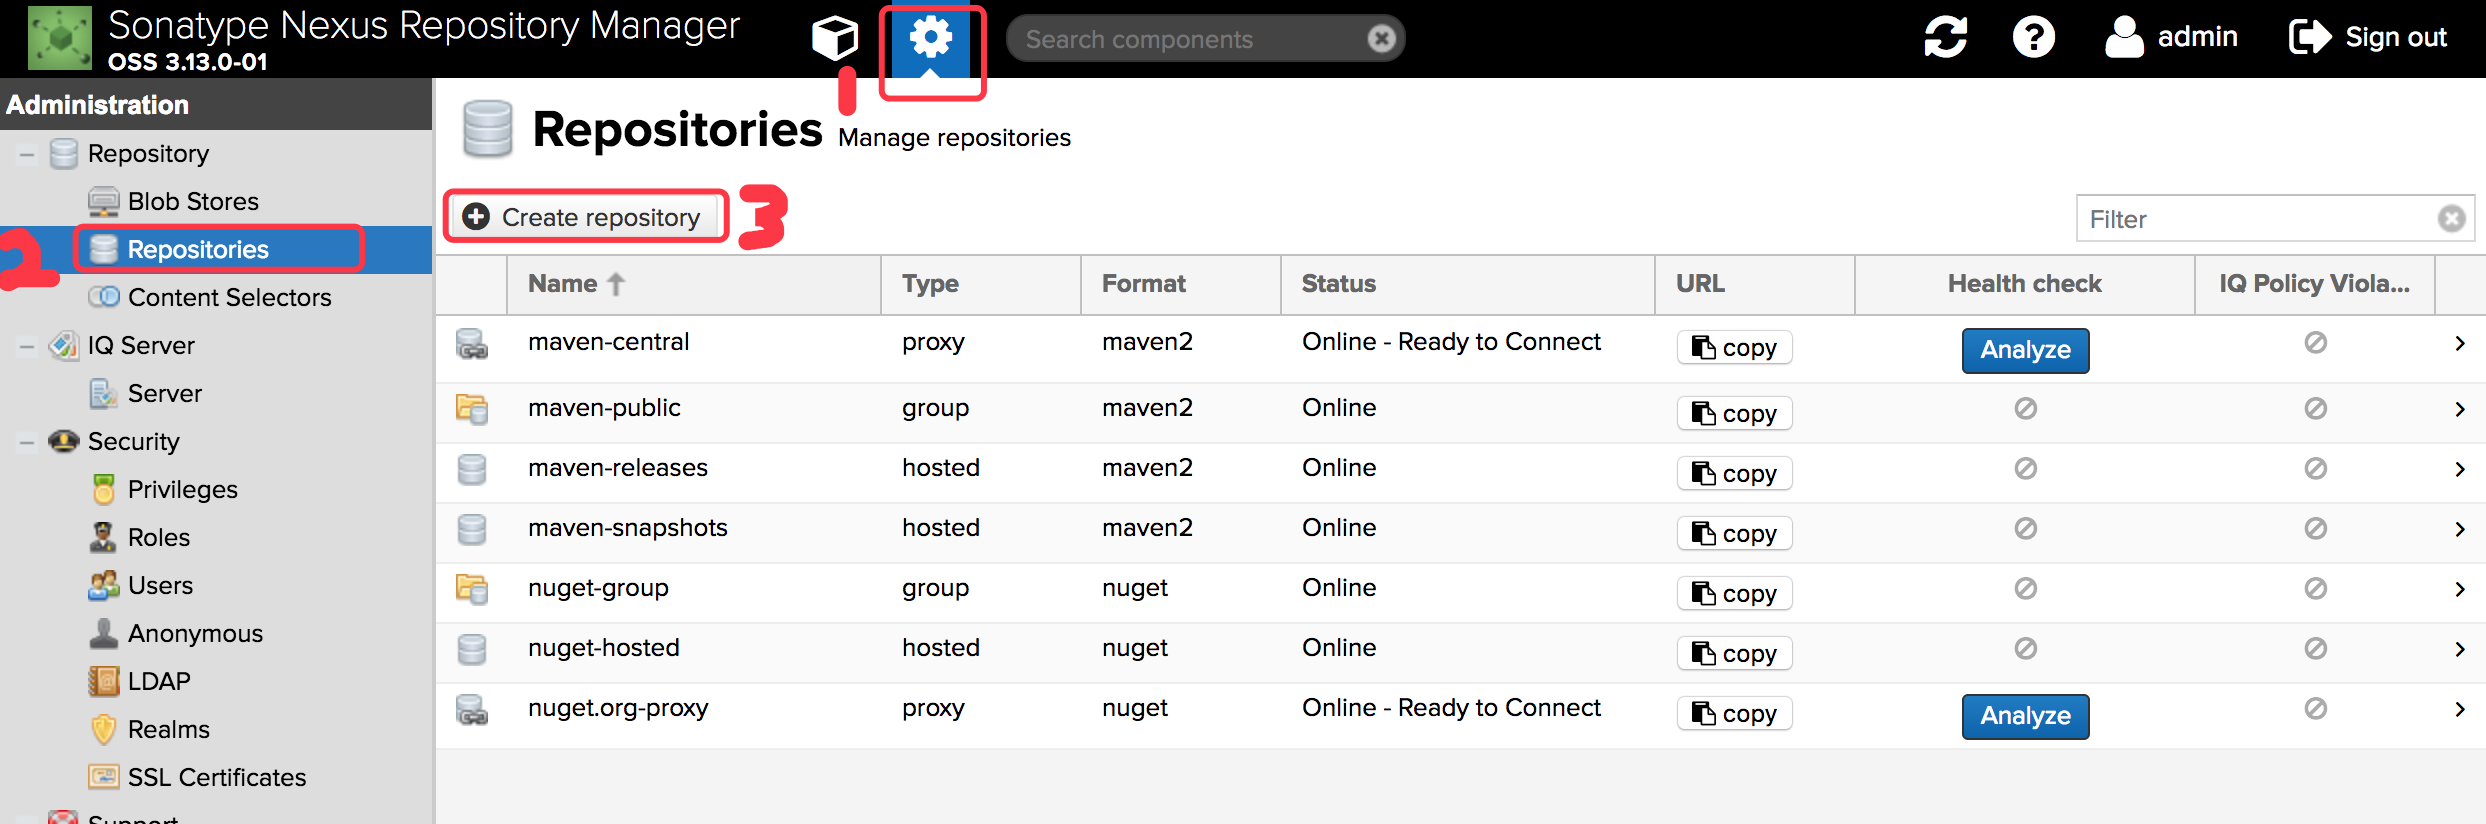
-
Select Maven 2 (proxy):
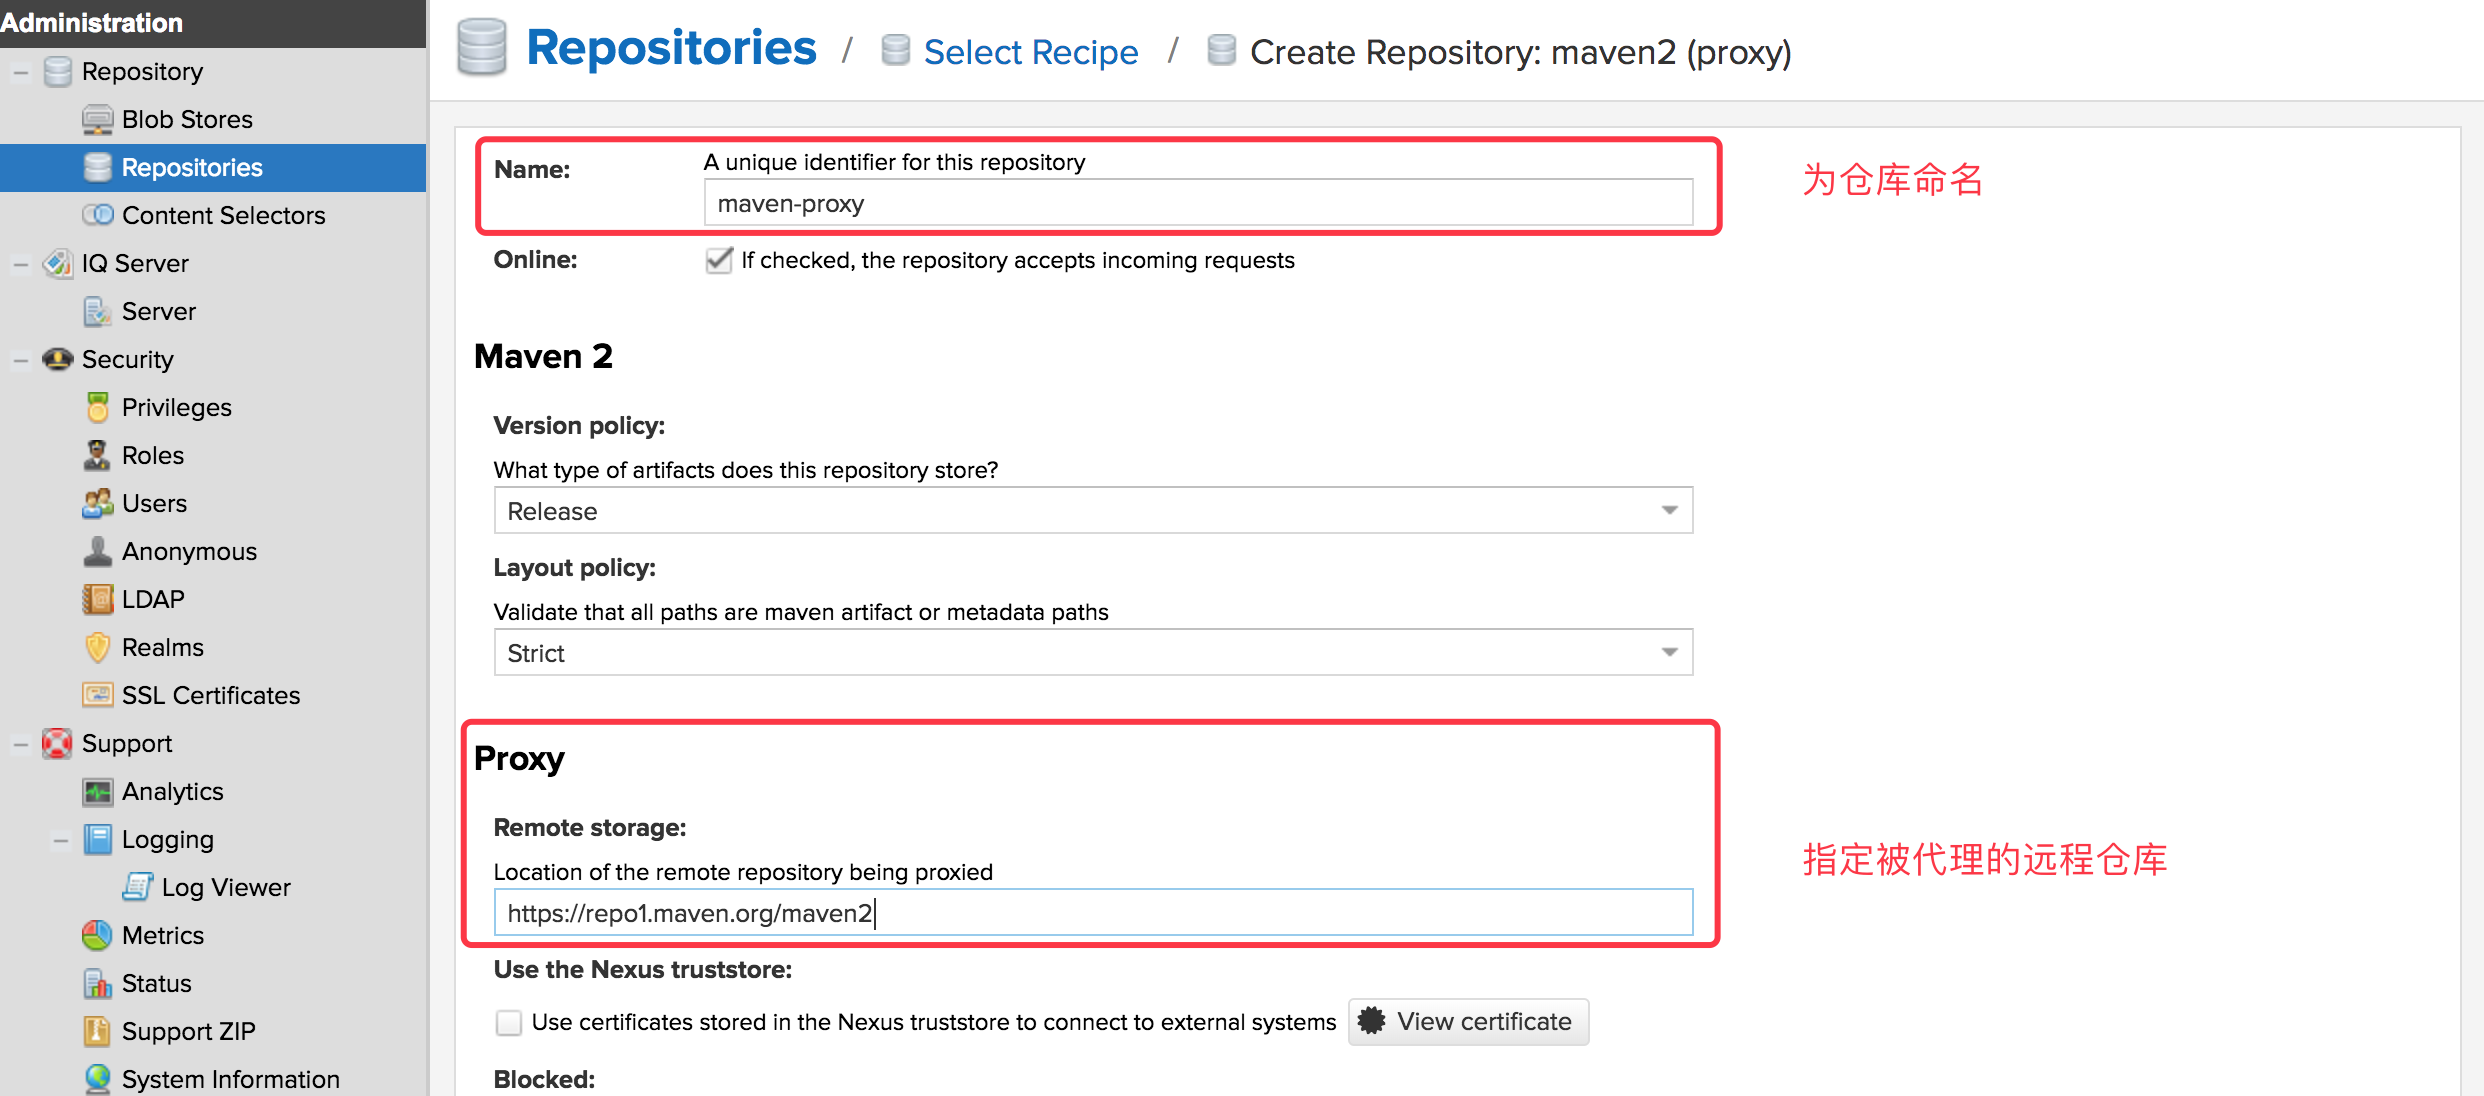
-
Click "Create repository"
-
-
Create POM file (pom.xml) as follows:
$ vim /etc/maven/pom.xml <project> <modelVersion>4.0.0</modelVersion> <groupId>com.example</groupId> <artifactId>nexus-proxy</artifactId> <version>1.0-SNAPSHOT</version> <dependencies> <dependency> <groupId>junit</groupId> <artifactId>junit</artifactId> <version>4.10</version> </dependency> </dependencies> </project> -
Build maven-proxy:
# Before building, you need to configure the Java environment (the mvn command defaults to / usr/java/latest/bin/java)
$ ln -s /usr/lib/jvm/java-1.8.0-openjdk-1.8.0.181-3.b13.el7_5.x86_64/jre/bin/java /usr/java/latest/bin/java

# Start building
$ mvn package
[INFO] Building jar: /etc/maven/target/nexus-proxy-1.0-SNAPSHOT.jar
[INFO] ------------------------------------------------------------------------
[INFO] BUILD SUCCESS
[INFO] ------------------------------------------------------------------------
[INFO] Total time: 1:27.411s
[INFO] Finished at: Tue Oct 09 13:21:33 CST 2018
[INFO] Final Memory: 8M/20M
[INFO] ------------------------------------------------------------------------
# Construction completed!
The build process can be viewed in the web interface, Click
 —— Click Components - Select the corresponding warehouse name (maven-proxy).
Configure npm-proxy
-
Back up the existing npm configuration file (.npmrc), if not, ignore this step;
-
Enter the web side and configure Nexus:
-
Configure repository:
-
Select npm (proxy):
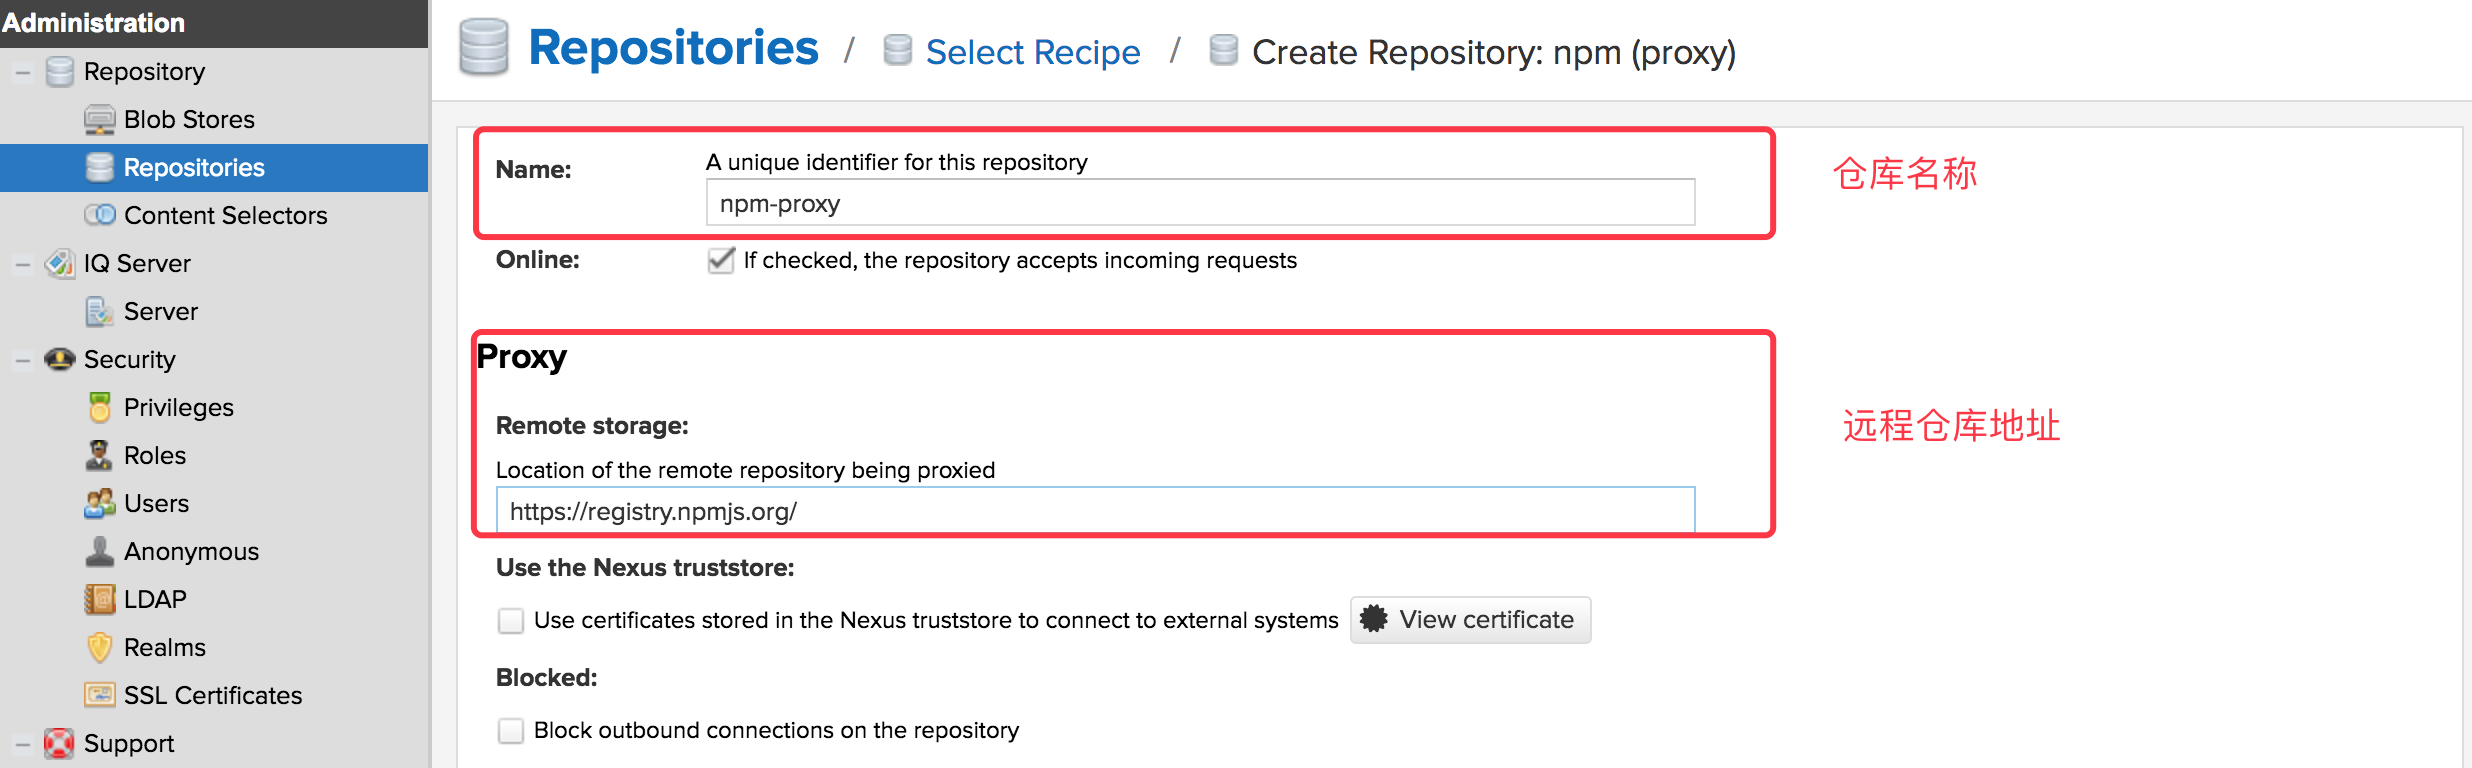
-
Click "Create repository"
-
-
Go to the command line and configure npm:
$ npm config set registry http://localhost:8081/repository/npm-proxy $ vim package.json { "name": "npm-proxy", "version": "0.0.1", "description": "Test Project 1", "dependencies" : { "commonjs" : "0.0.1" } } -
Build npm-proxy:
$ npm install
Managing nexus
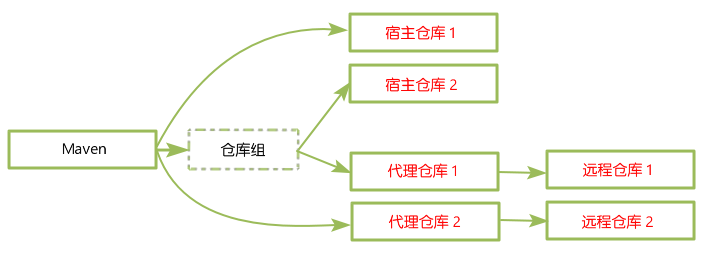
Nexus Warehouse Classification
- hosted Host Warehouse: It is mainly used to deploy components that cannot be obtained from public warehouses (such as JDBC driver of oracle) and project components of oneself or a third party.
- Proxy agent warehouse: proxy public remote warehouse;
- Virtual virtual warehouse: for adapting to Maven 1;
- Group warehouse group: Nexus manages multiple warehouses through the concept of warehouse group, so that we can request warehouse group directly in the project, and then request to multiple warehouses managed by warehouse group.