Material Design (View and Shadow Details)

Keywords: Android Attribute xml Google

Android L:


Google has confirmed that Android L is Android Lollipop (5.0).


Google has already launched Android L Developer Preview (developer preview) in advance to help developers understand Android features more quickly, and recently launched 64-bit simulator mirrors, and Nexus 6 and 9, the first Android L system to be launched.

I believe that the official version of Android L is not far away from us, so it's time to start learning Android L!


If you are interested in how Android L configures simulators and creates projects, you can see my previous article:

Android L - Simulator Configuration and Creation Project


Material Design:


Material Design is a new design language launched by Google. Its feature is the flattening of imitations.


Material Design contains a lot of content, and I roughly divide it into four parts:

Theme and layout—— ANDROID L - Material Design Details (Theme and Layout)

Views and Shadows—— ANDROID L - Material Design Details (Views and Shadows)

UI control—— ANDROID L - Material Design Details (UI Controls)

Animation -- ANDROID L - Material Design Details (Animation)


Let's start with Part Two: Material Views and Shadows


Views and Shadows


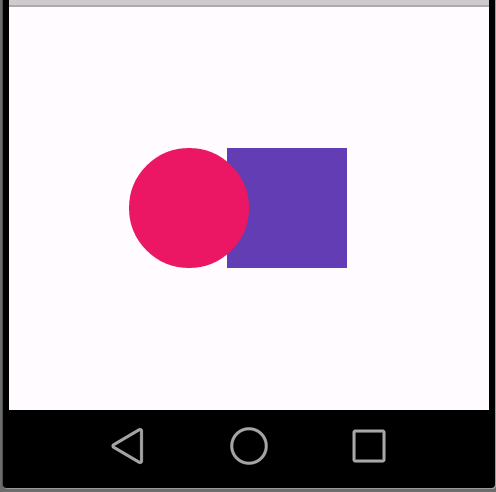
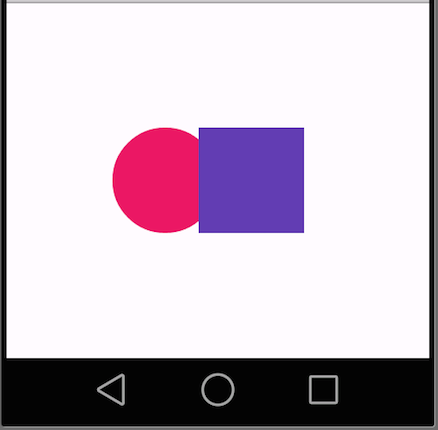
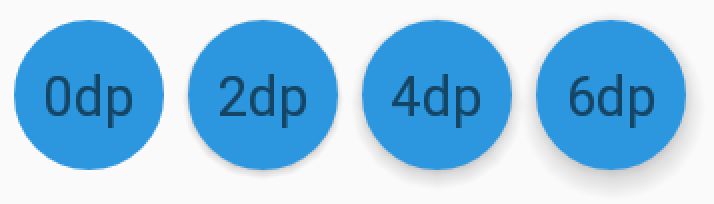
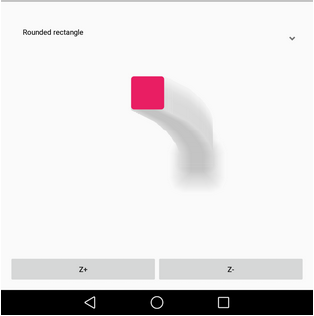
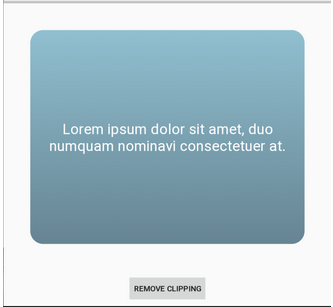
View's size and position are determined by x and y. Now we have the concept of z axis, which is the elevation of View, and height determines the size of shadow.
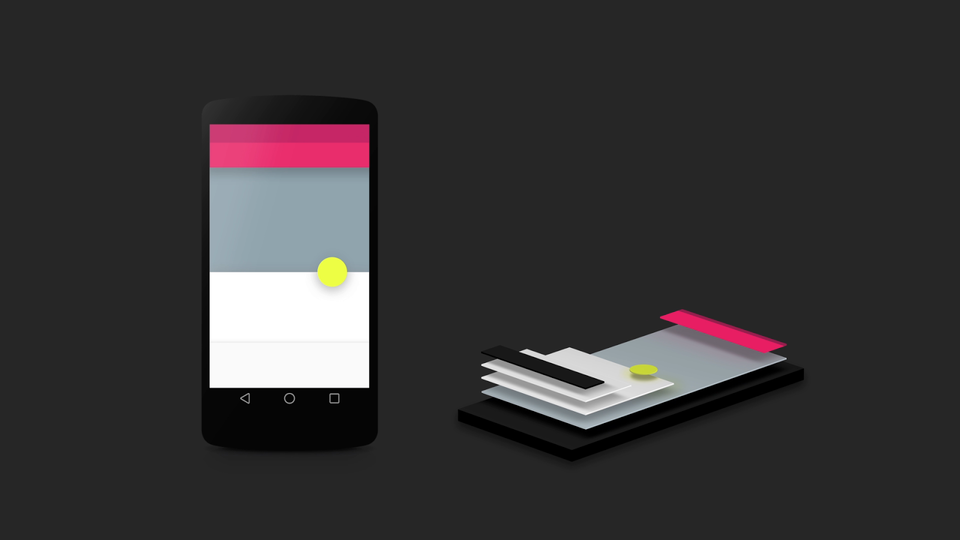


View Elevation


The z value of View consists of two parts, elevation and translation z (both new attributes introduced by Android L).

eleavation is a static member and translationZ is used for animation.

Z = elevation + translationZ


Use the android:elevation attribute to define in layout

Use the View.setElevation method to define in the code

To set the translation of the view, you can use the View.setTranslationZ method

New ViewProperty Animator. Z and ViewProperty Animator. translationZ methods set elevation values for views


New property values: translationZ allows you to create an animation that temporarily reflects the elevation of View.

This is useful for responding to touch gestures. See the following code (code in official Demo):

  1. int action = motionEvent.getActionMasked();  
  2.                 /* Raise view on ACTION_DOWN and lower it on ACTION_UP. */  
  3.                 switch (action) {  
  4.                     case MotionEvent.ACTION_DOWN:  
  5.                         Log.d(TAG, "ACTION_DOWN on view.");  
  6.                         view.setTranslationZ(120);  
  7.                         break;  
  8.                     case MotionEvent.ACTION_UP:  
  9.                         Log.d(TAG, "ACTION_UP on view.");  
  10.                         view.setTranslationZ(0);  
  11.                         break;  
  12.                     default:  
  13.                         return false;  
  14.                 }  

A simple touch monitor that sets translationZ values when clicking and lifting, respectively, as shown in the following figure:


Shadows and Outlines


The background boundary of the view determines the default shadow shape. Outlines represent the shape of graphical objects and determine the ripple area for touch feedback.


Setting up a shadow in Android L is simple and requires only two points:

1. Setting eleavation value

2. Add a background or outline


outline can be set in xml by defining a background:

  1. <TextView  
  2.     android:id="@+id/myview"  
  3.     ...  
  4.     android:elevation="2dp"  
  5.     android:background="@drawable/myrect" />  
  1. <!-- res/drawable/myrect.xml -->  
  2. <shape xmlns:android="http://schemas.android.com/apk/res/android"  
  3.        android:shape="rectangle">  
  4.     <solid android:color="#42000000" />  
  5.     <corners android:radius="5dp" />  
  6. </shape>  


You can also create an outline by code:

  1. /* Get the size of the shape from resources. */  
  2. int shapeSize = getResources().getDimensionPixelSize(R.dimen.shape_size);  
  3.   
  4. /* Create a circular outline. */  
  5. mOutlineCircle = new Outline();  
  6. mOutlineCircle.setRoundRect(00, shapeSize, shapeSize, shapeSize / 2);  
  7.   
  8. /* Create a rectangular outline. */  
  9. mOutlineRect = new Outline();  
  10. mOutlineRect.setRoundRect(00, shapeSize, shapeSize, shapeSize / 10);  

Set an outline for a view (if you want to prevent a view from shading, set outline to null):

  1. floatingShape.setOutline(mOutlineCircle);  

The above method has been replaced in the official version of Android L5.0. Now I will introduce the following method of setting outline in Android L5.0:

  1. ViewOutlineProvider viewOutlineProvider = new ViewOutlineProvider() {  
  2.     @Override  
  3.     public void getOutline(View view, Outline outline) {  
  4.         int size = getResources().getDimensionPixelSize(R.dimen.fab_size);  
  5.         outline.setOval(00, size, size);  
  6.     }  
  7. };  
  8. fab.setOutlineProvider(viewOutlineProvider);  


The following figure shows the shadowing effect using different eleavation values:


The following illustrations show shadows and drag effects from different backgrounds/contours:


Drawable Tinting


Another unique feature of Android L is that it can now define alpha masks for images and easily use the android:tint attribute to adjust tones.


Here is an example of using the tint attribute to adjust different colors to the background:

  1. <LinearLayout  
  2.     android:orientation="horizontal"  
  3.     android:layout_width="wrap_content"  
  4.     android:layout_height="wrap_content"  
  5.     android:layout_gravity="center_horizontal">  
  6.     <ImageView  
  7.         ...  
  8.         android:src="@drawable/xamarin_white"  
  9.         android:background="@drawable/mycircle"/>  
  10.     <ImageView  
  11.         ...  
  12.         android:src="@drawable/xamarin_white"  
  13.         android:background="@drawable/mycircle"  
  14.         android:tint="#2C3E50"/>  
  15.     <ImageView  
  16.         ...  
  17.         android:src="@drawable/xamarin_white"  
  18.         android:background="@drawable/mycircle"  
  19.         android:tint="#B4BCBC"/>  
  20. </LinearLayout>  

Design sketch:


Clipping Views


You can use the View.setClipToOutline method to cut the outline area of a view.

Only rectangle,circle, and round rectangle outlines support clipping (the Outline.canClip method is used to determine whether clipping is possible)


To clip a renderable view shape, you need to first set an outline and then call the View.setClipToOutline method:

  1. floatingShape.setClipToOutline(true);  


Let's look at an example of using tailoring:

  1. int margin = Math.min(clippedView.getWidth(), clippedView.getHeight()) / 10;  
  2. Outline mClip = new Outline();  
  3. mClip.setRoundRect(margin, margin, clippedView.getWidth() - margin,  
  4.         clippedView.getHeight() - margin, margin / 2);  
  5. /* Sets the Outline of the View. */  
  6. clippedView.setOutline(mClip);  
  7. /* Enables clipping on the View. */  
  8. clippedView.setClipToOutline(true);  
First, create an outline, set the area size for the outline, add the outline to the view, confirm the clipping, the effect is as follows:


Because clipping a view is a resource-intensive operation, do not add animation when clipping a view (Reveal Effect animation can be used to achieve this effect, the animation will be introduced).


Conclusion:


I divide Material Design into the following four parts:

Theme and layout—— ANDROID L - Material Design Details (Theme and Layout)

Views and Shadows—— ANDROID L - Material Design Details (Views and Shadows)

UI control—— ANDROID L - Material Design Details (UI Controls)

Animation -- ANDROID L - Material Design Details (Animation)


The views and shadows in this article are very important because they will be frequently used in Android L development in the future.

When I introduce all the features of Android L, I will start to write an example Demo, which I believe will be easier to understand.


The rest of the UI controls, animation, I will continue to update, please look forward to...

Posted by satant on Sun, 24 Mar 2019 10:57:29 -0700