The essence of mask:
The image of the original image and the mask mask are processed and transported, and the result image is obtained.
What is the operation of maps and masks?
In fact, each pixel in the image and each corresponding pixel in the mask are processed and operated.
For example: 1 & 1 = 1; 1 & 0 = 0;
For example, a 3*3 image is computed with a 3*3 mask.
As follows:
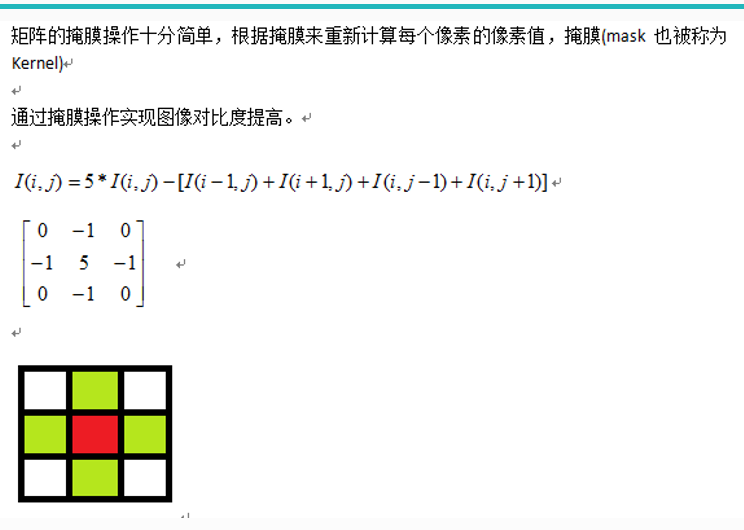
The principle is simple. Five times the value of a red pixel minus the sum of the values of four green pixels is used as the pixel value of a new red pixel.
The whole picture is traversed and modeled once in accordance with this method.
First, the concrete underlying principle code is as follows:
#include <opencv.hpp>
#include <iostream>
#include <math.h>
#include <opencv2/highgui/highgui_c.h>


using namespace cv;

int main(int argc, char** argv) {
    Mat src, dst;
    src = imread("L:/4.jpg");
    if (!src.data) {
        printf("could not load image...\n");
        return -1;
    }
    namedWindow("input image", CV_WINDOW_AUTOSIZE);
    imshow("input image", src);


    int cols = (src.cols - 1) * src.channels();
    int offsetx = src.channels();
    int rows = src.rows;

    dst = Mat::zeros(src.size(), src.type());  //Zero Matrix of the Same Size and Type as the Original Photo
    for (int row = 1; row < (rows - 1); row++) {
        const uchar* previous = src.ptr<uchar>(row - 1);
        const uchar* current = src.ptr<uchar>(row);
        const uchar* next = src.ptr<uchar>(row + 1);
        uchar* output = dst.ptr<uchar>(row);
        for (int col = offsetx; col < cols; col++) {
            output[col] = saturate_cast<uchar>(5 * current[col] - (current[col - offsetx] + current[col + offsetx] + previous[col] + next[col]));  //Core part
        }
    }

    namedWindow("contrast image demo", CV_WINDOW_AUTOSIZE);
    imshow("contrast image demo", dst);

    waitKey(0);
    return 0;
}
The core part of the program involves pointer issues:
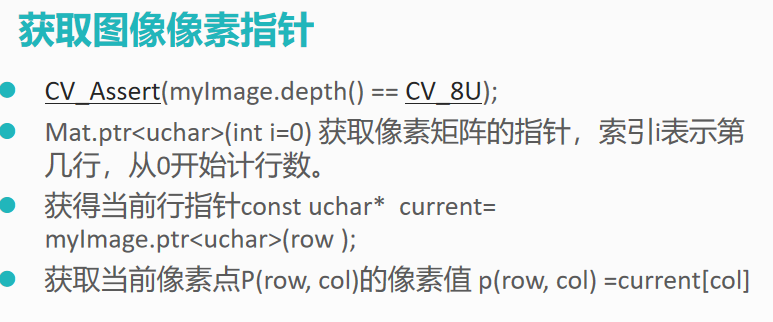
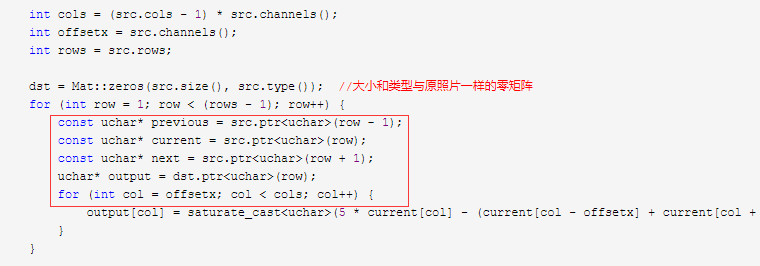
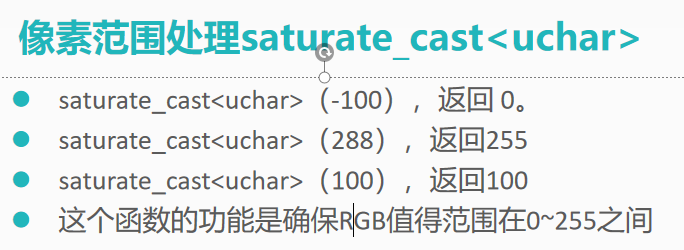
Pixel boundary value processing problem:

2. Calling opencv's core directly
#include <opencv.hpp>
#include <iostream>
#include <math.h>
#include <opencv2/highgui/highgui_c.h>


using namespace cv;

int main(int argc, char** argv) {
    Mat src, dst;
    src = imread("L:/4.jpg");
    if (!src.data) {
        printf("could not load image...\n");
        return -1;
    }
    namedWindow("input image", CV_WINDOW_AUTOSIZE);
    imshow("input image", src);

    double t = getTickCount();
    Mat kernel = (Mat_<char>(3, 3) << 0, -1, 0, -1, 5, -1, 0, -1, 0);
    filter2D(src, dst, src.depth(), kernel);
    double timeconsume = (getTickCount() - t) / getTickFrequency();
    printf("tim consume %.2f\n", timeconsume);

    namedWindow("contrast image demo", CV_WINDOW_AUTOSIZE);
    imshow("contrast image demo", dst);

    waitKey(0);
    return 0;
}
The main changes in code are

Other heads and tails remain unchanged
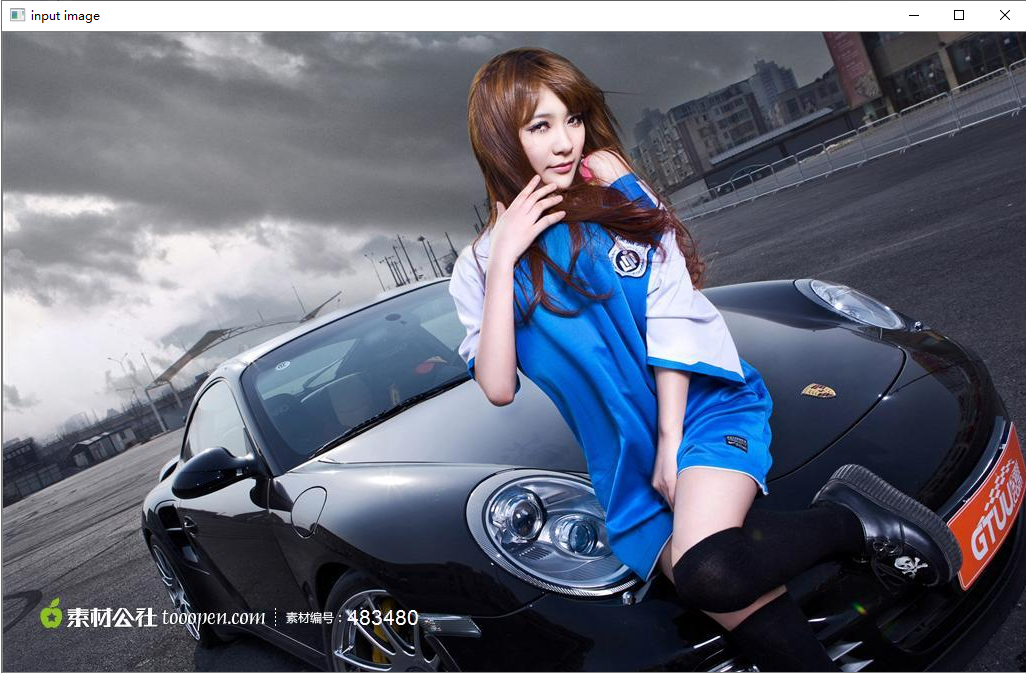
The principle and effect of one and two codes are exactly the same. The results are as follows:
Original image:
Enhanced image:
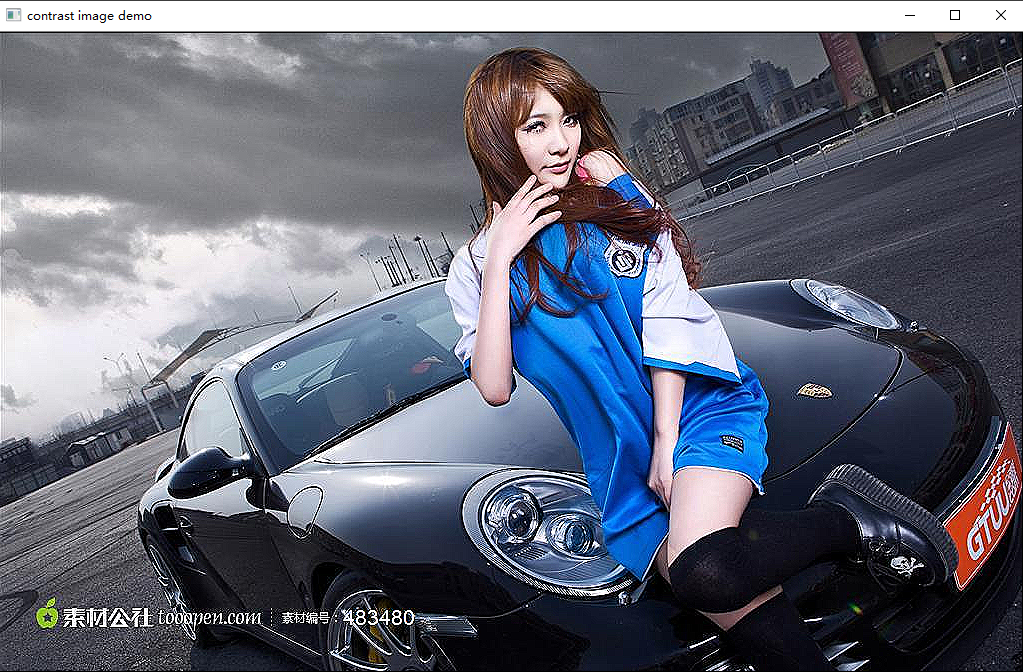
Look at the railings behind the car, the effect is still very obvious.
