Tools needed:
NERDTree
Cscope
ctags
vundle
homebrew(for mac)
Catalog:
Introduction to Software
NERDTree
NERDTree is a vim plug-in that displays tree directories: 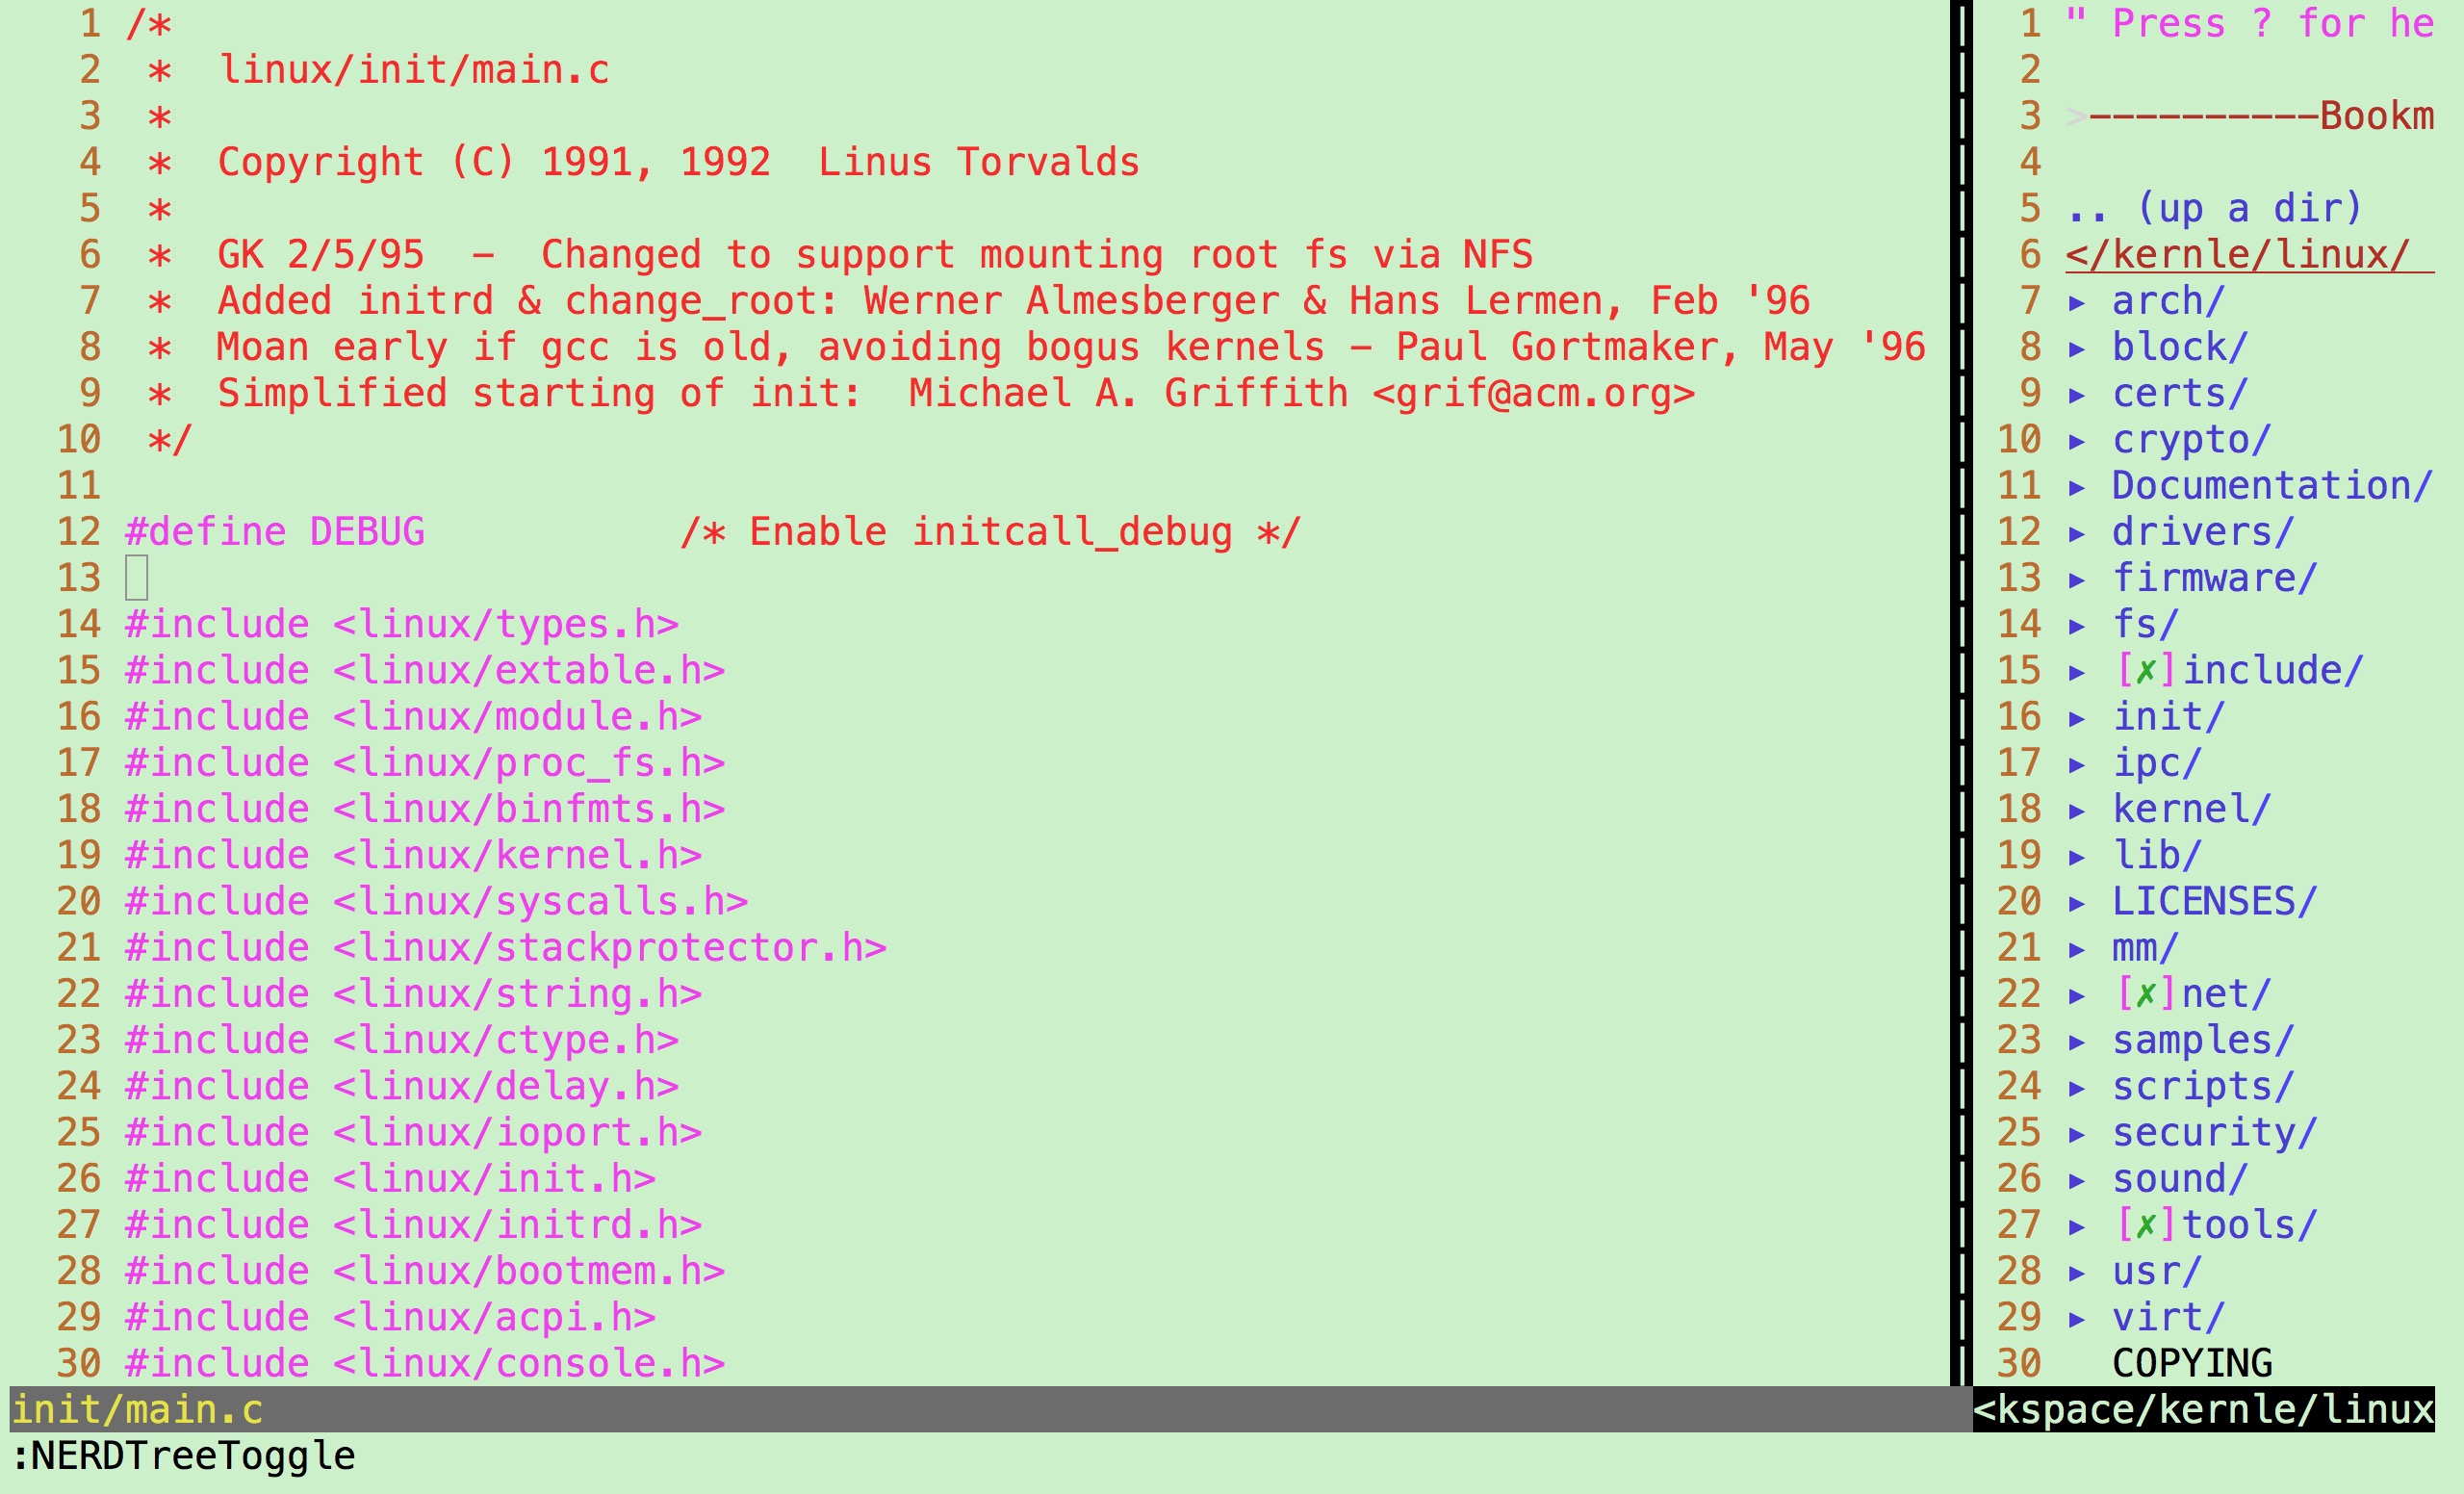
Enter the tree interface of the current directory, through the keyboard "up and down" key, can move the selected directory or file. There is a "+" number in front of the directory. Press Enter to expand the directory. Press Enter to show the contents of the file in the right window. The focus of the cursor is on the right side. The tree directory on the left side of ctr+w+h cursor focus and the file display window on the right side of CTR L + W + L cursor focus. Press "ctrl+w+w" and the cursor will automatically switch between the left and right windows. Cursor focus left tree window, press "?" Pop up the help of NERDTree and press again "?" Turn off help display. Enter ": q" to return and close the window where the cursor is located.
More detailed shortcuts to NERDTree are available for reference:
https://www.linuxidc.com/Linux/2017-03/141699.htm
(Enter in NERDTree? You can also see help)
Cscope
Cscope is a tool and plug-in suitable for VIM. Through Cscope, we can easily get the definition of a function and be called by those functions.
Before cscope is used, it needs to generate a cache file. After cscope-R, you can see a file named cscope.out, which is executed in vim.
:cs add cscope.outYou can load this file. You can also specify a preloaded cache file in the script. 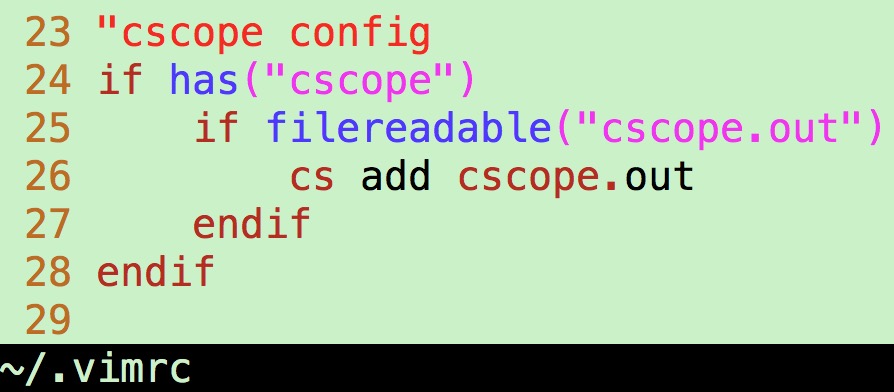
Functional demonstration: 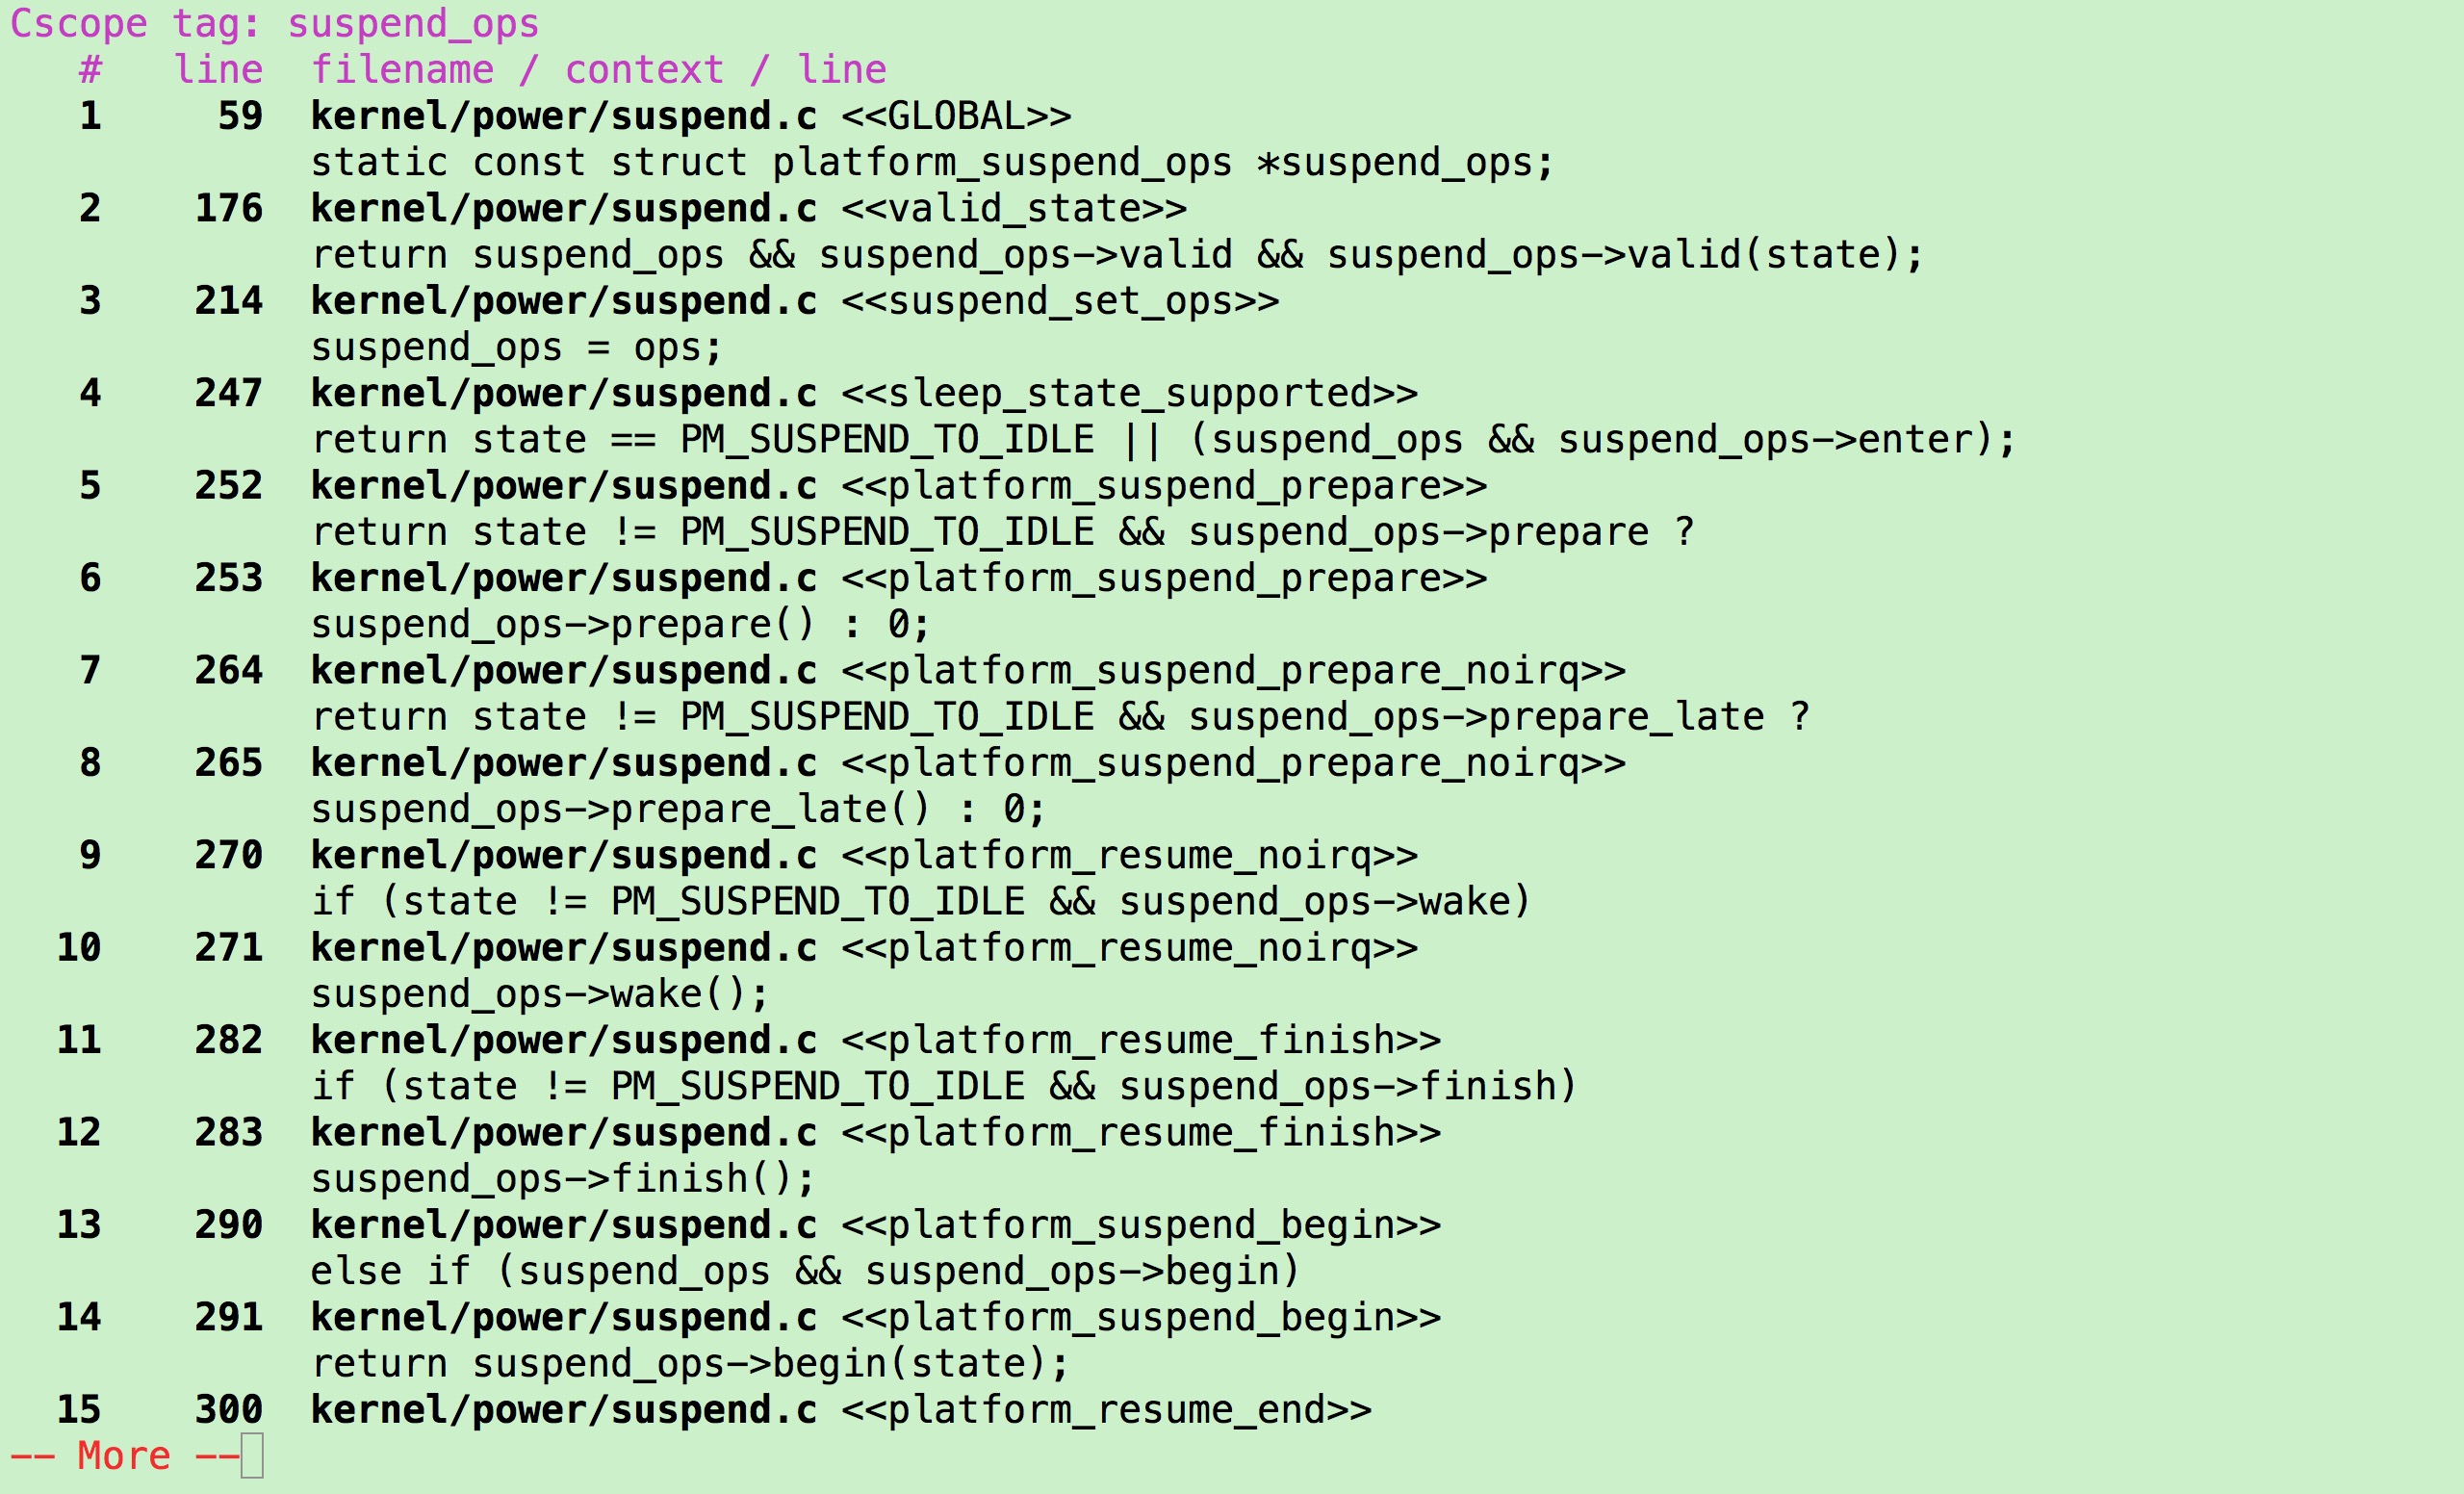
(Shortcuts such as f/b/q can be used to move quickly, to select from functions, and to jump to the corresponding position after inputting the corresponding number.)
Enter on the command line
: cs -hYou can view the help file: 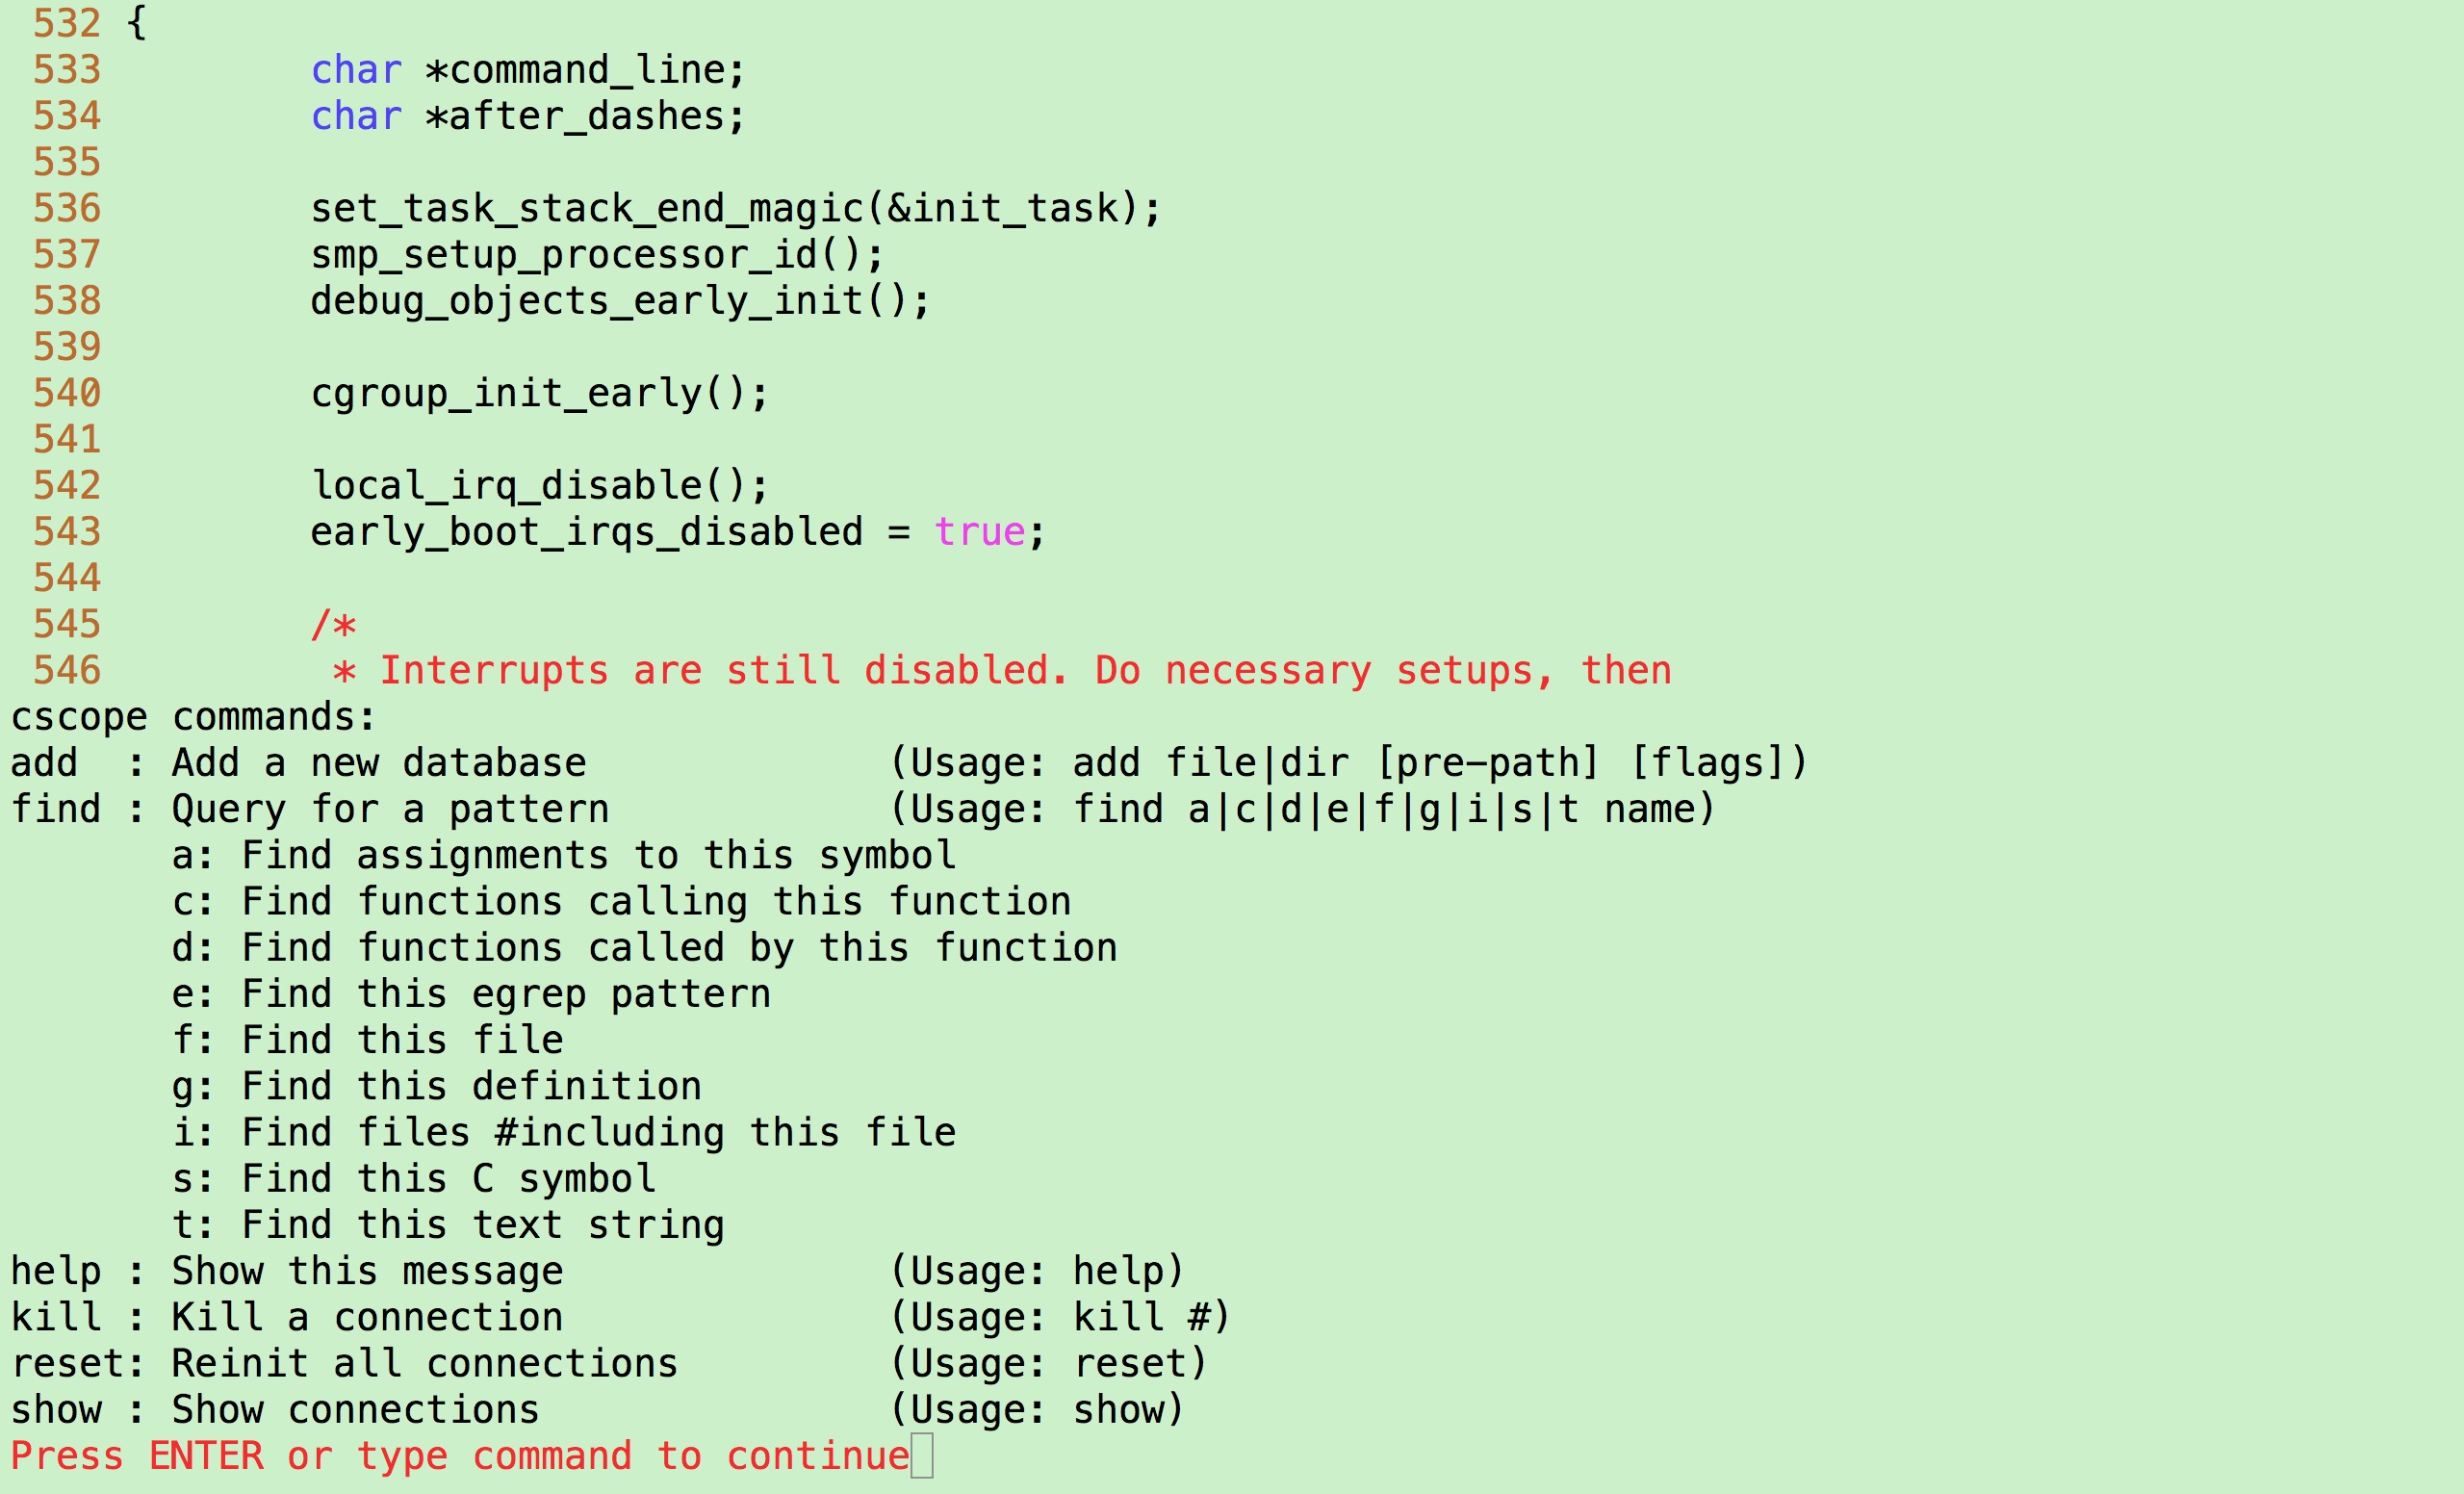
ctags
ctags is a plug-in that facilitates function jumping, which is less functional than cscope, but more convenient to use.
After the tags file is generated, the shortcut keys ctrl +] and ctrl+t can be used to jump and return.
Detailed use can be referred to:
https://blog.csdn.net/gangyanliang/article/details/6889860
vundle
Vim itself can meet many needs of developers, but its scalability is also very strong, and there have been some killer extensions that allow Vim to have the characteristics of a "modern" integrated development environment. So the first thing you need is a useful extension manager.
Although there are many other ways to extend vim, Vim also has multiple plug-in managers, but we strongly recommend Vundle, which can search, install, update and remove VIM plug-ins, no longer need to manually manage VIM plug-ins, you can imagine it as pip of Vim. With Vundle, it's easy to install and update packages.
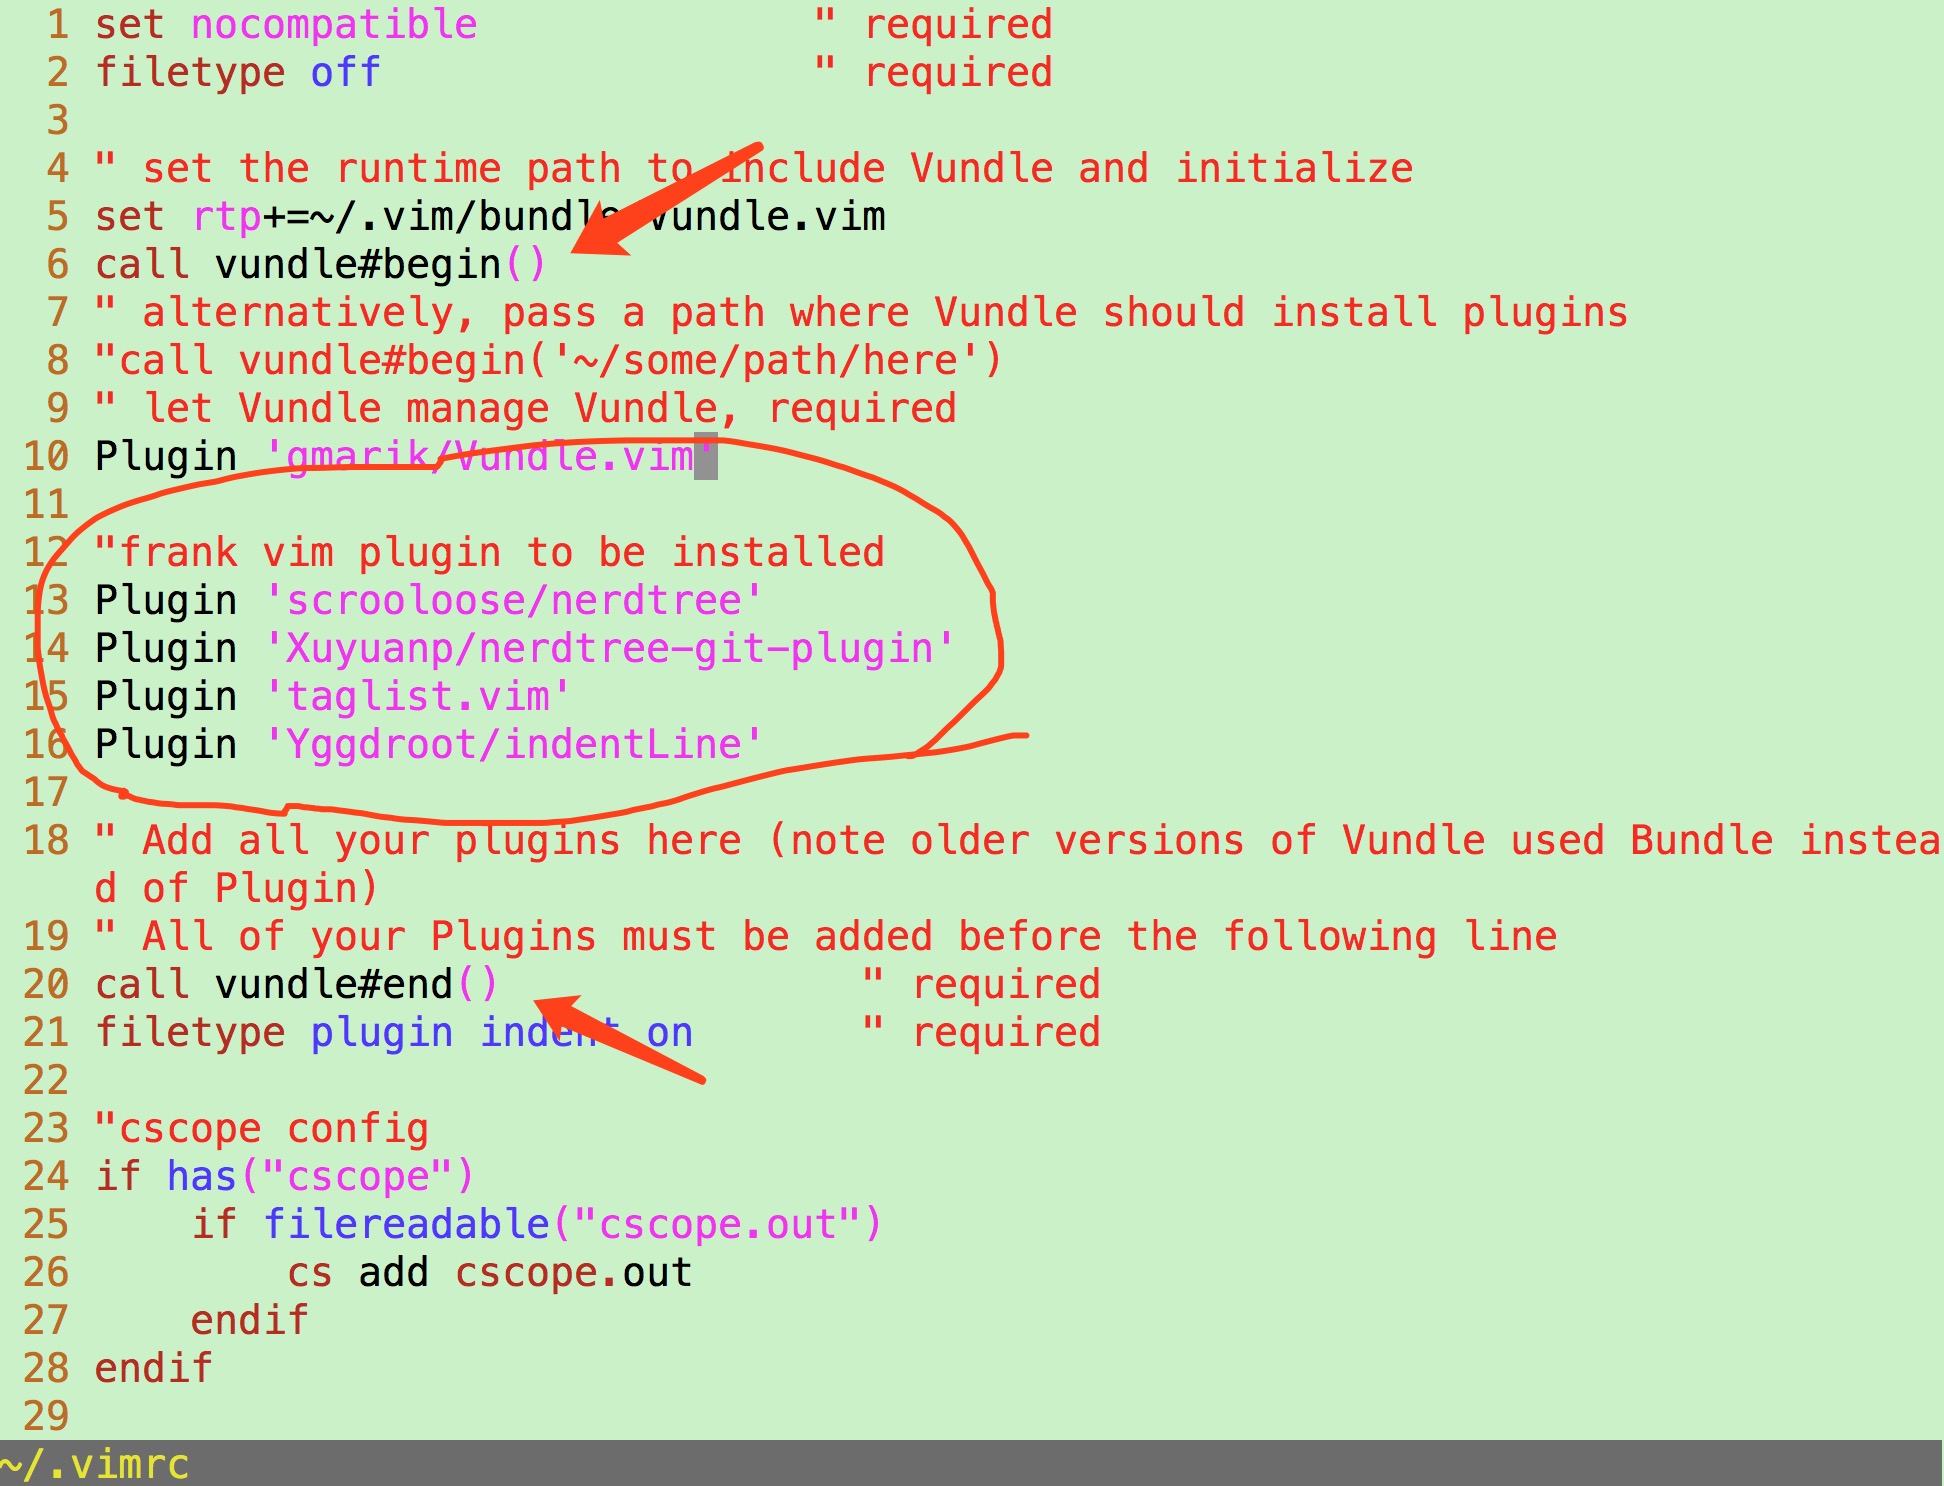
Download vundle:
git clone https://github.com/gmarik/Vundle.vim.git ~/.vim/bundle/Vundle.vimModify the configuration file to make vundle effective (vim ~/.vimrc), and paste this paragraph to the top:
set nocompatible              " required
filetype off                  " required

" set the runtime path to include Vundle and initialize
set rtp+=~/.vim/bundle/Vundle.vim
call vundle#begin()
" alternatively, pass a path where Vundle should install plugins
"call vundle#begin('~/some/path/here')
" let Vundle manage Vundle, required
Plugin 'gmarik/Vundle.vim'

" Add all your plugins here (note older versions of Vundle used Bundle instead of Plugin)
" All of your Plugins must be added before the following line
call vundle#end()            " required
filetype plugin indent on    " required
homebrew
Homebrew is a mac software that allows you to install things that Apple does not pre-install but needs through Homebrew.
Official website:
https://brew.sh/index_zh-cn
Usage method:
/usr/bin/ruby -e "$(curl -fsSL https://raw.githubusercontent.com/Homebrew/install/master/install)"Then you can install the uninstall software through it:
brew install xxx
brew uninstall xxx
mac installation
mac builds vim environment based on homebrew and vundle, and installs these two software as described above.
1. Install software through homebrew
brew install ctags
brew install cscope
2. Install plug-ins and configure them through vundle
The general steps for installing vim plug-ins can be summarized as follows:
1. In the configuration file ~/.vimrc, write the plug-in you want to install between the call vundle begin () and call vundle end () lines: Plugin'plug-in name'

2. Then open the Vim editor and run the following command: PluginInstall, Vundle will automatically download and install the corresponding plug-ins

3. Further detailed configuration of plug-ins in. vimrc
Miscellaneous configuration of ~/.vimrc: 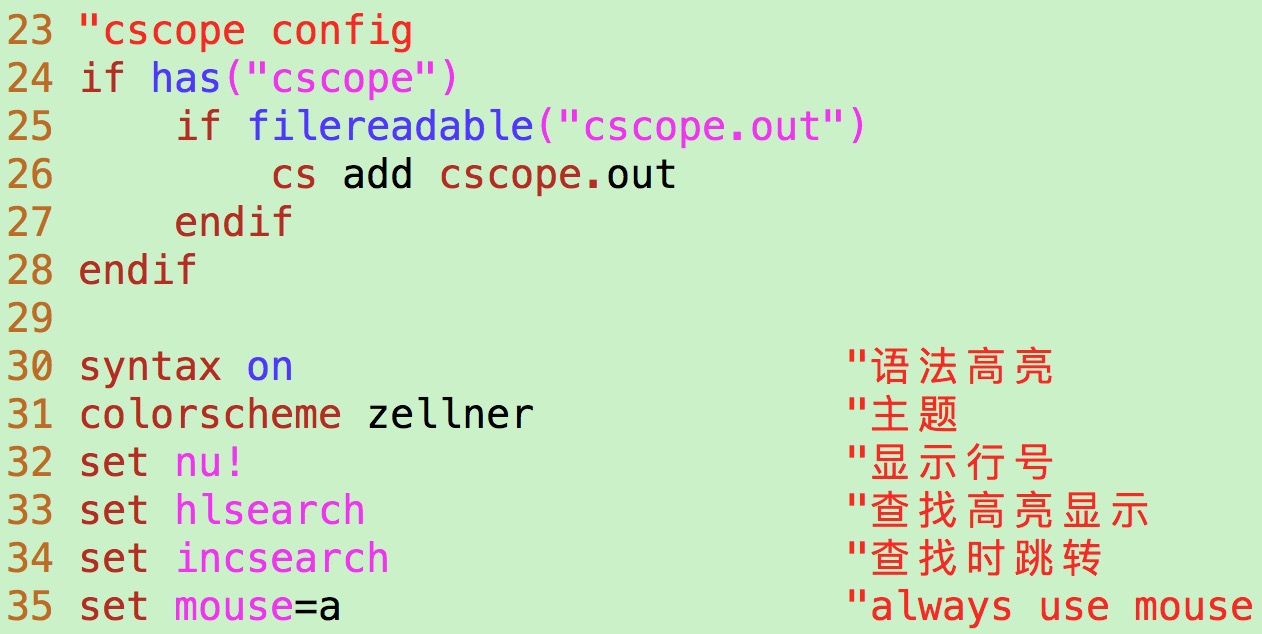
Others, such as NERDTree and Tlist, are too long to take a screenshot, so paste the entire ~/.vimrc file directly:
set nocompatible              " required
filetype off                  " required

" set the runtime path to include Vundle and initialize
set rtp+=~/.vim/bundle/Vundle.vim
call vundle#begin()
" alternatively, pass a path where Vundle should install plugins
"call vundle#begin('~/some/path/here')
" let Vundle manage Vundle, required
Plugin 'gmarik/Vundle.vim'

"frank vim plugin to be installed
Plugin 'scrooloose/nerdtree'
Plugin 'Xuyuanp/nerdtree-git-plugin'
Plugin 'taglist.vim'
Plugin 'Yggdroot/indentLine'

" Add all your plugins here (note older versions of Vundle used Bundle instead of Plugin)
" All of your Plugins must be added before the following line
call vundle#end()               " required
filetype plugin indent on       " required

"cscope config
if has("cscope")
    if filereadable("cscope.out")
        cs add cscope.out
    endif
endif

syntax on               "Syntax highlighting
colorscheme zellner         "theme
set nu!                         "set number
set hlsearch            "Find highlights
set incsearch           "Look-up jump
set mouse=a             "always use mouse

" frank mvim plugin config
" -------- pulgin NERDTree
"Use F12 Keys quickly pull it out and hide it
map <F12> :NERDTreeToggle<CR>
let NERDTreeChDirMode=1
"Display bookmarks"
let NERDTreeShowBookmarks=1
"Setting Ignore File Type"
let NERDTreeIgnore=['\~$', '\.pyc$', '\.swp$']
"Window size"
let NERDTreeWinSize=20 "25
" Modify the default arrow
let g:NERDTreeDirArrowExpandable = '▸'
let g:NERDTreeDirArrowCollapsible = '▾'

"How can I open a NERDTree automatically when vim starts up if no files were specified?
autocmd StdinReadPre * let s:std_in=1
autocmd VimEnter * if argc() == 0 && !exists("s:std_in") | NERDTree | endif
" open vim Open automatically NERDTree
"autocmd vimenter * NERDTree

"How can I open NERDTree automatically when vim starts up on opening a directory?
autocmd StdinReadPre * let s:std_in=1
autocmd VimEnter * if argc() == 1 && isdirectory(argv()[0]) && !exists("s:std_in") | exe 'NERDTree' argv()[0] | wincmd p | ene | endif
" Close vim When, if the open file is excluded NERDTree When there are no other files, it automatically closes, reducing the number of clicks:q!
autocmd bufenter * if (winnr("$") == 1 && exists("b:NERDTree") && b:NERDTree.isTabTree()) | q | endif

" In the process of development, we hope git The information is directly in the uuuuuuuuuuu NERDTree It is shown in, and Eclipse Similarly, the modified files and the added files are marked accordingly, and the plug-ins that need to be installed are nerdtree-git-plugin,The configuration information is as follows
let g:NERDTreeIndicatorMapCustom = {
    \ "Modified"  : "✹",
    \ "Staged"    : "✚",
    \ "Untracked" : "✭",
    \ "Renamed"   : "➜",
    \ "Unmerged"  : "═",
    \ "Deleted"   : "✖",
    \ "Dirty"     : "✗",
    \ "Clean"     : "✔︎",
    \ "Unknown"   : "?"
    \ }
" set number
let NERDTreeShowLineNumbers=1
let NERDTreeAutoCenter=1

" Start at the terminal vim When, share NERDTree
let g:nerdtree_tabs_open_on_console_startup=1

" Displayed on the right
let NERDTreeWinPos=1

" -------- plugin Tlist
"let Tlist_Use_Right_Window = 1          "Give Way taglist The window appears Vim To the right of the
let Tlist_File_Fold_Auto_Close = 1      "When multiple files are displayed at the same timetagWhen, set to uuuuuuuuuuuu1,Can make taglist Display only the current file
                    "tag,Other documents tag They're all folded up.

let Tlist_Show_One_File = 1             "Display only one file'stag,The default is to display more than one
let Tlist_Sort_Type ='name'             "Tag Ordering rules, sorted by name. The default is to sort in the order that appears in the file

let Tlist_GainFocus_On_ToggleOpen = 1       "Taglist When the window opens, switch to focus immediately
let Tlist_Exit_OnlyWindow = 1           "If taglist Window is the last window, then exit vim

let Tlist_WinWidth = 23             "Set the form width to32,You can set it up according to your preferences.
let Tlist_Ctags_Cmd='/usr/local/bin/ctags'  "It's more important here. Settings ctags Location, not pointing MacOS The one with it,>It's what we use. homebrew The one installed

"Automatic Opening Tlist
autocmd vimenter * TlistToggle

"Use F10 Keys quickly pull it out and hide it
map <F10> :TlistToggle<CR>

"map t :TlistToggle<CR>              "Hotkey settings, I set them to Leader+t Come out and close Taglist

" -------- plugin indentline
"" Supporting arbitrariness ASCII Codes can also use special characters:¦, ┆, or │ ,But only in utf-8Effective under coding
let g:indentLine_char='¦'
" send indentline Take effect
let g:indentLine_enabled = 1
Ultimately: 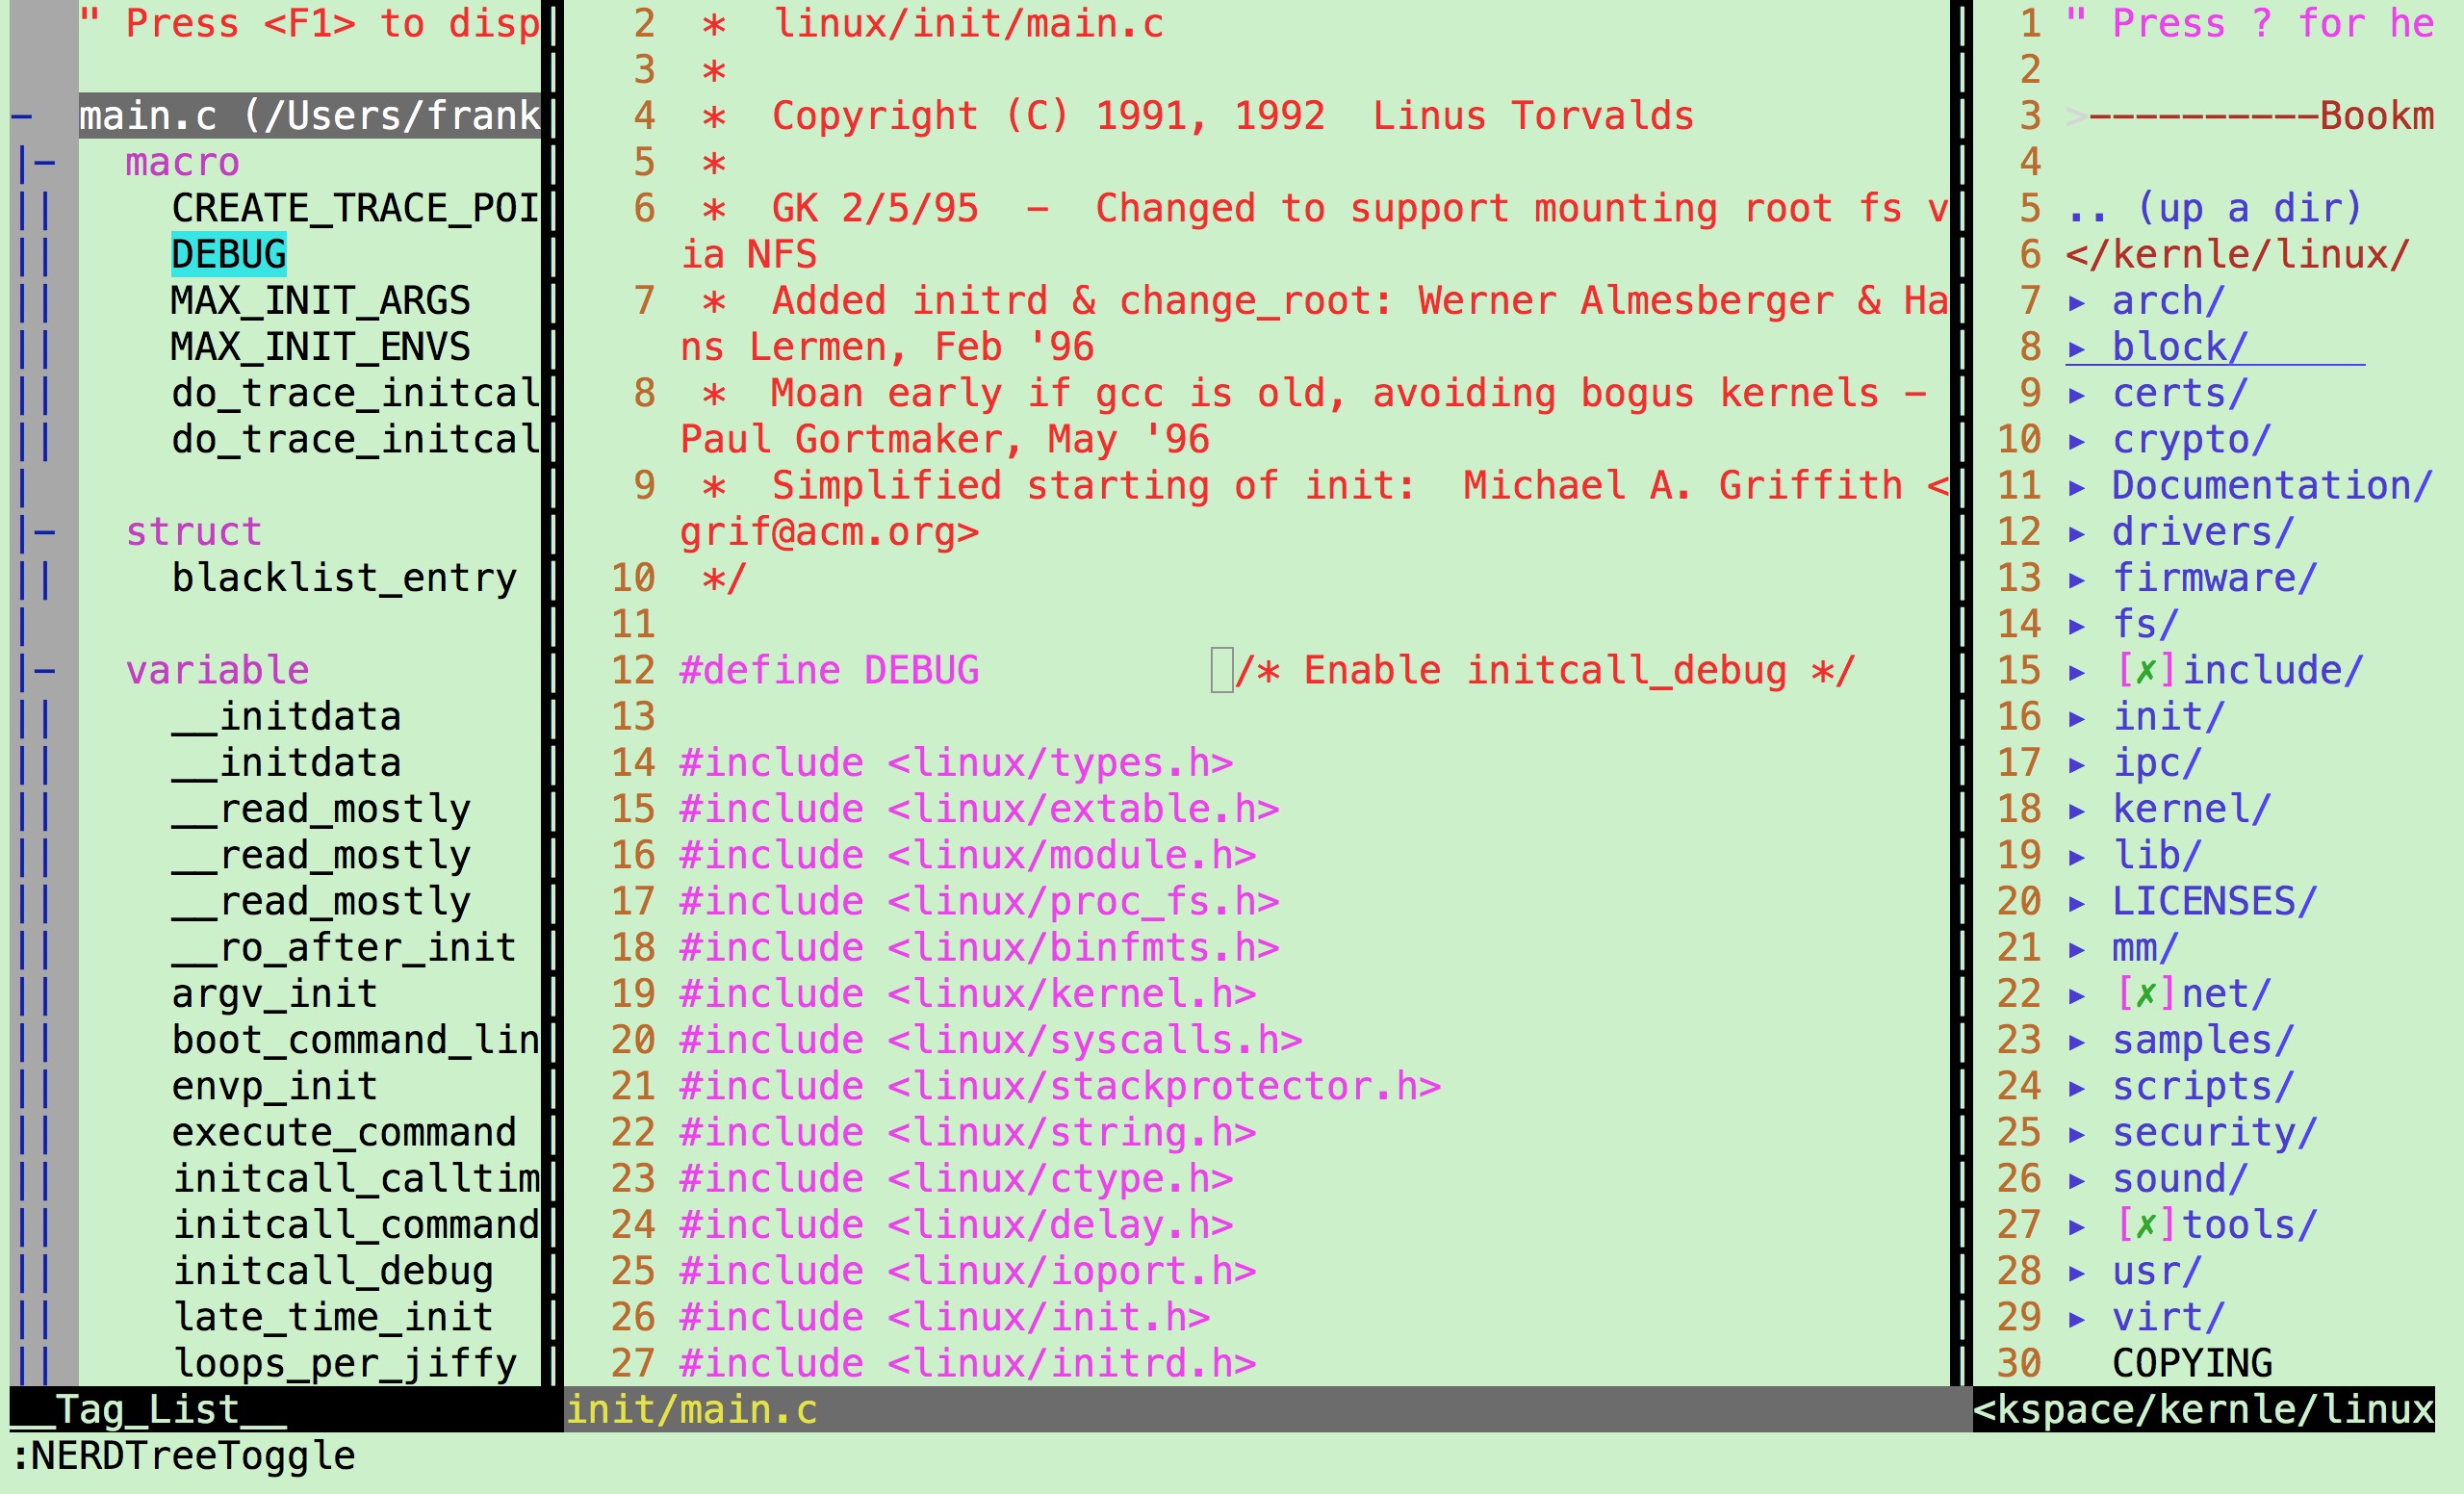
F9 and F11 can open and close the sidebar.
ubuntu installation
ubuntu can use existing tools directly:
https://download.csdn.net/download/qq_33160790/10556797
The three files are moved to the ~/ directory: 
Move the VIM folder in vim.7z to the ~/ directory and rename it. vim. 
Ultimately: 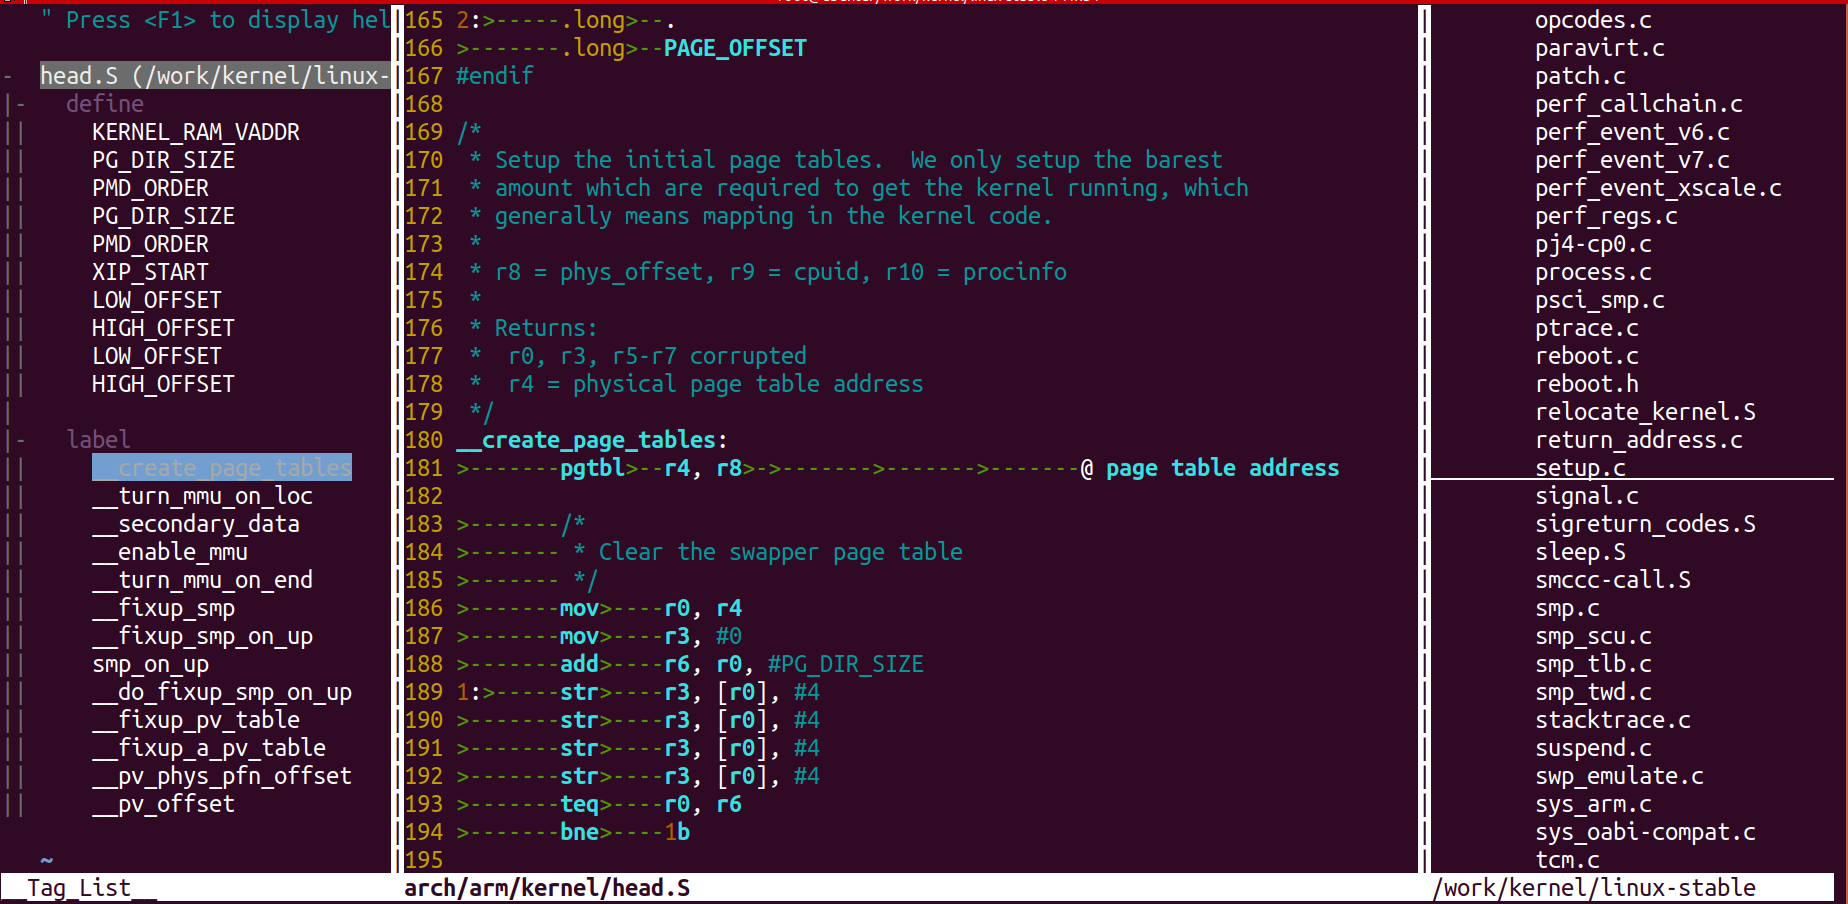
(You can control the sidebar by pressing F1 and F2)
Reference article:
https://blog.csdn.net/weixin_40539892/article/details/79252927