What is LVS?
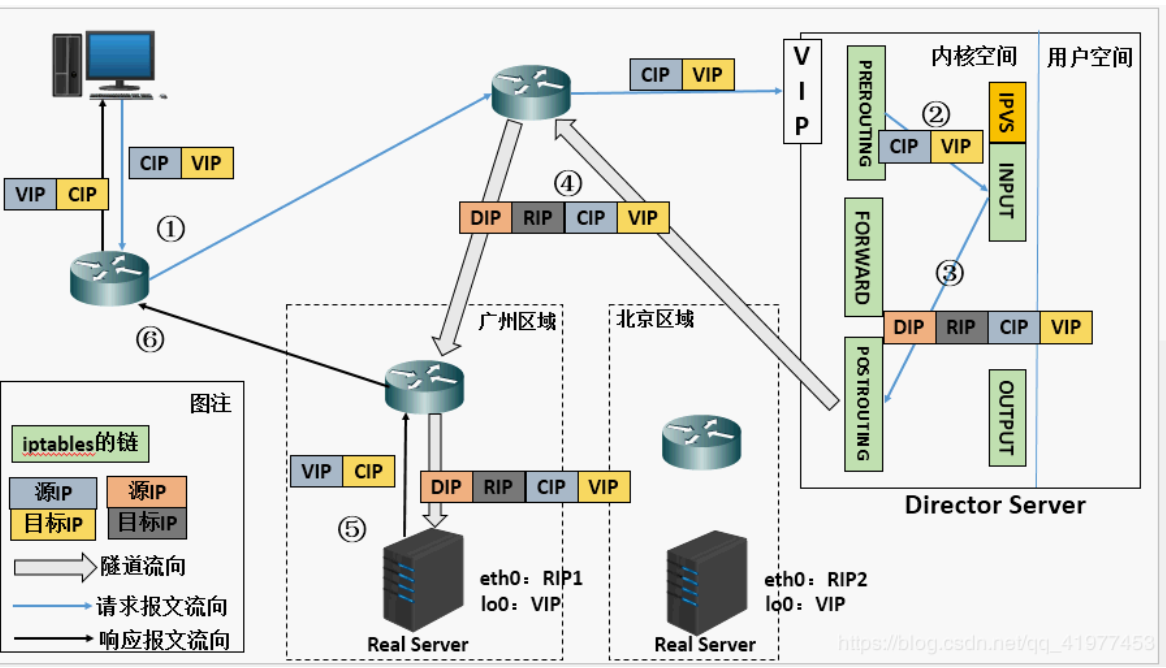
LVS (Linux Virtual Server), or Linux virtual server, is an open source load balancing project led by DR. Zhang wensong. At present, LVS has been integrated into Linux kernel module. This project implements the load balancing scheduling scheme of data request based on IP in Linux kernel. Its architecture is shown in Figure 1. The end Internet user accesses the external load balancing server of the company from the outside, and the end user's Web request will be sent to LVS scheduler. The scheduler decides to send the request to a back-end Web server according to its preset algorithm, for example, round The query algorithm can evenly distribute external requests to all servers on the back end. Although the end user accessing LVS scheduler will be forwarded to the real server on the back end, if the real server is connected to the same storage, the service provided is the same. The service content obtained by the end user is the same no matter which real server they visit. The whole cluster Transparent to users. Finally, according to the different working modes of LVS, the real server will choose different ways to send the data needed by users to the end users. LVS working modes are divided into NAT mode, TUN mode and DR mode.
Introduction of three working modes
1,nat
In simple terms, the traditional NAT requires that the incoming and outgoing traffic pass through the scheduler. The scheduler will select a destination server, and rewrite the destination IP of the incoming traffic into the target server of load balancing, and the source IP address will also be changed into the IP address of the scheduler. The mechanism is simple, but the limitation is large. IPVS needs to maintain every mapping relationship, and the incoming and outgoing traffic needs to go through the scheduler, which will actually become the bottleneck.
2,dr
, i.e. Direct Routing mode. In this mode, the scheduler directly rewrites the mac address of the incoming packet and changes it to the mac address of the selected target server, so that the server can be reached. But in this case, the IPVS server needs to be in the same LAN as the real server, and the real server must have a real network card (in this way, packets rewriting the mac address can reach the server)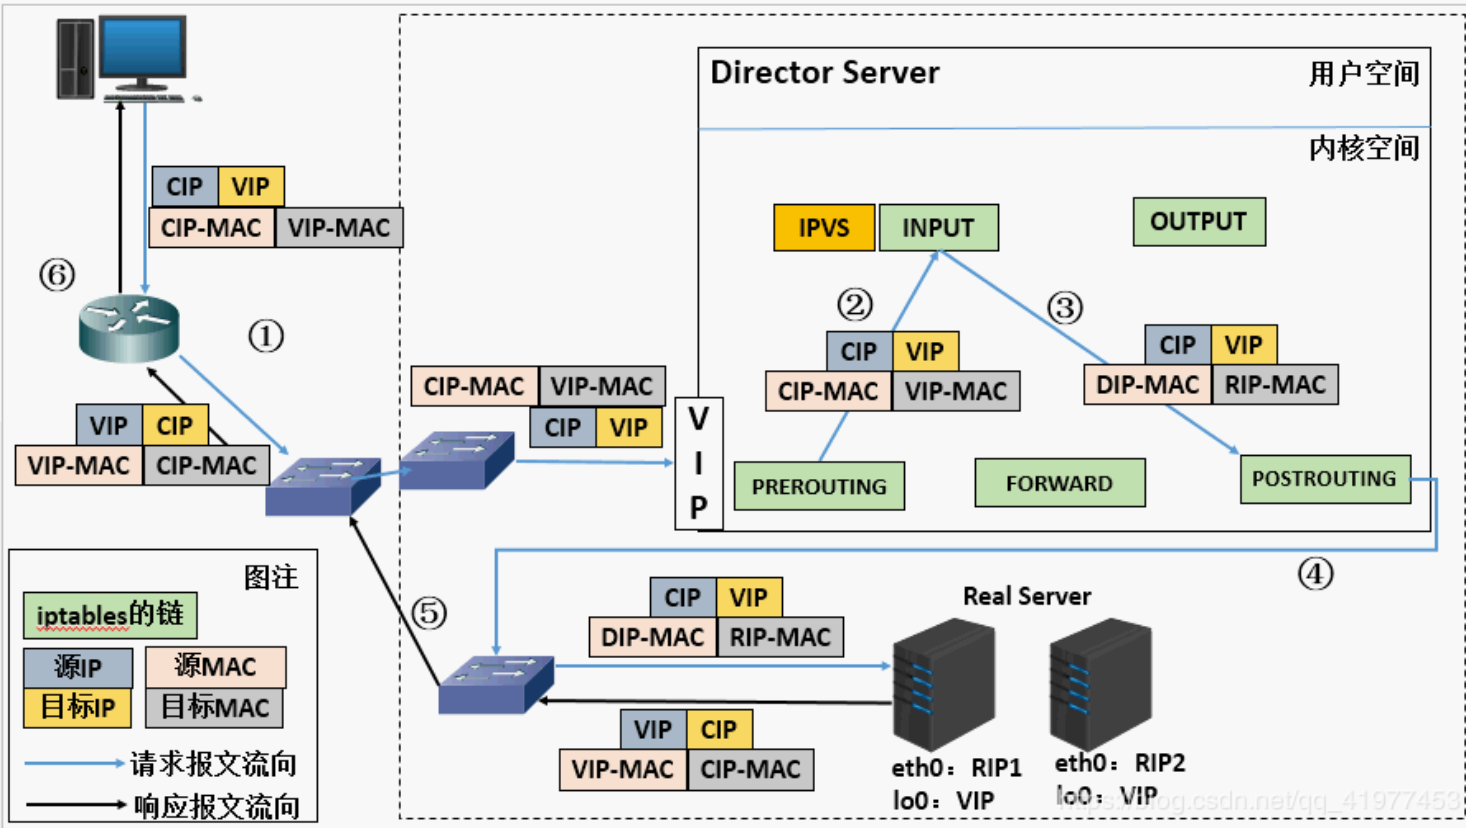
3,tun
IP Tunneling mode. In this mode, the dispatcher repackages the incoming packet into an IP packet, and then sends it to the selected destination server. After the destination server processes it, it directly sends the response to the customer (of course, the source IP of the repackaged message
The address is still to be filled in as scheduler).
algorithm
Training algorithm weighted training algorithm minimum connection algorithm weighted bottom connection algorithm
LVS Scheduling Method LVS scheduling method:
1.Fixed Scheduling Method
(1).RR poll
(2).WRR weighted polling
(3).DH destination address hash
(4).SH source address hash
2.Dynamic Scheduling Method
(1).LC minimum connection
(2).WLC weighted least connection
(3).SED minimum expected delay
(4).NQ never queue scheduling method
(5).LBLC local based minimum connection
(6).LBLCR with replication based on local preserved
Keepalived is mainly used for health check of RealServer and implementation of failover between LoadBalance host and BackUP host. IPVS is usually used with keepalived, which is also one of the subprojects of LVS project to detect the state of the server.
In lvs system, preserved has three functions as follows:
1 manage LVS load balancing software
2 realize the health check function of LVS cluster node
3 high availability function as system network service
That is, Keepalived implements the function of heartbeat + ldirectord.
Configuration process
Experimental environment requirements:
Physical machine: 172.25.3.250
server1: 172.25.3.1 --VS
server2: 172.25.3.2 --VS
server3: 172.25.3.3 --RS
server4: 172.25.3.4 --RS
1. Load balancing
Deploy on server1
In order to avoid problems in the subsequent installation of the software, first specify the yum source configuration, as follows
[rhel-source]
name=Red Hat Enterprise Linux $releasever - $basearch - Source
baseurl=http://172.25.3.250/rhel6.5
enabled=1
gpgcheck=0
gpgkey=file:///etc/pki/rpm-gpg/RPM-GPG-KEY-redhat-release

[LoadBalancer]
name=LoadBalancer
baseurl=http://172.25.3.250/rhel6.5/LoadBalancer
gpgcheck=0

[HighAvailability]
name=HighAvailability
baseurl=http://172.25.3.250/rhel6.5/HighAvailability
gpgcheck=0

[ResilientStorage]
name=ResilientStorage
baseurl=http://172.25.3.250/rhel6.5/ResilientStorage
gpgcheck=0

[ScalableFileSystem]
name=ScalableFileSystem
baseurl=http://172.25.3.250/rhel6.5/ScalableFileSystem
gpgcheck=0
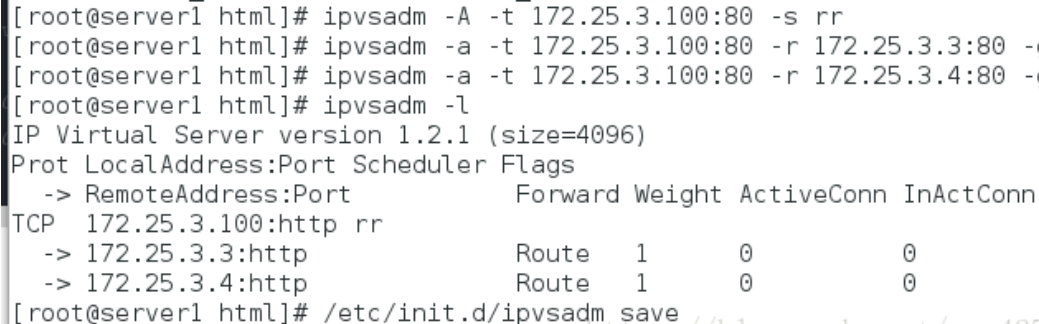
[root@server1 ~]# yum install ipvsadm -y                  ##Install management cluster service ipvsadm
[root@server1 ~]# ip addr add 172.25.3.100/24 dev eth0    ##Add ip temporarily (vip)
[root@server1 ~]# ipvsadm -A -t 172.25.3.100:80 -s rr   ## rr polling mode
[root@server1 ~]# ipvsadm -a -t 172.25.3.100:80 -r 172.25.3.3:80 -g
[root@server1 ~]# ipvsadm -a -t 172.25.3.100:80 -r 172.25.3.4:80 -g
                                  #vip add RS address and set it to D mode - r: RS address, - g: DR mode

[root@server1 ~]# /etc/init.d/ipvsadm save                ##Save ipvsadm operation
server3–RS
[root@server3 ~]#  vim /var/www/html/index.html            #Write default publish file
[root@server3 ~]# ip addr add 172.25.3.100/32 dev eth0     ##Realserver also adds a virtual ip address, which is the same as the virtual ip address of the dispatcher
[root@server3 ~]# yum install arptables_jf -y              ##Install arp firewall arp firewall to shield data packets and intercept ip conflicts. Because the addresses of virtual machine and real server are the same, you need to drop the virtual ip when entering the real server, that is, intercept the virtual ip of real server
[root@server3 ~]# arptables -A IN -d 172.25.3.100 -j DROP  ##Deny the client access to the virtual ip of the realserver, as long as the input is directly dropped
[root@server3 ~]# arptables -A OUT -s 172.25.3.100 -j mangle --mangle-ip-s 172.25.3.3
                                                           ##Because tcp handshakes three times, it still needs to be in the form of vip address to shake hands when going out, and the real data transmission to the client is realserver, and the mangle parameter is this function
[root@server3 ~]# /etc/init.d/arptables_jf save
server4–RS
[root@server4 ~]#  vim /var/www/html/index.html            #Write default publish file
[root@server4 ~]# ip addr add 172.25.3.100/32 dev eth0     ##Realserver also adds a virtual ip address, which is the same as the virtual ip address of the dispatcher
[root@server4 ~]# yum install arptables_jf -y              ##Install arp firewall arp firewall to shield data packets and intercept ip conflicts. Because the addresses of virtual machine and real server are the same, you need to drop the virtual ip when entering the real server, that is, intercept the virtual ip of real server
[root@server4 ~]# arptables -A IN -d 172.25.3.100 -j DROP  ##Deny the client access to the virtual ip of the realserver, as long as the input is directly dropped
[root@server4 ~]# arptables -A OUT -s 172.25.3.100 -j mangle --mangle-ip-s 172.25.3.4
                                                           ##Because tcp handshakes three times, it still needs to be in the form of vip address to shake hands when going out, and the real data transmission to the client is realserver, and the mangle parameter is this function
[root@server4 ~]# /etc/init.d/arptables_jf save
Client test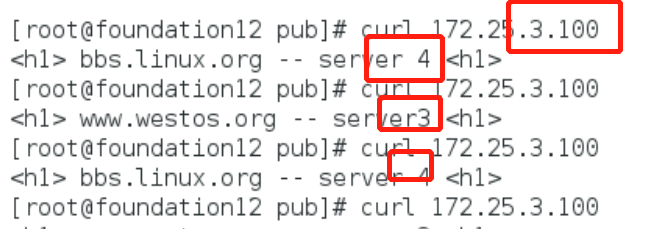
You can see that when accessing the virtual IP100, the two real servers poll in turn. When a real server is shut down, you can see that access failure will occur. Therefore, a detection function is needed to be able to detect it in time to avoid bad user experience.
2.ldirectord realizes lvs health check
[root@server1 ~]# yum install ldirectord-3.9.5-3.1.x86_64.rpm
##Installation service [root@server1 ~]# rpm -qpl ldirectord-3.9.5-3.1.x86_64.rpm ##Find profile [root@server1 ~]# cd /etc/ha.d/ [root@server1 ha.d]# cp /usr/share/doc/ldirectord-3.9.5/ldirectord.cf . [root@server1 ha.d]#
vim ldirectord.cf ##Modify profile
virtual=172.25.3.100:80
real=172.25.3.3:80 gate
real=172.25.3.4:80 gate
fallback=127.0.0.1:80 gate ##After the server2 and Server3 services are down, access the local port 80
service=http
scheduler=rr ##Scheduling mode: polling
#persistent=600
#netmask=255.255.255.255
protocol=tcp
checktype=negotiate
checkport=80 ##port
request="index.html" ##file [root@server1 ha.d]# /Etc / init.d/ldirectored start start the service
Client test:
server3 up
server4 up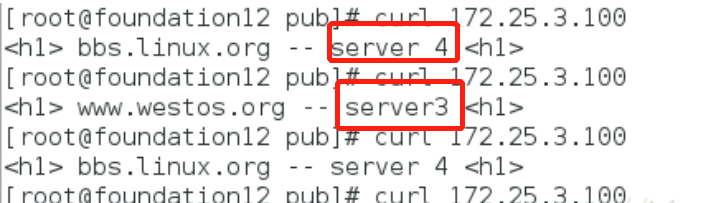
server down,server4up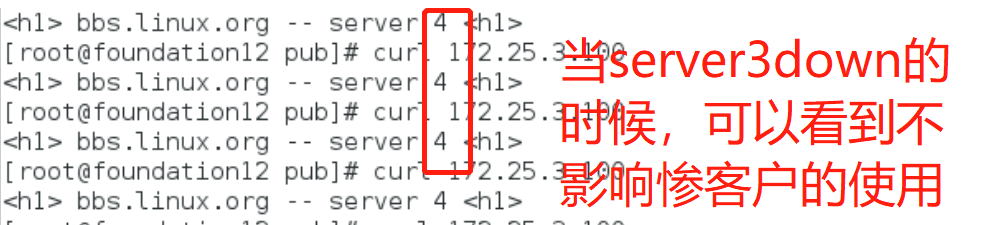
3. keepalived deployment realizes the function of heartbeat + ldirectord
[root@server1 ~]# /etc/init.d/ldirectord stop [root@server1 ~]#
chkconfig ldirectord off
##Close ldirectord Service, otherwise keepalived conflict lftp 172.25.3.250:/pub> get keepalived-1.4.3.tar.gz #Obtain keepalived Installation package [root@server1 ~]# tar
zxf keepalived-1.4.3.tar.gz [root@server1 ~]# cd keepalived-1.4.3 yum
install gcc [root@server1 keepalived-1.4.3]# ./configure
–prefix=/usr/local/keepalived --with-init=SYSV [root@server1 keepalived-1.4.3]# make [root@server1 keepalived-1.4.3]# make
install ##install keepalived,Dependency services may need to be installed [root@server1 ~]# yum
install openssl-devel.x86_64 -y ##Resolve dependencies
[root@server1 ~]# cd /usr/local/keepalived/etc/rc.d/init.d/
[root@server1 init.d]# chmod +x keepalived
[root@server1 local]# ln -s /usr/local/keepalived/etc/keepalived/ /etc
[root@server1 local]# ln -s /usr/local/keepalived/etc/sysconfig/keepalived /etc/sysconfig/
[root@server1 local]# ln -s /usr/local/keepalived/etc/rc.d/init.d/keepalived /etc/init.d/
[root@server1 local]# ln -s /usr/local/keepalived/sbin/keepalived /sbin/
[root@server1 init.d]# vim /etc/keepalived/keepalived.conf
global_defs {
notification_email {
root@localhost
}
notification_email_from keepalived@localhost
smtp_server 127.0.0.1
smtp_connect_timeout 30
router_id LVS_DEVEL
vrrp_skip_check_adv_addr
#> vrrp_strict vrrp_garp_interval 0 vrrp_gna_interval 0 } vrrp_instance VI_1 {
state MASTER
interface eth0
virtual_router_id 56
priority 100 ##Value should be greater than BACKUP's
advert_int 1
authentication {
auth_type PASS
auth_pass 1111
}
virtual_ipaddress {
172.25.129.100
} } virtual_server 172.25.3.100 80 {
delay_loop 3
lb_algo rr
lb_kind DR # persistence_timeout 50
protocol TCPreal_server 172.25.3.3 80 { weight 1 TCP_CHECK { connect_timeout 3 retry 3 delay_before_retry 3 } } real_server 172.25.3.4 80 { weight 1 TCP_CHECK { connect_timeout 3 retry 3 delay_before_retry 3 } } }
Open the service and reload: keepalived
[root@server1 ~]# /etc/init.d/keepalived start [root@server1 ~]#
/etc/init.d/keepalived reload
Copy the configuration file of server1 to server2
[root@server1 ~]# scp -r /usr/local/keepalived/
root@172.25.3.2:/usr/local/ [root@server1 ~]# scp -r
/etc/keepalived/keepalived.conf root@172.25.3.2:/etc/keepalived/
backup deployment of server2
vim /etc/yum.repos.d/rhel-source.repo ##Configure the complete yum source yum install -y
ipvsadm ##Installation service yum install openssh -y ln -s
/usr/local/keepalived/etc/keepalived/ /etc/ ln -s
/usr/local/keepalived/etc/sysconfig/keepalived /etc/sysconfig/ ln -s
/usr/local/keepalived/etc/rc.d/init.d/keepalived /etc/init.d/ ln -s
/usr/local/keepalived/sbin/keepalived /sbin/ cd
/usr/local/keepalived/etc/rc.d/init.d chmod +x keepalived vim
/etc/keepalived/keepalived.conf
##Content to be modified VRRP? Instance VI? 1{
state BACKUP
interface eth0
virtual_router_id 12
priority 50 #Must be less than master
advert_int 1
authentication {
auth_type PASS
auth_pass 1111
}
virtual_ipaddress {
172.25.0.100
} }
[root@server4 ~]# /etc/init.d/keepalived start [root@server4 ~]# /etc/init.d/keepalived reload [root@server2 ~]# /etc/init.d/httpd
start [root@server3 ~]# /etc/init.d/httpd start
Client test
When the keepalived of server1 is closed, the server will automatically replace the backup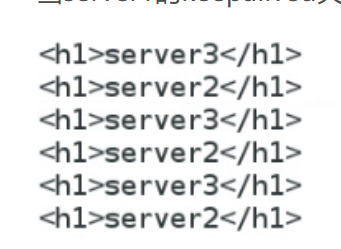
tunnel mode
tunnel mode
Clear the original rule ipvsadm-c before doing
server1
1.modprobe ipip
2.ip addr del 172.25.3.100/32 dev eth0 #Delete the vip in the original etho
3. ip addr add 172.25.3.100/24 dev tunl0 #Add vip to the tunnel
4.ip link set up tunl0
5.ipvsadm -A -t 172.25.3.100:80 -s rr
6. ipvsadm -a -t 172.25.3.100:80 -r 172.25.7.2 -i #-i tunnel mode
7. ipvsadm -a -t 172.25.3.100:80 -r 172.25.7.3 -i
8.ipvsadm -ln
server2
- ip addr del 172.25.3.100/32 dev eth0
- modprobe ipip
- ip addr add 172.25.3.100/32 dev tunl0
- ip link set up tunl0
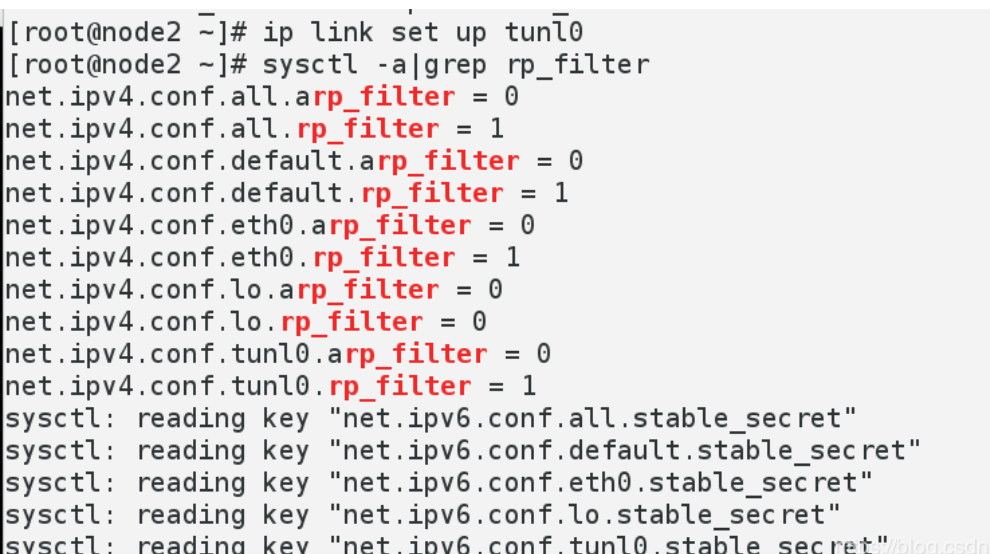
- sysctl -a|grep rp_filter #Take a look and change all 1 to 0
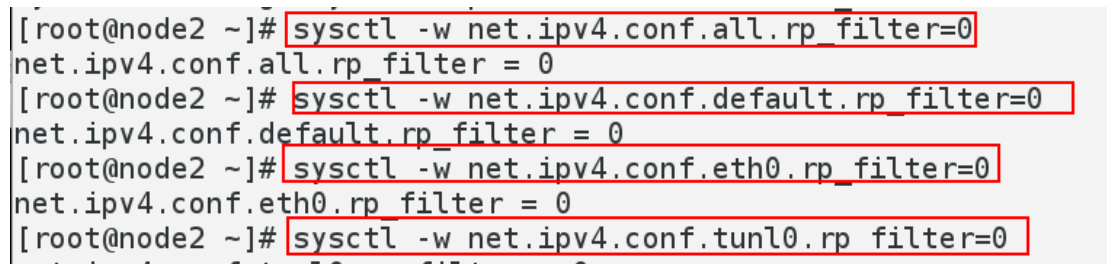
- sysctl -w net.ipv4.conf.all.rp_filter=0
- sysctl -w net.ipv4.conf.default.rp_filter=0
- sysctl -w net.ipv4.conf.eth0.rp_filter=0
- sysctl -w net.ipv4.conf.tunl0.rp_filter=0
- sysctl -a|grep rp_filter #Check it out.
- sysctl -p
server3- ip addr del 172.25.7.100/32 dev eth0
- modprobe ipip
- ip addr add 172.25.7.100/32 dev tunl0
- ip link set up tunl0
- sysctl -a|grep rp_filter #Take a look and change all 1 to 0
- sysctl -w net.ipv4.conf.all.rp_filter=0
- sysctl -w net.ipv4.conf.default.rp_filter=0
- sysctl -w net.ipv4.conf.eth0.rp_filter=0
- sysctl -w net.ipv4.conf.tunl0.rp_filter=0
- sysctl -a|grep rp_filter #Check it out.
- sysctl -p
The test results can be seen as the result of two service cycles

