LNMP Deployment and Application
Interpretation of LNMP Architecture
The LNMP platform is a combination of Linux, Ngnix, MySQL and PHP.
Architecture, requires Linux server, MySQL database, PHP parsing environment
MySQL Installation Configuration
For consistency with Nginx, PHP environments, here is the option to install MySQL components as source code compilation
MySQL Deployment Method
Compile and install MySQL
Optimize Adjustment
Initialize database
Start the mysql service and set the password for the root database account
There are two ways to configure static and dynamic separation of web pages and parse PHP
Use PHP's FPM module to forward Web requests to access PHP pages to the Apache server for processing
Newer versions of PHP have built-in FPM modules for parsing PHP
Case Management, Optimize Resolution Efficiency
FastCGIl Separates Http Server from Dynamic Scripting Language
Nginx handles static requests and forwards dynamic requests
PHP FPM specifically parses PHP dynamic requests
Single-server LMP architectures typically use FPM to resolve PHP
PHP Compile Installation Steps
Compile and Install PHP
Add "--enable-fpm" when compiling options to enable this module
Post-installation adjustments include configuration file creation and path optimization of corresponding command tools, installation of ZendGuardLoader (to improve PHP resolution efficiency), and load configuration
Call native php-fpm process configuration method
Establish FPM configuration file php-fpm.conf, modify configuration options, such as: PID file run users, number of service processes, etc.
Start php-fpm process
server {} configuration segment configuration in Nginx configuration file transfers PHP web page requests to FPM module for processing
Server {} configuration segment configuration in Nginx configuration file transfers PHP web page requests to FPM module processing
[root@localhost ~ ]# vim /usr/local/nginx/conf/nginx.conf
Server{
......
location ~ .php$ {
root
/var/www/kgc;
Fastcgi pass 127.0.0.1:9000; //fpm port number: 9000
fastcgi index index.php;
include
fastcgi.conf;
......
Discuz
A Set of Common Community Forum Software System Promoted by Kangsheng Innovation (Beijing) Technology Co., Ltd.
Generally, since its introduction in June 2001, it has been the theory with the highest maturity and coverage in the world
Tan Software System-
PHPWind
PHPWind is a forum program based on PHP and MySQL
It is one of the most popular general forum programs in China.The predecessor of PHPWind is
ofstar, published in 2004, PHPWind by Hangzhou Detian Information Technology Co., Ltd.
Division Development, Software Full Open Source Free
WordPress
A blog platform developed in the PHP language that allows users to support PHP and
Set up your own blog on the server of the MySQL database.You can also
WordPress is used as a content management system (CMS).
WordPress is a free open source project under the GNU General Public License
Authorized Publishing
SKYUC
A VOD Video On Demand system developed by Sky Network for many years, with perfect support
Streaming media software such as QVOD, Webplayer9
LNMP Architecture Actual Warfare
1. Remote mounting of LNMP requires compression packages locally
[root@localhost ~]# mkdir /abc //Create mount point
[root@localhost ~]# Mount.cifs //192.168.100.10/LAMP-C7/mnt //remotely mount all required packages to the local/mnt directory
2. Compile and install Nginx
1. Unzip the source package into the / opt directory
[root@localhost ~]# cd /mnt //Switch to Mount Point Directory
[root@localhost mnt]# ls
Discuz_X3.4_SC_UTF8.zip nginx-1.12.2.tar.gz
mysql-boost-5.7.20.tar.gz php-7.1.20.tar.gz
[root@localhost mnt]# tar zxvf nginx-1.12.2.tar.gz -C /opt //Unzip the Nginx source package under / opt
[root@localhost mnt]# cd /opt/ //Switch to Unzipped Directory
[root@localhost opt]# ls
nginx-1.12.2 rh
2. Install the environment component packages needed to compile Nginx
[root@localhost opt]# yum -y install \
gcc \ //c Language
gcc-c++ \ //c++ Language
pcre-devel \ //pcre language tool
zlib-devel //Function Library for Data Compression
3. Create program user nginx and compile Nginx
[root@localhost opt]# useradd-M-s/sbin/nologin nginx //Create program user, secure non-logon state
[root@localhost opt]# id nginx
uid=1001(nginx) gid=1001(nginx) group=1001(nginx)
[root@localhost opt]# cd nginx-1.12.0/ //Switch to nginx directory
[root@localhost nginx-1.12.0]#. /configure \ //configure nginx
--prefix=/usr/local/nginx \ //Installation Path
--user=nginx \ //User name
--group=nginx \ //user group
--with-http_stub_status_module //State Statistics Module
4. Compile and Install
[root@localhost nginx-1.12.2]#make && make install
5. Route optimization
[root@localhost nginx]# ln -s /usr/local/nginx/sbin/nginx /usr/local/sbin/
//Create a soft connection to allow the system to recognize nginx startup scripts
[root@localhost nginx]# nginx -t //Check the syntax of the configuration file
nginx: the configuration file /usr/local/nginx/conf/nginx.conf syntax is ok
nginx: configuration file /usr/local/nginx/conf/nginx.conf test is successful
[root@localhost nginx]# nginx //Open ngnix
[root@localhost nginx]# netstat -ntap | grep 80 //View port, nginx is already on
tcp 0 0 0.0.0.0:80 0.0.0.0:* LISTEN 39620/nginx: master
[root@localhost nginx]# systemctl stop firewalld.service //Close Firewall
[root@localhost nginx]# setenforce 0
[root@localhost nginx]# Nginx //Open nginx service
[root@localhost nginx]# Cd/etc/init.d/ //Switch to boot profile directory
[root@localhost init.d]# ls
functions  netconsole  network  README
[root@localhost init.d]# vim nginx //Edit startup script file

    #!/bin/bash
    # Chkconfig: - 9920 //Comment Information
    # description: Nginx Service Control Script
    PROG="/usr/local/nginx/sbin/nginx"           //Set variable to nginx command file
    PIDF="/usr/local/nginx/logs/nginx.pid"       //Set variable PID file process number to 5346
    case "$1" in
        start)
            $PROG                                              //Open Service
            ;;
        stop)
            kill -s QUIT $(cat $PIDF)                    //Shut down services
            ;;
        restart)                                                  //Restart Service
            $0 stop
            $0 start
            ;;
        reload)                                                  //Overload Services
            kill -s HUP $(cat $PIDF)
            ;;
        *)                                                           //Error input prompt
                    echo "Usage: $0 {start|stop|restart|reload}"
                    exit 1
    esac
    exit 0
[root@localhost init.d]# Chmod +x/etc/init.d/nginx //Grant startup script execution privileges
[root@localhost init.d]# chkconfig --add nginx //add to service manager
[root@localhost init.d]# service nginx stop //stop nginx service with service
[root@localhost init.d]# service nginx start //use service to start nginx service
[root@localhost ~]# Vim/lib/systemd/system/nginx.service//Create configuration file [Unit] Description=nginx //describe After=network.target //Describe service type [Service] Type=forking //Background running mode PIDFile=/usr/local/nginx/logs/nginx.pid //PID file location ExecStart=/usr/local/nginx/sbin/nginx //Start Services ExecReload=/usr/bin/kill -s HUP $MAINPID //Based on PID overload configuration ExecStop=/usr/bin/kill -s QUIT $MAINPID //Terminate process based on PID PrivateTmp=true [Install] WantedBy=multi-user.target [root@localhost ~]# Chmod 754/lib/systemd/system/nginx.service//Set Execution Permissions [root@localhost ~]# systemctl stop nginx.service //close nginx [root@localhost ~]# systemctl start nginx.service //open nginx
3. Install MySQL
1. Install environment components
[root@localhost ~]# yum install -y \ //install environment components
ncurses \
ncurese-devel \ //Library for controlling terminal screen display
bison \ //Grammar Analysis Tools
cmake //cmake tool
[root@localhost ~]# Useradd-s/sbin/nologin MySQL //Create program user
2. Unzip the source package into the / opt directory
[root@localhost ~]# cd /mnt
[root@localhost mnt]# tar zxvf mysql-boost-5.7.20.tar.gz -C /opt   ##Unzip Source Package to/opt
[root@localhost mnt]# cd /opt
[root@localhost opt]# ls
mysql-5.7.20  nginx-1.12.2  rh
3. cmake configuration
[root@localhost opt]# cd mysql-5.7.20/ //Switch to MySQL directory
[root@localhost mysql-5.7.20]# Cmake \ //cmake configuration
-DCMAKE_INSTALL_PREFIX=/usr/localmysql \            //Installation Path
-DMYSQL_UNIX_ADDR=/usr/local/mysql/mysql.sock \ //Define sock file connection database file
-DSYSCONFDIR=/etc \                                                   //Profile directory
-DSYSTEMD_PID_DIR=/usr/local/mysql \                      //PID File Directory
-DDEFAULT_CHARSET=utf8 \                                       //Specify Character Set
-DDEFAULT_COLLATION=utf8_general_ci \                 //Specify Character Set Default
-DWITH_INNOBASE_STORAGE_ENGINE=1 \            //Storage Engine
-DWITH_ARCHIVE_STORAGE_ENGINE=1 \
-DWITH_BLACKHOLE_STORAGE_ENGINE=1 \
-DWITH_PERFSCHEMA_STORAGE_ENGINE=1 \
-DMYSQL_DATADIR=/usr/local/mysql/data \                 //Database Data File Directory
-DWITH_BOOST=boost \                                               //Underlying runtime
-DWITH_SYSTEMD=1                                                   //Master-Slave Parameters
4. Compile and Install
[root@localhost mysql-5.7.20]#make && make install
5. Modify Mysql's configuration file
[root@localhost mysql-5.7.20]# chown -R mysql:mysql /usr/local/mysql/
//Database catalog permission adjustment
[root@localhost mysql-5.7.20]# vim /etc/my.cnf
//Adjust Profile

    [client]                            //Client
    port = 3306
    default-character-set=utf8
    socket = /usr/local/mysql/mysql.sock

    [mysql]                           //Client
    port = 3306
    default-character-set=utf8
    socket = /usr/local/mysql/mysql.sock

    [mysqld]                         //The server
    user = mysql                  //user
    basedir = /usr/local/mysql      //Set the installation directory for mysql
    datadir = /usr/local/mysql/data    //Set up the storage directory for the data in the mysql database
    port = 3306                    //Set up port 3306
    character_set_server=utf8            //Chinese Character Set
    pid-file = /usr/local/mysql/mysqld.pid     //pid file path
    socket = /usr/local/mysql/mysql.sock     //sock file path
    server-id = 1                                           //Master-Slave Service Parameters

    sql_mode=NO_ENGINE_SUBSTITUTION,STRICT_TRANS_TABLES,NO_AUTO_CREATE_USER,NO_AUTO_VALUE_ON_ZERO,NO_ZERO_IN_DATE,NO_ZERO_DATE,ERROR_FOR_DIVISION_BY_ZERO,PIPES_AS_CONCAT,ANSI_QUOTES
//Support module

[root@localhost mysql-5.7.20]# echo 'PATH=/usr/local/mysql/bin:/usr/local/mysql/lib:$PATH' >> /etc/profile
    //Write MySQL commands to the local host environment configuration
[root@localhost mysql-5.7.20]# echo 'export PATH' >> /etc/profile
     //Set Global Environment Configuration
[root@localhost mysql-5.7.20]# source /etc/profile
    //Restart Profile
6. Initialize the database
[root@localhost mysql-5.7.20]# cd /usr/local/mysql/
[root@localhost mysql]# bin/mysqld \
--initialize-insecure \ ##initialization
--user=mysql \ ##user
--basedir=/usr/local/mysql \ ##Installation directory
--datadir=/usr/local/mysql/data ##database data file directory
7. Copy MySQL service configuration file to/usr/lib/systemd/system/for easy systemctl management
[root@localhost mysql]# cp usr/lib/systemd/system/mysqld.service /usr/lib/systemd/system/
//Easy systemctl management
[root@localhost mysql]# systemctl enable mysqld //Start-up self-start
[root@localhost mysql]# systemctl start mysqld.service //Open database
[root@localhost mysql]# Netstat-ntap | grep 3306 //View MySQL port number open
tcp6  0  0 :::3306    :::*       LISTEN   59464/mysqld
8. Set mysql password
[root@localhost mysql]# mysqladmin -u root -p password
Enter password:
New password:                 //New password
Confirm new password:     //Confirm Password
4. Compile and Install PHP
1. Installation Environment Dependency Package
[root@localhost mysql]# yum install -y \
> libjpeg \                              //jpeg picture format and development kit
> libjpeg-devel \
> libpng libpng-devel \           //png pictures and development kits
> freetype freetype-devel \    //Font Library
> libxml2 \                              //xml file library
> libxml2-devel \
> zlib zlib-devel \                    //Compression Library
> curl curl-devel \                   //Supports data file download tools
> openssl openssl-devel        //Secure Access Connection
2. Unzip the source package into the / opt directory
[root@localhost mysql]# cd /abc
[root@localhost abc]# tar jxvf php-7.1.10.tar.bz2 -C /opt
[root@localhost abc]# cd /opt
[root@localhost opt]# ls
mysql-5.7.20  nginx-1.12.2  php-7.1.10  rh
3. Configuring php parameters
[root@localhost opt]# cd php-7.1.10/
[root@localhost php-7.1.10]# ./configure
--prefix=/usr/local/php                        //Installation Path
--with-mysql-sock=/usr/local/mysql/mysql.sock   ##Connect files to build communication bridges
--with-mysqli                                    //Client Support Library
--with-zlib                                         //compress
--with-curl                                        //Supports upload and download functions
--with-gd                                          //gd Image Support Picture Processing Library
--with-jpeg-dir                                  //jpeg
--with-png-dir                                   //png
--with-freetype-dir                            //Typeface
--with-openssl                                  //Secure Access Connection
--enable-fpm                                    //fpm supports dynamic request module
--enable-mbstring                            //Multi-byte string
--enable-xml                                    //xml file
--enable-session                             //session supports sessions
--enable-ftp                                     //ftp service
--enable-pdo                                   //Drive Connection Management
--enable-tokenizer                          //PHP built-in function
--enable-zip                                    //zip package
4. Compile and Install
[root@localhost php-7.1.10]# make && make install
5. Configure Core Profiles
(php.ini core profile, php-fpm.conf process service profile, www.conf extension profile)
[root@localhost php-7.1.10]# cp php.ini-development /usr/local/php/lib/php.ini //Copy to the installation directory lib Library
[root@localhost php-7.1.10]# Vim/usr/local/php/lib/php.ini//Configure Core Profile

mysqli.default_socket = /usr/local/mysql/mysql.sock     //Default connection file
date.timezone = Asia/Shanghai                                      //time

[root@localhost php-7.1.10]# /usr/local/php/bin/php-m //Verify installed modules
6. Configure and optimize FPM modules
[root@localhost php-7.1.10]# cd /usr/local/php/etc/
[root@localhost etc]# cp php-fpm.conf.default php-fpm.conf //Optimize replication of default process service configuration files
[root@localhost etc]# cd /usr/local/php/etc/php-fpm.d/
[root@localhost php-fpm.d]# cp www.conf.default www.conf //Optimize Copy Extension Profile
[root@localhost php-fpm.d]# cd /usr/local/php/etc/
[root@localhost etc]# vim php-fpm.conf //Open fpm.pid process
pid = run/php-fpm.pid
[root@localhost etc]# /usr/local/php/sbin/php-fpm -c /usr/local/php/etc/php.ini
[root@localhost etc]# Netstat-ntap | grep 9000 //View port information
tcp   0 0 127.0.0.1:9000   0.0.0.0:*    LISTEN   69104/php-fpm: mast
[root@localhost etc]# Ln-s/usr/local/php/bin/*/usr/local/bin//Create soft connections for system identification
[root@localhost etc]# ps aux | grep -c "php-fpm"
4
7. Configure Nginx to support PHP functions
[root@localhost etc]# vim /usr/local/nginx/conf/nginx.conf    ##Configure nginx Profile
    location ~ \.php$ {
        root           html;
        fastcgi_pass   127.0.0.1:9000;
        fastcgi_index  index.php;
        fastcgi_param  SCRIPT_FILENAME  /usr/local/nginx/html$fastcgi_script_name;     //Site Path
        include        fastcgi_params;
    }
[root@localhost etc]# Vim/usr/local/nginx/html/index.php //test PHP web page
<?php
phpinfo();
?>

[root@localhost etc]# Nginx-s stop //stop nginx service
[root@localhost etc]# Nginx //Start nginx Service
8. Test Web Page with Test Machine
Enter http://192.168.35.134/index.php in the browser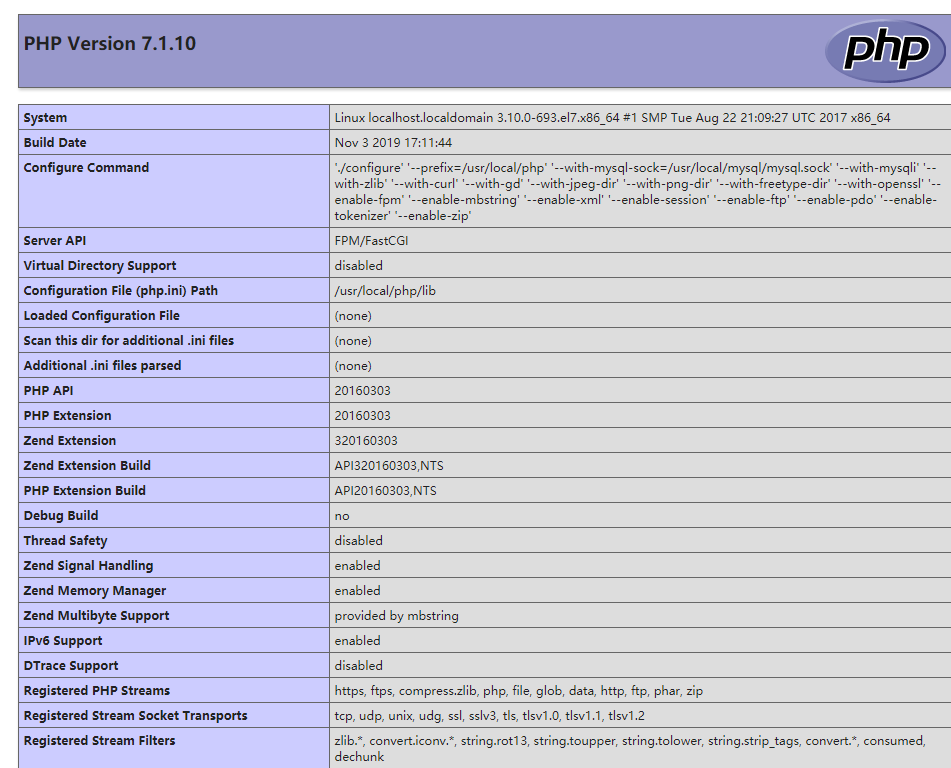
9. Enter database to create bbs database and set administrator and password
[root@localhost etc]# mysql -u root -p
Enter password:      //Enter the database with the previously set abc23 password
mysql> CREATE DATABASE BBS;   //Create bbs database
Query OK, 1 row affected (0.00 sec)

mysql> GRANT all ON bbs.* TO 'bbsusers'@'%' IDENTIFIED BY 'admin123';
//Authorized database user bbsuser sets password for administrator
Query OK, 0 rows affected, 1 warning (0.00 sec)

mysql> GRANT all ON bbs.* TO 'bbsusers'@'localhost' IDENTIFIED BY 'admin123';
Query OK, 0 rows affected, 1 warning (0.00 sec)

mysql> flush privileges;         //Refresh Database
Query OK, 0 rows affected (0.00 sec)

mysql> quit       //Sign out

[root@localhost etc]# Vim/usr/local/nginx/html/index.php //Test database connection status
<?php
$link=mysqli_connect('192.168.131.129','bbsusers','admin123');
if($link) echo "<h1>Success!</h1>";
else echo "Fail!!";
?>
[root@localhost etc]# systemctl restart nginx.service //restart service
5. Install Discuz Forum
1. Unzip the forum package into the / opt directory and copy the contents to the bbs site
[root@localhost etc]# cd /mnt
[root@localhost mnt]# Unzip Discuz_X3.4_SC_UTF8.zip-d/opt //Unzip to/opt
[root@localhost mnt]# cd /opt
[root@localhost opt]# ls
dir_SC_UTF8  mysql-5.7.20  nginx-1.12.2  php-7.1.10  rh  Explain.htm
[root@localhost opt]# cd dir_SC_UTF8/ //Enter Forum Directory
[root@localhost dir_SC_UTF8]# cp -r upload/ /usr/local/nginx/html/bbs/
//Copy the contents of the / opt directory to the bbs directory of the html site
2. Enter the site and give program users rights
[root@localhost dir_SC_UTF8]# Cd/usr/local/nginx/html/bbs/ //cut into BBS site directory
[root@localhost bbs]# Chown-R root:nginx. /config/ //Titler User Title
[root@localhost bbs]# Chown-R root:nginx. /data/ //modify nginx genus group
[root@localhost bbs]# chown -R root:nginx ./uc_client/
[root@localhost bbs]# chown -R root:nginx ./uc_server/
[root@localhost bbs]# Chmod-R 777. /config/ //Modify all permissions
[root@localhost bbs]# chmod -R 777 ./data/
[root@localhost bbs]# chmod -R 777 ./uc_client/
[root@localhost bbs]# chmod -R 777 ./uc_server/
3. Enter the 192.168.131.129/bbs/install/index.php site in your browser and enter the Discuz Forum Installation Wizard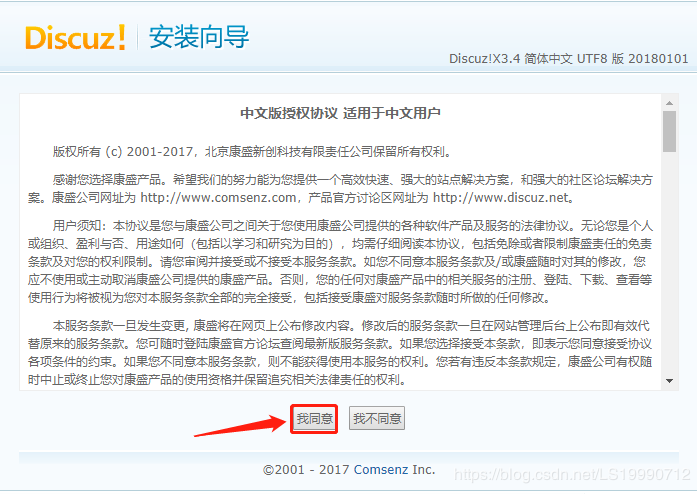
4. The running environment is completely new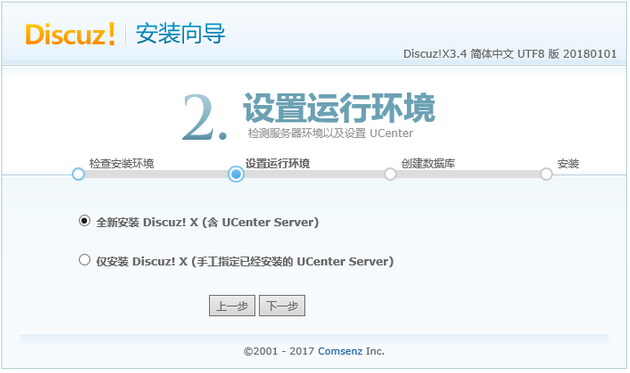
5. Install Database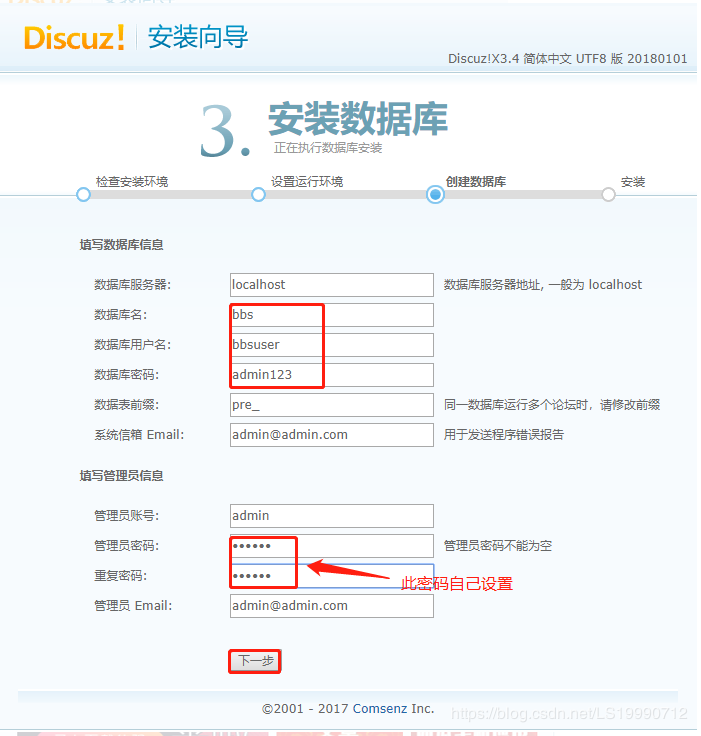
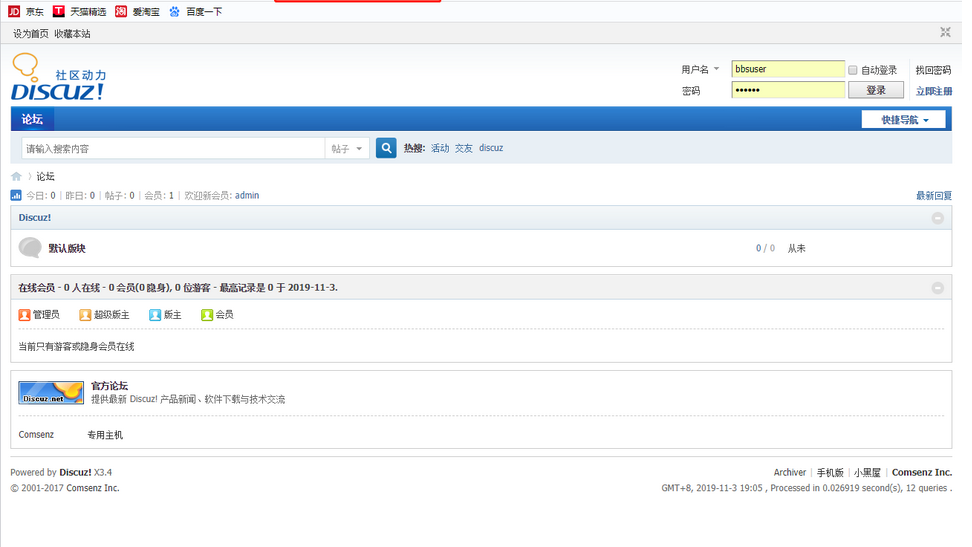
6. Create Success and Visit Forum