Step 1 - prepare files for migration
The files downloaded from the lvgl official website mainly need the following selected files or folders:
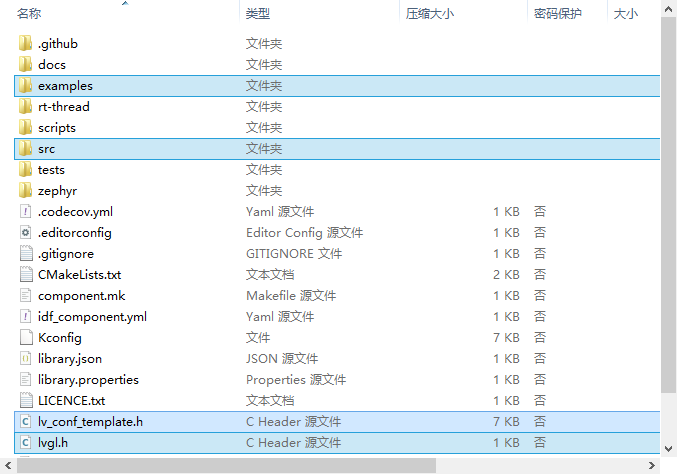
Create a new folder named lvgl in your own project, and extract all the above selected files into the folder. The complete project file tree is as follows:
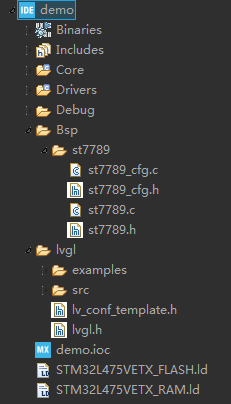
Of which:
- The driver file in Bsp folder is ST7789. For details, please refer to ST7789 drive;
- The lvgl/example folder contains various official examples. The reason why it is recommended to copy them to the project is to facilitate access at any time in the future. At the same time, the porting folder contains the templates of the transplanted key interface files;
- lvgl/src folder contains all core files of GUI library;
- lvgl.h contains declarations of various functions for easy calling_ conf_ Template. H is the template configured for lvgl.
Step 2 - modify and supplement relevant documents
1. Files in the porting folder
The porting folder contains the following files:
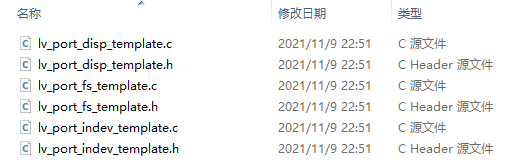
Of which:
- The template file of disp is the registration file that displays the relevant interface functions;
- The template file of fs is the registration file of the interface function related to the file system;
- The template file of indev is the registration file of the interface function of the input device.
This essay will focus on the migration of GUI system, so only the modification of disp template file is described here:
- Create a copy of the template file related to disp, rename it and remove it_ Template suffix;
- Change #if 0 at the beginning of the h file to #if 1 to enable the file;
- Declare the function of external call initialization port in h file:
/**********************
 * GLOBAL PROTOTYPES
 **********************/
void lv_port_disp_init(void);
- Change the #if 0 at the beginning of the c file to #if 1 to enable the file;
- For the buffer setting of LVGL, the source file provides examples of three methods. The first method is adopted in this paper, so the latter two methods are commented out and only the first method is modified, as follows:
    /**
     * LVGL requires a buffer where it internally draws the widgets.
     * Later this buffer will passed to your display driver's `flush_cb` to copy its content to your display.
     * The buffer has to be greater than 1 display row
     *
     * There are 3 buffering configurations:
     * 1. Create ONE buffer:
     *      LVGL will draw the display's content here and writes it to your display
     *
     * 2. Create TWO buffer:
     *      LVGL will draw the display's content to a buffer and writes it your display.
     *      You should use DMA to write the buffer's content to the display.
     *      It will enable LVGL to draw the next part of the screen to the other buffer while
     *      the data is being sent form the first buffer. It makes rendering and flushing parallel.
     *
     * 3. Double buffering
     *      Set 2 screens sized buffers and set disp_drv.full_refresh = 1.
     *      This way LVGL will always provide the whole rendered screen in `flush_cb`
     *      and you only need to change the frame buffer's address.
     */

    /* Example for 1) */
    #define MY_DISP_HOR_RES   256U
    static lv_disp_draw_buf_t draw_buf_dsc_1;
    static lv_color_t buf_1[MY_DISP_HOR_RES * 10];                          /*A buffer for 10 rows*/
    lv_disp_draw_buf_init(&draw_buf_dsc_1, buf_1, NULL, MY_DISP_HOR_RES * 10);   /*Initialize the display buffer*/

//    /* Example for 2) */
//    static lv_disp_draw_buf_t draw_buf_dsc_2;
//    static lv_color_t buf_2_1[MY_DISP_HOR_RES * 10];                        /*A buffer for 10 rows*/
//    static lv_color_t buf_2_2[MY_DISP_HOR_RES * 10];                        /*An other buffer for 10 rows*/
//    lv_disp_draw_buf_init(&draw_buf_dsc_2, buf_2_1, buf_2_2, MY_DISP_HOR_RES * 10);   /*Initialize the display buffer*/
//
//    /* Example for 3) also set disp_drv.full_refresh = 1 below*/
//    static lv_disp_draw_buf_t draw_buf_dsc_3;
//    static lv_color_t buf_3_1[MY_DISP_HOR_RES * MY_DISP_VER_RES];            /*A screen sized buffer*/
//    static lv_color_t buf_3_2[MY_DISP_HOR_RES * MY_DISP_VER_RES];            /*An other screen sized buffer*/
//    lv_disp_draw_buf_init(&draw_buf_dsc_3, buf_3_1, buf_3_2, MY_DISP_VER_RES * LV_VER_RES_MAX);   /*Initialize the display buffer*/
- Modify the resolution as follows:
    disp_drv.hor_res = 240;
    disp_drv.ver_res = 240;
- Supplementary initialization functions are as follows:
/*Initialize your display and the required peripherals.*/
static void disp_init(void)
{
    st7789_init();
}
- Add the flush function. Note that if you use the write point function, the screen will be very slow, so the recommended method is as follows:
/*Flush the content of the internal buffer the specific area on the display
 *You can use DMA or any hardware acceleration to do this operation in the background but
 *'lv_disp_flush_ready()' has to be called when finished.*/
static void disp_flush(lv_disp_drv_t * disp_drv, const lv_area_t * area, lv_color_t * color_p)
{
    /*The most simple case (but also the slowest) to put all pixels to the screen one-by-one*/

//    int32_t x;
//    int32_t y;
//    for(y = area->y1; y <= area->y2; y++) {
//        for(x = area->x1; x <= area->x2; x++) {
//            /*Put a pixel to the display. For example:*/
//            /*put_px(x, y, *color_p)*/
//            st7789_draw_pixel(x, y, color_p->full);
//            color_p++;
//        }
//    }

    uint16_t  x1, y1, x2, y2, size;

    x1 = area->x1;
    y1 = area->y1;
    x2 = area->x2;
    y2 = area->y2;
    size = (x2 - x1 + 1) * (y2 - y1 + 1);

    st7789_set_address(x1, y1, x2, y2);
    st7789_cfg_dcx_set();
    st7789_cfg_spi_write((uint8_t*)color_p, size * 2);

    /*IMPORTANT!!!
     *Inform the graphics library that you are ready with the flushing*/
    lv_disp_flush_ready(disp_drv);
}
2. Modify lv_conf.h file
- Set lv_conf_template.h create a copy and rename it lv_conf.h;
- Modify #if 0 to #if 1 to enable the file;
- Connect LV_ COLOR_ 16_ The swap macro is defined as 1 to resolve the color error of the registered flush function.
3. Add time base
I've heard that LVGL has its own non preemptive operating system, which needs time base support. Here, the system's own tick timer interrupt can be used, as follows:
/**
  * @brief This function handles System tick timer.
  */
void SysTick_Handler(void)
{
  /* USER CODE BEGIN SysTick_IRQn 0 */

  /* USER CODE END SysTick_IRQn 0 */
  HAL_IncTick();
  /* USER CODE BEGIN SysTick_IRQn 1 */
  lv_tick_inc(1);

  /* USER CODE END SysTick_IRQn 1 */
}
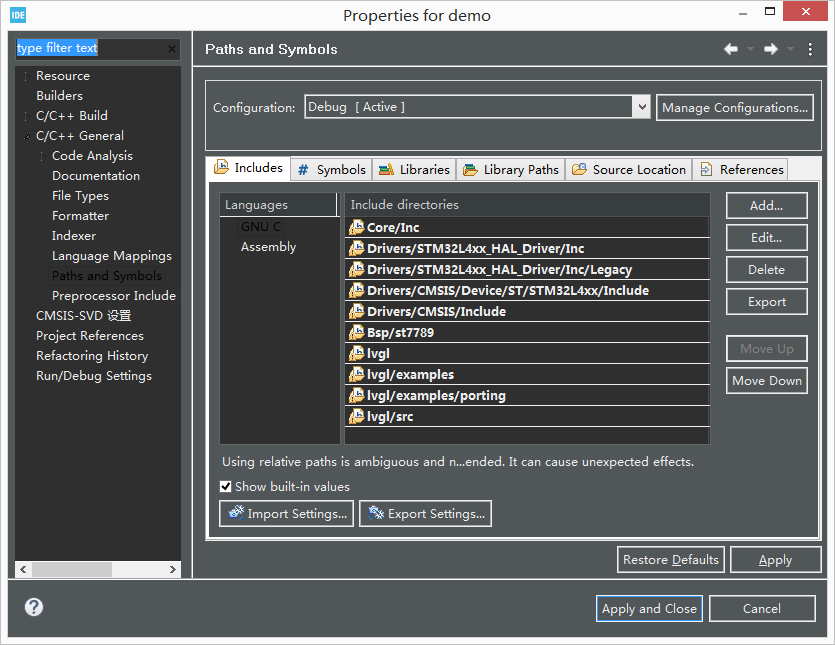
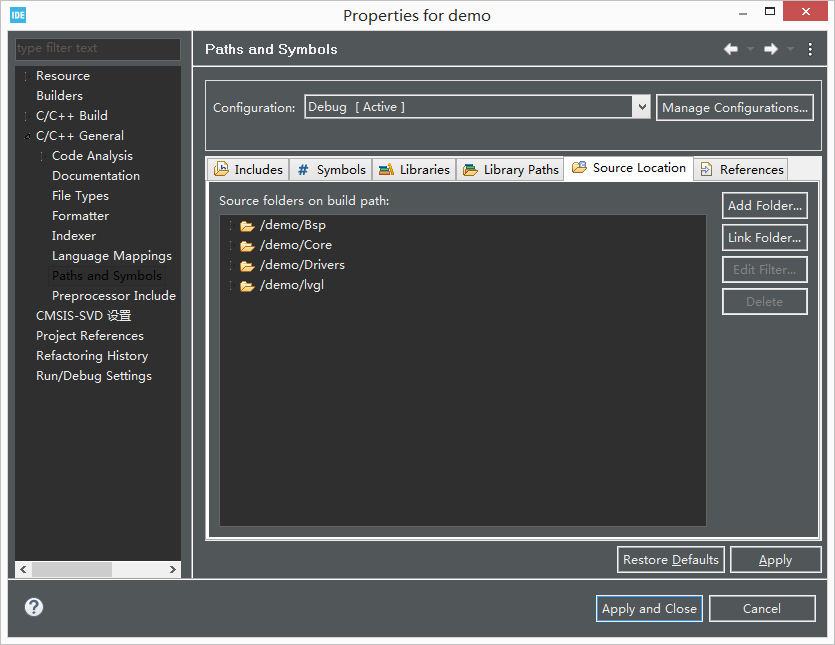
Step 3 - Project attribute setting modification
Add the relevant file path to the path, as follows:
Add relevant folders in the source file location as follows:
Step 4 - call of LVGL related functions
First, it needs to be initialized as follows:
  /* USER CODE BEGIN 2 */
  lv_init();
  lv_port_disp_init();

  /* USER CODE END 2 */
Secondly, a very important step is to call lv_ in the while (1) cycle. task_ Handler() function, as follows:
  /* Infinite loop */
  /* USER CODE BEGIN WHILE */
  while (1)
  {
    lv_task_handler();
    /* USER CODE END WHILE */

    /* USER CODE BEGIN 3 */
  }
  /* USER CODE END 3 */
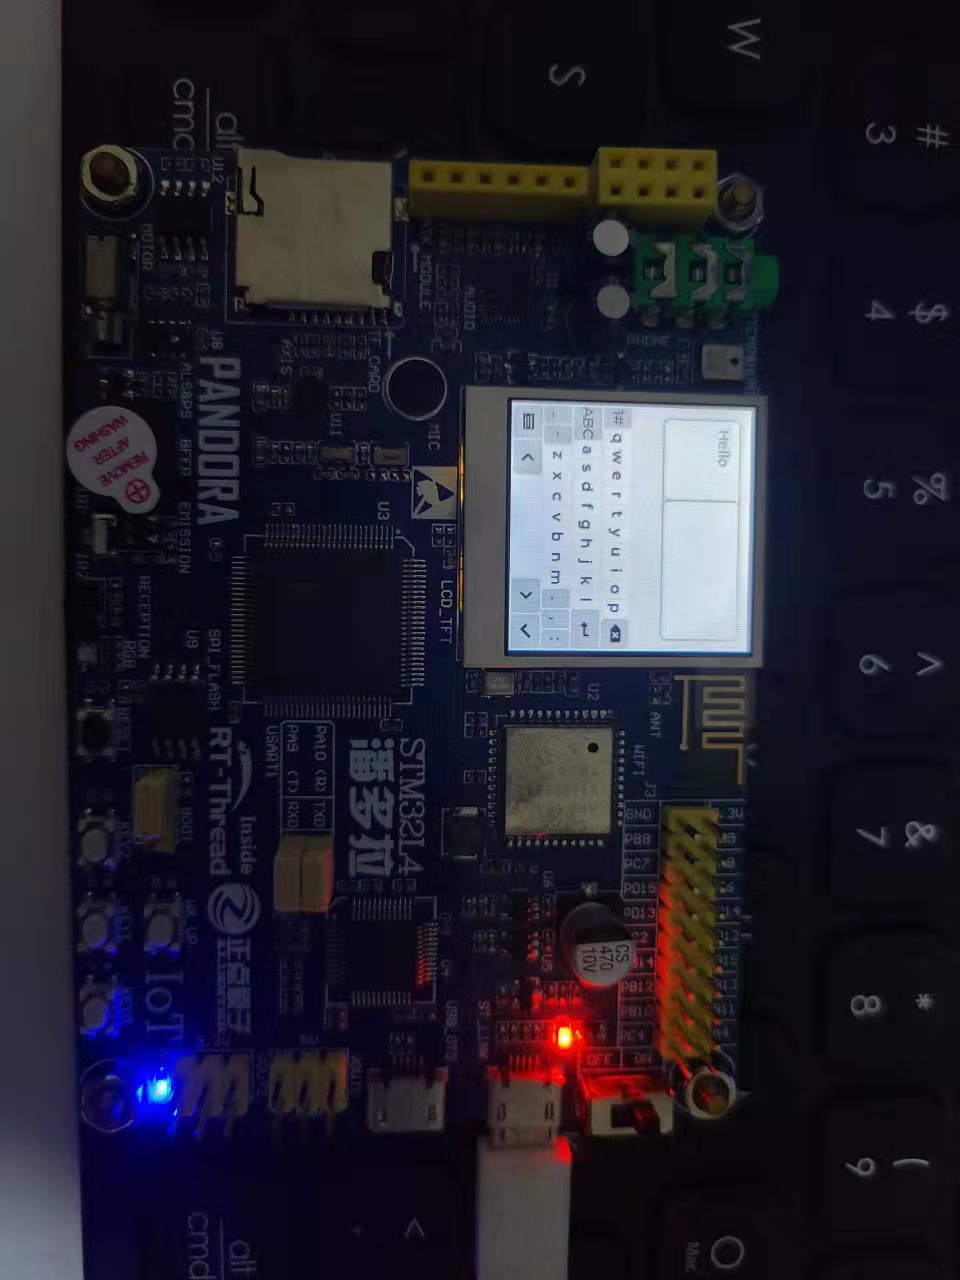
Considering that the use of functions is relatively complex, the examples in the library will have very important reference significance. When using the built-in examples, you only need to include the header file lv_examples.h can call its own examples, for example:
  /* USER CODE BEGIN 2 */
  lv_init();
  lv_port_disp_init();
  lv_example_keyboard_1();

  /* USER CODE END 2 */
The final display effect is as follows:
Step 5 - clipping of LVGL Library
In actual use, after the above transplantation, the Flash occupancy rate of the system is very high, as follows:

Therefore, reasonable tailoring should be considered. Unfortunately, I tried, but I didn't succeed.