preface
- After we purchase a ECs, we usually need to install some common software. This article will introduce the common installation methods and configurations of some software
- Before installing the software, we need to do some preparatory work
- First, check whether the yum source is available. If the following figure appears, it indicates that the yum source is available
[root@VM-0-10-centos ~]# yum list

- Then follow the new yum source (update is recommended)
yum -y update: upgrade all packages, as well as software and system kernel;
yum -y upgrade: upgrade all packages without upgrading software and system kernel
[root@VM-0-10-centos ~]# yum update -y
- Then you can start installing the software
1, Installing nodejs
1. Install using yum source
- Installing nodejs
[root@VM-0-10-centos ~]# yum install -y nodejs
- View node and npm versions
[root@VM-0-10-centos ~]# node -v
v10.24.0
[root@VM-0-10-centos ~]# npm -v
6.14.11
[root@VM-0-10-centos ~]#
- Install cnpm. Cnpm can download the npm installation package faster
[root@VM-0-10-centos ~]# npm install -g cnpm --registry=https://registry.npm.taobao.org
- View the installation path of cnpm
[root@VM-0-10-centos ~]# which cnpm
/usr/local/bin/cnpm
[root@VM-0-10-centos ~]#
- View cnpm version number
[root@VM-0-10-centos ~]# cnpm -v
cnpm@7.1.0 (/usr/local/lib/node_modules/cnpm/lib/parse_argv.js)
npm@6.14.15 (/usr/local/lib/node_modules/cnpm/node_modules/npm/lib/npm.js)
node@10.24.0 (/usr/bin/node)
npminstall@5.3.1 (/usr/local/lib/node_modules/cnpm/node_modules/npminstall/lib/index.js)
prefix=/usr/local
linux x64 4.18.0-305.3.1.el8.x86_64
registry=https://registry.npmmirror.com
[root@VM-0-10-centos ~]#
2. Install using binaries
- To be added!!!
2, pm2 daemon
1. pm2 introduction
- pm2 is a daemon manager that helps you keep your applications online
- nodejs does not have a daemon. Once an error is reported, it will not restart the project itself
- Generally, npm is used for installation (there is no pm2 installation package in yum source)
2. Install pm2
- Install pm2
[root@VM-0-10-centos ~]# npm install -g pm2
// perhaps
[root@VM-0-10-centos ~]# cnpm install -g pm2
- Verify that the installation was successful
[root@VM-0-10-centos ~]# pm2 -v
5.1.2
[root@VM-0-10-centos ~]#
3. pm2 common commands
- pm2 start: start the application
similar to nodejs, when starting a program, first enter the directory where the program is located
// Start the app.js program
[root@VM-0-10-centos ~]# pm2 start app.js
// Start the application and name it "app"
[root@VM-0-10-centos ~]# pm2 start app.js --name="app"
// Automatically restart the application when the file changes
[root@VM-0-10-centos ~]# pm2 start app.js --watch
// Start bash script file
[root@VM-0-10-centos ~]# pm2 start upload.sh
- pm2 stop: stop the application
// Stop process with id 0
[root@VM-0-10-centos ~]# pm2 stop 0
// Stop all processes
[root@VM-0-10-centos ~]# pm2 stop [all]
- pm2 restart: restart the application
// Restart all processes
[root@VM-0-10-centos ~]# pm2 restart [all]
- pm2 list: view the list of Daemons
[root@VM-0-10-centos ~]# pm2 list

- pm2 monit: View resource consumption
// View resource consumption
[root@VM-0-10-centos ~]# pm2 monit
- pm2 logs: view logs
// View all logs
[root@VM-0-10-centos ~]# pm2 logs
// Displays the log for the specified application
[root@VM-0-10-centos ~]# pm2 logs [app-name]
- pm2 flush: clear all log files
[root@VM-0-10-centos ~]# pm2 flush
- pm2 show: displays all information of the application
// Displays all information about the application
[root@VM-0-10-centos ~]# pm2 show [app-name]
3, Installing Nginx
1. Install using yum source
- Installing nginx
[root@VM-0-10-centos ~]# yum install -y nginx
- View nginx version
[root@VM-0-10-centos ~]# nginx -v
nginx version: nginx/1.14.1
[root@VM-0-10-centos ~]#
- Start nginx
[root@VM-0-10-centos ~]# nginx
- Stop nginx
[root@VM-0-10-centos ~]# nginx -s stop
- Restart nginx
[root@VM-0-10-centos ~]# nginx -s reload

// perhaps
[root@VM-0-10-centos ~]# systemctl restart nginx
2. Configure Nginx
- Enter the / home/front directory, create the nginx directory, and then create a new nginx.conf file in this directory
[root@VM-0-10-centos /]# cd /home/front/
[root@VM-0-10-centos front]# mkdir nginx
[root@VM-0-10-centos front]# ll
 Total consumption 4
drwxr-xr-x 2 root root 4096 12 April 10:59 nginx
[root@VM-0-10-centos front]# cd nginx/
[root@VM-0-10-centos nginx]# touch nginx.conf
[root@VM-0-10-centos nginx]# ll
 Total consumption 0
-rw-r--r-- 1 root root 0 12 April 10:59 nginx.conf
[root@VM-0-10-centos nginx]#
- Main profile found
my main configuration file is in: / etc/nginx/nginx.conf
[root@VM-0-10-centos nginx]# cd /etc/nginx/
[root@VM-0-10-centos nginx]# ll
 Total consumption 76
-rw-r--r-- 1 root root 2469 10 August 2019 nginx.conf
-rw-r--r-- 1 root root 2656 10 August 2019 nginx.conf.default
- Enter the main configuration file and modify the configuration information in nginx.conf file
1. Specify user as root;
2. Specify the log file path in case of Nginx error (remember to create the corresponding directory and file name after modification) and the comment line
3. Specify the root path as: root /home/front; Index.html and index.htm;
4. The main configuration file needs to be merged with / home/nginx/nginx.conf; file
# For more information on configuration, see:
#   * Official English Documentation: http://nginx.org/en/docs/
#   * Official Russian Documentation: http://nginx.org/ru/docs/

### 1. Specify user as root
user root;
worker_processes auto;
### 2. Specifies the path to the log file when nginx errors occur
error_log /home/nginx/logs/error.log;
# pid /run/nginx.pid;

# Load dynamic modules. See /usr/share/doc/nginx/README.dynamic.
include /usr/share/nginx/modules/*.conf;

events {
    worker_connections 1024;
}

http {
    log_format  main  '$remote_addr - $remote_user [$time_local] "$request" '
                      '$status $body_bytes_sent "$http_referer" '
                      '"$http_user_agent" "$http_x_forwarded_for"';

    access_log  /var/log/nginx/access.log  main;

    sendfile            on;
    tcp_nopush          on;
    tcp_nodelay         on;
    keepalive_timeout   65;
    types_hash_max_size 2048;

    include             /etc/nginx/mime.types;
    default_type        application/octet-stream;

    # Load modular configuration files from the /etc/nginx/conf.d directory.
    # See http://nginx.org/en/docs/ngx_core_module.html#include
    # for more information.
    include /etc/nginx/conf.d/*.conf;
### 3. Specify the root path as: root /home/front; Index.html and index.htm;
    server {
       listen       80 default_server;
       listen       [::]:80 default_server;
       server_name  _;
       # root         /usr/share/nginx/html;
       root         /home/front;
       index  index.html index.htm;

        # Load configuration files for the default server block.
        include /etc/nginx/default.d/*.conf;

        # location / {
        # }

        error_page 404 /404.html;
            location = /40x.html {
        }

        error_page 500 502 503 504 /50x.html;
            location = /50x.html {
        }
    }

# Settings for a TLS enabled server.
#
#    server {
#        listen       443 ssl http2 default_server;
#        listen       [::]:443 ssl http2 default_server;
#        server_name  _;
#        root         /usr/share/nginx/html;
#
#        ssl_certificate "/etc/pki/nginx/server.crt";
#        ssl_certificate_key "/etc/pki/nginx/private/server.key";
#        ssl_session_cache shared:SSL:1m;
#        ssl_session_timeout  10m;
#        ssl_ciphers PROFILE=SYSTEM;
#        ssl_prefer_server_ciphers on;
#
#        # Load configuration files for the default server block.
#        include /etc/nginx/default.d/*.conf;
#
#        location / {
#        }
#
#        error_page 404 /404.html;
#            location = /40x.html {
#        }
#
#        error_page 500 502 503 504 /50x.html;
#            location = /50x.html {
#        }
#    }
### 4. The main configuration file needs to merge the / home/nginx/nginx.conf file
     include /home/nginx/*.conf;
}
- Enter the / home/nginx directory and create the logs directory and the error.log file
[root@VM-0-10-centos nginx]# cd /home/nginx/
[root@VM-0-10-centos nginx]# mkdir logs
[root@VM-0-10-centos nginx]# cd logs
[root@VM-0-10-centos logs]# touch error.log
[root@VM-0-10-centos logs]# ll
 Total consumption 4
-rw-r--r-- 1 root root 2390 12 April 13:44 error.log
[root@VM-0-10-centos logs]#
- Then write something in / home/nginx/nginx.conf
[root@VM-0-10-centos logs]# cd ../
[root@VM-0-10-centos nginx]# ll
 Total consumption 8
drwxr-xr-x 2 root root 4096 12 April 11:52 logs
-rw-r--r-- 1 root root  231 12 April 11:43 nginx.conf
[root@VM-0-10-centos nginx]# vi nginx.conf
### Sub profile
server {
  listen 80;
  server_name localhost;
  root /home/front;
  # autoindex on;
  add_header Cache-Control "no-cache, must-revalidate";

  location / {
    add_header Access-Control-Allow-Origin *;
  }
}
- Check whether the configuration file is successful. The following indicates success
[root@VM-0-10-centos front]# nginx -t
nginx: the configuration file /etc/nginx/nginx.conf syntax is ok
nginx: configuration file /etc/nginx/nginx.conf test is successful
[root@VM-0-10-centos front]#
- ⚠️ Note: if the configuration file is checked successfully but Nginx is restarted, the following error occurs
nginx: [error] invalid PID number "" in "/run/nginx.pid"
the following code needs to be executed
// /etc/nginx/nginx.conf is the main configuration file
[root@VM-0-10-centos front]# nginx -c /etc/nginx/nginx.conf
// Then restart
[root@VM-0-10-centos front]# nginx -s reload
if it is not successful, check the nginx process, then close the nginx process and restart nginx
[root@VM-0-10-centos front]# ps -ef|grep nginx
root      978504       1  0 14:14 ?        00:00:00 nginx: master process nginx
root      990563  978504  0 14:20 ?        00:00:00 nginx: worker process
root     1014622  852386  0 14:31 pts/0    00:00:00 grep --color=auto nginx
[root@VM-0-10-centos front]# sudo kill -quit 978504
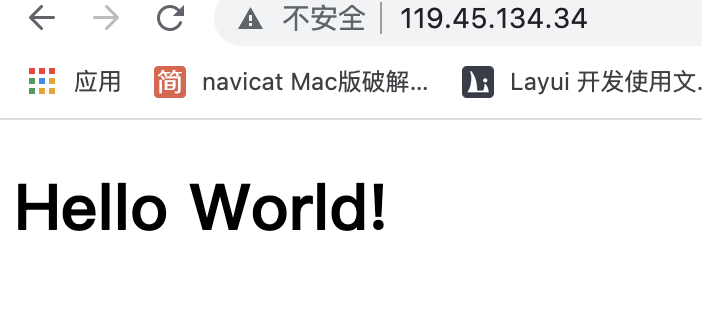
- Add an index.html file in the front directory and write the following code. When the browser accesses the server's public IP, the following figure shows that the configuration is successful
<!DOCTYPE html>
<html lang="en">

<head>
  <meta charset="UTF-8">
  <meta http-equiv="X-UA-Compatible" content="IE=edge">
  <meta name="viewport" content="width=device-width, initial-scale=1.0">
  <title>Document</title>
</head>

<body>
  <h1>Hello World!</h1>
</body>

</html>
4, Install MySQL
1. Install using yum source
- Install MySQL 8.0
// Note: we want to install MySQL server
// If you enter mysql, only the client will be installed
[root@VM-0-10-centos home]# yum install mysql-server
- After installation, enter mysql -u root -p to show that MySQL is not started
complete!
[root@VM-0-10-centos home]# mysql -u root -p
Enter password:
ERROR 2002 (HY000): Can't connect to local MySQL server through socket '/var/lib/mysql/mysql.sock' (2)
[root@VM-0-10-centos home]#
- Check MySQL status
[root@VM-0-10-centos home]# service mysqld status
Redirecting to /bin/systemctl status mysqld.service
● mysqld.service - MySQL 8.0 database server
   Loaded: loaded (/usr/lib/systemd/system/mysqld.service; disabled; vendor preset: disabled)
   Active: inactive (dead)
[root@VM-0-10-centos home]#
- Start MySQL
[root@VM-0-10-centos home]# service mysqld restart
Redirecting to /bin/systemctl restart mysqld.service
[root@VM-0-10-centos home]#
- Log in again and enter without entering your password
[root@VM-0-10-centos home]# mysql -u root -p
Enter password:
Welcome to the MySQL monitor.  Commands end with ; or \g.
Your MySQL connection id is 8
Server version: 8.0.26 Source distribution

Copyright (c) 2000, 2021, Oracle and/or its affiliates.

Oracle is a registered trademark of Oracle Corporation and/or its
affiliates. Other names may be trademarks of their respective
owners.

Type 'help;' or '\h' for help. Type '\c' to clear the current input statement.

mysql>
- If the login is unsuccessful and the password is required, it indicates that MySQL has given the default password during initialization, which can be found in the log
[root@VM-0-10-centos home]# cat /var/log/mysqld.log |grep password
- After copying the default password, log in again
[root@VM-0-10-centos home]# mysql -u root -p
- View the database, if it displays: You must reset your password using ALTER USER
[root@VM-0-10-centos home]# show databsaes;
- Then reset the password: the password must have letters, numbers and characters
- The password set is the MySQL login password
mysql> alter user 'root'@'localhost' identified by 'Example of setting password: test123123.';
- Then log in again with the set password
- view the database
mysql> show databases;
+--------------------+
| Database           |
+--------------------+
| information_schema |
| mysql              |
| performance_schema |
| sys                |
+--------------------+
4 rows in set (0.01 sec)

mysql>
- When using Navicat to connect to the test database, an error may be reported: Test Failed 1130 - Host 'server IP' is not allowed to connect to this MySQL server
- You can enter the following commands from the command line (login status)
// Use database
mysql> use mysql;
Reading table information for completion of table and column names
You can turn off this feature to get a quicker startup with -A

Database changed

// %Is a wildcard that matches all IP addresses
// Using mysql_native_password plug-in for verification (different from that before v8.0)
// You can use the original password or set a simple 123456 password
mysql> create user 'root'@'%' identified with mysql_native_password by 'lgk123123';
Query OK, 0 rows affected (0.01 sec)

// Give all permissions to 'root' @ '%'
mysql> grant all privileges on *.* to 'root'@'%';
Query OK, 0 rows affected (0.01 sec)

// Make settings effective
mysql> flush privileges;
Query OK, 0 rows affected (0.00 sec)

// Exit MySQL
mysql> exit;
- View MySQL version number
[root@VM-0-10-centos home]# mysql --version
mysql  Ver 8.0.26 for Linux on x86_64 (Source distribution)
[root@VM-0-10-centos home]#
5, Install MongoDB
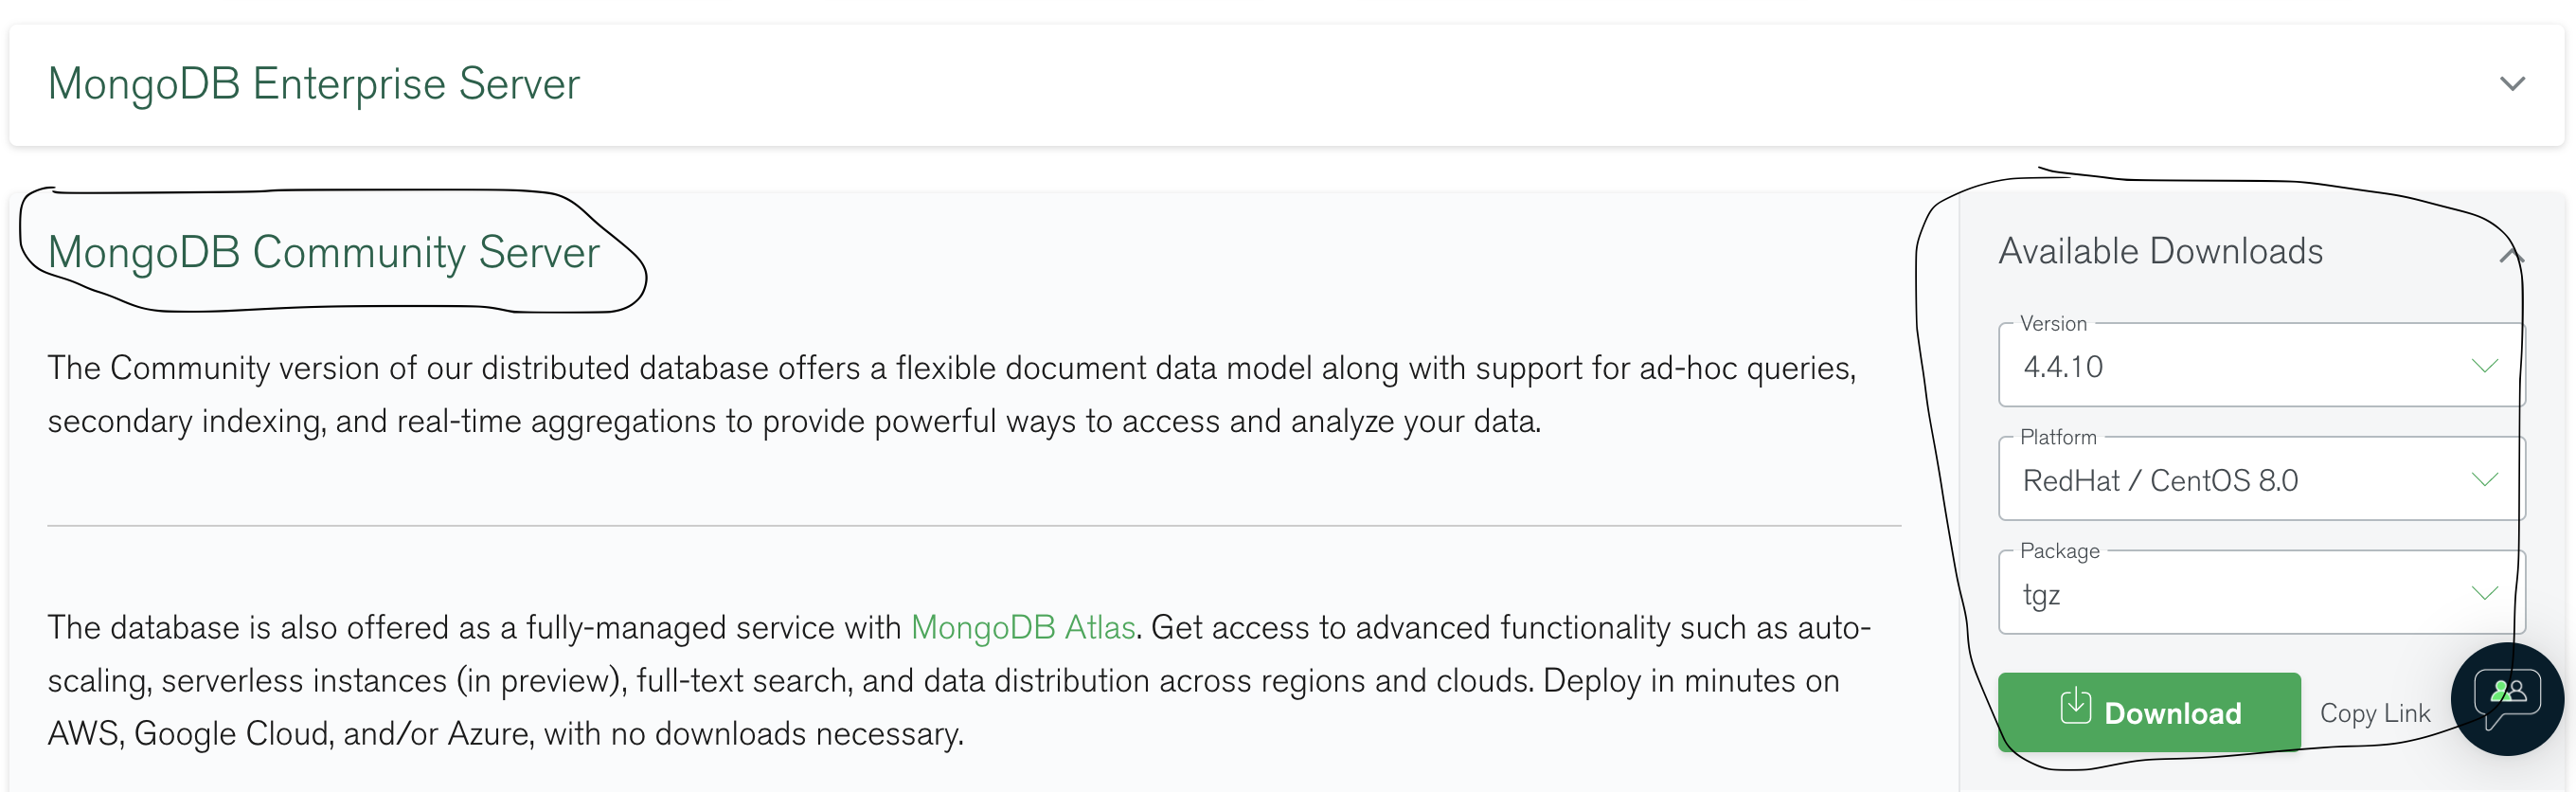
1. Download MongoDB
- MpngoDB official website address: https://www.mongodb.com/try/download/community
- As shown in the figure, click Download to Download
- Upload the downloaded MongoDB file to the server
[root@VM-0-10-centos home]# cd resources/
[root@VM-0-10-centos resources]# ll
 Total consumption 70384
-rw-r--r-- 1 root root 72072638 12 April 16:24 mongodb-linux-x86_64-rhel80-4.4.10.tgz
[root@VM-0-10-centos resources]#
2. Install MongoDB
- Unzip mongodb Linux x86 under resources_ 64-rhel80-4.4.10.tgz file
[root@VM-0-10-centos resources]# tar -zxvf mongodb-linux-x86_64-rhel80-4.4.10.tgz
[root@VM-0-10-centos resources]# ll
 Total consumption 70388
drwxr-xr-x 3 root root     4096 12 April 16:26 mongodb-linux-x86_64-rhel80-4.4.10
-rw-r--r-- 1 root root 72072638 12 April 16:24 mongodb-linux-x86_64-rhel80-4.4.10.tgz
[root@VM-0-10-centos resources]#
- Enter / usr/local to create the mongodb directory
[root@VM-0-10-centos resources]# cd /usr/local/
[root@VM-0-10-centos local]# mkdir mongodb
[root@VM-0-10-centos local]# ll
 Total dosage 48
drwxr-xr-x.  2 root root 4096 12 April 9:40 bin
drwxr-xr-x.  2 root root 4096 6 June 22-13:06 etc
drwxr-xr-x.  2 root root 4096 6 June 22-13:06 games
drwxr-xr-x.  2 root root 4096 6 June 22-13:06 include
drwxr-xr-x.  4 root root 4096 12 April 9:14 lib
drwxr-xr-x.  4 root root 4096 6 June 22-13:06 lib64
drwxr-xr-x.  2 root root 4096 6 June 22-13:06 libexec
drwxr-xr-x   2 root root 4096 12 April 16:29 mongodb
drwxr-xr-x  16 root root 4096 12 March 20:54 qcloud
drwxr-xr-x.  2 root root 4096 6 June 22-13:06 sbin
drwxr-xr-x.  5 root root 4096 6 June 22-13:06 share
drwxr-xr-x.  2 root root 4096 6 June 22-13:06 src
srwxrwxrwx   1 root root    0 12 March 20:54 yd.socket.server
[root@VM-0-10-centos local]#
- The extracted mongodb Linux x86_ Move all files under 64-rhel80-4.4.10 to the new / usr/local/mongodb directory
[root@VM-0-10-centos mongodb-linux-x86_64-rhel80-4.4.10]# cp -r bin/ /usr/local/mongodb/
[root@VM-0-10-centos mongodb-linux-x86_64-rhel80-4.4.10]# cp -r LICENSE-Community.txt /usr/local/mongodb/
[root@VM-0-10-centos mongodb-linux-x86_64-rhel80-4.4.10]# cp -r MPL-2 /usr/local/mongodb/
[root@VM-0-10-centos mongodb-linux-x86_64-rhel80-4.4.10]# cp -r README /usr/local/mongodb/
[root@VM-0-10-centos mongodb-linux-x86_64-rhel80-4.4.10]# cp -r THIRD-PARTY-NOTICES /usr/local/mongodb/
[root@VM-0-10-centos mongodb-linux-x86_64-rhel80-4.4.10]# cd /usr/local/mongodb/
[root@VM-0-10-centos mongodb]# ll
 Total consumption 136
drwxr-xr-x 2 root root  4096 12 April 16:38 bin
-rw-r--r-- 1 root root 30608 12 April 16:39 LICENSE-Community.txt
-rw-r--r-- 1 root root 16726 12 April 16:39 MPL-2
-rw-r--r-- 1 root root  1977 12 April 16:39 README
-rw-r--r-- 1 root root 75685 12 April 16:40 THIRD-PARTY-NOTICES
[root@VM-0-10-centos mongodb]#
- Add the executable file in the bin directory under mongodb to the PATH
[root@VM-0-10-centos mongodb]# export PATH=/usr/local/mongodb/bin:$PATH
[root@VM-0-10-centos mongodb]#
- Before startup, create two directories under the mongodb directory
// Data storage directory
[root@VM-0-10-centos mongodb]# mkdir data
// Log file directory
[root@VM-0-10-centos mongodb]# mkdir logs
[root@VM-0-10-centos mongodb]# cd logs/
// Create a mongod.log file in the logs directory to store logs
[root@VM-0-10-centos logs]# touch mongod.log
[root@VM-0-10-centos logs]#
- Set that the current user has read and write permissions to these two directories
[root@VM-0-10-centos logs]# sudo chown `whoami` /usr/local/mongodb/data
[root@VM-0-10-centos logs]# sudo chown `whoami` /usr/local/mongodb/logs/mongod.log
[root@VM-0-10-centos logs]#
- Start MongoDB service
[root@VM-0-10-centos logs]# mongod --dbpath /usr/local/mongodb/data --logpath /usr/local/mongodb/logs/mongod.log --fork
- Open the / usr/local/mongodb/logs/mongod.log file. If you see the following similar information, it indicates that the startup is successful
[root@VM-0-10-centos logs]# tail -10f /usr/local/mongodb/logs/mongod.log
{"t":{"$date":"2021-12-04T16:57:52.197+08:00"},"s":"I",  "c":"FTDC",     "id":20625,   "ctx":"initandlisten","msg":"Initializing full-time diagnostic data capture","attr":{"dataDirectory":"/usr/local/mongodb/data/diagnostic.data"}}
{"t":{"$date":"2021-12-04T16:58:52.158+08:00"},"s":"I",  "c":"STORAGE",  "id":22430,   "ctx":"WTCheckpointThread","msg":"WiredTiger message","attr":{"message":"[1638608332:158320][1324308:0x7f8b7f2aa700], WT_SESSION.checkpoint: [WT_VERB_CHECKPOINT_PROGRESS] saving checkpoint snapshot min: 34, snapshot max: 34 snapshot count: 0, oldest timestamp: (0, 0) , meta checkpoint timestamp: (0, 0) base write gen: 1"}}
- Enter mongo to enter the MongoDB database
[root@VM-0-10-centos logs]# mongo
MongoDB shell version v4.4.10
connecting to: mongodb://127.0.0.1:27017/?compressors=disabled&gssapiServiceName=mongodb
Implicit session: session { "id" : UUID("c469261f-dcd0-4f6c-a27a-3fc97c4d4f4c") }
MongoDB server version: 4.4.10
Welcome to the MongoDB shell.
For interactive help, type "help".
For more comprehensive documentation, see
        https://docs.mongodb.com/
Questions? Try the MongoDB Developer Community Forums
        https://community.mongodb.com
---
- view the database
> show databases;
admin   0.000GB
config  0.000GB
local   0.000GB
>
6, Install git
1. Install using yum source
- Install git
[root@VM-0-10-centos resources]# yum -y install git
- View git version
complete!
[root@VM-0-10-centos resources]# git --version
git version 2.27.0
[root@VM-0-10-centos resources]#
- If the git version is lower, you can upgrade the git Version (the above installed version is newer, and the following steps can be ignored)
- First, remove git from the yum source
[root@VM-0-10-centos resources]# yum remove git
- Then install git dependencies using yum source
[root@VM-0-10-centos resources]# yum install -y curl-devel expat-devel gettext-devel openssl-devel zlib-devel

// Install git by compiling the source code
[root@VM-0-10-centos resources]# yum install - y gcc perl-ExtUtils-MakeMaker

[root@VM-0-10-centos resources]# yum install -y tcl build-essential tk gettext
- Download the latest version of git through the wget instruction
[root@VM-0-10-centos resources]# wget https://github.com/git/git/archive/v2.27.0.tar.gz
- decompression
[root@VM-0-10-centos resources]# tar -zxvf v2.27.0.tar.gz
- Enter the source directory
[root@VM-0-10-centos resources]# cd git-2.27.0
- Compile the source code using make
// At compile time, specify where the installed executable is located
[root@VM-0-10-centos git-2.27.0]# make prefix=/usr/local/git all
- Install after compilation
[root@VM-0-10-centos git-2.27.0]# make prefix=/usr/local/git install
- Failed to execute git instruction. Enter / usr/local/git/bin to view
- Make soft connection
// Enter / usr/bin
[root@VM-0-10-centos git-2.27.0]# cd /usr/bin

// Make soft connection
[root@VM-0-10-centos bin]# ln -s /usr/local/git/bin/git git
- Then you can execute the git instruction
[root@VM-0-10-centos resources]# git --version
git version 2.27.0
[root@VM-0-10-centos resources]#
2. Set password free update
- Do secret free login through ssh
// Generate the secret free login key through SSH keygen
// Fill in the user name of git warehouse through the - C attribute
ssh-keygen -t rsa -C "1910184628@qq.com"

// Click enter three times to generate the key

// Print the key on the terminal
cat ~/.ssh/id_rsa.pub

// After copying the key, enter "My Settings" in Gitee warehouse to add the key

// Paste the key onto the key content
- The advantage of adding a key to a user's settings: all items of the user can be password free clone without clicking "warehouse settings" on each item
- Enter the back resources directory just created, and then download the code from git clone
git clone git@gitee.com:lgk2021/Project name.git
- Update code
// Enter the directory where you want to update the source code and execute
git pull