I. samba
Samba is a free software that implements SMB protocol on Linux and UNIX systems. It consists of server and client programs. SMB (Server Messages)
Block (Information Service Block) is a communication protocol for sharing files and printers in LAN. It provides file and printer sharing services for different computers in LAN. SMB protocol is a client/server protocol through which clients can access shared file systems, printers and other resources on servers. By setting "NetBIOS"
OverTCP/IP enables Samba to share resources not only with local area network hosts, but also with computers around the world.
SAMBA: This suite mainly includes the main daemon files (smbd and nmbd) of SAMBA and the file files of SAMBA.(
document), and other SAMBA-related logrotate settings and boot options files;
samba-common: This suite mainly provides SAMBA's main profile (smb.conf), smb.conf grammar test program.(
Tesparm) and so on; samba-client: This suite provides Linux as SAMBA Client
At the end, the required tool instructions, such as smbmount, which mounts the SAMBA file format, etc.
Installation configuration
 1 Yum install Samba samba-client.x86_64 samba-common-y# install Samba
 - > system CTL start SMB # # open samba
 --> system CTL enable smb. service # setting to start
 - > system CTL stop firewalld # # close firewalld service
Install samba, samba-client, samba-servr Suite 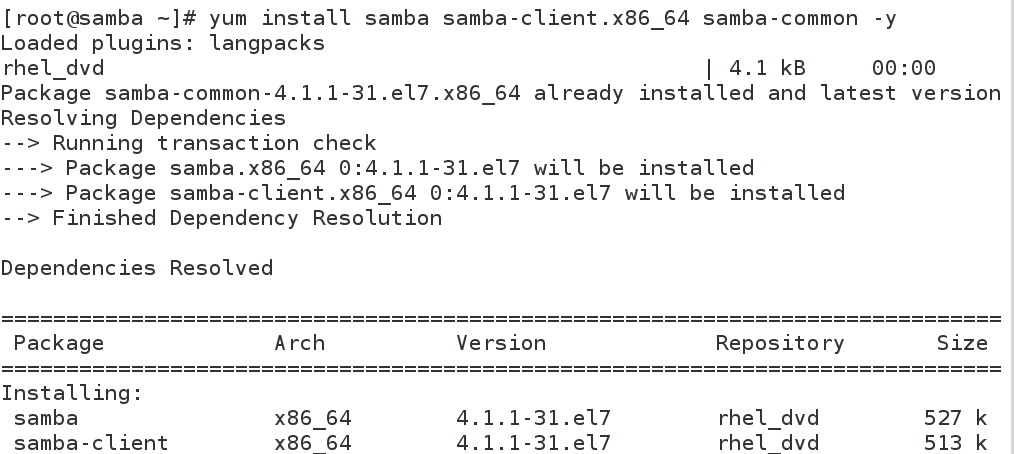
Open and set boot start 
1. Create users and basic commands
server
1 smbpasswd -a student
                ##To create a samba user, the user must already have the system in place, otherwise the creation fails
2 pdbedit -L                  ##List samba users
3 pdbedit -x student          ##Delete samba users
//test
client
1 smbclient //172.25.254.127/student -U student
                              ##Log on to 127 Host Shared Directory with samba User student
-->ls
//Home directory not visible
server
1 getsebool -a | grep samba   ##Find the selinux value of filtered samba
--> setsebool -P samba_enable_home_dirs on
                              ##Open samba's home directory to see
client
1 smbclient //172.25.254.127/student -U student33
                              ##Re-login, test success
-->ls
Create samba users 
List samba users, -x deletes samba users, and then establishes 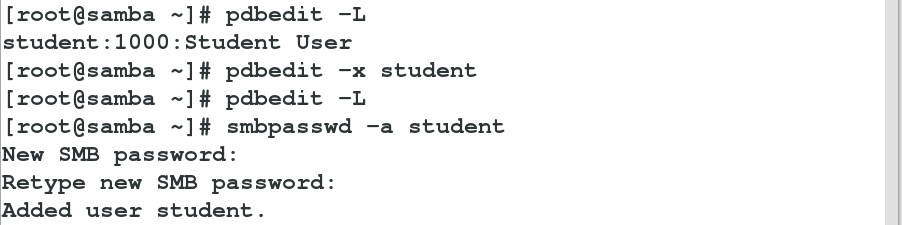
client login cannot access home directory 
Open the selinux value visible in the samba shared home path 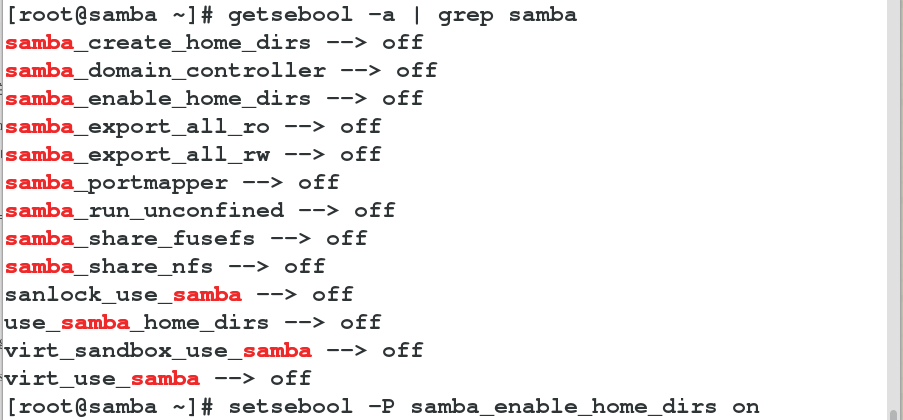
Test success 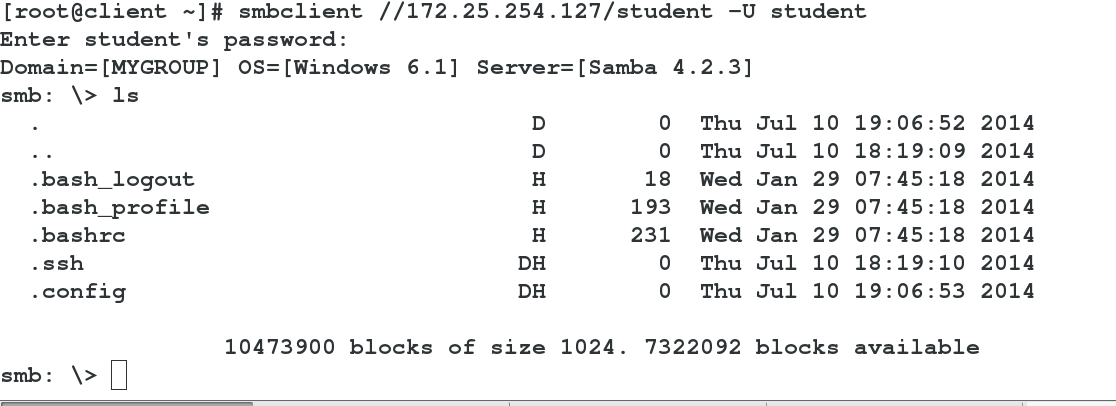
II. Shared directories
1. Self-created directories
server
1 mkdir /hello                          ##Create the hello directory under the root
-->touch /hello/hello{1..3}             ##Create three files in this directory
2 semanage fcontext -a -t samba_share_t '/hello(/.*)?'
                                        ##Change the security context of the hello directory
3 restorecon -RvvF /hello/              ##Refresh the security context
4 vim /etc/samba/smb.conf               ##Edit samba configuration file
  89 workgroup = hello                  ##Set the shared directory to hello directory
  321 [DATA]                            ##Directory name
  322 comment = local directory /hello  ##introduce
  323 path = hello                      ##Absolute paths to shared directories
-->systemctl restart smb                ##Restart samba service
5 test
client
smbclient //172.25.254.127/DATA -U student
                          ##Log on to 127 Host Shared Directory DATA with samba User student
Edit the samba configuration file. The shared directory is hello 
The name is DATA, as shown in the figure. 
Create a shared directory, change the security context of the directory, and refresh the security context 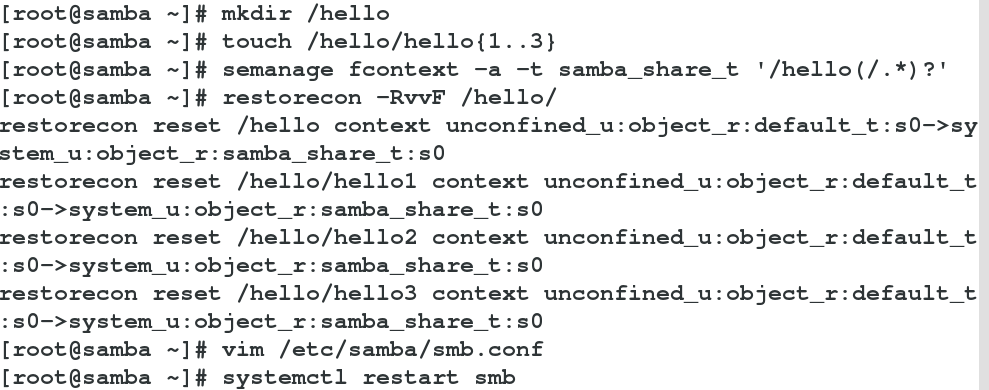
Test success 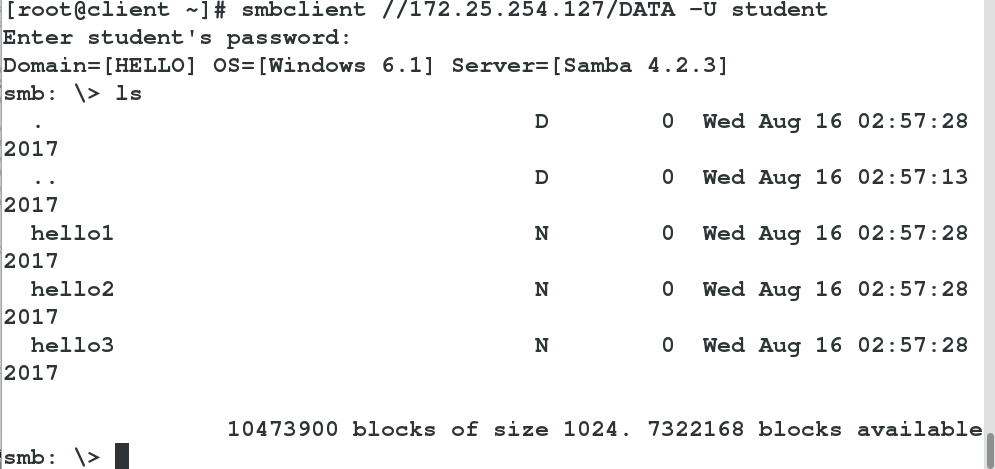
2. System catalogue
1 vim /etc/samba/smb.conf               ##Edit samba configuration file
  324 [CONFIG]                          ##Directory name
  325 comment = local directory /mnt    ##introduce
  326 path = /mnt                       ##Absolute paths to shared directories
-->systemctl restart smb                ##Restart samba service
2 getsebool -a | grep samba             ##Absolute paths to shared directories
--> setsebool -P samba_export_all_ro on ##Open the system directory to see
3 test
client
smbclient //172.25.254.127/CONFIG -U student
                        ##Log on to 127 Host Shared Directory CONFIG with samba User student
Write the system directory to the configuration file as shown in Figure 1 
Landing success is invisible 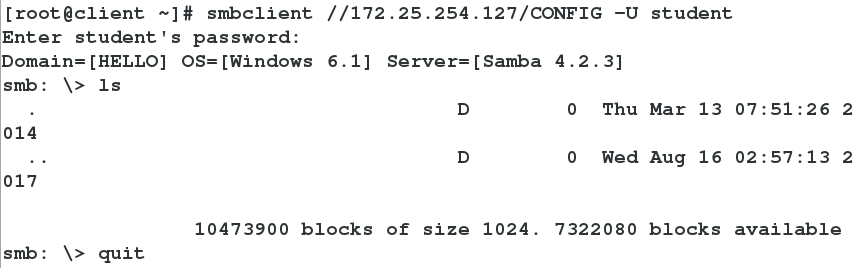
Open the selinux value visible in the system directory 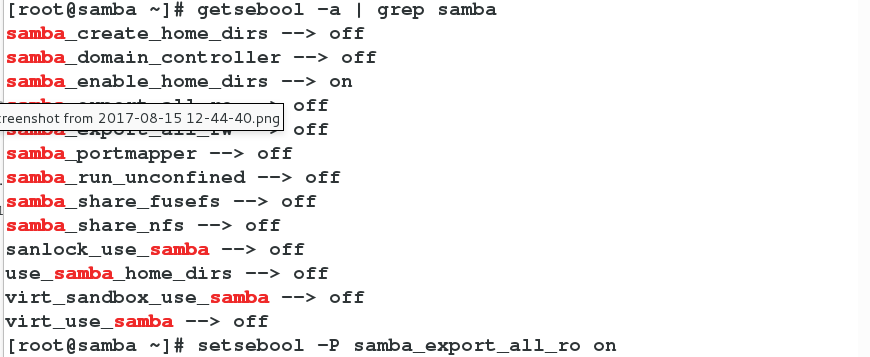
Test success 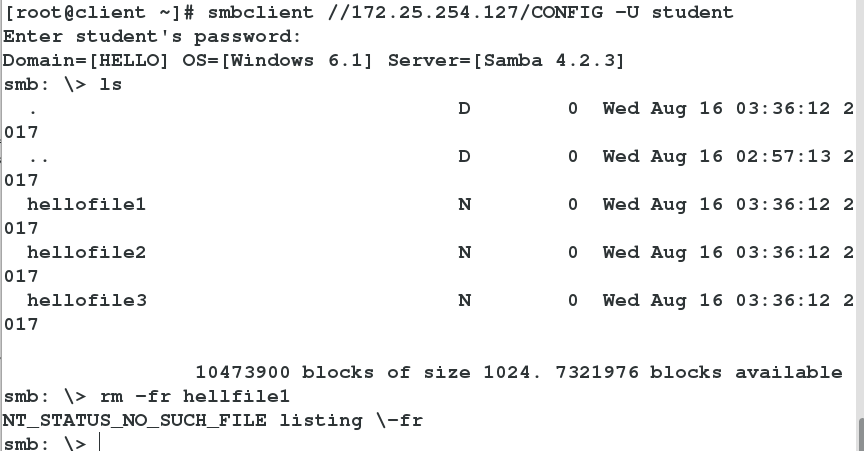
III. PARAMETER CONFIGURATION
1. Read-write control
 Allow system directories to be writable
1 vim /etc/samba/smb.conf             ##Edit samba configuration file
  330 writable=yes                    ##Allow users to write
-->systemctl restart smb              ##Restart samba service
2 setsebool -P samba_export_all_rw on ##Open selinux that can be written in the system directory
3 test
client
 mount -o username=student,password=student //172.25.254.127
                                      ##Users can log in and mount directly with studnet
-->df
-->cd /mnt->ls
-->touch hello
Configuration files allow users to write 
Open the writable selinux value of the system shared directory 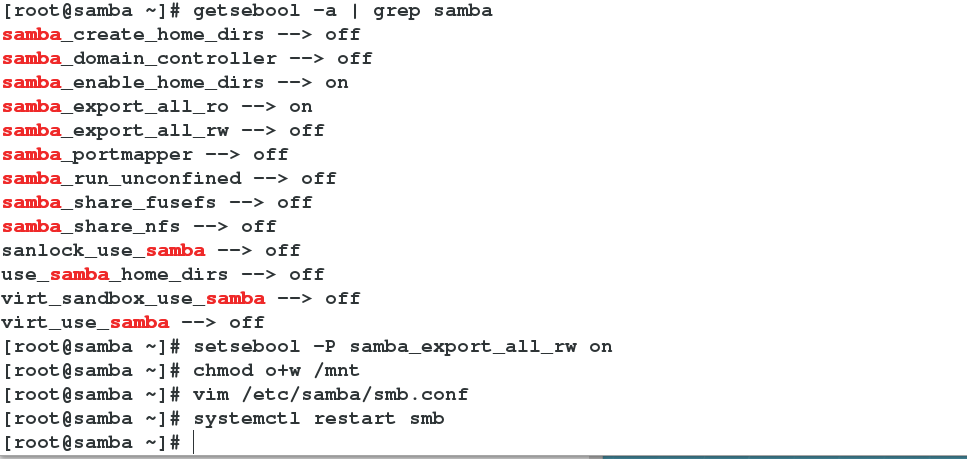
Test success 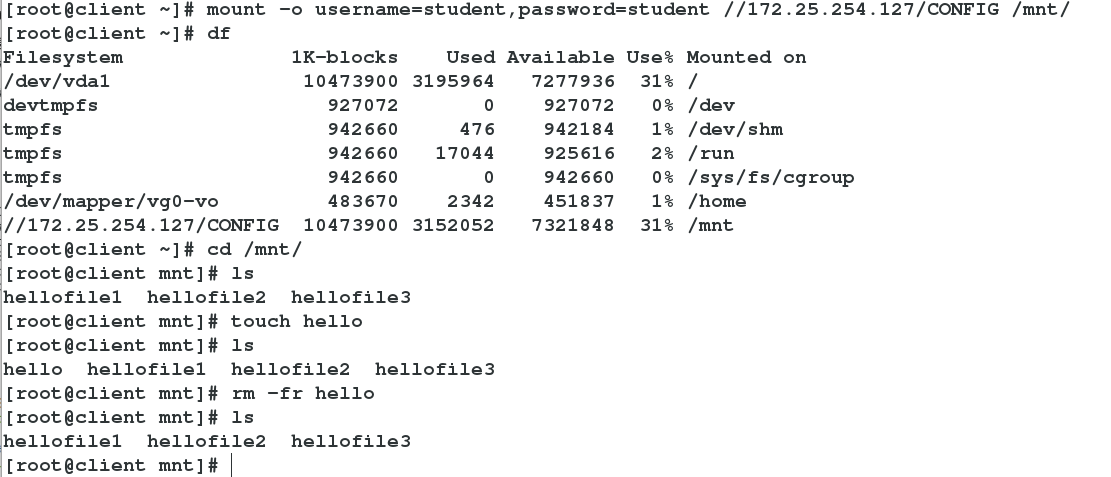
Designated user writes
1 vim /etc/samba/smb.conf
  330# writable=yes              ##Comment out all user writes
  331 write list = student       ##Specify student user writes
-->systemctl restart smb
2 test
client
 mount -o username=student,password=student //172.25.254.127
                                 ##Users can log in and mount directly with studnet
-->df
-->cd /mnt->ls
-->rm -fr hello
 mount -o username=nihao,password=nihao //172.25.254.127
                                 ##nihao users can mount but not write
-->df
-->cd /mnt->ls
-->touch nihao
Specify student user writes 
Testing nihao user not writable 
student user writes
Specifies user group writable
1 vim /etc/samba/smb.conf
  331 write list = +student         ##Specify student user groups to write
-->systemctl restart smb
2 usermod -G student nihao          ##Adding student additional groups to nihao users
-->id nihao                         ##View the id of the nihao user
3 test
client
 mount -o username=nihao,password=nihao //172.25.254.127 # studnet users can log in and mount directly
-->df
-->cd /mnt->ls
-->touch nihao                      ##Successful File Creation, Successful Testing
Specify student user group writable 
nihao users also student groups 
Specify nihao users as system administrators 
The test was successful, writable, and file creation was root user privilege 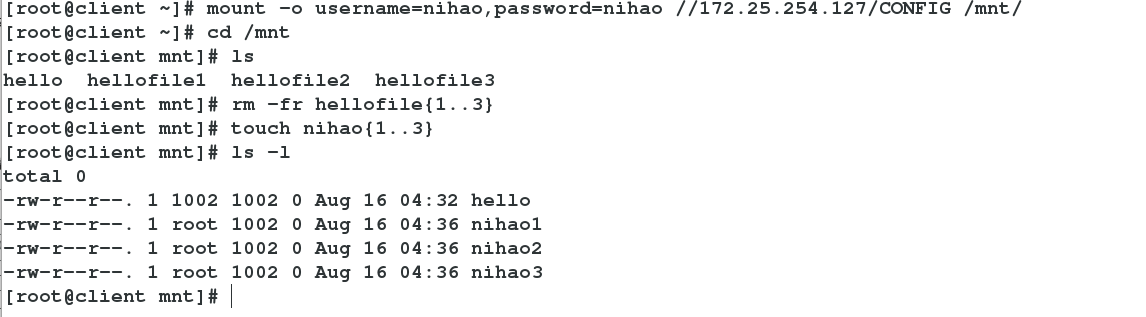
2. Access control
Anonymous Access
1 vim /etc/samba/smb.conf
  125 map to guest = bad user     ##Point to anonymous users
  324 guet ok = yes               ##Allow anonymous login
client test
2 smbclient //172.25.254.127/DATA ##Successful anonymous login visit
Anonymous user pointing 
Allow anonymous users to log in 
Anonymous User Logon Test Successful 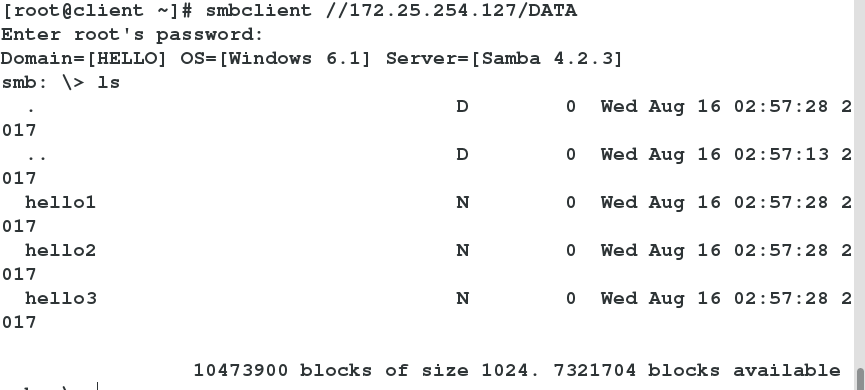
Access control through IP
1 vim /etc/samba/smb.conf
  325 hosts deny =172.25.254.227   ##Deny access to 227 hosts
2 vim /etc/samba/smb.conf
  325 hosts allow =172.25.254.27   ##Allow access to 27 hosts
Deny access to 227 hosts 
227 host access denied 
Allow 27 host login access 
27 Host Landing Successful 
Designated user login
3 vim /etc/samba/smb.conf
  326 valid users = student       ##Allow student users to log in
Specify that student users can log in 
Studdent User Logged in Successfully 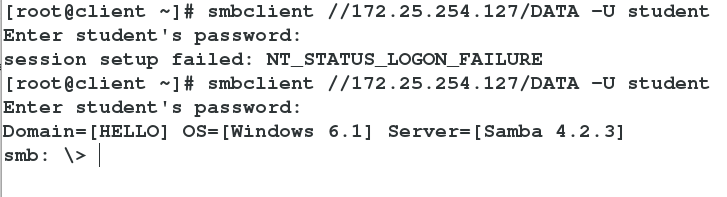
Specify user group login
4 vim /etc/samba/smb.conf
  326 valid users = +student       ##Allow student user groups to log in
Specify the student group to log in 
Increase the number of nihao users and add samba users 
Adding additional group student s to nihao users 
nihao User Logged in Successfully 
2. Multiuser mounting
client
1 yum install cifs-utils -y ##Install cifs-utils
2 vim /root/hello ##Editing Authentication Documents
username=nihao ##user
password=nihao ##Password
3 chmod 660 /root/hello ##Give authentication 660 privileges
//test
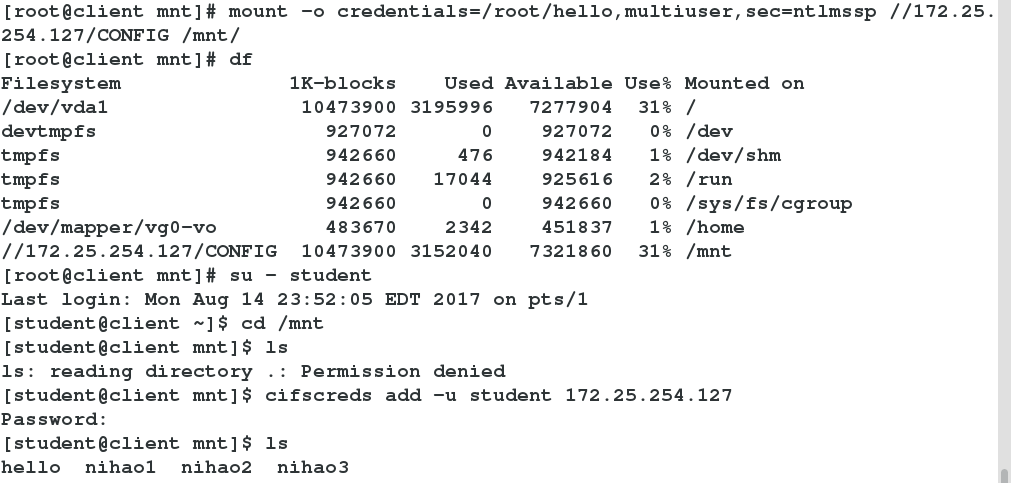
1 monut -o credentials=/root/hello,multiuser,sec=ntlmssp //172.25.254.127/CONFIG /mnt/ ##Anonymous landing
-->df
2 su - student ##Switching student users
-->cd /mnt/
-->ls ##Be refused
3 cifscreds add -u student 172.25.254.127 ##Added student User Logon Authentication
-->ls ##Test successInstall the cifs-utils plug-in 
Edit the authentication file and grant it 660 privileges 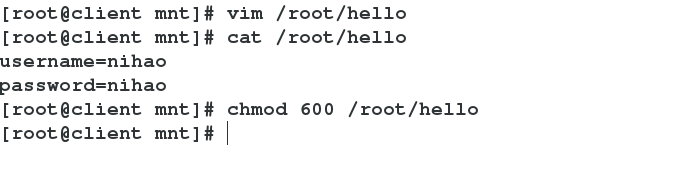
Multiuser mount login, switch to student user to see rejected, add student user with cifscreds, test success