linux redhat6 Oracle11g rac +lvm +asm installation process summary experience
Installation environment
Main operating system: windows 10
Virtual machine VMware 15: Two Red Hat Enterprise linux 6.10
Package: Oracle Database software: Oracle11gR2
Cluster software: Oracle grid infrastructure 11gR2(11.2.0.4.0)
Shared storage: ASM
network configuration
Database (first node):
public ip: 192.168.10.100
private ip: 192.168.20.11
virtual ip: 192.168.10.103
scan ip: 192.168.10.105
Database SID: acdm1
DATA file location: + DATA
OCR: +OCR
Database (second node):
public ip: 192.168.10.102
private ip: 192.168.20.22
virtual ip: 192.168.10.104
scan ip: 192.168.10.105
Database SID: acdm2
DATA file location: + DATA
OCR: +OCR
Environmental configuration
Configure root logical volume (double node)
#Just to practice installing oracle, you can skip this step
#The following operations are required for the first node and the second node
Add 80g disks to each node
reboot #Restart virtual machine
fdisk -l view partition status
My newly added disk is / dev/sdb1. You should be optimistic about your new disk name.
Close swap
[root@localhost Desktop]# free
             total       used       free     shared    buffers     cached
Mem:       1905164    1001764     903400       3652      32040     598392
-/+ buffers/cache:     371332    1533832
Swap:      1048572          0    1048572
Swap swap partition in use
#Turn off all swap partitions / and show details
[root@localhost Desktop]# swapoff -av
swapoff on /dev/sda3
[root@localhost Desktop]# free
             total       used       free     shared    buffers     cached
Mem:       1905164    1001256     903908       3652      32180     598548
-/+ buffers/cache:     370528    1534636
Swap:            0          0          0
New partition
Partition the 80G hard disk just added
Command (m for help): n
Command action
   e   extended
   p   primary partition (1-4)
p
Partition number (1-4): 1
First cylinder (1-10443, default 1):
Using default value 1
Last cylinder, +cylinders or +size{K,M,G} (1-10443, default 10443):
Using default value 10443
Command (m for help): w
The partition table has been altered!
New physical volume
[root@localhost Desktop]# pvcreate /dev/sdb1
  Physical volume "/dev/sdb1" successfully created
New volume group
[root@localhost Desktop]#vgcreate lvm2020 /dev/sdb1
Volume group "lvm2020" successfully created
New logical volume for new root
[root@localhost Desktop]# lvcreate -L 79G -n lv2020 lvm2020
  Logical volume "lv2020" created.
[root@localhost Desktop]#mkfs -t ext4 /dev/lvm2020/lv2020
######New / mnt/usb directory for mounting lv2020
[root@localhost Desktop]#mkdir /mnt/usb
[root@localhost Desktop]#mount /dev/lvm2020/lv2020 /mnt
######Use dump to backup the root directory to / mnt/usb
If there is no dump command, install it. If it is a new virtual machine, configure the yum source
[root@localhost Desktop]#yum -y install dump*
[root@localhost Desktop]#dump /mnt/usb/root.bak /
Restore root.bak
[root@localhost Desktop]#restore -rf /mnt/root.bak
Modify the boot partition id of the root directory in the boot configuration file / boot/grub/grub.conf and the file system configuration table / ect/fstab.
Take a look at the uuid of the newly added logical volume lv2020
[root@localhost Desktop]#blkid
vim /etc/fstab
#
# /etc/fstab
# Created by anaconda on Wed Jan  8 06:23:22 2020
#
# Accessible filesystems, by reference, are maintained under '/dev/disk'
# See man pages fstab(5), findfs(8), mount(8) and/or blkid(8) for more info
#
UUID=56125f64-8d90-4c84-9723-cb98db8ab8f6 /                       ext4    defaults        1 1
UUID=8bec9b72-3c54-49a1-93a1-0e781e393a12 /boot                   ext4    defaults        1 2
UUID=165084df-c6d7-4f68-991d-90fd96f2c8e0 swap                    swap    defaults        0 0
tmpfs                   /dev/shm                tmpfs   defaults        0 0
devpts                  /dev/pts                devpts  gid=5,mode=620  0 0
sysfs                   /sys                    sysfs   defaults        0 0
proc                    /proc                   proc    defaults        0 0
# grub.conf generated by anaconda
#
# Note that you do not have to rerun grub after making changes to this file
# NOTICE:  You have a /boot partition.  This means that
#          all kernel and initrd paths are relative to /boot/, eg.
#          root (hd0,0)
#          kernel /vmlinuz-version ro root=/dev/sda2
#          initrd /initrd-[generic-]version.img
#boot=/dev/sda
default=0
timeout=5
splashimage=(hd0,0)/grub/splash.xpm.gz
hiddenmenu
title Red Hat Enterprise Linux 6 (2.6.32-754.el6.x86_64)
        root (hd0,0)
        kernel /vmlinuz-2.6.32-754.el6.x86_64 ro root=UUID=56125f64-8d90-4c84-9723-cb98db8ab8f6 rd_NO_LUKS LANG=en_US.UTF-8 rd_NO_MD SYSFONT=latarcyrheb-sun16 crashkernel=auto  KEYBOARDTYPE=pc KEYTABLE=us rd_NO_DM rhgb quiet
        initrd /initramfs-2.6.32-754.el6.x86_64.img
Restart the virtual machine and view the root mounted partition
reboot
df -Th
[root@localhost Desktop]# df -Th
Filesystem           Type     Size  Used Avail Use% Mounted on
/dev/mapper/lvm2020-lv2020
                     ext4      78G  5.3G   69G   8% /
Configure hosts file (double node)
vim /etc/hosts
add mapping
Set according to the ip and host name set by myself / for example, my host name is orarac1 orarac2
#------public ip-------------

192.168.10.100    orarac1

192.168.10.102    orarac2

#------private ip-------------

192.168.20.11   orarac1-priv

192.168.20.22   orarac2-priv

#------vip ip-----------------

192.168.10.103     orarac1-vip

192.168.10.104     orarac2-vip

#------scan ip---------------

192.168.10.105    scan-ip
Create group / user grid and oracle (two nodes)
groupadd -g 1000 oinstall
groupadd -g 1100 asmadmin
groupadd -g 1200 dba
groupadd -g 1300 asmdba
groupadd -g 1301 asmoper
useradd -u 1100 -g oinstall -Gasmadmin,asmdba,asmoper -d /home/grid grid
useradd -u 1101 -g oinstall -G dba,asmdba-d /home/oracle oracle
echo grid | passwd --stdin grid
echo oracle | passwd --stdin oracle
Create directory and set permissions (two nodes)
mkdir -p/u01/app/oracle/product/11.2.0.4/db_1
chown -R oracle:oinstall /u01/app/oracle
chmod -R 775 /u01/app/oracle
chmod -R 775 /u01/app/oracle
mkdir -p /u01/app/grid/product/11.2.0.4
chown -R grid:oinstall /u01/app/grid
chmod -R 775 /u01/app/grid
Configure the limitsconf file (two nodes)
vim /etc/security/limits.d/90-nproc.conf
Find this line and note it
#*Soft nproc 1024 with comments#
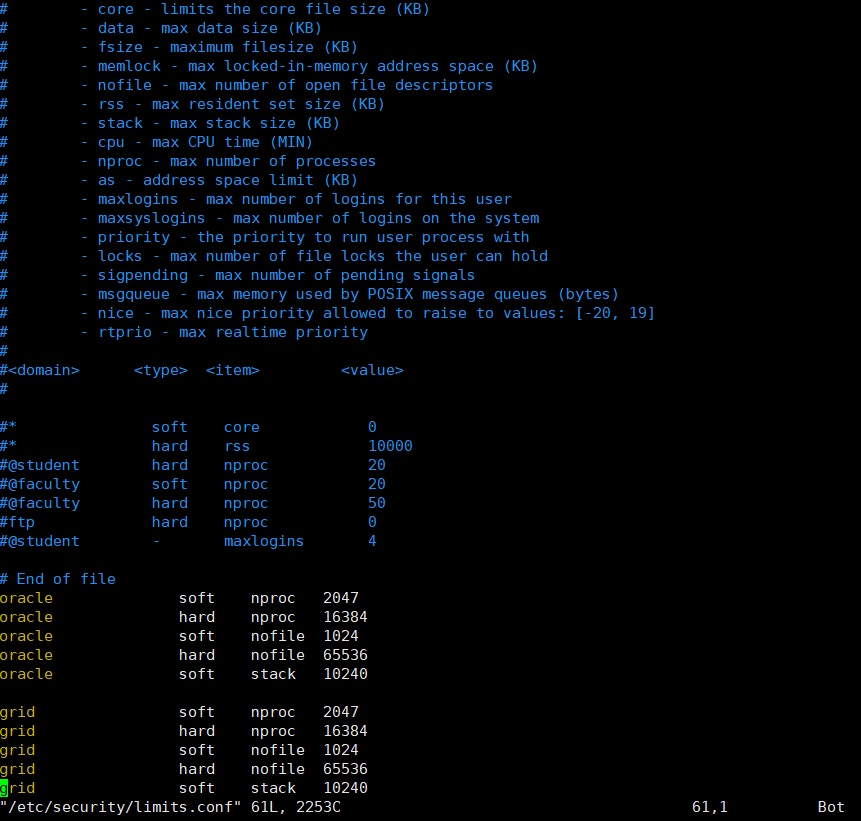
vim /etc/security/limits.conf
oracle              soft    nproc  2047
oracle              hard    nproc  16384
oracle              soft    nofile 1024
oracle              hard    nofile 65536
oracle              soft    stack  10240

grid                soft    nproc  2047
grid                hard    nproc  16384
grid                soft    nofile 1024
grid                hard    nofile 65536
grid                soft    stack  10240
Configure sysctl.conf file (two nodes)
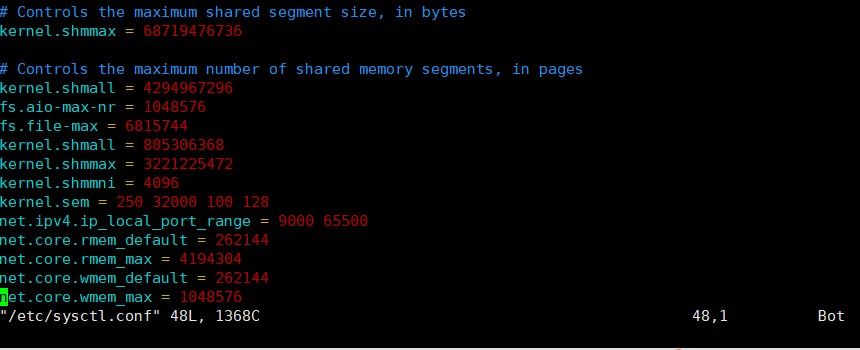
vim /etc/sysctl.conf
Add kernel configuration
fs.aio-max-nr = 1048576
fs.file-max = 6815744
kernel.shmall = 805306368
kernel.shmmax = 3221225472
kernel.shmmni = 4096
kernel.sem = 250 32000 100 128
net.ipv4.ip_local_port_range = 9000 65500
net.core.rmem_default = 262144
net.core.rmem_max = 4194304
net.core.wmem_default = 262144
net.core.wmem_max = 1048576
 Execute the following command to validate the configuration
sysctl -p
Modify login profile (two nodes)
vim /etc/profile
Increase:
if [ $USER = "oracle" ]; then
       if [ $SHELL = "/bin/ksh" ]; then
             ulimit -p 16384
             ulimit -n 65536
       else

              ulimit -u 16384 -n 65536


       fi

fi
Execute the following command to take effect the parameters
source /etc/profileModify / dev/shm (two nodes)
vim /etc/fstab
tmpfs /dev/shm tmpfs defaults,size=3146641408  Remount shm
mount -o remount /dev/shmStop the following services (two nodes)
chkconfig autofs off
chkconfig acpid off
chkconfig sendmail off
chkconfig cups-config-daemon off
chkconfig cpus off
chkconfig xfs off
chkconfig lm_sensors off
chkconfig gpm off
chkconfig openibd off
chkconfig pcmcia off
chkconfig cpuspeed off
chkconfig nfslock off
chkconfig ip6tables off
chkconfig rpcidmapd off
chkconfig apmd off
chkconfig sendmail off
chkconfig arptables_jf off
chkconifg microcode_ctl off
chkconfig rpcgssd off
chkconfig ntpd off
chkconfig iptables off
service iptables stop
service ip6tables stop
Modify SELINUX (two nodes)
vim /etc/selinux/config
Modify to SELINUX=disabled
Configure the root user environment variable (two nodes)
vim /root/.bash_profile
Add to
export
ORACLE_HOME=/u01/app/grid/product/11.2.0.4

export
PATH=$ORACLE_HOME/bin:$ORACLE_HOME/OPatch:/sbin:/bin:/usr/sbin:/usr/bin
export PATH
Configure grid user environment variables (one node)
vim /home/grid/.bash_profile
export   ORACLE_SID=+ASM1

export   ORACLE_BASE=/u01/app/grid/base

export   ORACLE_HOME=/u01/app/grid/product/11.2.0.4

export   PATH=$ORACLE_HOME/bin:$ORACLE_HOME/OPatch:$PATH

export   ORACLE_TERM=xterm

export LD_LIBRARY_PATH=$ORACLE_HOME/lib:$ORACLE_HOME/oracm/lib:/lib:/usr/lib:/usr/local/lib:$ORACLE_HOME/lib32
Configure grid user environment variable (two nodes)
vim /home/grid/.bash_profile
export ORACLE_SID=+ASM2
export ORACLE_BASE=/u01/app/grid/base
export ORACLE_HOME=/u01/app/grid/product/11.2.0.4
export PATH=$ORACLE_HOME/bin:$ORACLE_HOME/OPatch:$PATH
export ORACLE_TERM=xterm
export LD_LIBRARY_PATH=$ORACLE_HOME/lib:$ORACLE_HOME/oracm/lib:/lib:/usr/lib:/usr/local/lib:$ORACLE_HOME/lib32
Upload the installation package to the server and extract it (you can upload it to the server through FTP)
P13390677-112040-linux-x86-64-1of7.zip -- database installation package 1 (upload to node 1) upload to / home/oracle directory
P13390677-112040-linux-x86-64-2of7.zip -- database installation package 2 (upload to node 1) upload to / home/oracle directory
P13390677-112040-linux-x86-64-3of7.zip -- grid installation package (upload to node 1) upload to / home/grid directory
Pdksh-5.2.14-1.i386.rpm -- Ksh RPM package (upload to two nodes) can be uploaded to the / root directory
Log in with the grid user and unzip the grid installation package to the grid home directory.
unzip p13390677_112040_Linux-x86-64_3of7.zip
Log in with oracle user and extract the database installation package.
unzip p13390677_112040_Linux-x86-64_1of7.zip
unzip p13390677_112040_Linux-x86-64_2of7.zip
- Install the required software package (two nodes)
yum install binutils* compat-libstdc++-*
elfutils-libelf-* elfutils-libelf-devel-* gcc-* gcc-c++-* glibc-*
glibc-common-* glibc-devel-* glibc-headers-* libaio-* libaio-devel-* libgcc-*
libstdc++-* make-* sysstat-* unixODBC-* compat-libcap1-1.10-1.x86_64  -y


export CVUQDISK_GRP=oinstall

rpm -ivh /home/grid/grid/rpm/cvuqdisk-1.0.9-1.rpm

rpm -ivh pdksh-5.2.14-1.i386.rpm(Two nodes)

### Create VMwa
re shared disk
Administrator rights open CMD
cd C:\Program Files (x86)\VMware\VMware
Workstation>
vmware-vdiskmanager.exe -c -s 1000Mb -a
lsilogic -t 2 D: \ virtual machine image \ dd\ocr.vmdk
vmware-vdiskmanager.exe -c -s 1000Mb -a
lsilogic -t 2 D: \ virtual machine image \ dd\ocr2.vmdk
vmware-vdiskmanager.exe -c -s 1000Mb -a
lsilogic -t 2 D: \ virtual machine image \ dd\votingdisk.vmdk
vmware-vdiskmanager.exe -c -s 20000Mb -a
lsilogic -t 2 D: \ virtual machine image \ dd\data.vmdk
vmware-vdiskmanager.exe -c -s 10000Mb -a
lsilogic -t 2 D: \ virtual machine image \ dd\backup.vmdk
Add new disks on two virtual machines and select independent permanent mode. The control device node of the virtual machine is changed to SCSI 1:n add them by shutting down the machine. The order cannot be wrong: delete the number related to scsi1 in the previous file, and add and modify the vmx configuration file in the directory of RAC1 virtual machine as follows:
scsi1.present = "TRUE"
scsi1.virtualDev = "lsilogic"
scsi1.sharedBus = "virtual"
scsi1:1.present = "TRUE"
scsi1:1.mode = "independent-persistent"
Scsi1:1.filename = "D: \ virtual machine image \ dd\ocr.vmdk"
scsi1:1.deviceType = "plainDisk"
scsi1:2.present = "TRUE"
scsi1:2.mode = "independent-persistent"
Scsi1:2.filename = "D: \ virtual machine image \ dd\votingdisk.vmdk"
scsi1:2.deviceType = "plainDisk"
scsi1:3.present = "TRUE"
scsi1:3.mode = "independent-persistent"
Scsi1:3.filename = "D: \ virtual machine image \ dd\data.vmdk"
scsi1:3.deviceType = "plainDisk"
scsi1:4.present = "TRUE"
scsi1:4.mode = "independent-persistent"
Scsi1:4.filename = "D: \ virtual machine image \ dd\backup.vmdk"
scsi1:4.deviceType = "plainDisk"
scsi1:5.present = "TRUE"
scsi1:5.mode = "independent-persistent"
Scsi1:5.filename = "D: \ virtual machine image \ dd\ocr2.vmdk"
scsi1:5.deviceType = "plainDisk"
disk.locking = "false"
diskLib.dataCacheMaxSize = "0"
diskLib.dataCacheMaxReadAheadSize = "0"
diskLib.DataCacheMinReadAheadSize = "0"
diskLib.dataCachePageSize = "4096"
diskLib.maxUnsyncedWrites = "0"
Modify the vmx profile of RAC2:
scsi1.sharedBus = "virtual"
disk.locking = "false"
diskLib.dataCacheMaxSize = "0"
diskLib.dataCacheMaxReadAheadSize =
"0"
diskLib.DataCacheMinReadAheadSize =
"0"
diskLib.dataCachePageSize =
"4096"
diskLib.maxUnsyncedWrites = "0"
gui.lastPoweredViewMode =
"fullscreen"
checkpoint.vmState = ""
usb:0.present = "TRUE"
usb:0.deviceType = "hid"
usb:0.port = "0"
usb:0.parent = "-1"
Configure udev binding (two nodes)
First look at the shared disk. Log in using the root user.
sdb to sde are four shared disks. Execute the following script on the command line
for i in b c d e f ;

do

echo "KERNEL==\"sd*\",
BUS==\"scsi\", PROGRAM==\"/sbin/scsi_id --whitelisted
--replace-whitespace --device=/dev/\$name\", RESULT==\"`/sbin/scsi_id
--whitelisted --replace-whitespace --device=/dev/sd$i`\", NAME=\"asm-disk$i\",
OWNER=\"grid\", GROUP=\"asmadmin\",
MODE=\"0660\"">>
/etc/udev/rules.d/99-oracle-asmdevices.rules

done
View the binding rule file.
cat /etc/udev/rules.d/99-oracle-asmdevices.rules
Start udev.
start_udev
View the bound ASM disk. ll /dev/asm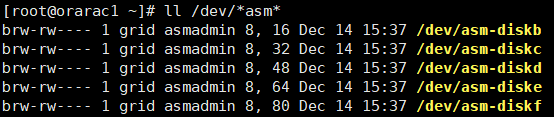
Configure mutual trust with script (one node) (executed by root user)
./sshUserSetup.sh -user grid -hosts "orarac1 orarac2" -advanced -noPromptPassphrase
(script in / home/grid/grid/sshsetup)
./sshUserSetup.sh -user oracle -hosts "orarac1 orarac2" -advanced -noPromptPassphrase (script in / home/oracle/database/sshsetup)
Install Grid Infrastructure (node 1)
Log in using the grid user.
cd /home/grid/grid

./runInstaller
Choose install cluster
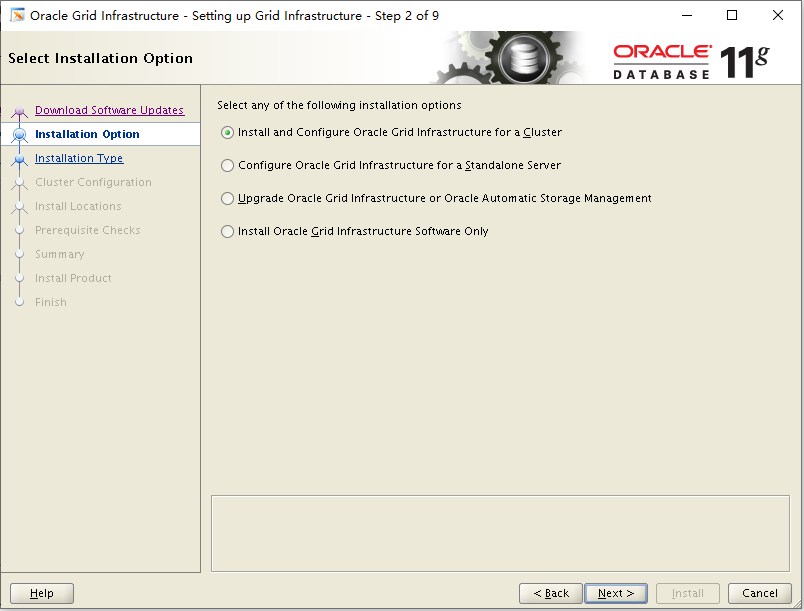
Choose a custom installation
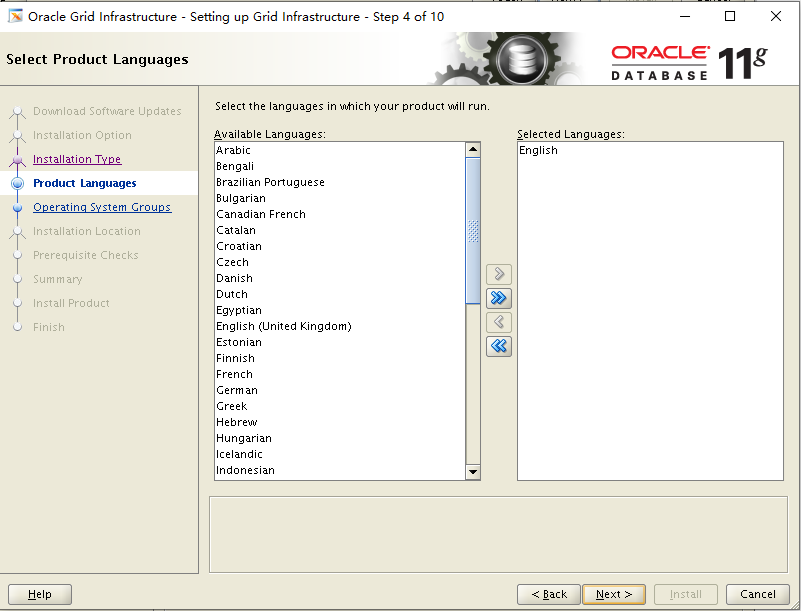
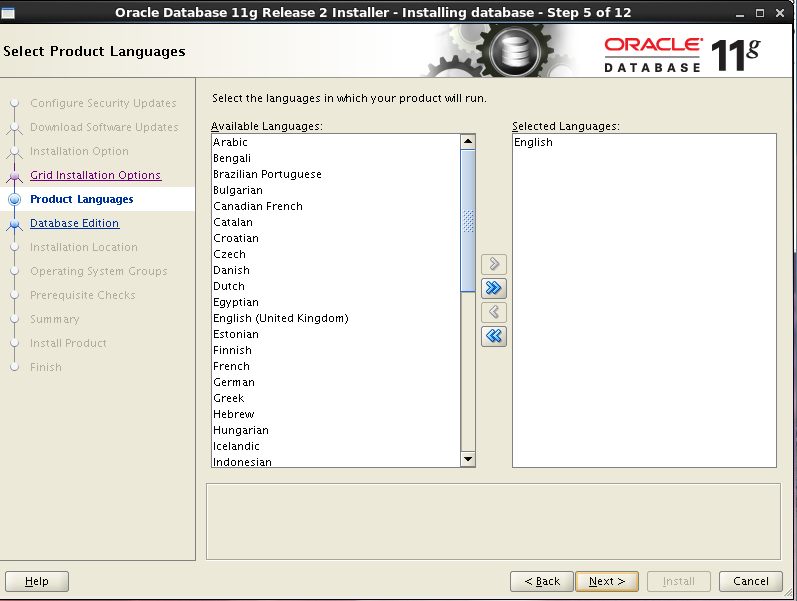
Choose language default English
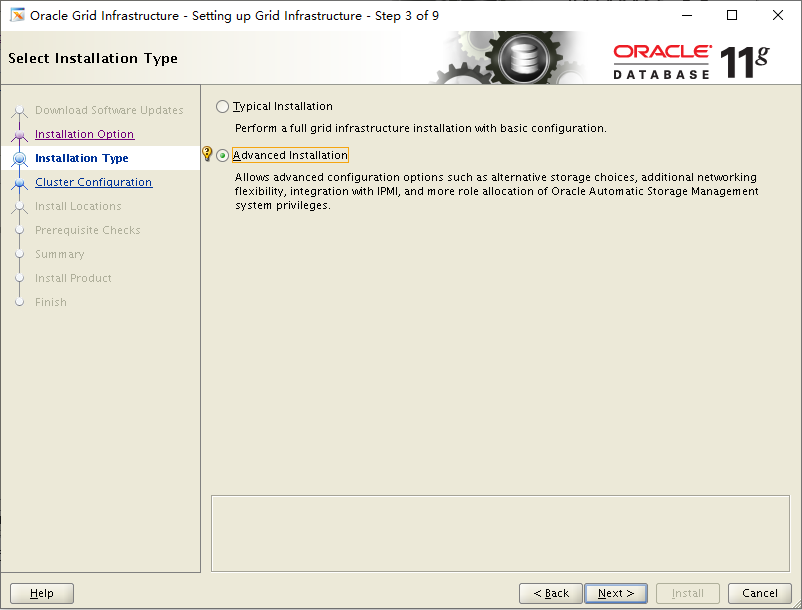
Choose language default English
Define cluster name, SCAN Name is scan IP defined in hosts, cancel GNS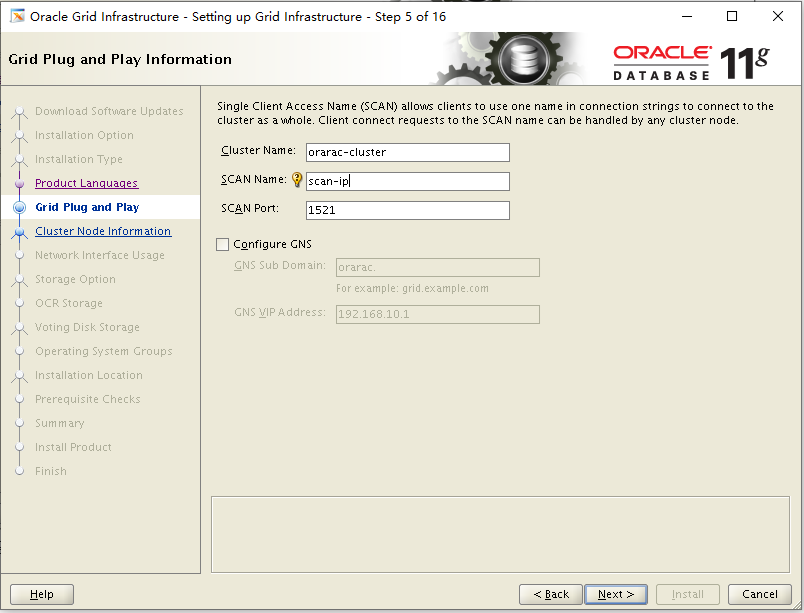
There is only the first node rac1 in the interface. Click "Add" to Add the second node rac2. If you can't find orarac2, look at the hosts and network configuration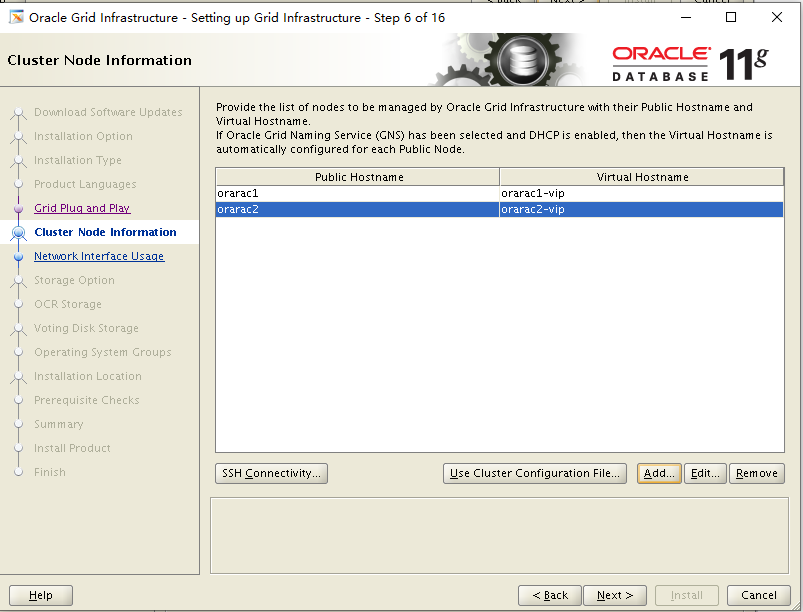 Select NIC
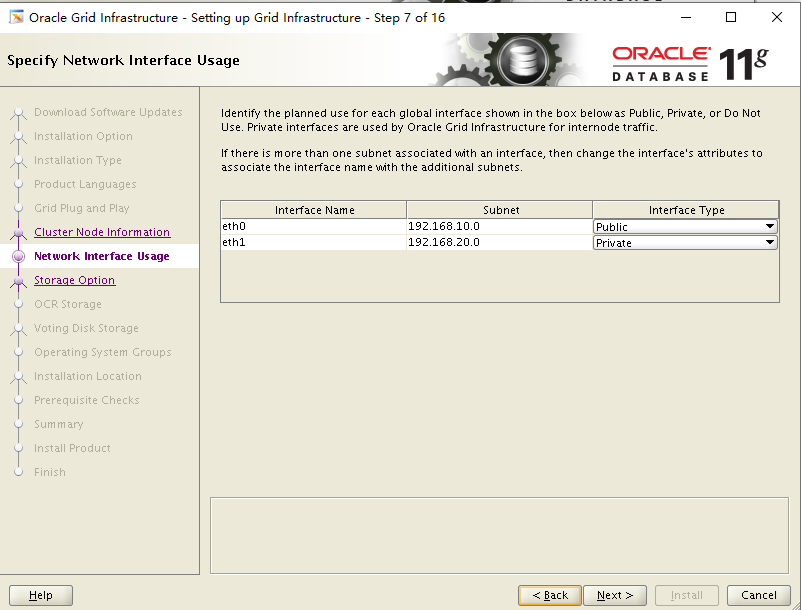
Choose to configure ASM mode sharing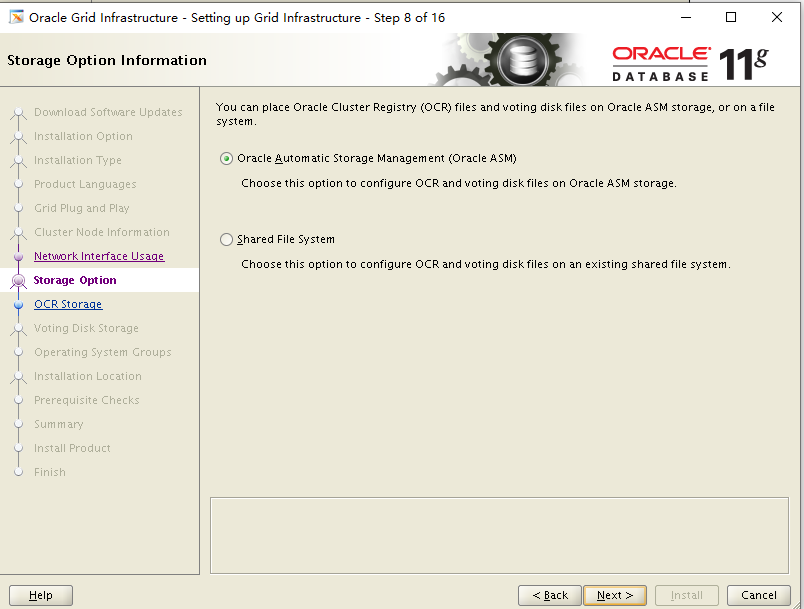
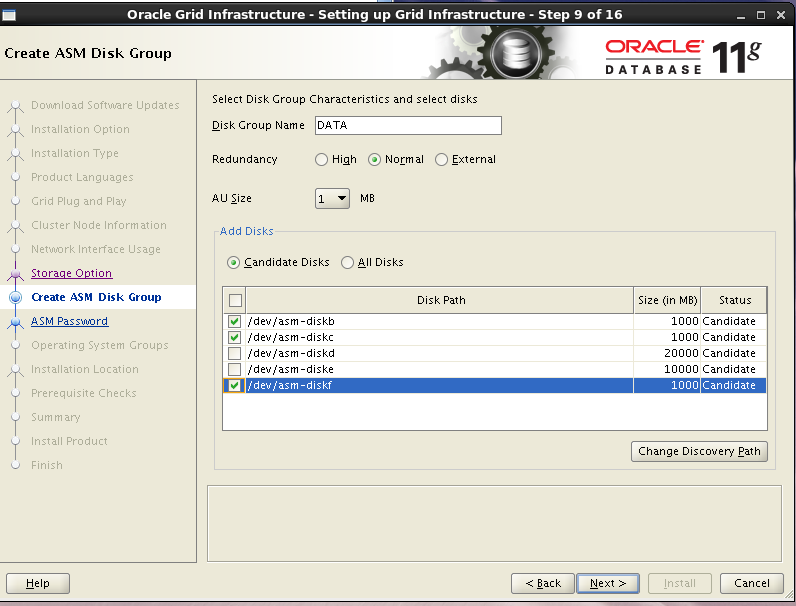
To configure ASM, select External as the redundancy mode of naked disk diskb, dickc and diskf. Because it is not used, you can also select only one device. The device here is used to make OCR registration disk and voting disk.
To configure the ASM instance, you need to set the password for the sys user with sysasm permission and the asmsnmp user with sysdba permission. Here, set the unified password to oracle, and you will be prompted that the password does not meet the standard. Click OK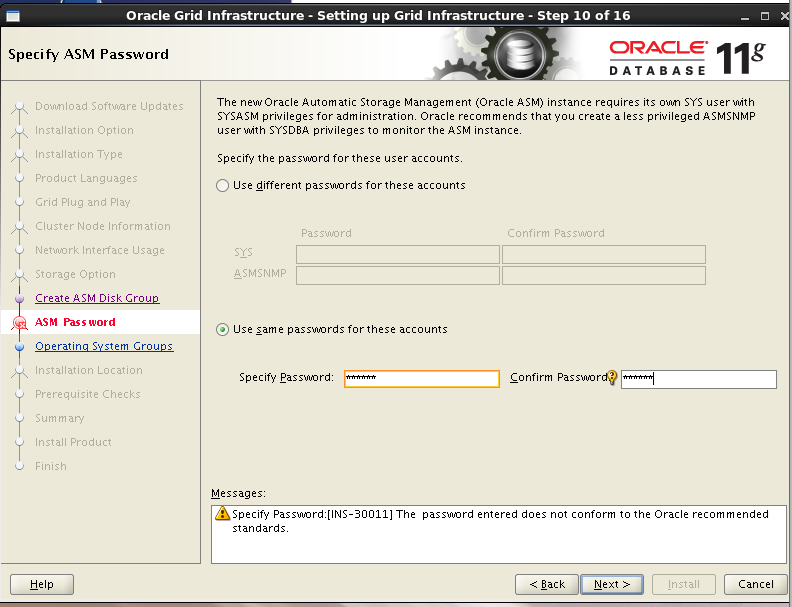
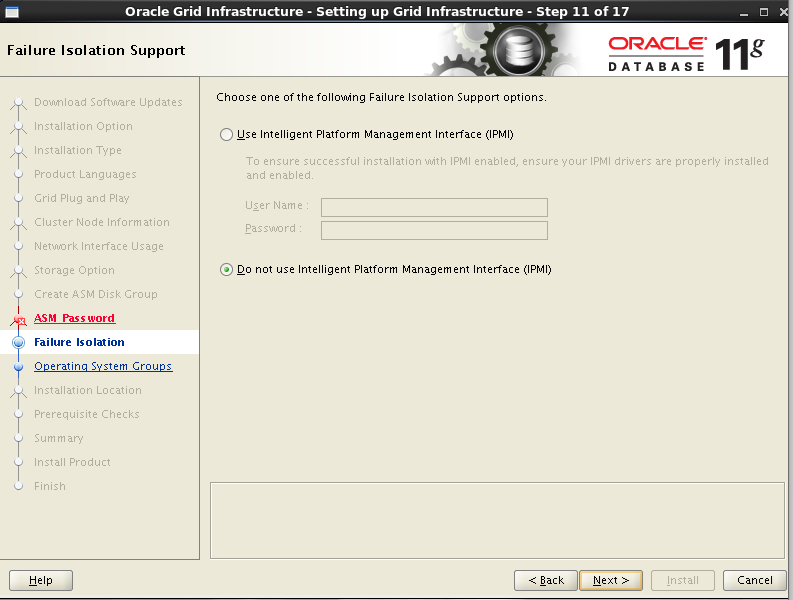
Do not choose intelligent management
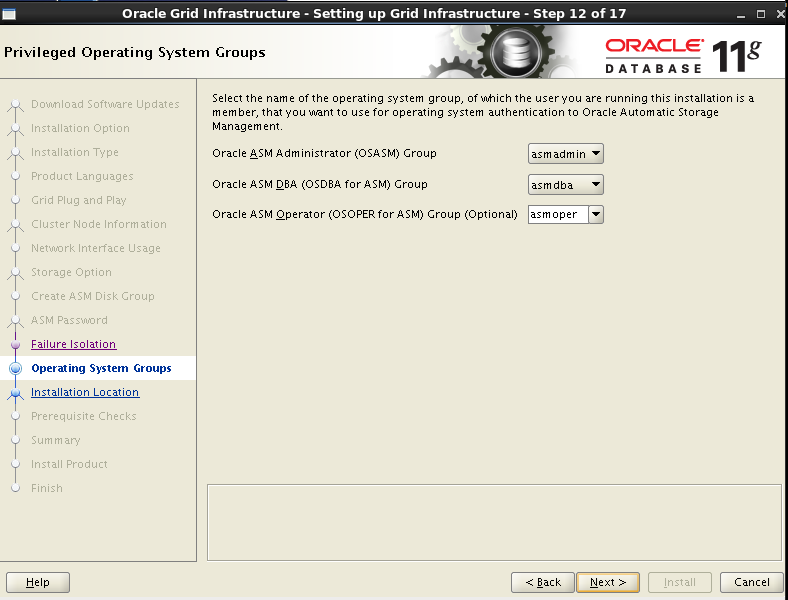
Check ASM instance permission grouping
Select the installation path and base directory of grid software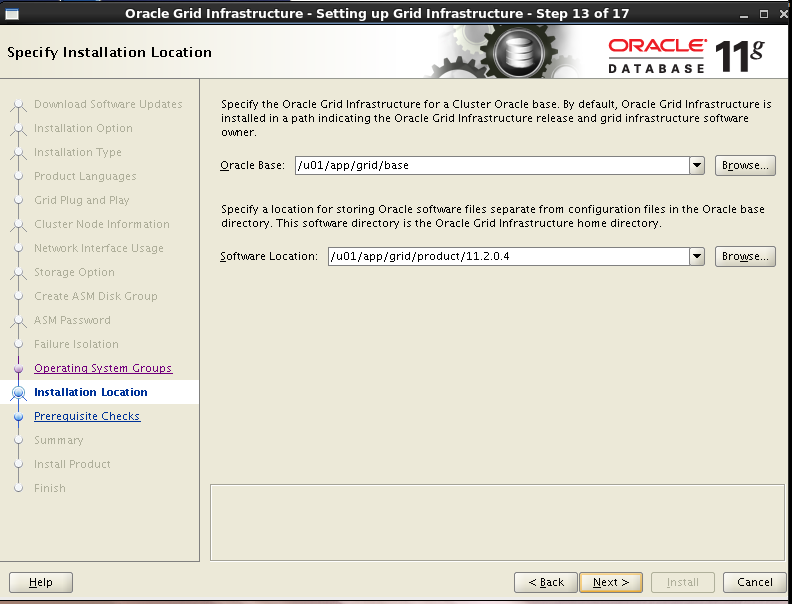
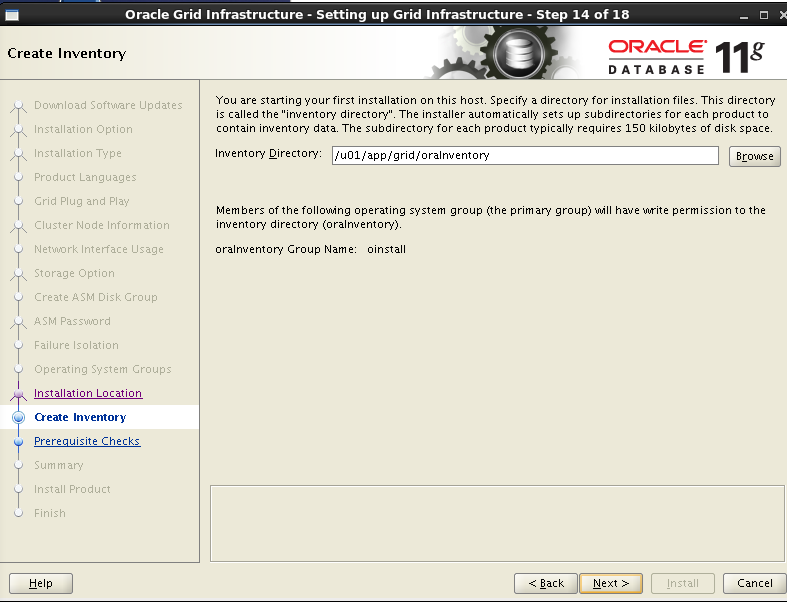
Select the grid installation list directory
Environmental detection
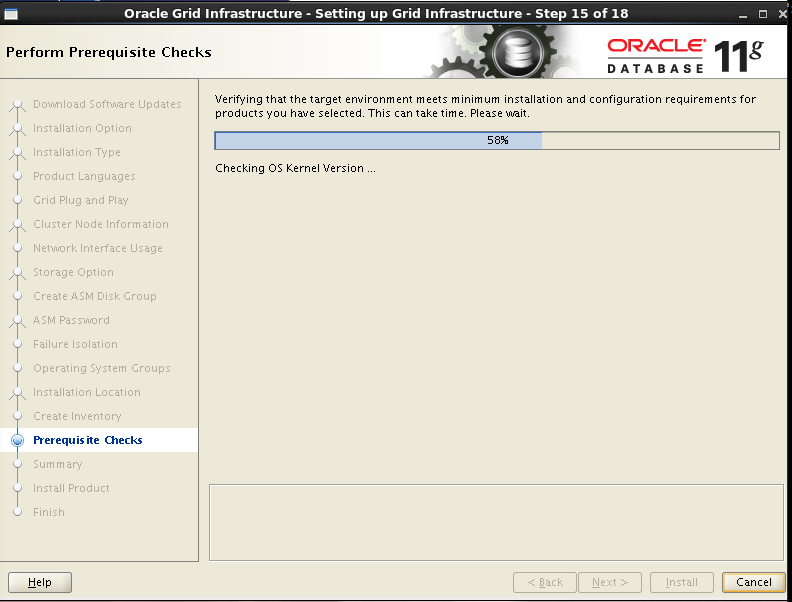
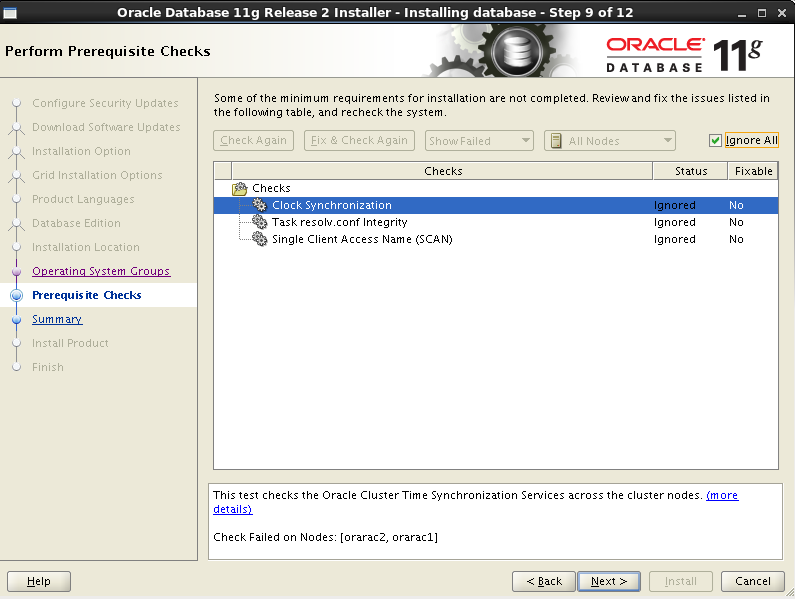
Environment detection has resolv.conf error, because DNS is not configured, it can be ignored, ntp error is because ntp is not configured.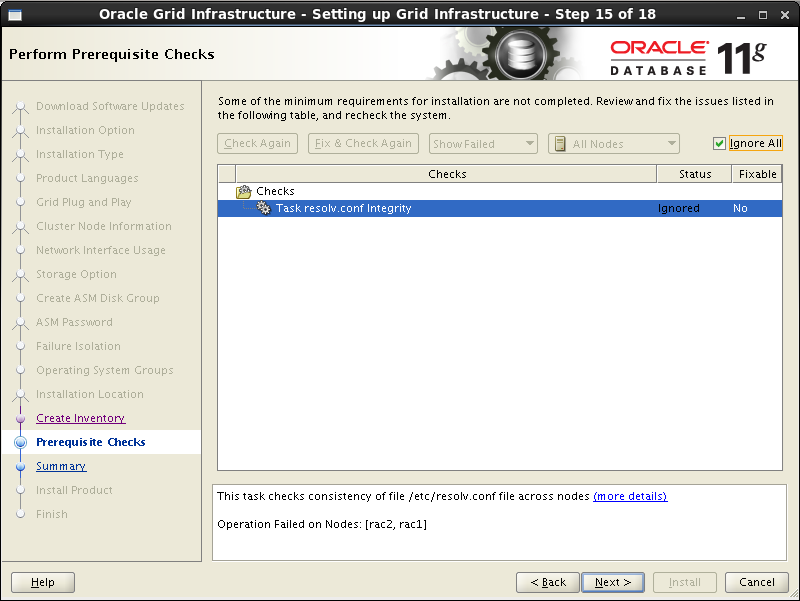
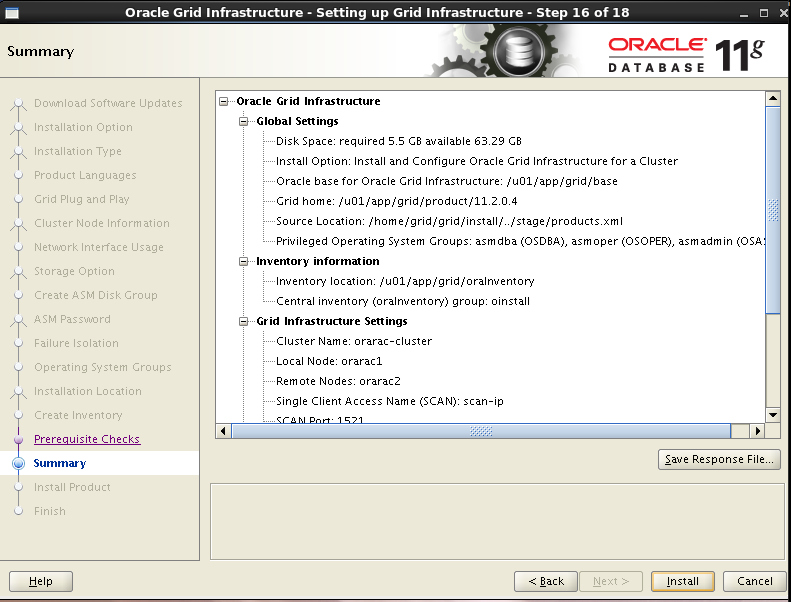
Overview of installing grid
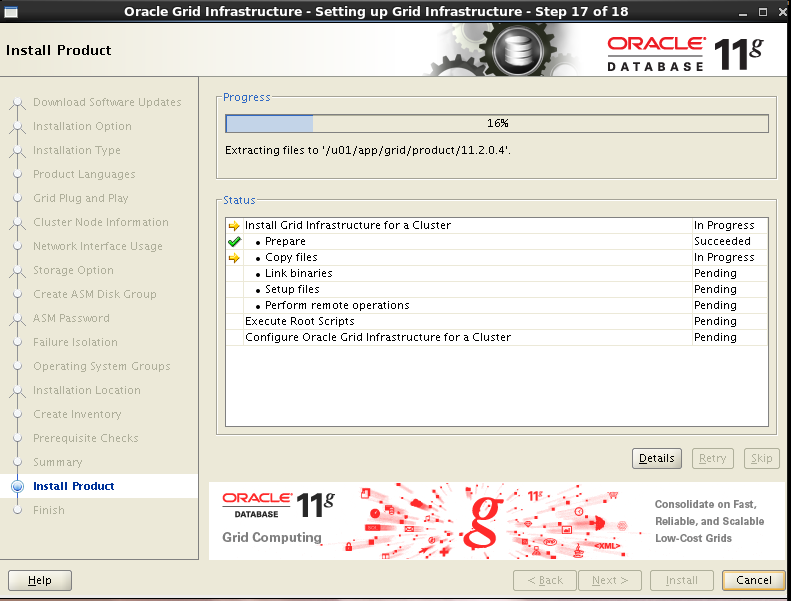
After the grid installation is completed, the root user will be prompted to execute the scripts orainstRoot.sh and root.sh in turn (the script must be executed in rac1 before it can be executed in other nodes). Click ok to install the next step
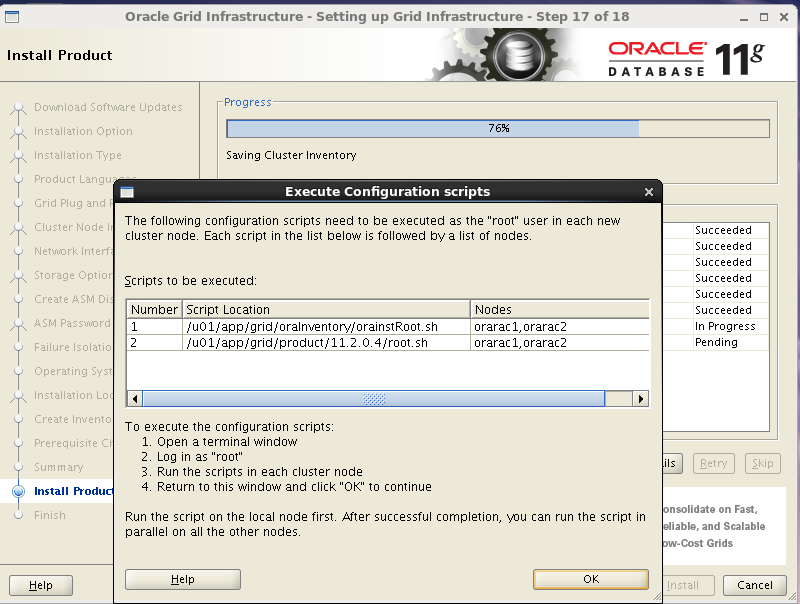
/u01/app/grid/oraInventory/orainstRoot.sh
/u01/app/grid/product/11.2.0.4/root.sh
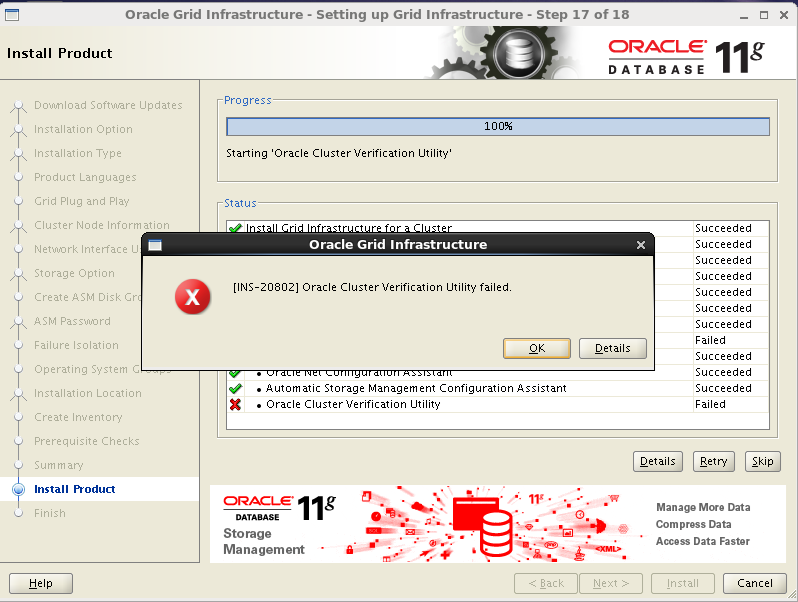
An error appears here because resolution.conf is not configured. You can ignore to click ok and NEXT
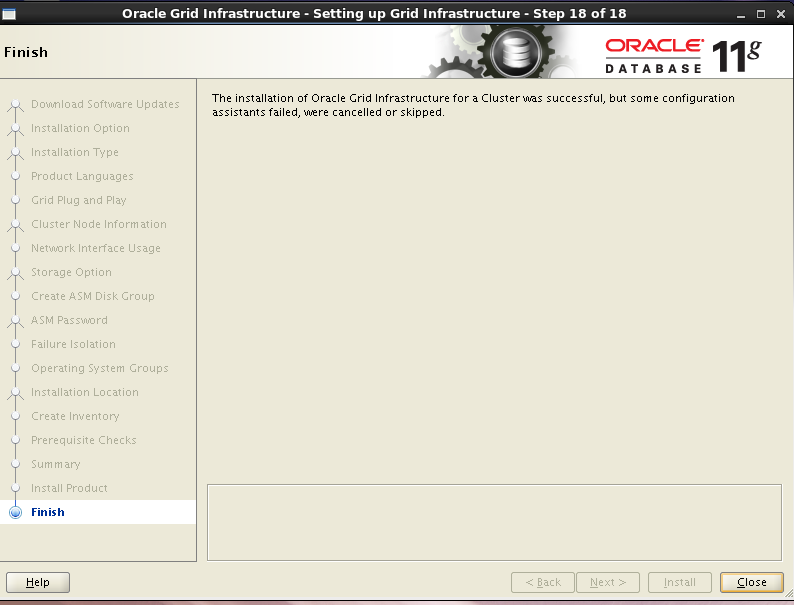
installation is complete
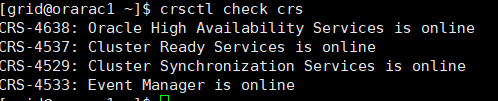
Resource check after grid installation (execute command under grid user)
Check crs status crsctl check crs
Check Clusterware resource CRS? Stat - t - V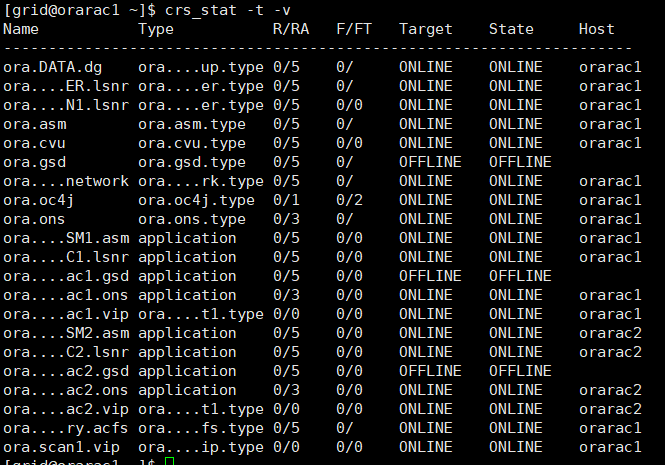
Check the cluster node olsnodes -n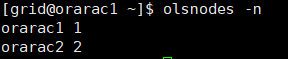
Check Oracle TNS listener processes on both nodes
`ps -ef|grep lsnr|grep -v 'grep'|grep -v 'ocfs'|awk '{print$9}'`
Confirm Oracle ASM capabilities for Oracle Clusterware files:
If the OCR and voting disk files are hidden on the Oracle ASM, as the Grid Infrastructure installation owner, use the following command syntax to confirm that the installed Oracle ASM is currently running
srvctl status asm -a

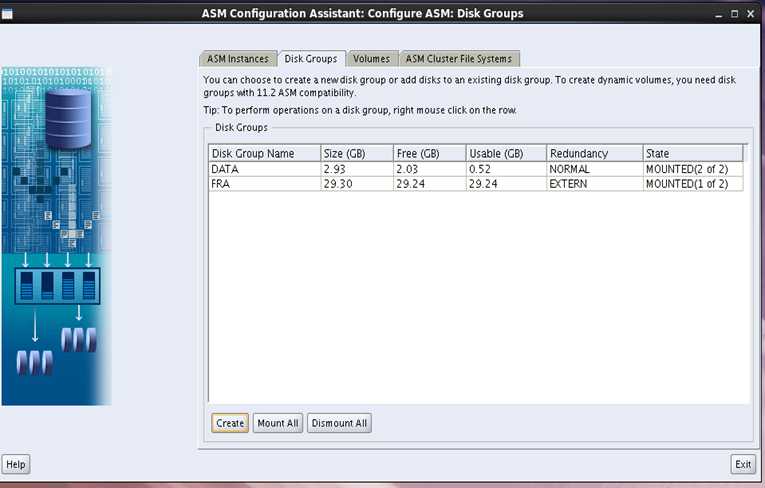
Creating ASM disk groups for data and rapid recovery
Install under the node (grid user)
Install with asmca command
Here we see that the OCR disk configured when installing grid already exists
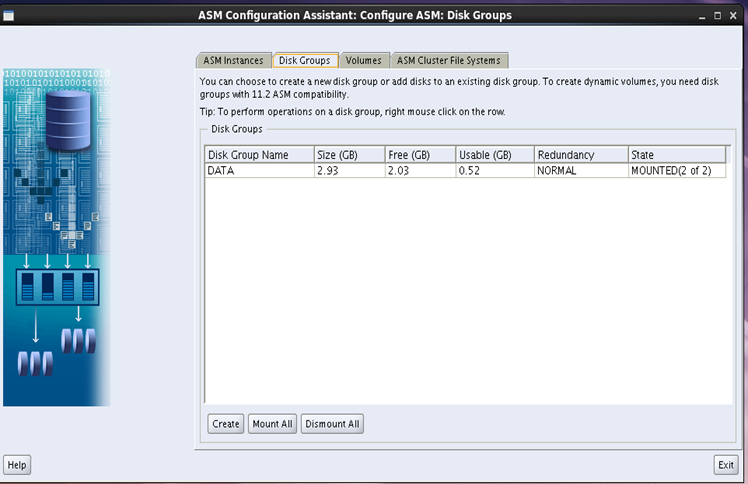
Add FRA disk and use ASM diskd and ASM disk
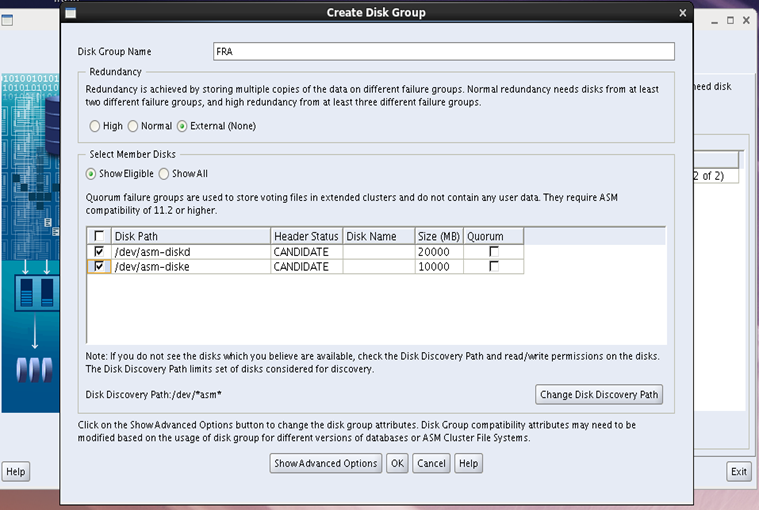
ASM disk group status
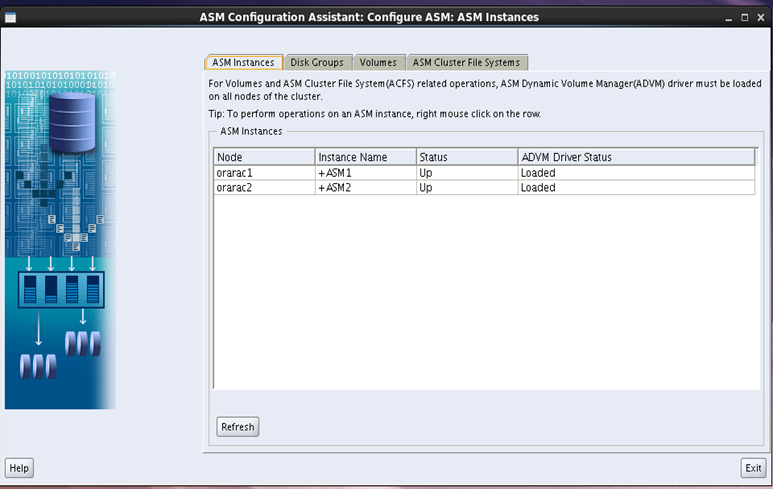
ASM example
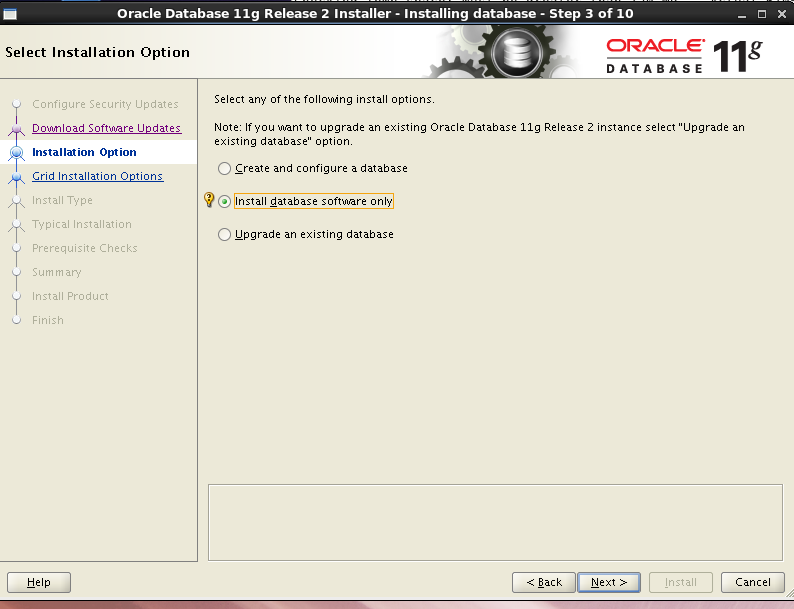
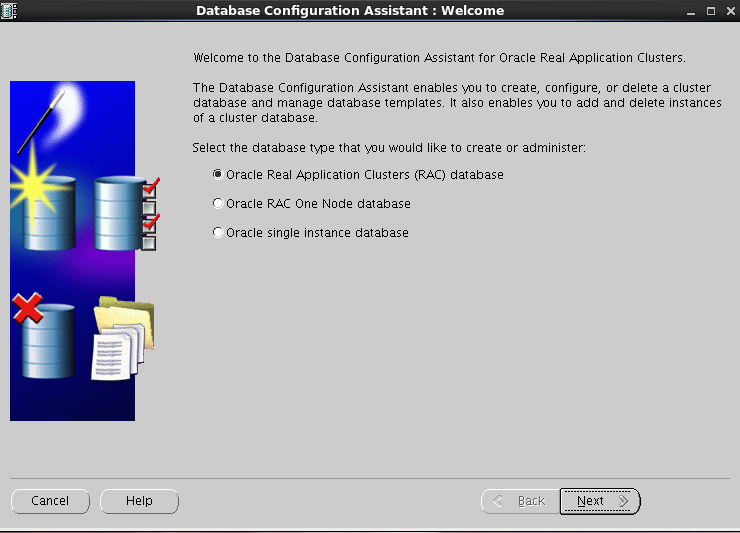
Installing Oracle databaser software (RAC)
Just install on one node (to oracle users)
Choose to install database software only
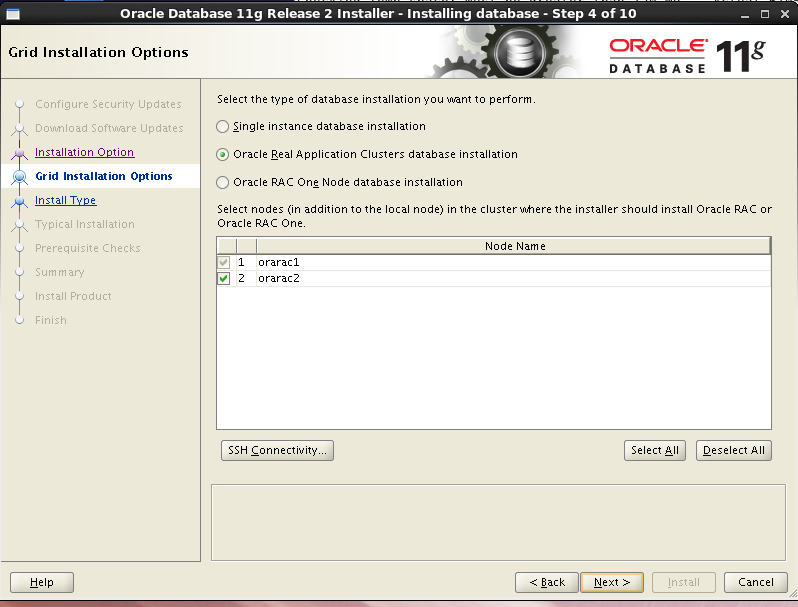
Select the Oracle Real Application Clusters database installation button (default) and make sure all nodes are checked
Choose language English
Choose to install enterprise software

Select the path to install the Oracle Software, and select the previously configured Oracle base and Oracle home

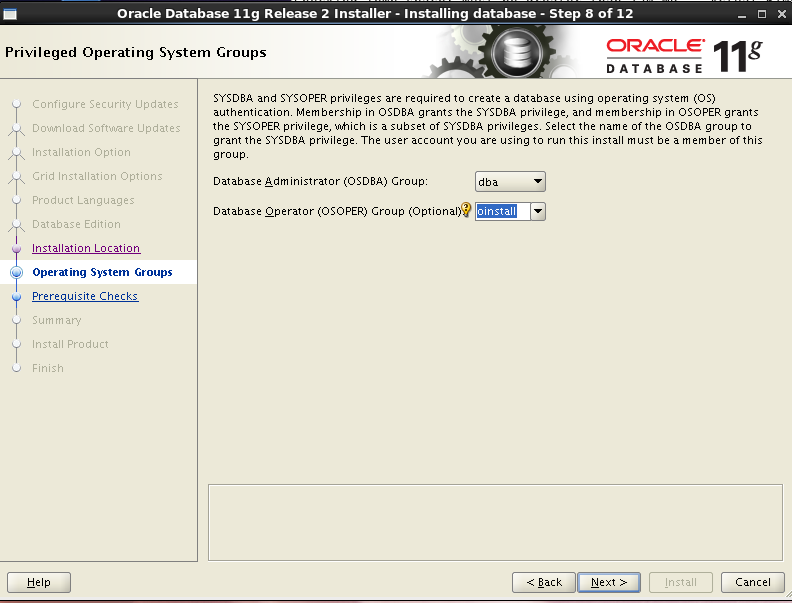
Oracle permissions granted to user groups
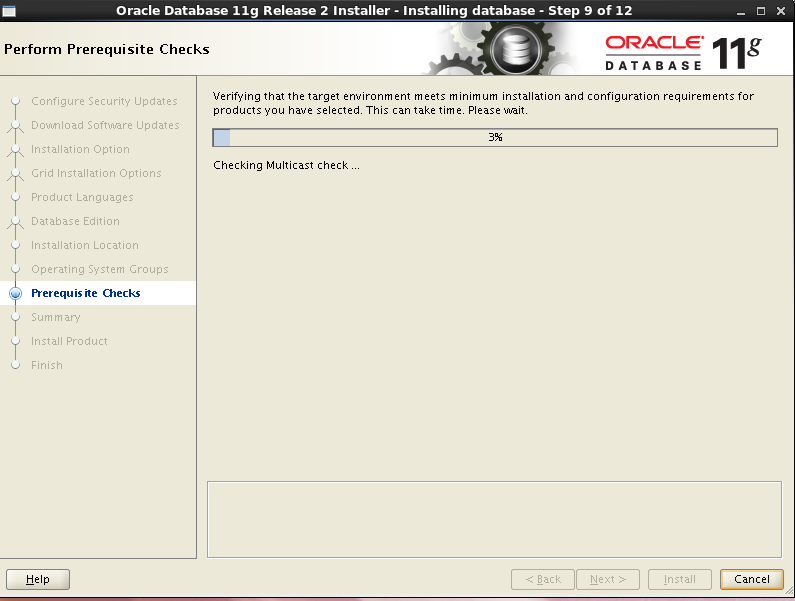
Pre inspection before installation
Select skip error
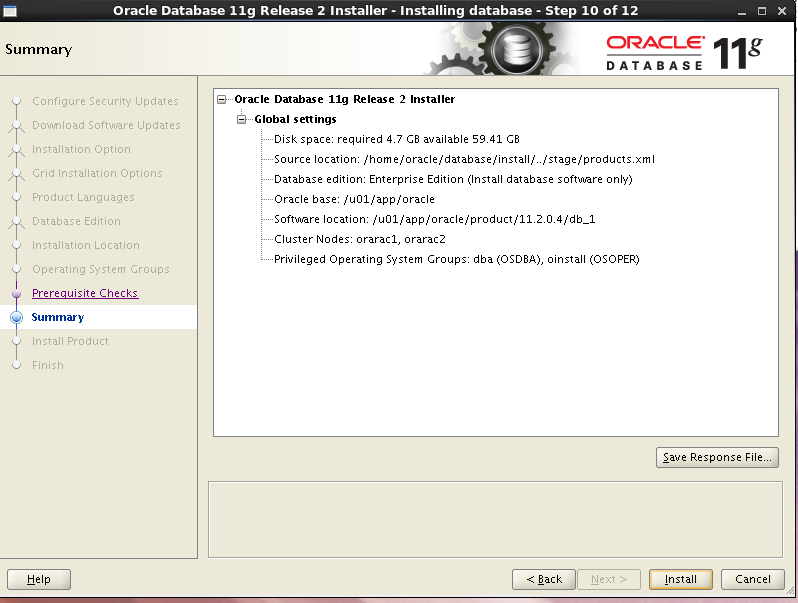
Overview of installing RAC
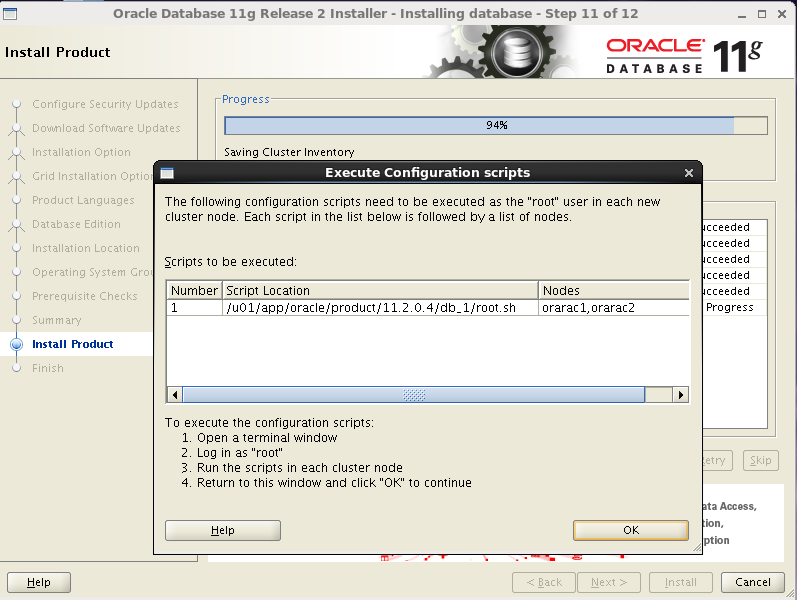
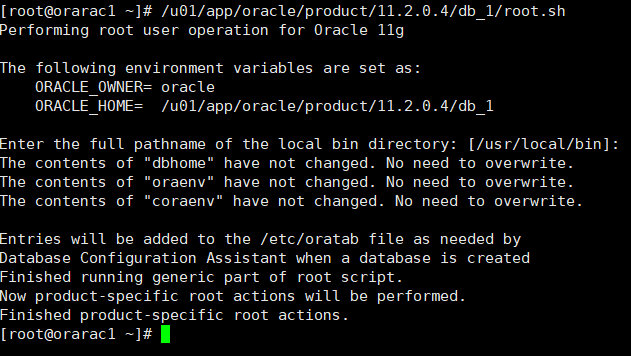
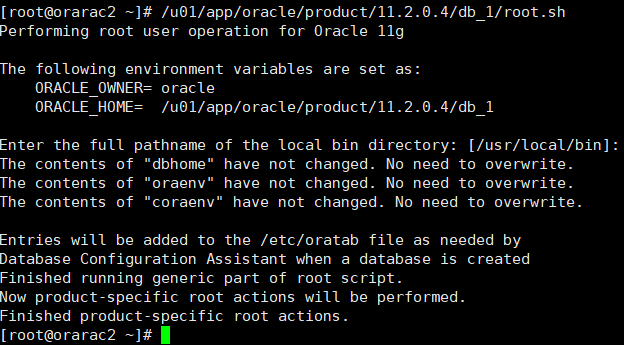
Execute the script under the root user of each node. Click ok after executing the script
Clustered database
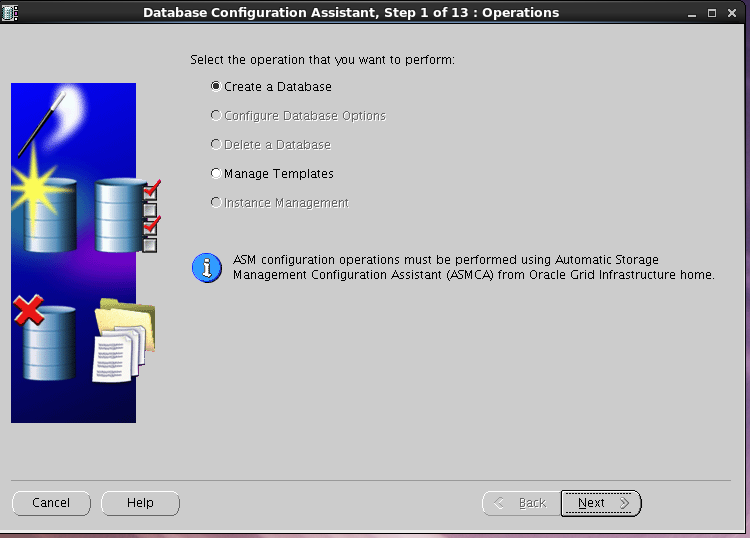
Creating RAC database with dbca executed by oracle user on node 1
Choose to create database
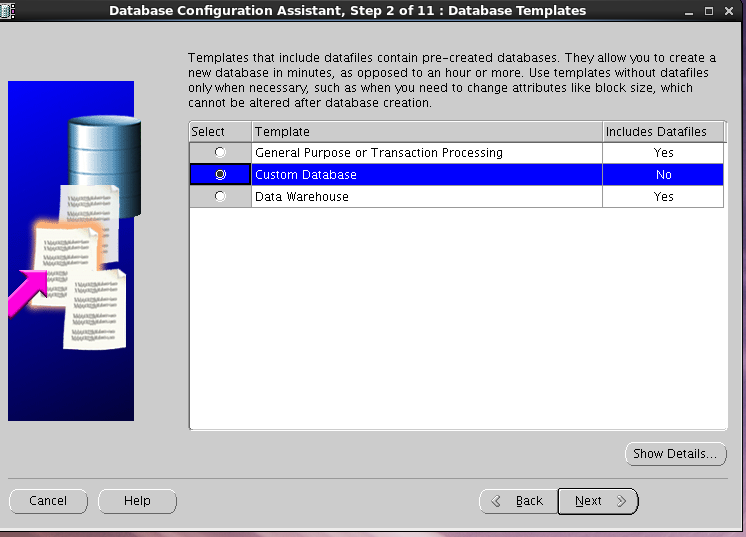
Choose a custom database
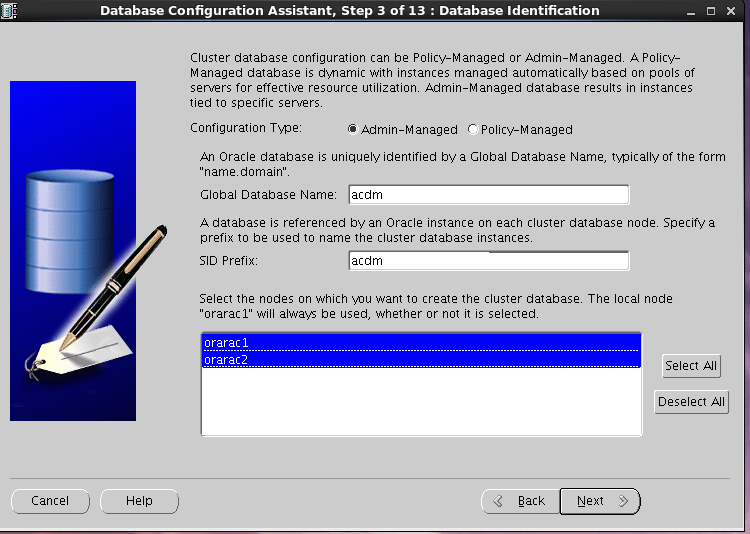
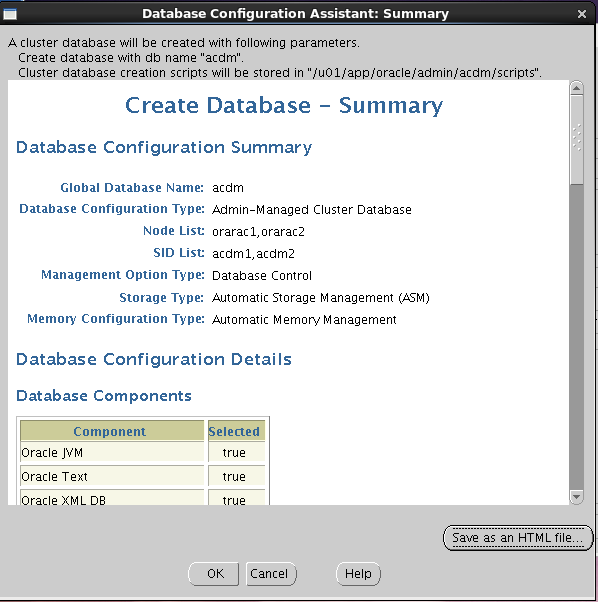
Select admin managed as the configuration type, enter the global database name acdm, SID prefix of each node instance is acdm, and select double nodes
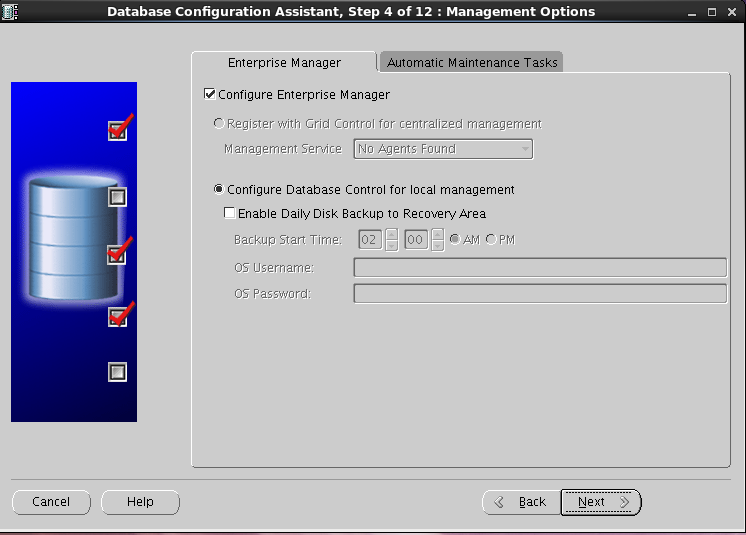
Select default, configure OEM, enable database automatic maintenance task
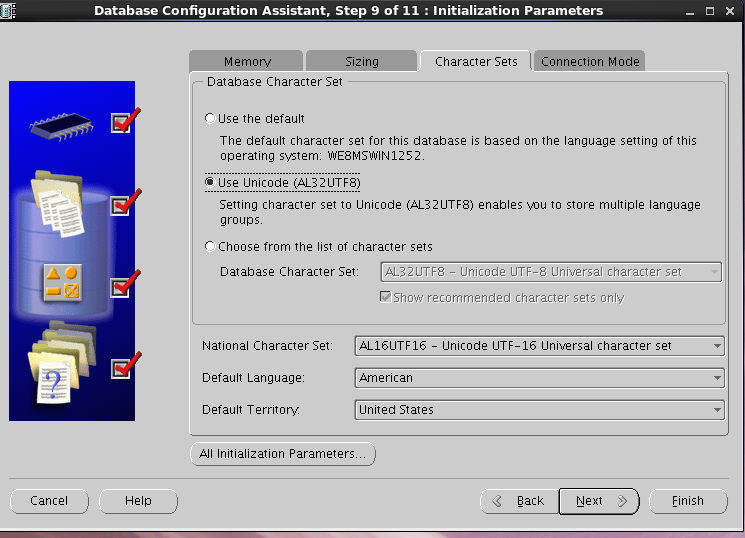
Select character set AL32UTF8
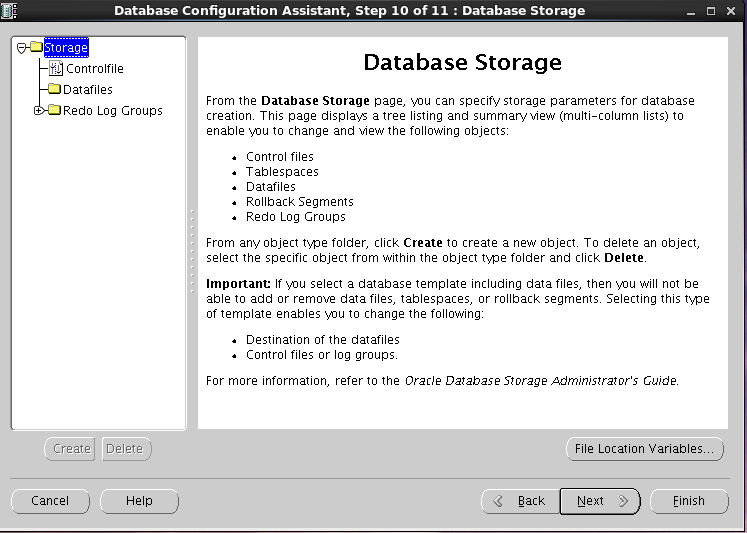
Select the default data store information
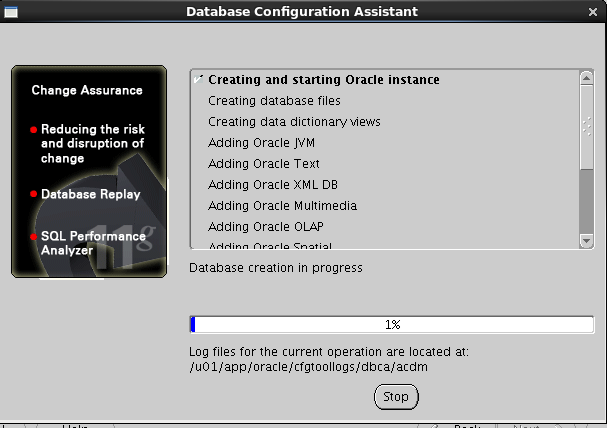
Start to create database, check the script to generate database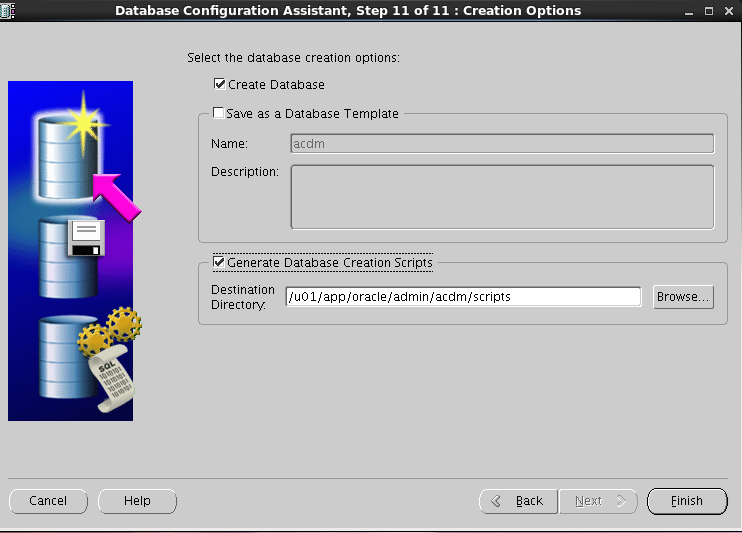
Click ok to start the installation
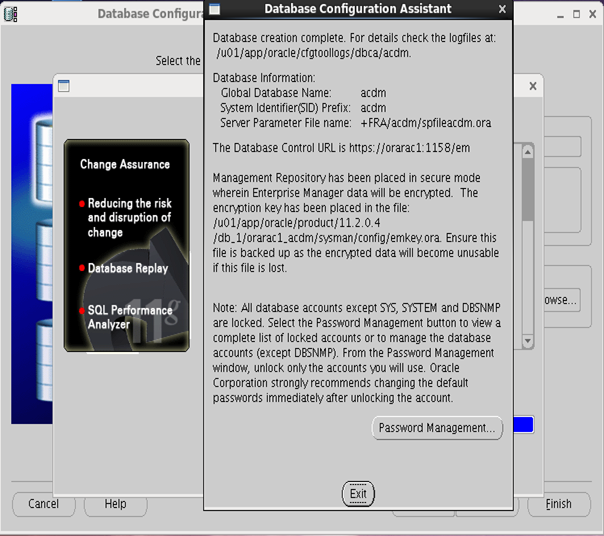
Start to build and install
RAC maintenance
View service status (executed under grid user)
crs_stat -t
Check the running status of the cluster
srvctl status database -d acdm
Check CRS status
Check the CRS status of the local node
crsctl check crs
Check the CRS status of the cluster
crsctl check cluster

-
View the node configuration information in the cluster
olsnodes

olsnodes -n

olsnodes -n -i -s -t

View the voting disk information of the cluster
crsctl query css votedisk

View cluster SCAN VIP information
srvctl config scan
View cluster SCAN Listener information
srvctl config scan_listener


