Linux
Walking into Linux system
Generally speaking, there are three ways for users to log in
Command login
ssh login
Graphical interface login
The highest authority account is root, which can operate for everything!
Shut down
Shutdown command
shutdowm
sync	Synchronize data from memory to hard disk
shutdown Shutdown command, you can man shutdown Take a look at the help documentation
shutdown -h -10 This command everyone, the computer will shut down in 10 minutes
shutdown -h now Turn it off immediately
shutdown -h 20:25 The system will be 20 today:25 Shut down
shutdown -h +10 Shut down in ten minutes
shutdown -r now The system restarts immediately
shutdown -r +10 The system will restart in ten minutes
reboot Is to restart, which is equivalent to shutdown -r now
halt Shut down the system, equivalent to shutdown -h now and poweroff
The following table of contents explains
System startup must:
/bin: Store binary executable(ls,cat,mkdir etc.),Common commands are usually here.
/etc: Store system management and configuration files(-------------------)
/home: The root directory where all user files are stored is the base point of the user's home directory, such as the user user Your home directory is/home/user,Can use~user express(---------------)

/usr: It is an important directory for storing system applications/usr/local Local system administrator software installation directory (install system level applications). This is the largest directory. Almost all the applications and files to be used are in this directory.(------------------)
/usr/x11r6 deposit x window Directory of
/usr/bin Numerous applications
/usr/sbin Some hypervisors for super users
/usr/doc linux file
/usr/include linux The header file required to develop and compile the application
/usr/lib Configuration files of commonly used dynamic link libraries and software packages
/usr/man Help documentation
/usr/src Source code, linux The source code of the kernel is placed in/usr/src/linux in
/usr/local/bin Locally added commands
/usr/local/lib Locally added Libraries

/opt: Where additional installed optional application packages are placed. In general, we can tomcat And so on.
/proc: Virtual file system directory is the mapping of system memory. You can directly access this directory to obtain system information.(-----------)
/root: Home directory (privilege class) of super user (system administrator)^o^)
/sbin: Store binary executable files, only root Can be accessed. Here are the system level management commands and programs used by the system administrator. For example ifconfig Wait.(-------)
/dev: Used to store equipment files.
/mnt: The system administrator installs the mount point of the temporary file system. The system provides this directory for users to temporarily mount other file systems.
/boot: Store various files used for system boot
/lib: It stores the shared libraries and kernel modules required for the operation of programs in the file system. The shared library is also called dynamic link shared library, which has a similar function windows Inside.dll File, which stores the shared files required for the operation of the root file system program.
/tmp: It is used to store various temporary files. It is a public temporary file storage point.(-------------------)
/var: Files used to store data that needs to be changed during operation are also overflow areas of some large files, such as log files of various services (system startup logs, etc.).(------)
/lost+found: This directory is usually empty. The system shuts down abnormally and leaves "homeless" files( windows What's your name.chk)Right here

/www:Store server content
Common basic commands
Directory management
Absolute path, relative path
Absolute path
Full path name: D:\Postman
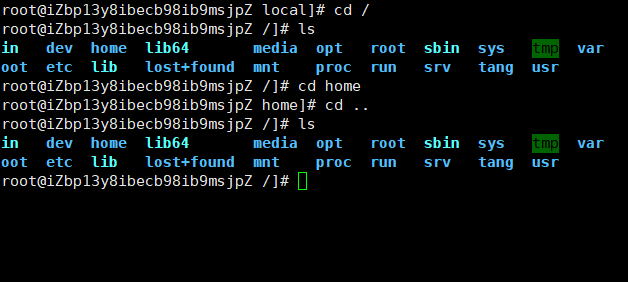
cd: Switch directory

./:current directory

cd..Return to the previous directory
Relative path
Commands are often used in Linux
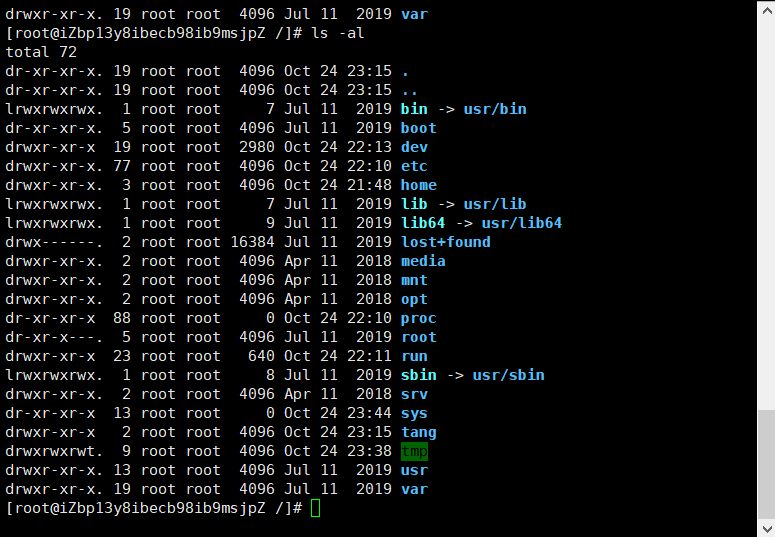
cd..Return to the previous directory
ls List directory
clear clear
-a Parameters: all,View all files, including hidden files
-l Parameters: list all files, including file attributes and permissions, and no hidden files
cd /catalogue/Directory absolute path jump
cd~Return to current directory
 All Linux Can be combined! ls -al
cd Command switch directory
cd directory name (absolute paths start with /, relative paths, how to find the current directory... /... /)
Show current directory
pwd Show current directory
create folder
mkdir create folder
mkdir -p test2/test3/test4 Recursive creation
Remove Folder
rmdir -p The file name can only delete files whose folder is empty
rmdir -p test2/test3/test4 Recursive deletion
Copy file
cp(Copy files or directories)
cp Original place new place
cp To which file is the file name copied
rm command
Remove files or directories
-f Ignore nonexistent files, no warnings, and force deletion
-r Recursively delete directory
-i Interactive, delete, ask whether to delete
rm-rf / #All the files in the system have been deleted
mv move files
mv -f Forced movement
-u Value replaces the updated file
mv kaung1 kuang2: rename
 mv kaung1 admin/: move
Basic properties
Ten letters
cd /Return to home directory
ls -ll see

In the example, boot The first attribute of the file is d Indicates in Linux Indicates a directory file

First letter

should be[d]Is the directory     Commonly used

should be[-]Is a file       Commonly used

should be[|]Is a linked document

should be[b]It means the interface device that can provide storage in the file(Random access device)

should be[c]It represents the serial port device in the device file, such as keyboard and mouse

Nine letters

[rwx]	r Represent readable w Representative writable x Representative executable

[rwx] Master permission 1 2 3

[r-x] Group permissions 4 5 6		Readable but not writable

[r-x]Other user permissions 7 8 9 can't be read or written

Section 1, 4 and 7 represent r read

  2 3 8 express w write

  3 6 9 express x If used x Indicates that you have execution permission
Modify file properties
chgrp: change file properties
charp -R Group name file name
-R recursively changes the file group, that is, when a file directory is a group, if the - R parameter is added, all the file groups under the directory will change
chmod changes 9 attributes of the file
chmod -R xyz File directory
Linu There are two methods to set file attributes, one is number, the other is symbol
Linux There are nine basic permissions for files, namely owner/group/others Each of the three identities has its own authority read/write/execute jurisdiction

Number represented by permission
r: 4 	w: 2 	x: 1
 Read write not execute rw-  6
 Readable, writable, non executable rwx 7
chomd 777 Folders give all users read, write, and execute

[root@iZbp13y8ibecb98ib9msjpZ home]# ls -ll
total 4
drwx------ 4 admin admin 4096 Oct 25 00:30 admin
[root@iZbp13y8ibecb98ib9msjpZ home]# chmod 777 admin
[root@iZbp13y8ibecb98ib9msjpZ home]# ls -ll
total 4
drwxrwxrwx 4 admin admin 4096 Oct 25 00:30 admin
[root@iZbp13y8ibecb98ib9msjpZ home]# chmod 700 admin
[root@iZbp13y8ibecb98ib9msjpZ home]# ls ll
ls: cannot access ll: No such file or directory
[root@iZbp13y8ibecb98ib9msjpZ home]# ls -ll
total 4
drwx------ 4 admin admin 4096 Oct 25 00:30 admin
File view content
(? Find up / find down n continue to find next n up)
In Linux system, use the following command to view the contents of the file
-
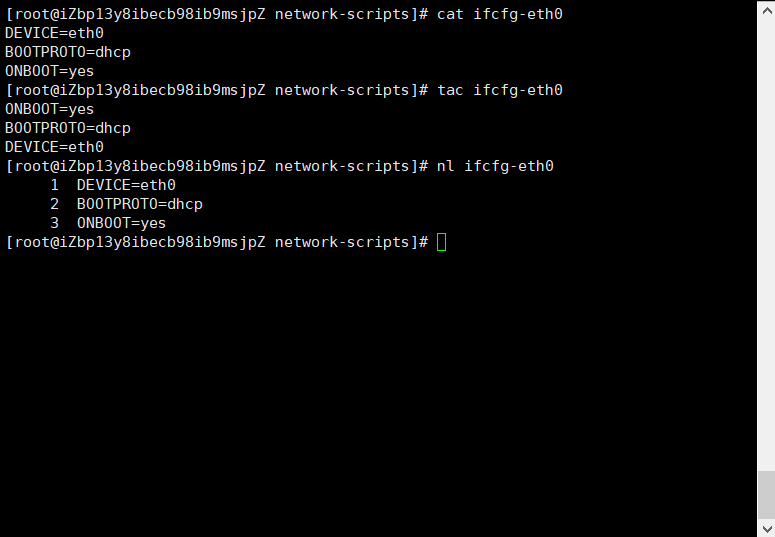
cat displays the contents of the file from the first line (read the article)
-
tac is displayed from the last line. It can be seen that tac is written upside down by cat
-
When nl is displayed, the line number is output by the way! When looking at the code, I want to display the line number
- more displays the contents of the file page by page. The blank indicates turning the page. enter represents looking down on a line: f line number

-
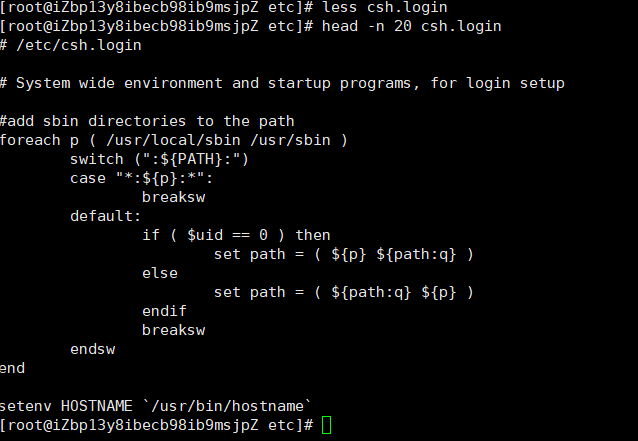
less is similar to more, but better than more, it can page forward and q exit the command
-
head just look at the first few lines
- Tell, just look at the tail
You can use the man command to open and view various command documents, such as man cp
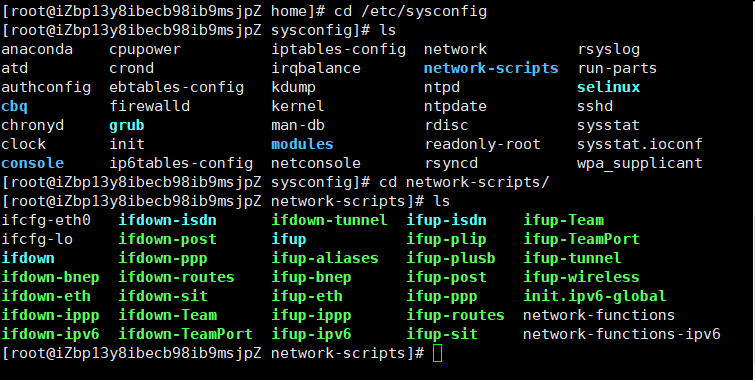
Network configuration directory: CD / etc / sysconfig / network scripts
ping www.baidu.com
ctrl+z end ping
ifconfig view network configuration
Expand: the concept of Linux link (just understand!)
Linux links are divided into two types: hard links and soft links!
Hard link: A – B: suppose B is the hard link of A, then the two cartons are the same file! Multiple paths are allowed for A file. Users can establish hard links to some important files through these mechanisms to prevent accidental deletion!
Soft link: Shortcut (similar to win shortcut). You can't access the shortcut key of the source file after deleting it
Create link ln command
The touch command creates a file
echo input string
 touch f1 create a file f1
 ln f1 f2 Create a hard link f2
 ln -s f1 f2 f3 Create a soft link(String link)f3
 echo "i love kuang" >> f1 to f1 Write string
[root@iZbp13y8ibecb98ib9msjpZ ~]# touch f1
[root@iZbp13y8ibecb98ib9msjpZ ~]# ls
f1
[root@iZbp13y8ibecb98ib9msjpZ ~]# ln f1 f2
[root@iZbp13y8ibecb98ib9msjpZ ~]# ls
f1  f2
[root@iZbp13y8ibecb98ib9msjpZ ~]# ln -s f1 f2 f3
ln: target 'f3' is not a directory
[root@iZbp13y8ibecb98ib9msjpZ ~]# ln -s f1 f3
[root@iZbp13y8ibecb98ib9msjpZ ~]# ls
f1  f2  f3
[root@iZbp13y8ibecb98ib9msjpZ ~]# echo "i love kuang" >> f1
[root@iZbp13y8ibecb98ib9msjpZ ~]# ll
total 8
-rw-r--r-- 2 root root 13 Oct 25 14:21 f1
-rw-r--r-- 2 root root 13 Oct 25 14:21 f2
lrwxrwxrwx 1 root root  2 Oct 25 14:19 f3 -> f1
[root@iZbp13y8ibecb98ib9msjpZ ~]# cat f1
i love kuang
[root@iZbp13y8ibecb98ib9msjpZ ~]# cat f3
i love kuang
[root@iZbp13y8ibecb98ib9msjpZ ~]# cat f2
i love kuang
Vim editor
vi vim upgrade
Vim is a text editor developed by vi. Code completion, compilation error jump and other convenience, programming is particularly convenient. Widely used by programmers. Especially Linux
vim three modes
vim -
Command mode
As soon as the user starts vi/vim, he enters command mode
In this state, keystrokes are recognized by Vim as commands rather than strings. For example, if we press, we will not enter a string, which is regarded as a command
-
i switch to input mode to input characters

-
x deletes the character at the current cursor
-
: switch to the bottom line command mode to enter the command in the lowest line. If the editing mode is selected, you need to exit the editing mode first! ESC
In input mode, the following keys can be used
- ENTER, ENTER, line feed
- BACK SPACE, backspace key to delete the previous character of the cursor
- DEL, delete key, delete the next character after the cursor
- Direction keys to move the cursor in the text
- HOME/END moves to the beginning / end of the line
- Page Up/Page Down: page up / down
- Insert: switch the cursor to the input / replace mode, and the cursor will become a vertical line / underline
- ESC exits the input mode and switches the command line
last line node
Input:
Enter wq in baseline mode
q exit program
w save file
Note: when vim a file exists, it means that the edited file does not exist. This is a new file
process
Create or edit a file, press i to enter the editing mode, write the content, exit the editing mode after writing, esc, exit and enter the bottom line command mode: wq save exit
| Method of moving cursor | |
|---|---|
| h or left arrow key (←) | Move the cursor one character to the left |
| j or down arrow key (↓) | Move the cursor down one character |
| k or up arrow key (↑) | Move the cursor up one character |
| l or right arrow key (→) | Move the cursor one character to the right |
| [Ctrl] + [f] | The screen "down" moves one page, which is equivalent to the [Page Down] key (common) |
| [Ctrl] + [b] | The screen "up" moves one page, which is equivalent to the [Page Up] key (common) |
| [Ctrl] + [d] | The screen "moves down" by half a page |
| [Ctrl] + [u] | The screen "up" moves half a page |
| + | The cursor moves to the next line that is not a space character |
| - | Move the cursor to the previous line of the non whitespace character |
| Number < space > (= important =) | That n means "number", for example, 20. Press the number and then the space bar, and the cursor will move n characters of this line to the right. |
| 0 or function key [Home] | This is the number "0": move to the first character of this line (commonly used) |
| $or function key [End] | Move to the last character of this line (common) |
| H | Move the cursor to the first character of the top line of the screen |
| M | Move the cursor to the first character of the line in the center of the screen |
| L | Move the cursor to the first character of the bottom line of the screen |
| G | Move to the last line of this file (common) |
| nG | N is a number. Move to line n of this file. For example, 20G will be moved to the 20th line of the file (can cooperate with: set nu) |
| gg | Move to the first line of this file, which is equivalent to 1G! (common) |
| Number enter > (= important =) | N is a number. Move the cursor down n lines (common) |
| Search replace | |
|---|---|
| /Word (important) | Look under the cursor for a string named word. For example, to search for the string vbird in the file, enter / vbird! |
| ?word | Look over the cursor for a string named word. |
| N (important) | This n is an English button. Represents the action of repeating the previous search. For example, if we just executed / vbird to search down the string vbird, then pressing n will continue to search down the next string named vbird. If yes? Vbird, press n to continue searching for the string named vbird! |
| N (important) | This n is an English key. Contrary to N, the previous search action is performed for "reverse". For example, after / vbird, pressing n means "up" to search vbird. |
| Delete, copy and paste | |
|---|---|
| x, X | In a line of words, X is to delete a character backward (equivalent to [del] key), and X is to delete a character forward (equivalent to [backspace], i.e. backspace key) (common) |
| nx | N is a number, and n characters are deleted successively. For example, I want to delete 10 consecutive characters, "10x". |
| dd | Delete the entire row where the cursor is located (common) |
| ndd | n is a number. Delete the downward n line where the cursor is located. For example, 20dd deletes 20 lines (common) |
| d1G | Delete all data from the cursor to the first row |
| dG | Delete all data from the cursor to the last line |
| d$ | Delete the cursor to the last character of the line |
| d0 | That is number 0. Delete cursor to first character of the line |
| yy | Copy the row where the cursor is located (common) |
| nyy | N is a number. Copy the down n lines where the cursor is located. For example, 20yy copies 20 lines (common) |
| y1G | Copy all data from the row where the cursor is located to the first row |
| yG | Copy all data from the row where the cursor is located to the last row |
| y0 | Copy the character of the cursor to all data at the beginning of the line |
| y$ | Copy the character of the cursor to all data at the end of the line |
| p, P | P is to paste the copied data on the next line under the cursor, and P is to paste on the cursor! For example, I currently have the cursor on line 20 and have copied 10 lines of data. After pressing P, the 10 lines of data will be pasted after the original 20 lines, that is, from 21 lines. But what if you press p? Then the original line 20 will be pushed to line 30. (common) |
| J | Combine the data of the cursor row and the next row into the same row |
| c | Delete multiple data repeatedly, for example, delete 10 rows down, [10cj] |
| U (important) | Restores the previous action. (common) |
| [Ctrl]+r | Redo the last action. (common) |
Part II: description of available buttons for switching from general mode to editing mode
| Enter the edit mode of input or substitution | |
|---|---|
| i. I (important) | Enter the input mode: I is "input from the current cursor", and I is "input from the first non space character of the current line". (common) |
| a, A | Enter the input mode: A is "input from the next character of the current cursor", and a is "input from the last character of the cursor line". (common) |
| o, O | Enter the input mode: This is the case of the English letter o. O is "enter a new line at the next line where the current cursor is located"; O enter a new line for the previous line at the current cursor! (common) |
| r, R | Enter replace mode: R will only replace the character where the cursor is located once; R will always replace the text where the cursor is located until ESC is pressed; (common) |
| [Esc] (important) | Exit edit mode and return to normal mode (common) |
Part III: description of available buttons for switching from general mode to instruction line mode
| Instruction line storage, departure, etc | |
|---|---|
| :w | Write the edited data to the hard disk file (common) |
| :w! | If the file attribute is "read only", the file is forced to be written. However, whether it can be written or not depends on your file permissions for the file! |
| :q | Leave vi (common) |
| :q! | If you have modified the file and don't want to save it, use it! Do not save files for forced exit. |
| Note that the exclamation mark (!) often means "mandatory" in vi | |
| : wq (important) | Leave after storage, if: wq! Leave after forced storage (common) |
| ZZ | This is a capital Z! If the file has not been changed, it will not be saved and left. If the file has been changed, it will be saved and left! |
| :w [filename] | Save the edited data into another file (similar to saving a new file) |
| :r [filename] | In the edited data, read the data of another file. Also, add the file content of "filename" to the line where the cursor is located |
| :n1,n2 w [filename] | Save the contents from n1 to n2 as a filename file. |
| :! command | Temporarily leave vi to display the result of executing command in command line mode! For example, "ls /home" can be used to view the file information output in ls under / home in vi! |
| : set nu set line number (important) | Display line number. After setting, the line number of each line will be displayed in the prefix of each line |
| :set nonu | Contrary to set nu, it is to cancel the line number! |
Account management
brief introduction
To realize user account management, the main tasks to be completed are as follows:
- Addition, deletion and modification of user accounts
- User password management
- User group management
User account management
The management of user accounts mainly involves the addition, modification and deletion of user accounts
Adding a user account is to create a new account in the system, and then assign resources such as user number, user group, home directory and login shell to the new account
Genus and group
The useradd command adds a user
useradd-Option user name

-m:Automatically create this user's home directory/home/qinjiang

Understand the essence: everything in Linux is a file. To add a user here is to write user information to a file/ etc/passwd
Delete user userdel
userdel  -r qinjiang When deleting a user, delete the directory together
[root@iZbp13y8ibecb98ib9msjpZ home]# userdel -r qinjiang
[root@iZbp13y8ibecb98ib9msjpZ home]# ls
admin
Modify user usermod
[root@iZbp13y8ibecb98ib9msjpZ home]# usermod -d /home/233 tang
After modification, you can view the configuration file
Switch users
su user name

#Most advanced
$
sign out
exit
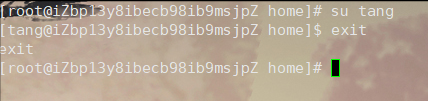
If you're root
Modify host name
hostname name
You need to reconnect and restart. It's gone
User password settings
We usually configure the password when the super user root is created
Linux that enters the password is not displayed
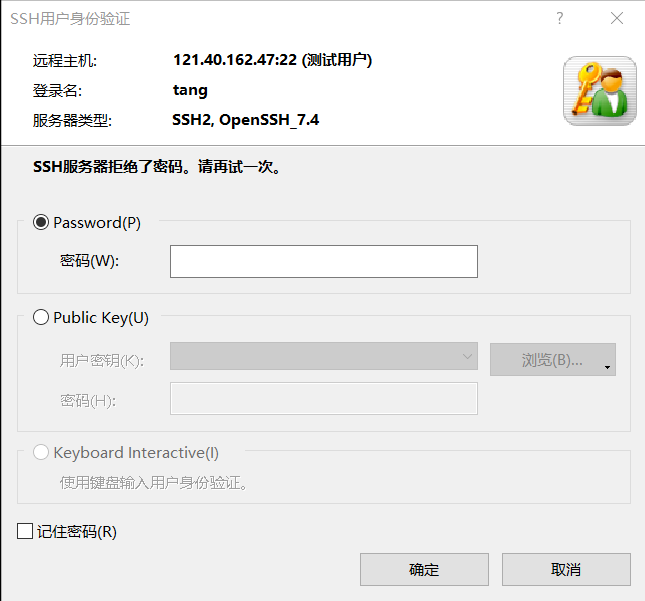
After modification, you need to create a new session property for login
Enter user name and password
If you are a super user:
password username:
new password:
re password:
If it is an ordinary user
[tang@yun ~]$ passwd
Changing password for user tang.
Changing password for tang.
(current) UNIX password:
New password:		The password can't be too simple
re password:
Lock the account!
root, such as Zhang San's resignation! If the account is frozen, this person can't log in
passwd -l tang After locking, the user cannot log in
passwd -d tang You can't log in without a password
User group management
Genus and group
Each user has a user group. The addition, deletion and modification of groups are actually updates to / etc/group files
Create a user group group

After creating a user group, you can get an id, which can be specified!

If it is not specified, it will increase automatically
Delete user group
groupdel

Modify user group name
groupmod -g 666 -n newtang tang

If users want to switch user groups
Log in to the current user
newgrp user name
File view (just understand)
/etc/passwd
User name: password (login password, we are not visible) user ID: annotative Description: Home Directory: login shell
Each line of this file represents a user. We can see where the user's home directory is and which group it belongs to!
Login password: store the real encrypted user password in the / etc/shell file to ensure the security of the password!
Disk management
Basic command
df,du

df: List the total disk usage plus-h You can view the size

du: Check disk space usage plus-a view hidden files du -sm/*Check the capacity occupied under the root directory


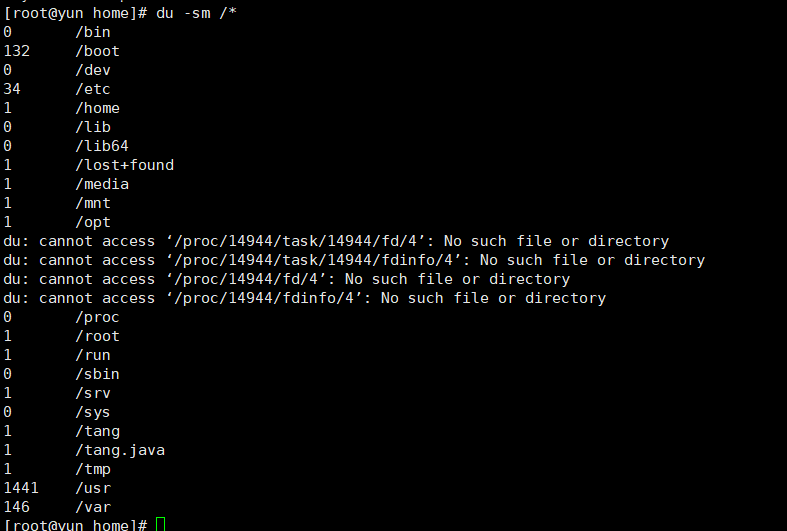
/The largest directory in the early stage of usr system
Mac or want to use Linux to mount some of our local disks or files!
mount (U SB flash disk)

Uninstall umount -f [mount location] (force uninstall)
Process management
For developers, in fact, Linux is more inclined to use
What is a process
1. In Linux, no program has its own process, and each process has an id number
2. Every process has a parent process
3. The process can exist in the foreground in two ways! Background operation!
4. Generally, services are run in the background, and basic programs are run in the foreground
command
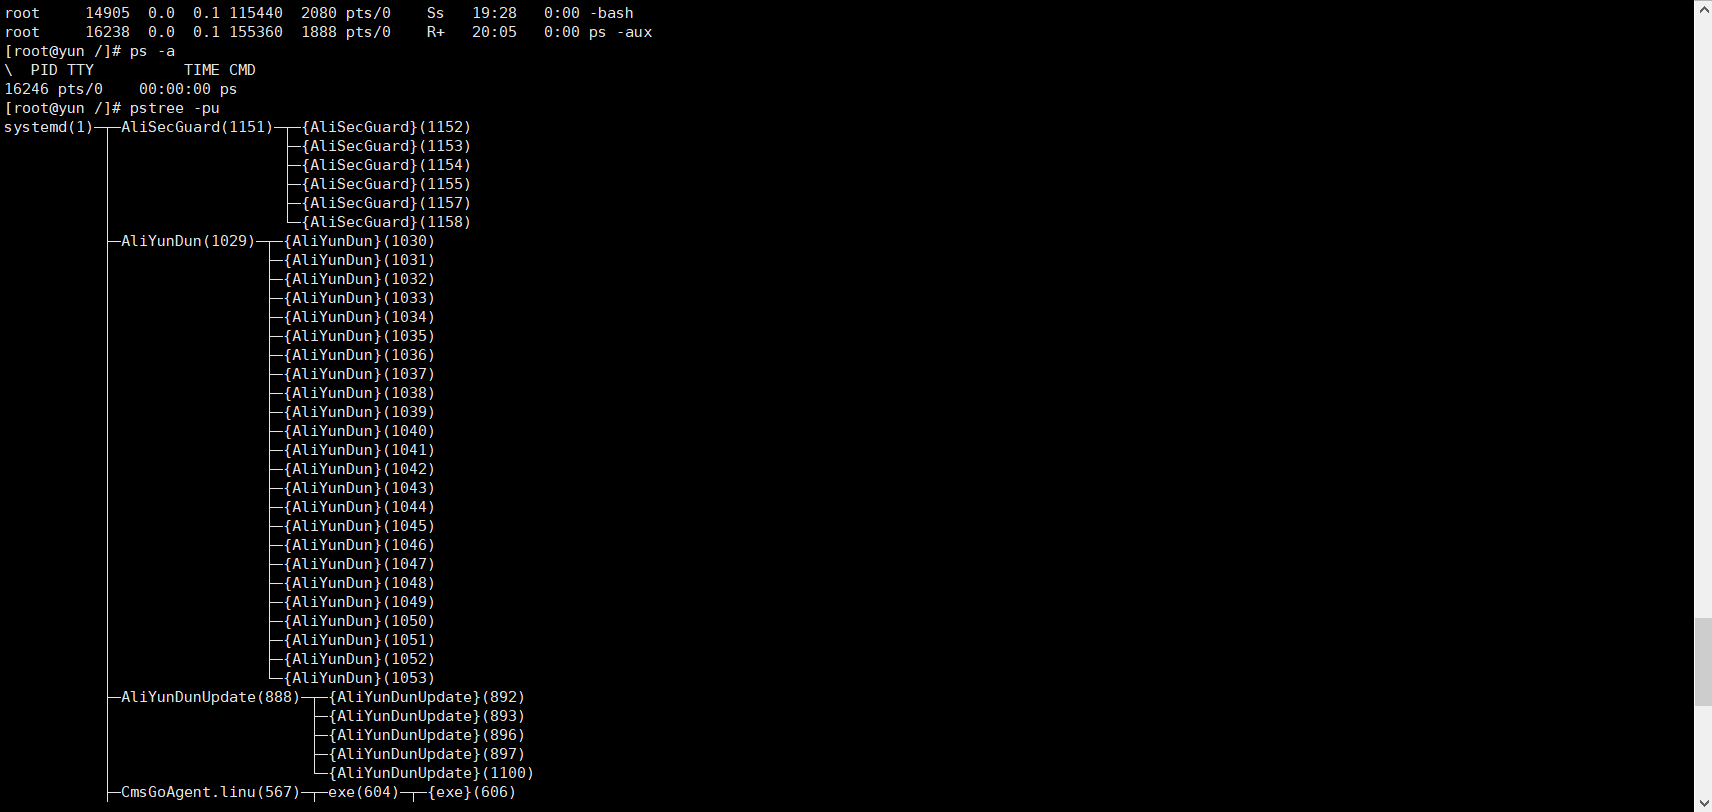
ps command: view the information of various processes being executed by the current system!
ps -xx:
- -a displays the information of all processes running on the current terminal ()
- -u displays the process with user information
- -x displays the parameters of the background running process!
ps -aux: View all processes
ps -aux |grep mysql
	| stay Linux This is called a pipe symbol A|B
	grep Find the qualified string in the file!
ps -ef: you can view the information of the parent process
ps -ef|grep mysql Looking at the process, we can generally view it through the directory tree structure
pstree
	-p:Show parent id
	-u:Show user groups
End process: kill the process, which is equivalent to win ending the task
kill-9: id of the process
But the java code we usually write is endless
kill -9 Process id
JDK environment installation
There are three ways to install software
- rpm(jdk: release a springBoot project online)
- Decompression (tomcat, start access through the Internet, publish the website)
- Install online using yum (docker: directly install and run)
JDK installation
- Download JDK to oracle official website
- Upload using FTP
Check whether the current exists java environment
java -version
 If so, uninstall
rpm -qa|grep jdk #Check jdk information
rpm -e --nodeps jdk_(Force delete)
After uninstallation, you can install java
rpm -ivh rpm package
If present, you can uninstall
Configure environment variables

Configure environment variables /etc/profile Add at the end of the file java Configuration and windows The security environment variables are the same
export JAVA_HOME=/jdk/jdk1.8
export CLASSPATH=$JAVA_HOME/lib/
export PATH=$PATH:$JAVA_HOME/bin
export PATH JAVA_HOME CLASSPATH
Make this configuration file effective
source/etc/profile
Tomcat installation
-
ssm war needs to be run in tomcat!
-
Download tomcat. Go to the official website and download it to end with tar.gz
-
Unzip tomcat
-
Start tomcat./xxx.sh to run
-
implement ./startup.sh
 stop it ./shutdown.sh
-
If the firewall port 8080 is open and the alicloud security group is open, you can directly access the remote
-
see firewall Service status
systemctl staus firewalld
 open
service firewalld start
 restart
service firewalld restart
 close
service firewalld stop
 View the protective wall
firewalld-cmd --list-all View all
firewalld-cmd --ports View port information
 Open port
 Open port command firewalld-cmd --zone=pubic --add-port/tcp --permanent
 service iptables restart   systemctl restart firewalld.service
 Command meaning
--zone: Scope
--add-port=80/tcp Add port format as port/Communication protocol
--permanent It will take effect permanently. It will become invalid after restarting without parameters
Docker installation
We are now running under Linux. We must connect to the Internet and install yum online
One click installation
centOS
yum install -y wget && wget -O install.sh http://download.bt.cn/install/install_6.0.sh && sh install.sh
Then there will be a choice y, and then you will be given an address and password managed by the pagoda panel
Operable
-
implement ./startup.sh
 stop it ./shutdown.sh
-
If the firewall port 8080 is open and the alicloud security group is open, you can directly access the remote
-
see firewall Service status
systemctl staus firewalld
 open
service firewalld start
 restart
service firewalld restart
 close
service firewalld stop
 View the protective wall
firewalld-cmd --list-all View all
firewalld-cmd --ports View port information
 Open port
 Open port command firewalld-cmd --zone=pubic --add-port/tcp --permanent
 service iptables restart   systemctl restart firewalld.service
 Command meaning
--zone: Scope
--add-port=80/tcp Add port format as port/Communication protocol
--permanent It will take effect permanently. It will become invalid after restarting without parameters
Docker installation
We are now running under Linux. We must connect to the Internet and install yum online
One click installation
centOS
yum install -y wget && wget -O install.sh http://download.bt.cn/install/install_6.0.sh && sh install.sh
Then there will be a choice y, and then you will be given an address and password managed by the pagoda panel