catalogue
1. Installation and deployment of MySQL database
3.MySQL asynchronous replication
1.mysql master-slave replication
Master slave replication process
3.mysql delayed synchronization
4. Semi synchronous replication of MySQL database
5. Group replication (full synchronization)
Experimental environment configuration:
Download MHA-7 High Availability Program
1. Installation and deployment of MySQL database
tar zxf mysql-boost-5.7.31.tar.gz  #decompression
cd mysql-5.7.31/
yum install cmake  #Installing cmake
cmake ../ -DCMAKE_INSTALL_PREFIX=/usr/local/mysql -DMYSQL_DATADIR=/data/mysql -DMYSQL_UNIX_ADDR=/data/mysql/mysql.sock -DWITH_INNOBASE_STORAGE_ENGINE=1 -DSYSCONFDIR=/etc -DENABLED_LOCAL_INFILE=1 -DWITH_EXTRA_CHARSETS=all -DDEFAULT_CHARSET=utf8mb4 -DDEFAULT_COLLATION=utf8mb4_unicode_ci -DWITH_BOOST=/root/mysql-5.7.31/boost/boost_1_59_0      #Configuration test
 Two plug-ins are missing, download and install
yum install bison.x86_64
yum install gcc-c++ -y
cmake ../ -DCMAKE_INSTALL_PREFIX=/usr/local/mysql -DMYSQL_DATADIR=/data/mysql -DMYSQL_UNIX_ADDR=/data/mysql/mysql.sock -DWITH_INNOBASE_STORAGE_ENGINE=1 -DSYSCONFDIR=/etc -DENABLED_LOCAL_INFILE=1 -DWITH_EXTRA_CHARSETS=all -DDEFAULT_CHARSET=utf8mb4 -DDEFAULT_COLLATION=utf8mb4_unicode_ci -DWITH_BOOST=/root/mysql-5.7.31/boost/boost_1_59_0    ##Retest
make    #compile
make install    #install

installation is complete
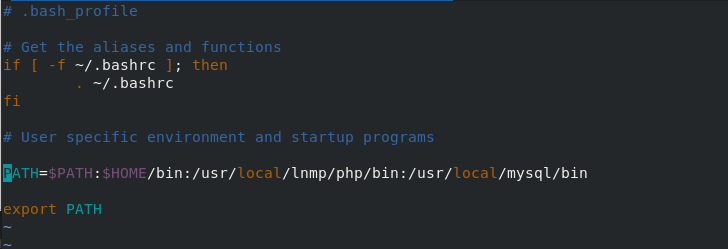
cd    #Switch environment home directory
vim .bash_profile   #Configure global file and add mysql path

PATH=$PATH:$HOME/bin:/usr/local/lnmp/php/bin:/usr/local/mysql/bin

source .bash_profile   #Document entry into force
mkdir -p /data/mysql  #Create mysql directory
useradd -M -d /data/mysql -s /sbin/nologin mysql  #Establish mysql user
chown mysql.mysql /data/mysql/   #Set the users and user groups of the directory
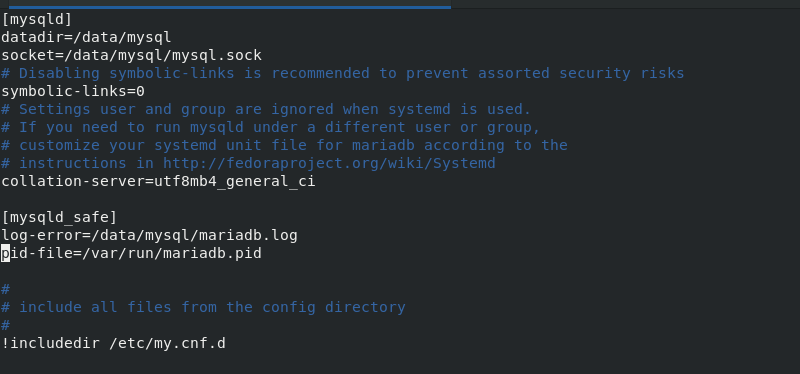
vim /etc/my.cnf #Modify the path of mysql file, as shown in the figure below
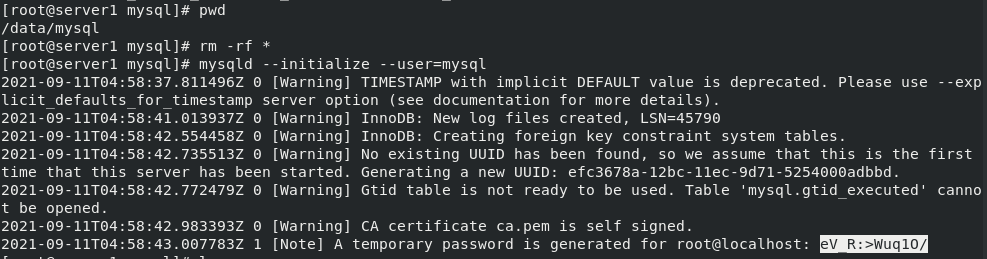
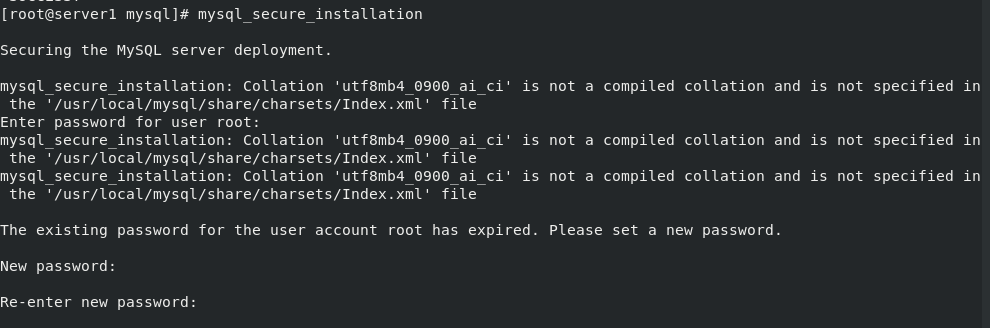
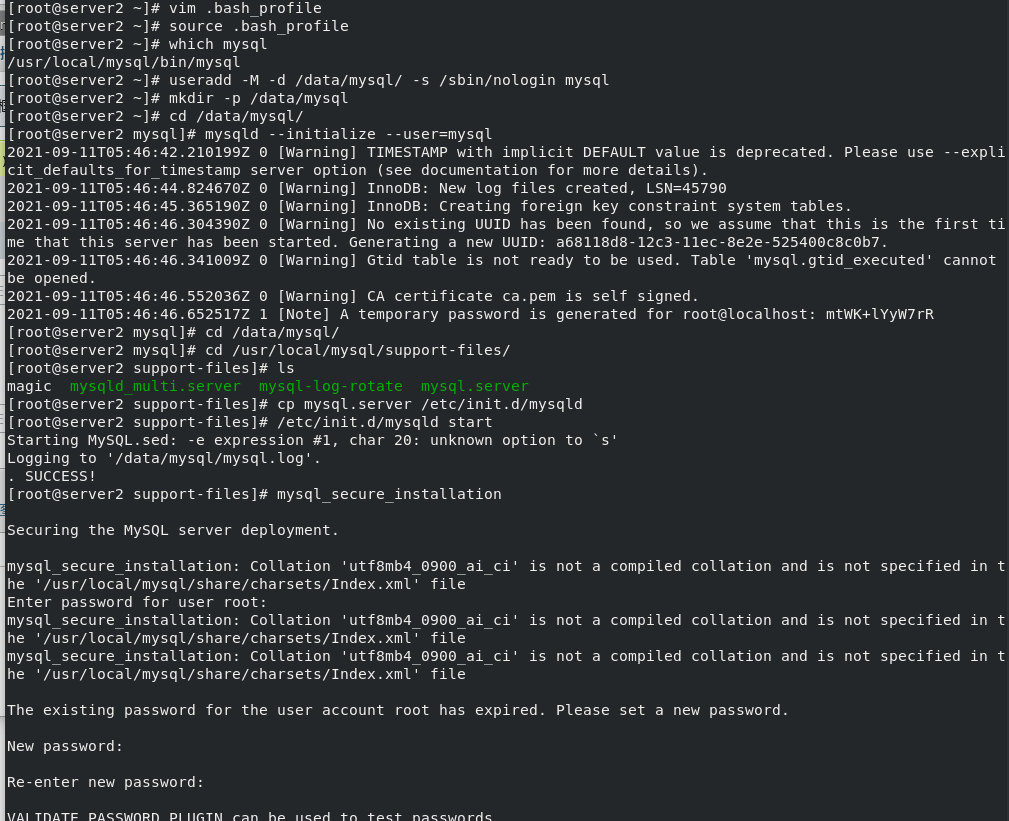
cd data/mysql/
mysqld --initialize --user=mysql    #mysql initialization. After initialization, the initialized password will be displayed at the end. It needs to be used when logging in
cd /usr/local/mysql/support-files/
ls
cp mysql.server /etc/init.d/mysqld   #Copy the mysql database service to the specified directory
/etc/init.d/mysqld start   #Specify the path to start the service
mysql_secure_installation   #Change the password to log in to the database
 Some parameters need to be set when logging in for the first time. I set them here as follows:
\\\
Press y|Y for Yes, any other key for No: n
Change the password for root ? ((Press y|Y for Yes, any other key for No) : n
Remove anonymous users? (Press y|Y for Yes, any other key for No) : y
Disallow root login remotely? (Press y|Y for Yes, any other key for No) : y
Remove test database and access to it? (Press y|Y for Yes, any other key for No) : y
\\\

mysql database installation and configuration completed!
You can log in using mysql -p
2. Web database mysql
Download the phpMyAdmin-5.0.2-all-languages.zip package
unzip phpMyAdmin-5.0.2-all-languages.zip   #decompression
mv phpMyAdmin-5.0.2-all-languages /usr/local/nginx/html/phpadmin   #Move to the html directory of nginx
systemctl start php-fpm.service   #Open PHP FPM service
systemctl enable php-fpm.service  #Set startup and self startup
vim /usr/local/lnmp/php/etc/php.ini   #Edit the php file and add the path of the mysql file
systemctl reload  php-fpm  #After modifying the file, reload it
The interface for editing php.ini file is as follows:


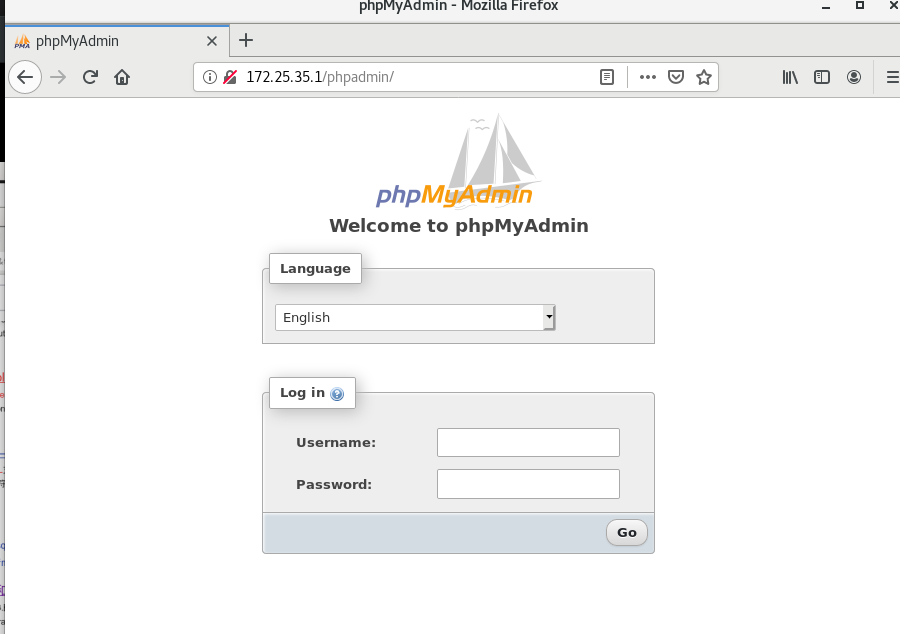
At this time, when nginx is enabled, the browser accesses 172.25.35.1/phpadmin
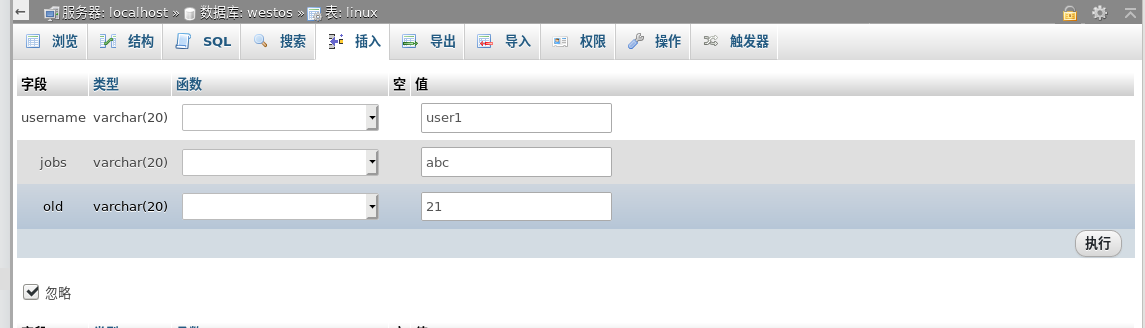
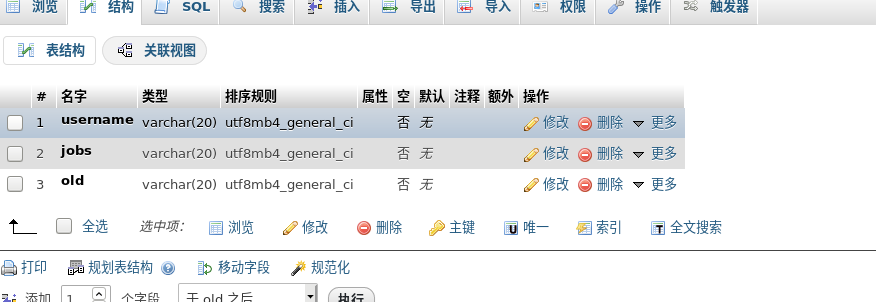
Build a westos library, linux tables, and insert a set of data
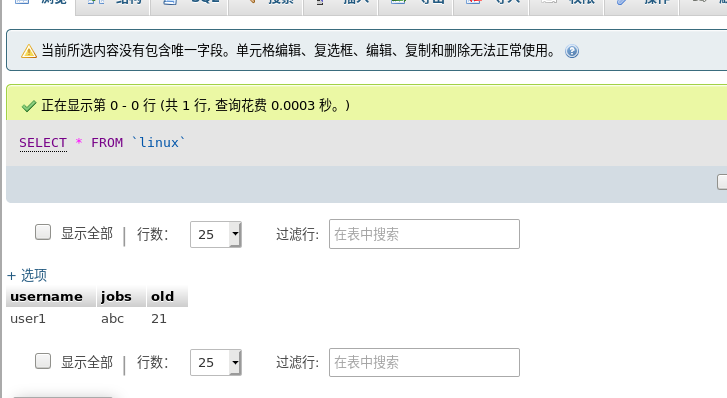 Enter the database to view the westos.linux table data
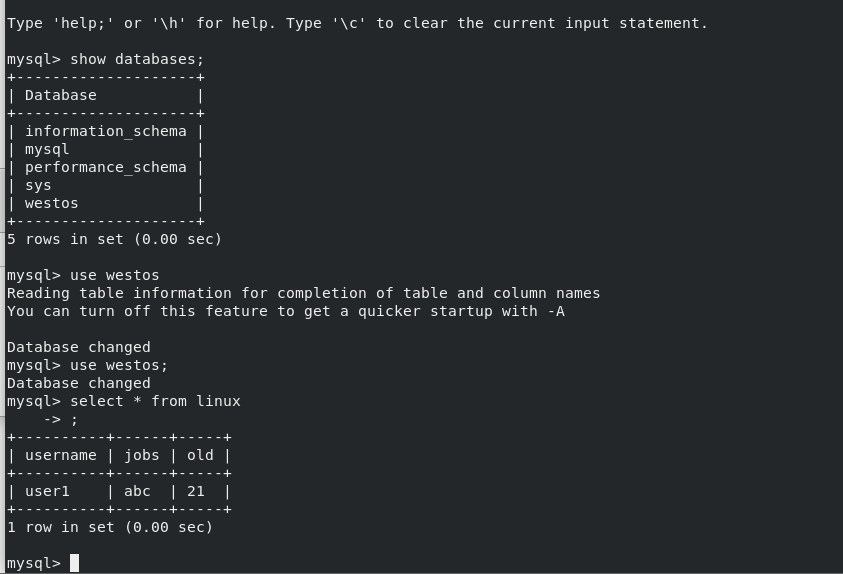
3.MySQL asynchronous replication
Asynchronous replication: the configuration file / etc/my.cnf finally writes the synchronous mode, which is to use the binary log for replication. Any operation done by the master will be recorded in the log. The master will not wait for the slave to copy before starting the next step. He will always do his own work and will not care about the state of the slave. He will write it in his own log when he has done it, The success of the slave synchronization depends on the slave itself. The success of the slave synchronization depends on two threads, I/O thread and sql thread. If the I/O thread is not yes, the master log cannot be obtained (the master's dumper thread will communicate with the slave's I/O thread). After the slave takes the binary log, first write the master's work in the relay log relay_log, and then the sql thread replays and relays_ Do the things in the log again, so the asynchronous replication of slave data is slightly slower than that of the master. The master host does not manage the abnormal status of the two slave threads. If the status is abnormal, it will lead to data synchronization.
The reason why asynchronous replication fails may be that the data of the two hosts are not synchronized, and the master data is too much than the slave data. The data is different before synchronization, so we need to make the two consistent before synchronization by backup and import.
1.mysql master-slave replication
Replication principle
mysql master-slave replication is an asynchronous replication process. Copying from one instance (Master) to another instance (slave) is completed by the I/O process on the master and the sql process and I/O process on the slave.
First, the master must open the binary log (bin log), because the whole replication process is actually that the slave side obtains the corresponding binary log from the master side, and then performs various operations recorded in the local full sequence log.
Configure slave database
mysql in server1 is the master database and mysql in server2 is the slave database
To set the configuration file of the slave database and synchronize the data in the master database with the master-slave replication successfully
server1 Middle database scp to server2:

scp -r /usr/local/mysql server2:/usr/local
scp /etc/my.cnf server2:/etc/

to configure server2 Medium mysql Environment variable file:

vim .bash_profile   #Configure the whole play file and add a path to make mysql globally effective
source .bash_profile   #Validate document
which mysql  #Check whether it is globally effective

New user, create mysql Directory, database initialization, change password login:

useradd -M -d /data/mysql -s /sbin/nologin mysql   #Establish user
mkdir -p /data/mysql   #create directory
cd /data/mysql/
mysqld --initialize --user=mysql   #Initialization, pay attention to the password after initialization
cd /usr/local/mysql/support-files/
ls
cp mysql.server /etc/init.d/mysqld   #Copy the mysql database service to the specified directory
/etc/init.d/mysqld start   #Specify the path to start the service
mysql_secure_installation   #Change the password to log in to the database
The database of server2 has been deployed
Master slave replication process
In master
master setting server ID
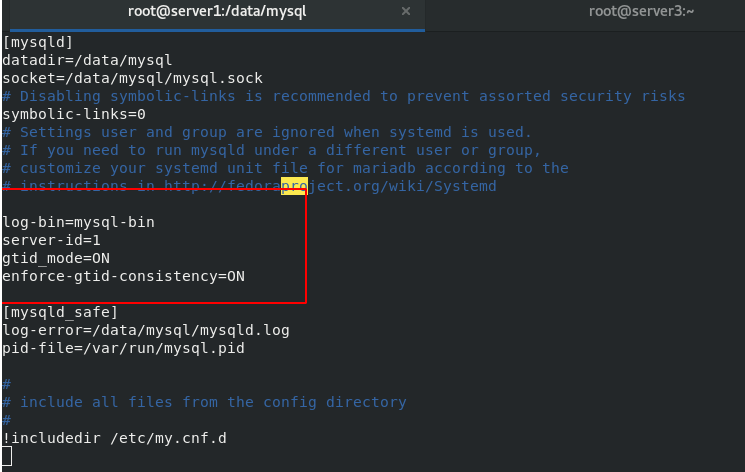
vim /etc/my.cnf
\\\
log-bin=mysql-bin
server-id=1
\\\
master creates and authorizes replication users
mysql -p  #Enter database
create user 'redhat'@'%' identified by 'westos';  #Create user repl
GRANT REPLICATION SLAVE ON *.* TO 'redhat'@'%';  #to grant authorization
show master status;  #View status

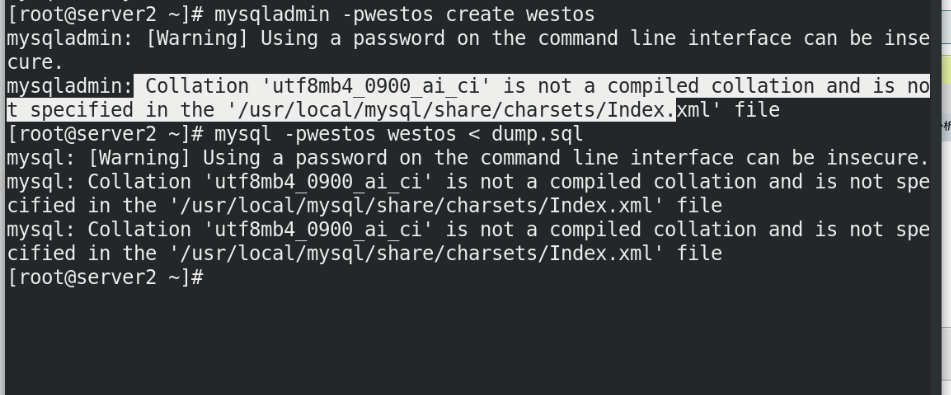
Before master-slave replication synchronization, the existing data of the two databases must be the same, so you need to import the backup file of server1 into the slave database
mysqldump -p westos > dump.sql   #Backup server1 database
scp dump.sql server2:     #Transfer to server2
 stay server2 Must be established and implemented in advance server1 Same database westos
mysql -p westos < dump.sql    #Import backup into server2 database
 At this point, the two databases are exactly the same
In slave
slave configuration server ID
vim /etc/my.cnf
\\\
log-bin=mysql-bin
server-id=1
\\\
slave configuration replication:
mysql -p  #Enter database
mysql> CHANGE MASTER TO
    ->     MASTER_HOST='172.25.35.1',
    ->     MASTER_USER='redhat',
    ->     MASTER_PASSWORD='Westos',
    ->     MASTER_LOG_FILE='mysql-bin.000001',
    ->     MASTER_LOG_POS=1770;

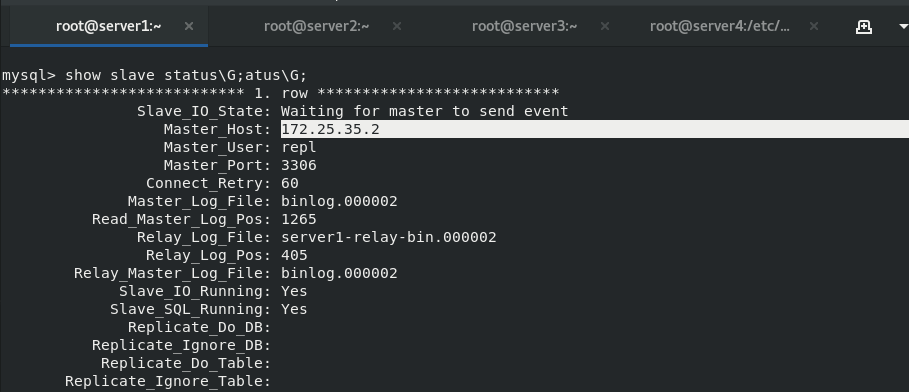
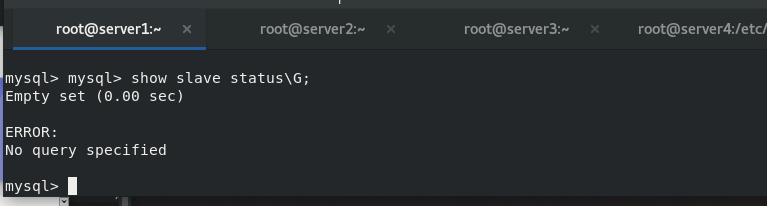
After the master-slave replication, enter in mysql of server2
show slave status\G;
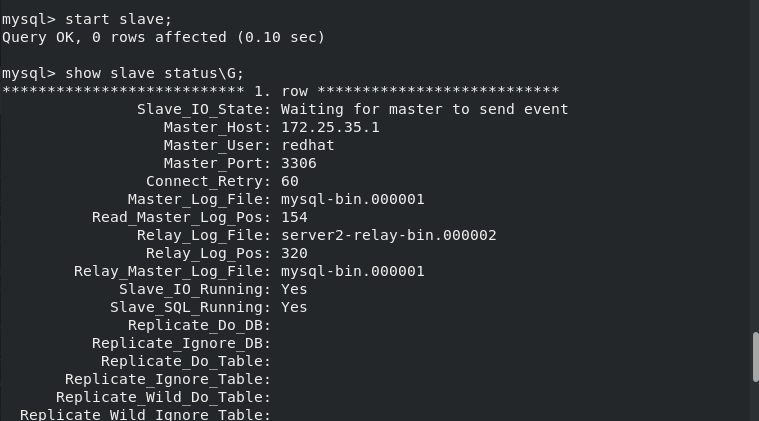 If you can see two yes's, the synchronization is successful
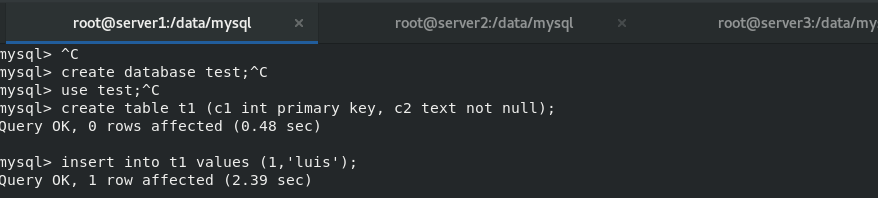
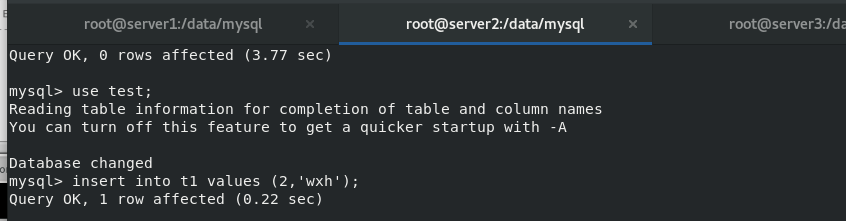
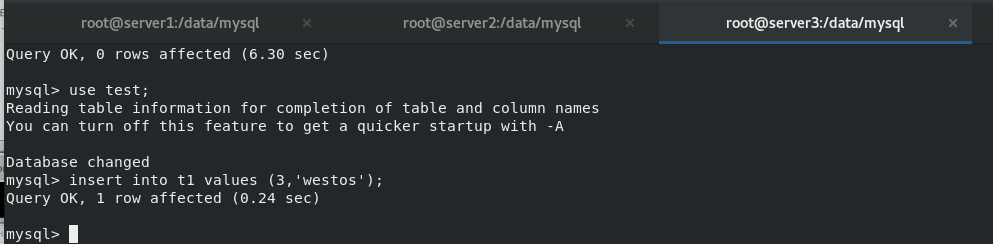
Insert a set of data into the master database
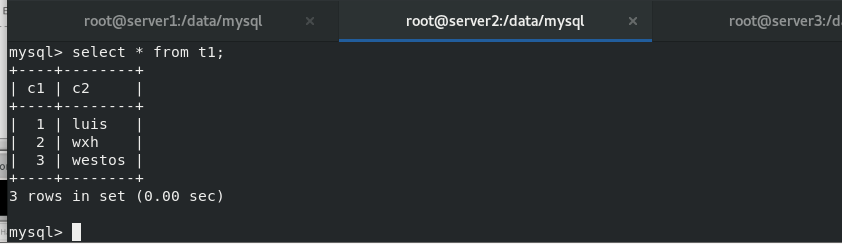
 View in the slave database

2.GTID copy
Configure server2 as the slave of server1 and Server3 as the slave of server2 Based on one master and one slave
master1 Medium:
vim /etc/my.cnf
\\\
[mysqld]
gtid_mode=ON
enforce-gtid-consistency=ON
\\\
/etc/init.d/mysqld restart
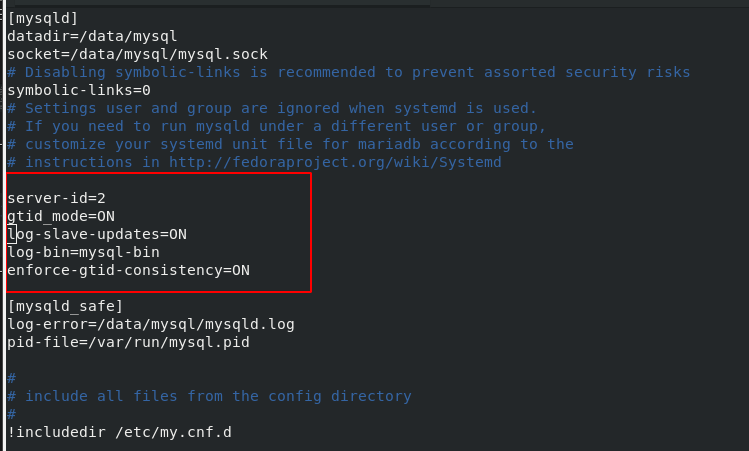
server2 is the slave of server1 and the master of server3
server3 is the slave of server2
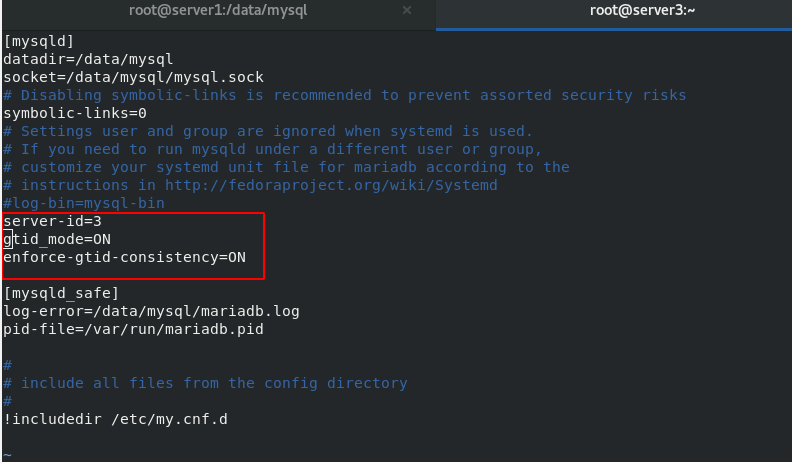
Compared with the slave group, this method is much simpler. When configuring the master-slave synchronization, you do not need to view the log file and number of the master database
3.mysql delayed synchronization
The purpose of delayed synchronization is to prevent misoperation of the master database from causing misoperation of the slave database
Master_ Log_ binlog file name of mysql in file main library
Read_Master_Log_Pos reads the location of the binlog file of mysql in the main database
Exec_Master_Log_Pos is the location of the binlog file of the main database mysql executed from the database
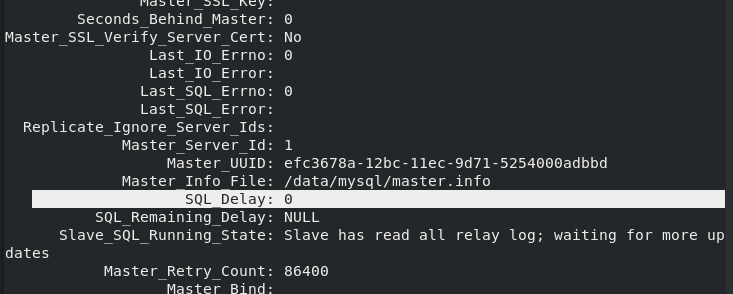
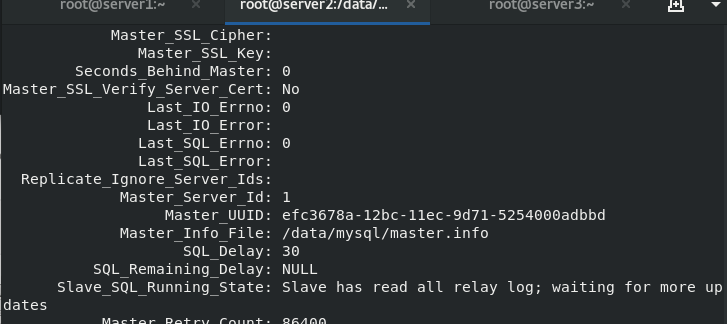
Seconds_ Behind_ The time unit of master slave database delaying master database synchronization is seconds
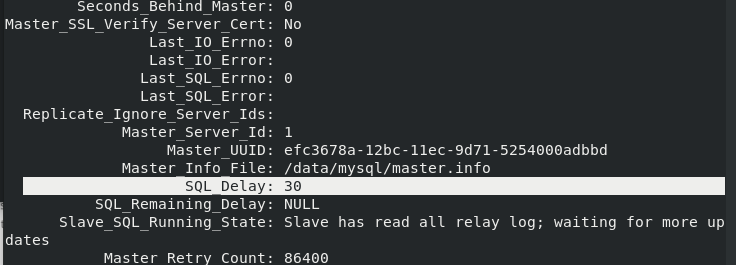
SQL_Delay sets the delayed synchronization time between the slave library server and the master library server
server2 is the slave of server1
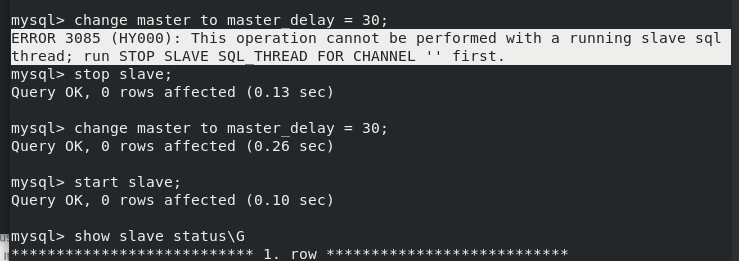
stay slave Upper execution
stop slave;
change master to master_delay = 30;    #The modification delay time is 30 seconds
show slave status\G;    #View status
start slave;     #At this point, our delay synchronization has been set to 30 seconds
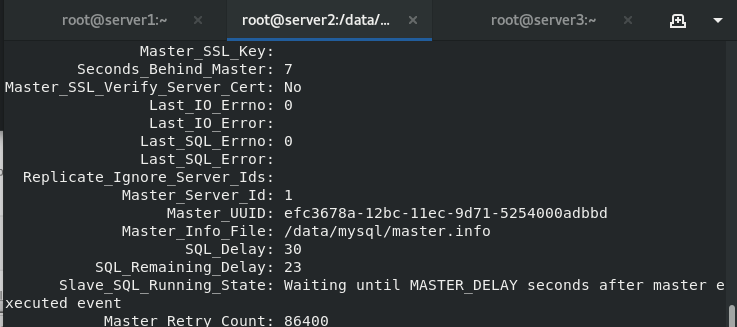
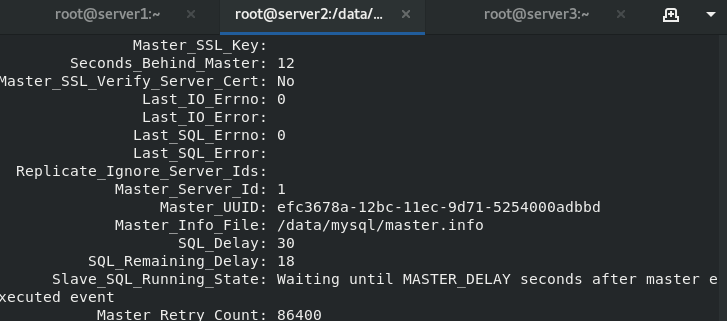
Insert a piece of data in the master side 
You can see that the server side delays taking effect
Until after a delay of 30 seconds, the Seconds Behind Master displays 0
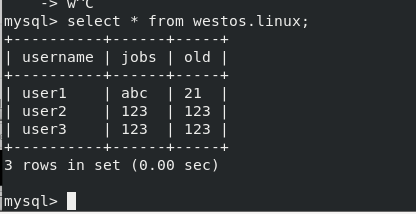
 View the inserted data and find that it has been synchronized
4. mysql parallel replication
Background: because I / O threads and SQL threads work in a single thread, while the Master can write in multiple threads, the Master and slave inevitably cause delays. Based on this, multithreading is implemented on SQL threads in versions 5.6, 5.7 and 8.0 to improve the concurrency of slave
Principle: after MySQL 5.6 turns on the parallel replication function, the SQL thread becomes the coordinator thread, which determines whether it can execute concurrently, which means that a worker thread can process continuous transactions of one database without waiting for other databases to complete
Experiment: configure the master-slave replication environment
Method 1:
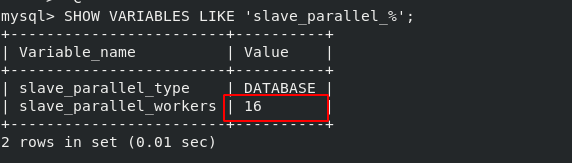
Enter the command in mysql to set the parallel replication workers (temporary, which will become the default after restarting mysql)
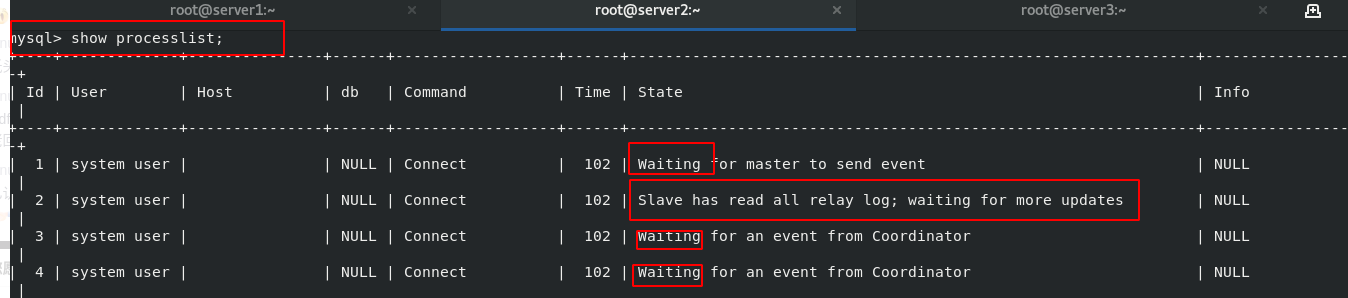
mysql> stop slave;

Query OK, 0 rows affected (0.03 sec)

mysql> set global slave_parallel_workers=16;

Query OK, 0 rows affected (0.05 sec)

mysql> start slave;

Query OK, 0 rows affected, 1 warning (0.07 sec)
SHOW VARIABLES LIKE 'slave_parallel_%';  #Check whether the setting is successful
show processlist   #See the status of 16 SQL threads
Method 2:
Configure parallel replication in the / etc/my.cnf file
vim /etc/my.cnf
\\\
relay_log_info_repository = TABLE  #Record relay.info in slave_relay_log_info table
master_info_repository = TABLE  #master.info is recorded in the table
relay_log_recovery = on   #It is enabled by default (automatic relay log recovery is started immediately after the database is started)
slave_parallel_workers=16  #Set the maximum number of parallel threads to 16
\\\
/etc/init.d/mysqld restart  #restart
mysql -p  #Enter database
SHOW VARIABLES LIKE 'slave_parallel_%';  #Check whether the setting is successful
show processlist   #See the status of 16 SQL threads
It is found that the setting of parallel workers is successful
It is found that there is only one thread on standby;
4. Semi synchronous replication of MySQL database
Semi synchronous replication adds a synchronous step to the asynchronous replication process. This means that the master node needs to wait for the slave node to confirm that it has received the transaction when committing. Only in this way can the master node continue to commit.
In this mode, the master node only needs to receive the return information from one of the slave nodes and will commit; Otherwise, you need to wait until the timeout time, and then switch to asynchronous mode before submitting; The purpose of this is to reduce the data delay of the master-slave database, improve the data security, and ensure that after the transaction is committed, the binlog is transmitted to at least one slave node, which can not guarantee that the slave node updates the transaction to the db. The performance will be reduced and the response time will be longer.
master:
INSTALL PLUGIN rpl_semi_sync_master SONAME 'semisync_master.so';
SET GLOBAL rpl_semi_sync_master_enabled =1;
show status like 'Rpl_semi%';
slave:
INSTALL PLUGIN rpl_semi_sync_slave SONAME 'semisync_slave.so';
SET GLOBAL rpl_semi_sync_slave_enabled = 1;
STOP SLAVE IO_THREAD;
START SLAVE IO_THREAD;
The semi synchronous replication configuration is successful. At this time, the new data inserted into the master database will be submitted by the master node to the slave node for confirmation until it times out
During the test, you can close the mysql database of the slave node and insert data into the master. If it is found that it takes ten seconds to submit, the configuration is successful!
5. Group replication (full synchronization)
MySQL group replication is a new function introduced from MySQL 5.7.17. It realizes the high availability function of master-slave replication. It supports single master model and multi master model (single master model by default).
Single master model: a master node is automatically selected from many MySQL nodes in the replication group. Only the master node can write, and other nodes are automatically set to read only. When the master node fails, a new master node will be automatically elected. After the election is successful, it will be set to writable, and other slave will point to the new master.
Multi master model: any node in the replication group can write, so there is no concept of master and slave. As long as the number of suddenly failed nodes is not too large, the multi master model can continue to be available.
Multi master mode configuration
Set from server1 to server3 to master1 to master3
Restore environment, change configuration file
master1: Delete the contents under / data/mysql and re initialize
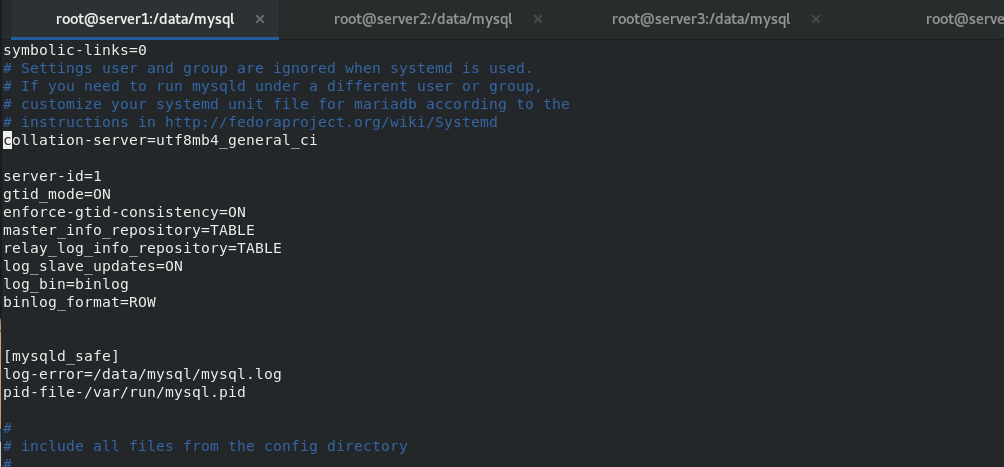
/etc/init.d/mysqld stop
cd /data/mysql

rm -fr *     #All files are deleted and then reinitialized
uuidgen    #Randomly generated UUID

vim /etc/my.cnf    #Edit profile
\\\
server-id=1
gtid_mode=ON
enforce-gtid-consistency=true
master_info_repository=TABLE
relay_log_info_repository=TABLE
binlog_checksum=NONE      #Turn off binlog verification
log_slave_updates=ON
log_bin=binlog
binlog_format=ROW       #Group replication relies on a row based replication format
transaction_write_set_extraction=XXHASH64
group_replication_group_name="aaaaaaaa-aaaa-aaaa-aaaa-aaaaaaaaaaaa"
plugin_load_add='group_replication.so'
group_replication_start_on_boot=off
group_replication_local_address= "server1:33061"
group_replication_group_seeds= "server1:33061,server2:33061,server3:33061"
group_replication_bootstrap_group=off    ##The option of whether the plug-in will boot automatically should generally be turned off. It only needs to be turned on by the node initiating the group replication and started only once. If it is on, a group with the same name will be generated when it is restarted next time, which may lead to conflict
group_replication_ip_whitelist="172.25.7.0/24,127.0.0.1/8"
group_replication_enforce_update_everywhere_checks=ON
group_replication_single_primary_mode=OFF
group_replication_allow_local_disjoint_gtids_join=ON
\\\
Reinitialize and start mysql to modify the settings
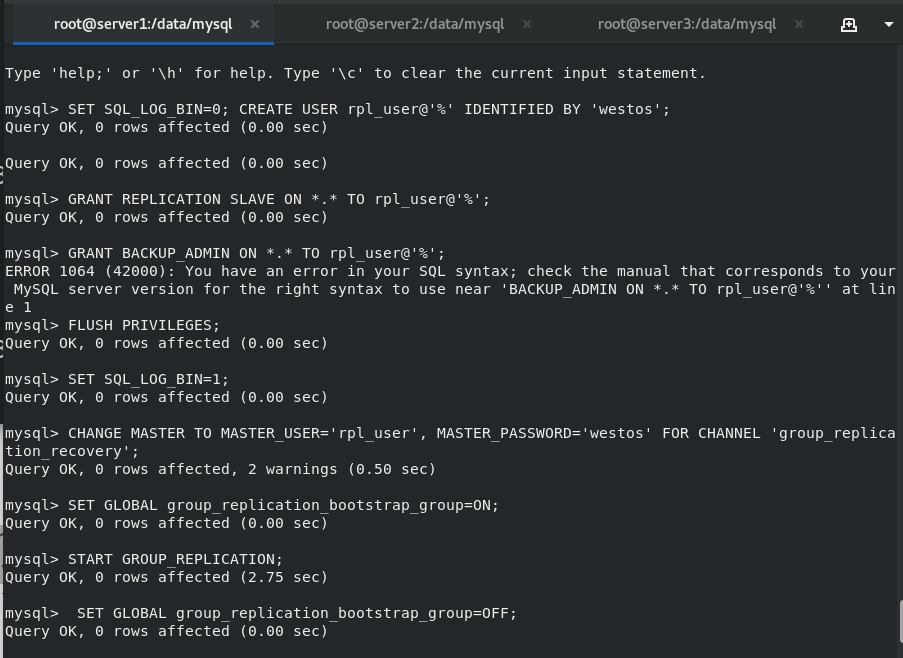
mysqld --initialize --user=mysql   #initialization
/etc/init.d/mysqld start   #Start database
mysql_secure_installation   #Change password login
mysql -pwestos
alter user root@localhost identified by 'westos';    #Change user root password
SET SQL_LOG_BIN=0;    #Close the binary log to prevent it from being transferred to other server s
CREATE USER rpl@'%' IDENTIFIED BY 'westos';     #Create users for replication
GRANT REPLICATION SLAVE ON *.* TO rpl@'%';     #All tables for all libraries
FLUSH PRIVILEGES;          #Refresh authorization table
SET SQL_LOG_BIN=1;           #After setting, open the log
CHANGE MASTER TO MASTER_USER='rpl', MASTER_PASSWORD='westos' FOR CHANNEL 'group_replication_recovery';
SET GLOBAL group_replication_bootstrap_group=ON;    #The group replication initiating node enables this parameter
START GROUP_REPLICATION;       #Turn on group replication
SET GLOBAL group_replication_bootstrap_group=OFF;
SELECT * FROM performance_schema.replication_group_members;     #View group status
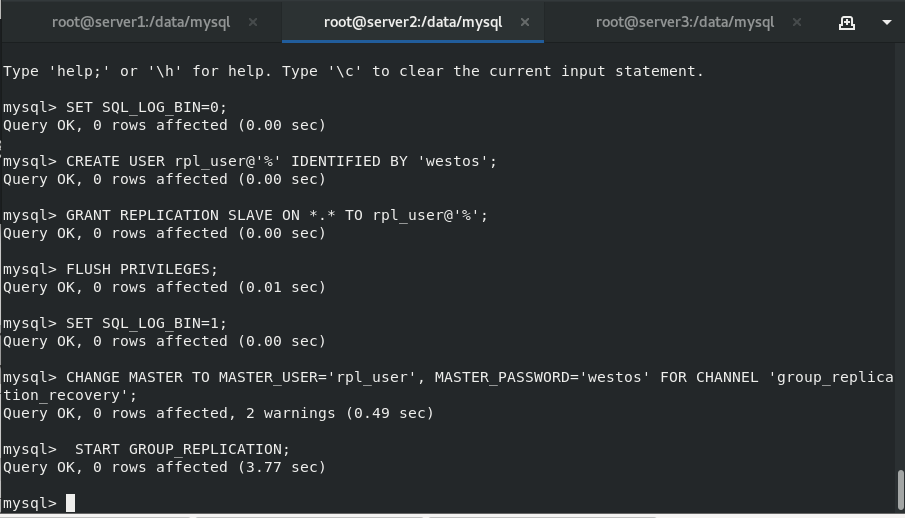
master2:
The configurations of master2 and master1 are the same as before. When modifying mysql settings, you do not need to turn on the node parameter
vim /etc/my.cnf (the address here needs to be changed to server2)
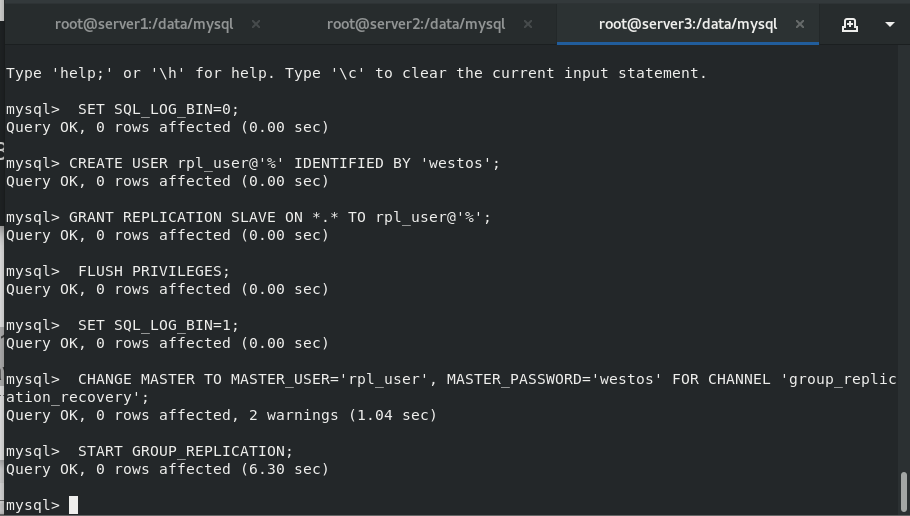
master3:
Master 3 configures the / etc/my.cnf file like 1 and 2
After deleting the contents under / data/mysql, re initialize and start mysql to modify the settings
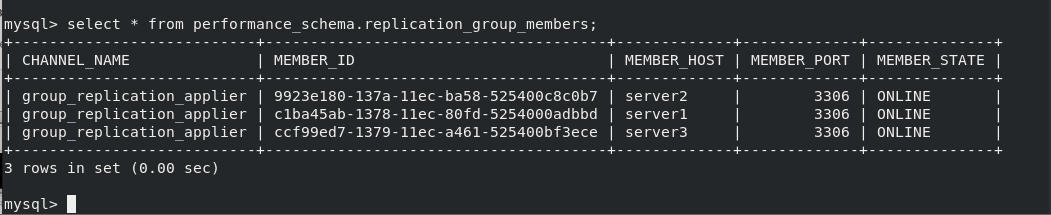
After setting up the multi master group of mysql database, insert new data into master1, 2 and 3 And view
6.mysql router
MYSQL Router principle:
MySQL Router is a lightweight agent between the application client and dbserver. It can detect, analyze and forward queries to the backend database instance, and return the results to the client. It is a substitute for MySQL proxy
The Router realizes read-write separation. The program is not directly connected to the database IP, but is fixedly connected to MySQL Router. MySQL Router is transparent to front-end applications. The application regards MySQL Router as an ordinary mysql instance, sends the query to MySQL Router, and MySQL Router will return the query result to the front-end application.
Read write separation principle
After receiving the request from the front-end application, MySQL Router distinguishes between read and write according to different ports, sends all queries connected to the read-write port to the master database, and sends the select query connected to the read-only port to multiple slave databases in the form of polling, so as to realize the purpose of separation of read and write. The results returned from reading and writing will be handed over to the MySQL Router, which will return them to the client application.
Installing and deploying mysql route
Download address:
Provide different platforms, binary packages and rpm packages, and select the appropriate installation method. However, to download binary packages, you need to manually create log directories and configure file settings. You also need to write your own startup script for startup, which is not provided by the official mysql route
I download the RPM package mysql-router-community-8.0.21-1.el7.x86 directly here_ 64.rpm
Create a new virtual machine server4 and download the routing plug-in in server4
rpm -ivh mysql-router-community-8.0.21-1.el7.x86_64.rpm

vim /etc/mysqlrouter/mysqlrouter.conf   #Write configuration file
\\\
[routing:ro]
bind_address = 0.0.0.0
bind_port = 7001
destinations = 172.25.35.1:3306,172.25.35.2:3306,172.25.35.3:3306
routing_strategy = round-robin

[routing:rw]
bind_address = 0.0.0.0
bind_port = 7002
destinations = 172.25.35.1:3306,172.25.35.2:3306,172.25.35.3:3306
routing_strategy = first-available
\\\

 systemctl restart mysqlrouter.service  #Just restart the router
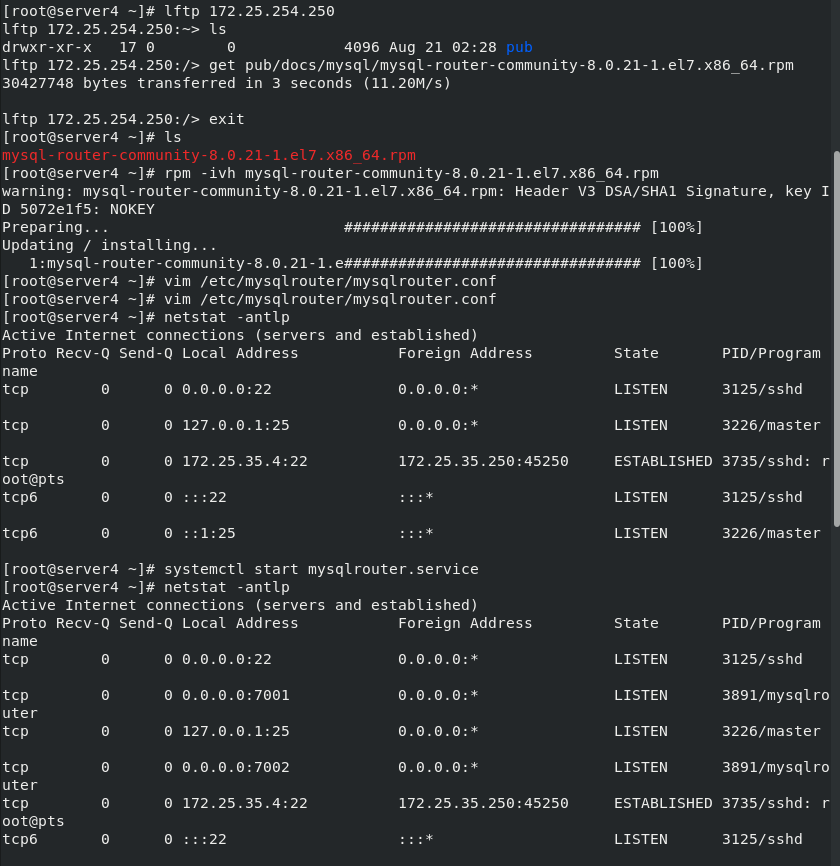
The routing function has been enabled. We have written server1, 2 and 3 databases in the router list, which can be configured as master-slave synchronization or group synchronization (one master and multiple slaves); I configure group synchronization here
Read write separation test
Authorize a user in server1
grant all on test.* to 'zca'@'%' identified by 'westos';
Verify read load balancing: it can be seen from the results that each read accesses a different host
mysql -h 172.25.35.4 -P 7001 -uzca -pwestos -e "select @@hostname"
Verify write: you can see that every write is written to the primary node. When the primary node stops or hangs, another node's database will take over the write function
7.MHA high availability
Experimental environment configuration:
Delete all files under / data/mysql in server1, server2 and server3, and edit / etc/my.conf as follows
To delete the previous group synchronization policy, you only need to enable gtid
master_info_repository=TABLE stores the operations in the master in the table (more secure)

mysqld --initialize-insecure --user=mysql Reinitialize(-insecure No password)

server1 No password in mysql(server1 As master)
grant replication slave on *.* to repl@'%' identified by 'westos';   #Authorized user
alter user root@'%' identified by 'westos';  #Change root password
grant all on *.* to root@'%' identified by 'westos';  #to grant authorization

After the initialization of server2 and 3, modify the / etc/my.conf file
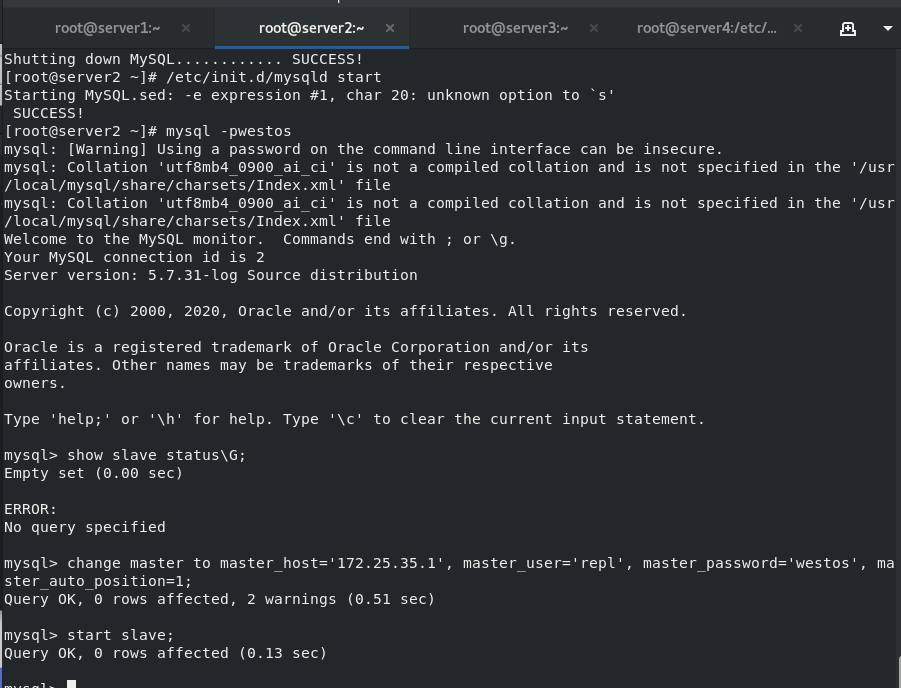
mysql start
#Set master-slave
change master to master_host='172.25.7.1',master_user='repl',master_password='westos',master_auto_position=1;
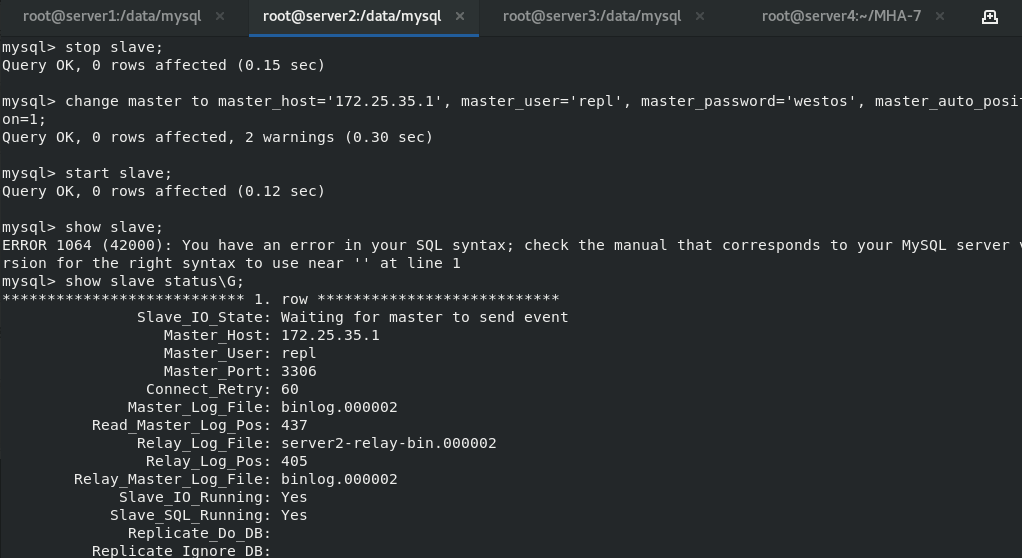
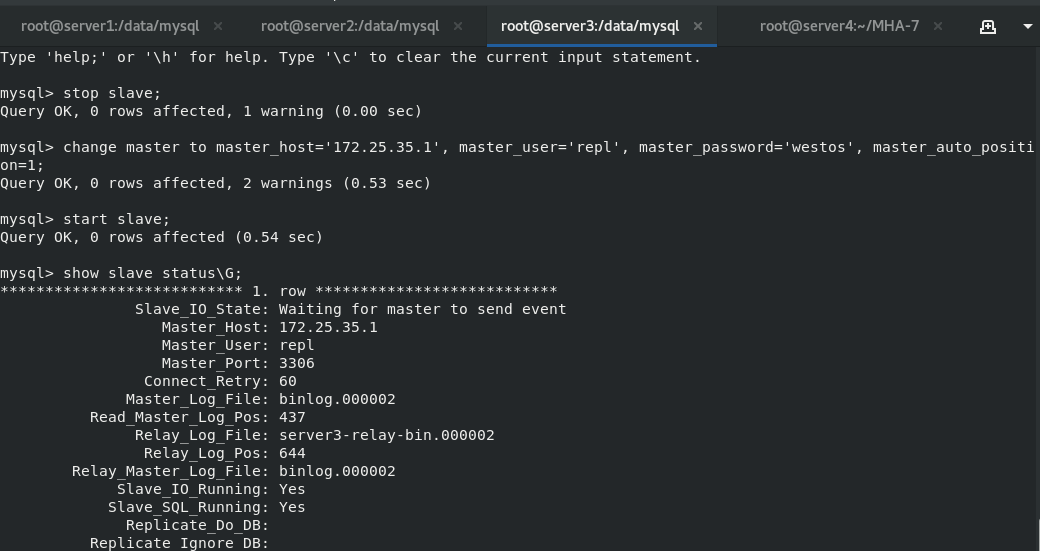
At this time, one master and two slaves are set
Download MHA-7 High Availability Program
On server4
/etc/init.d/mysqld stop
systemctl stop mysql.service
lftp 172.25.254.250
cd /pub/docs/mysql/MHA-7
 Download this directory to the host
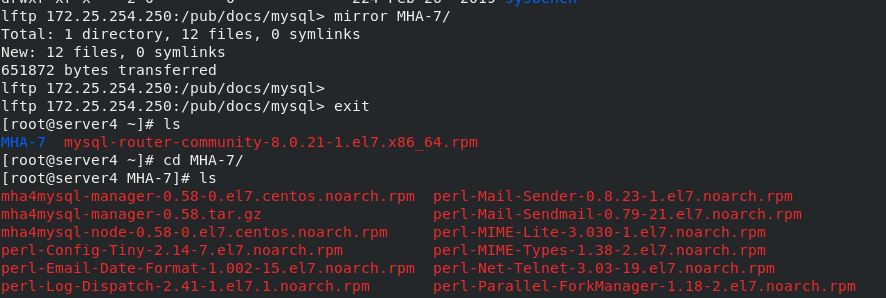
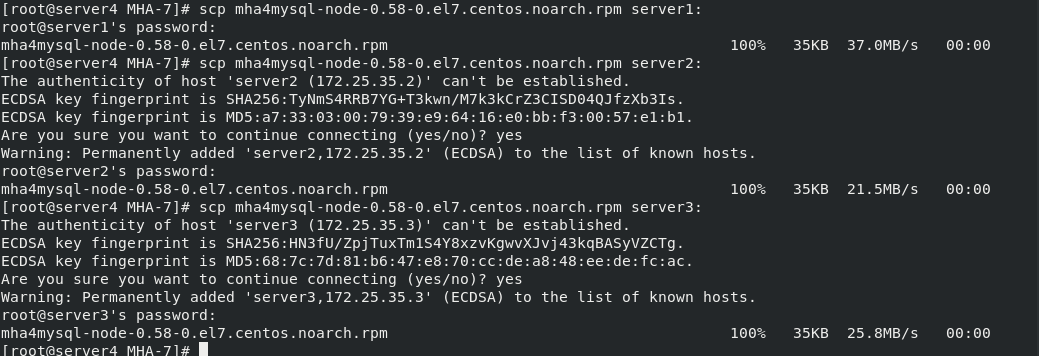
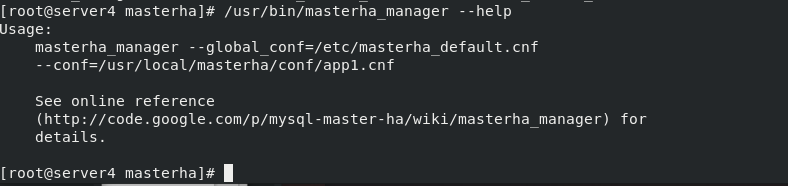
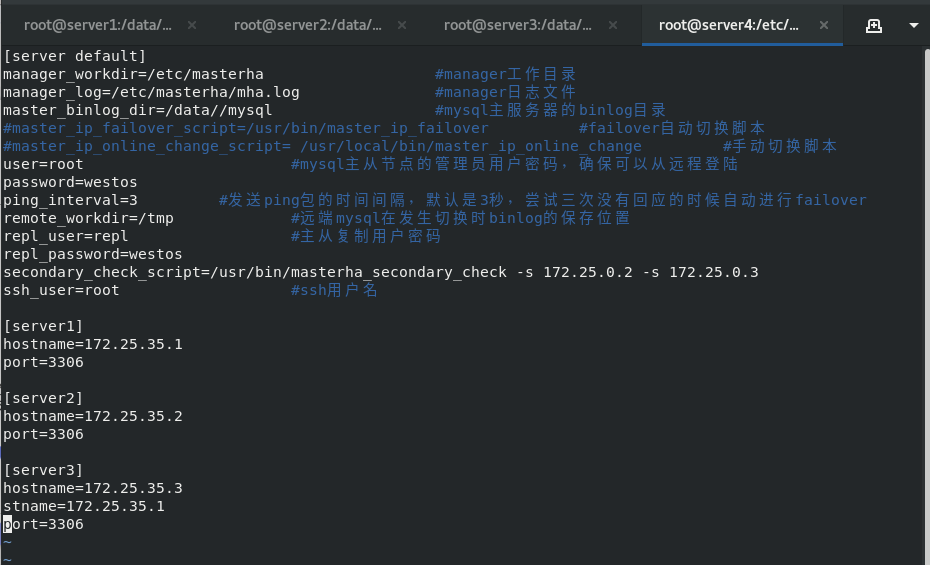
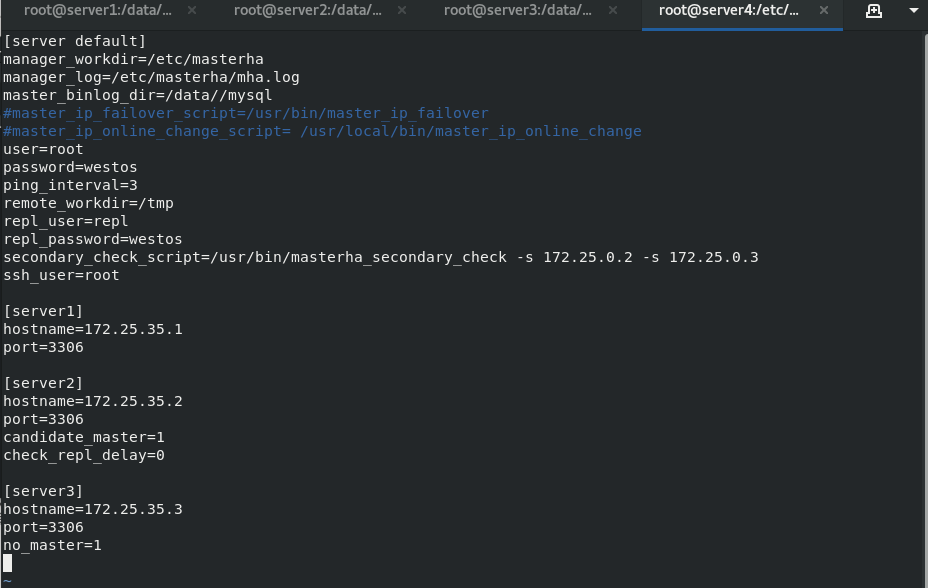
take mha4mysql-node-0.58-0.el7.centos.noarch.rpm Packet transfer to server2,3
scp mha4mysql-node-0.58-0.el7.centos.noarch.rpm server2:
scp mha4mysql-node-0.58-0.el7.centos.noarch.rpm server3:
Separate installation
yum install mha4mysql-node-0.58-0.el7.centos.noarch.rpm -y  #Because this package has dependencies, it cannot be installed using the rpm command

cd MHA-7
yum install *.rpm
mkdir /etc/masterha
cd /etc/masterha

vim app1.conf
\\\
[server default]
manager_workdir=/etc/masterha		#manager working directory
manager_log=/etc/masterha/mha.log   #manager log file
master_binlog_dir=/data/mysql		#binlog directory of mysql master server
#master_ip_failover_script=/usr/bin/master_ip_failover		#failover auto switch script
#master_ip_online_change_script= /usr/local/bin/master_ip_online_change		#Manual switch script
user=root			#The administrator user password of the mysql master-slave node to ensure that you can log in remotely
password=westos
ping_interval=3		#The interval between sending ping packets is 3 seconds by default. When there is no response after three attempts, it will start from 					 Perform failover automatically
remote_workdir=/tmp		#The location where the binlog is saved when the remote mysql is switched
repl_user=repl			#Master slave copy user password
repl_password=westos
#report_script=/usr/local/send_report		#Script to send alarm after switching
secondary_check_script=/usr/bin/masterha_secondary_check -s 172.25.35.2 -s 172.25.35.3
#shutdown_script=""		#After the fault occurs, close the script of the fault host to prevent brain crack
ssh_user=root			#ssh user name
[server1]
hostname=172.25.35.1
port=3306
#candidate_master=1
#check_repl_delay=0

[server2]
hostname=172.25.35.2
port=3306
candidate_master=1	#When failover is specified, this slave will take over the master, even if the data is not up-to-date.
check_repl_delay=0	#By default, if a slave lags behind the master's 100m relay logs, MHA will not select the slave as a new master, because the recovery of the slave takes a long time. Set check_repl_delay=0,MHA triggers the switch. When selecting a new master, the replication delay will be ignored. This parameter is set to candidate_ The host with master = 1 is very useful because the candidate master must be a new master in the process of switching

[server3]
hostname=172.25.35.3
port=3306
#no_master=1			#Always slave
\\\

stay server1\2\3 In, any one of them enters the database and authorizes the remote user to log in to the database
grant all on *.* to root@'%' identified by 'westos'; ##Make authorization
flush privileges; ##Refresh authorization list


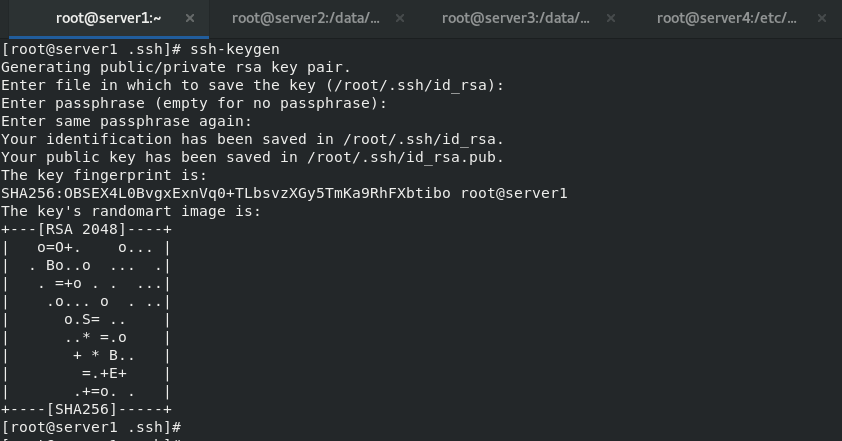
Establish key
stay server1 Establish key in
ssh-keygen  #Establish key
ssh-copy-id server1   #Copy to yourself and server2, server3 and server4
 Will the whole ssh File transfer to server1,server2,server3,server4 All hosts can connect without password
scp -r .ssh/ server1:
scp -r .ssh/ server2:
scp -r .ssh/ server3:
scp -r .ssh/ server4:
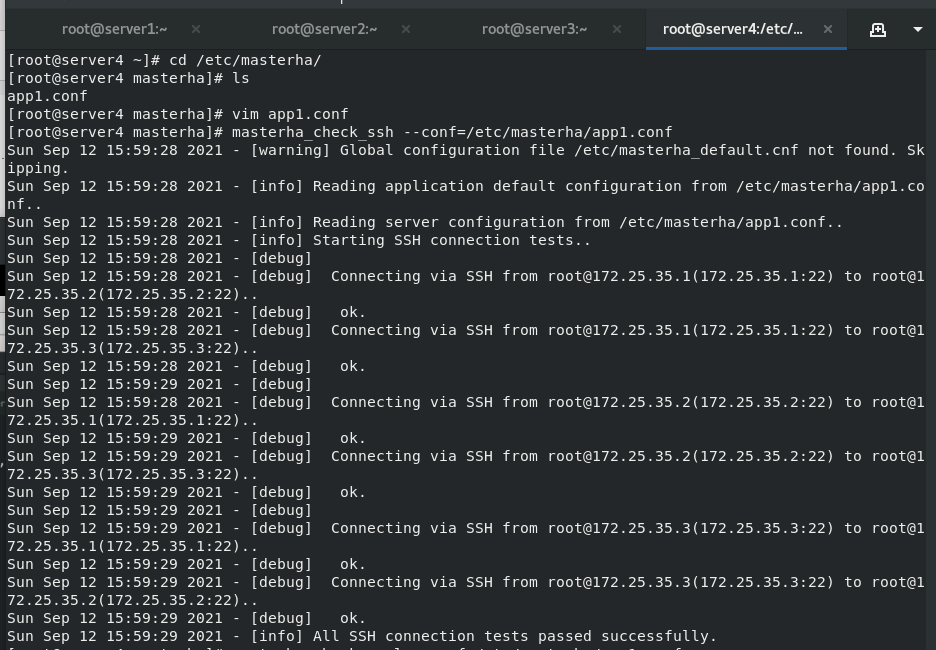
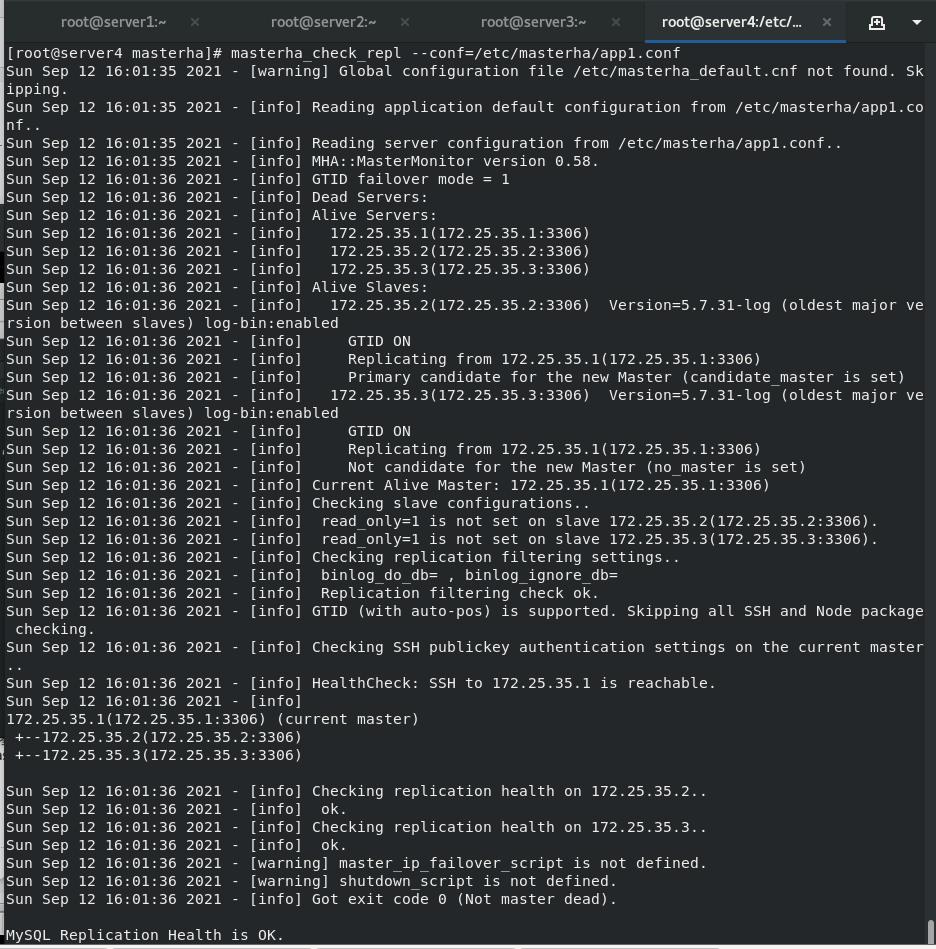
Check whether the experimental environment is configured successfully
stay server4 in

masterha_check_ssh --conf=/etc/masterha/app1.conf    #Detect ssh
masterha_check_repl --conf=/etc/masterha/app1.conf    #Check the repl to see if the status of one master and two slaves is correct
 After all are successful, you can enter instructions for manual switching or script automatic switching
Switch master manually
masterha_master_switch --conf=/etc/masterha/app1.conf --master_state=alive --new_master_host=172.25.7.2 --new_master_port=3306 --orig_master_is_new_slave --running_updates_limit=10000 #Manually switch the master to replace the running master with the standby master


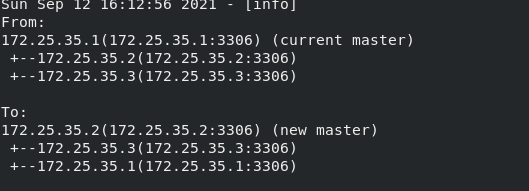
The standby master-server2 is now online Check the status of the slave in servers 1 and 3. It is found that the original master has changed from 1 to 2, and the slave has changed to 1 and 3.
Switch the master to server1
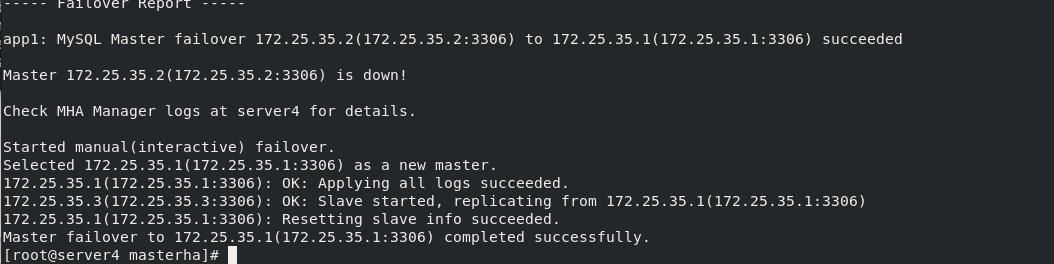
Close the database in server1 and test the manual switch after the master stops running
masterha_master_switch --master_state=dead --conf=/etc/masterha/app1.conf --dead_master_host=172.25.35.1 --dead_master_port=3306 --new_master_host=172.25.35.2 --new_master_port=3306 --ignore_last_failover    #This command is to replace the database that has been down
 Here is the first failover master,--ignore_last_failover Parameters can be omitted


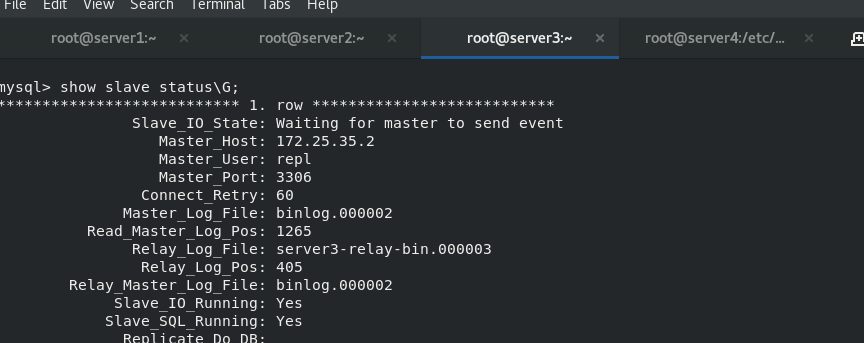
 View the slave status in server3
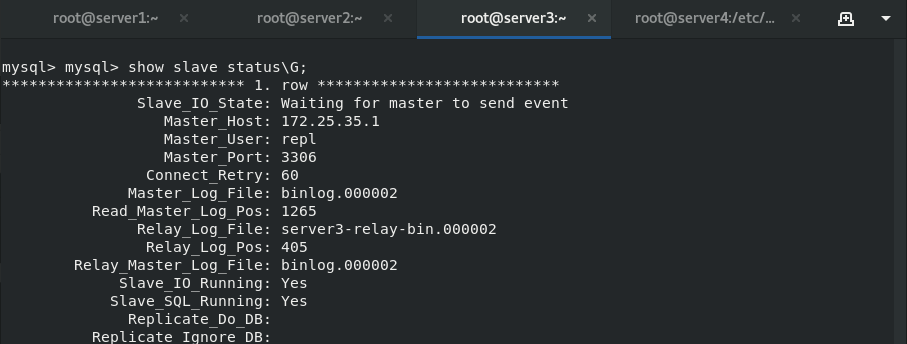
Now server1 becomes master and server3 becomes slave, but server2 needs to manually re-enter it to become the slave of server1
Auto switch master
Switch the master to server1
masterha_manager --conf=/etc/masterha/app1.conf &    #Turn on automatic master switching and put this process into the background
ps ax    #Monitor
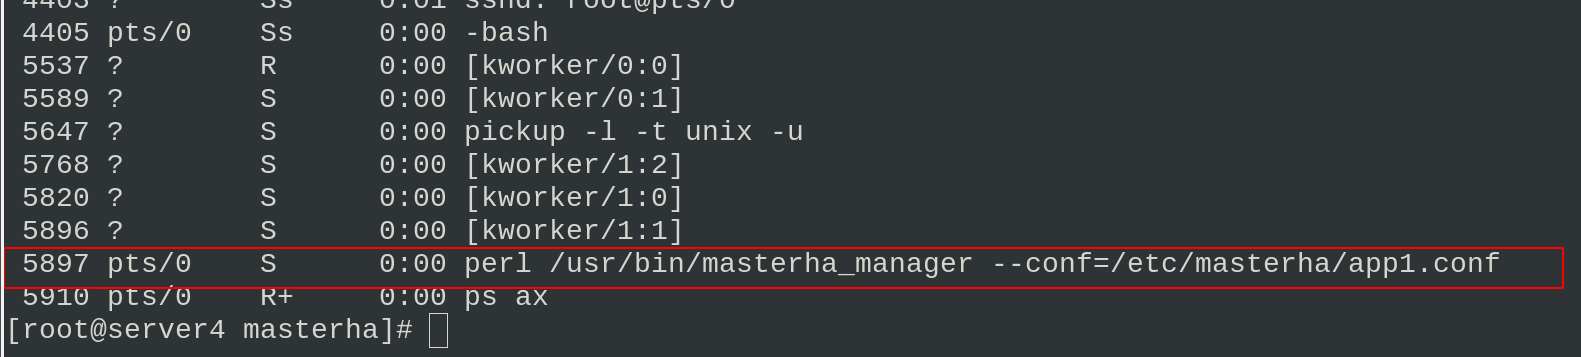
Closing the master will automatically switch to server2 as the master

When switching the master, server4 will be prompted to view the contents in the / etc/masterha directory. There will be two more files, app1.failover.complete and mha.log (log files, which will be generated after automatic switching)
App1.failover.complete is a locked file. There is no content in the file. When the master is failed over, it is switched at most once within eight hours by default. Therefore, if the current master is down again, MHA will check whether there is an app1.failover.complete file in the directory. If not, an error will be reported! (these two files need to be deleted when you want to switch)
Or when switching manually
masterha_master_switch --master_state=dead --conf=/etc/masterha/app1.conf --dead_master_host=172.25.7.1 --dead_master_port=3306 --new_master_host=172.25.7.2 --new_master_port=3306 –ignore_last_failover
Plus – ignore_last_failover parameter, skip the step of viewing this file
Drift IP - VIP setting
When the master is switched, the user does not know which host the master is switched to. We can use the router or set the VIP user
At present, it is one master and two slaves
server2 is master, and server1 and 3 are slave
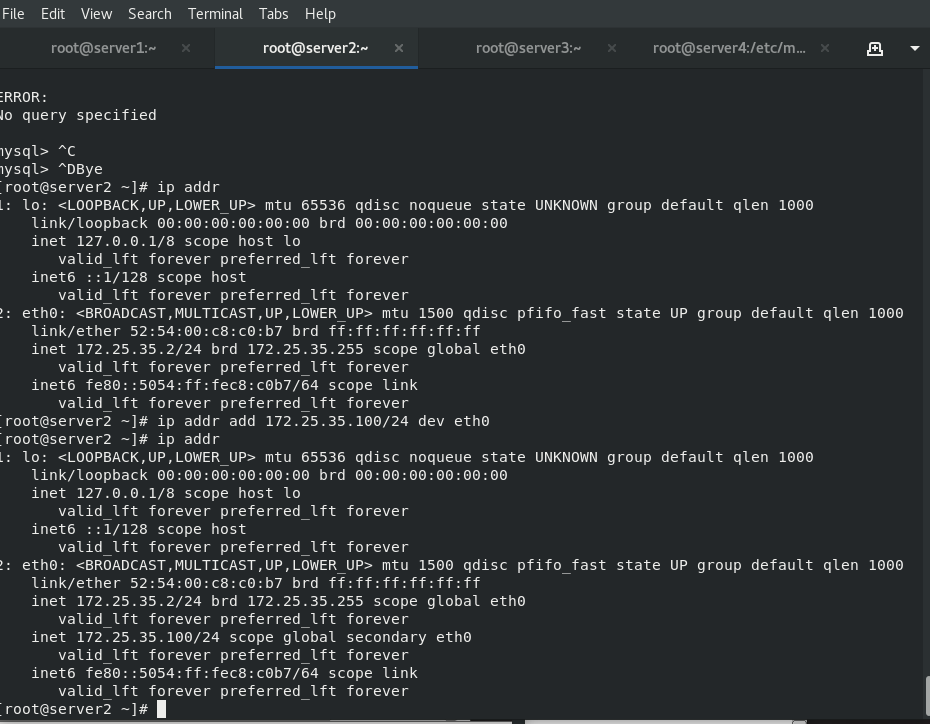
Add VIP user in master host
ip addr add 172.25.35.100/24 dev eth0
Download the script in server4, and use the script to make VIP users transfer with the master
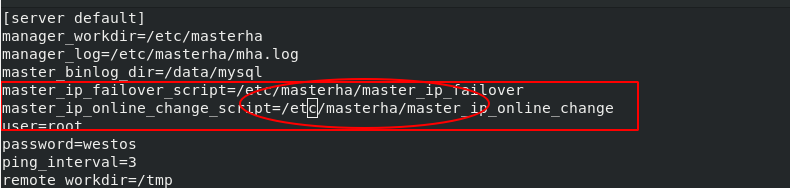
cd /etc/masterha/
lftp 172.25.254.250
cd /pub/docs/mysql
get master_ip_failover master_ip_online_change
exit
vim master_ip_failover   #Change the VIP user IP in the script (the faliover script is used when the master goes down)
vim master_ip_online_change  #Change the VIP user IP in the script (the online script is used when you manually change the master online)
vim app1.conf  #Uncomment the policy on the two lines of the script
master_ ip_ Modify parameters in the failover file: my $vip='172.25.35.100/24';
app1.conf remove the two lines of comments and modify the path
Detect after configuration file and script editing
masterha_check_repl --conf=/etc/masterha/app1.conf
The test is successful. Now the VIP user is in server2 (master)
Enable automatic replacement of master
masterha_manager --conf=/etc/masterha/app1.conf &
Stop the database for server2
/etc/init.d/mysqld stop
At this point, the master will automatically switch to server1
Check the ip address and find that VIP users are transferred to serve1 along with the master