Original Link: https://my.oschina.net/u/2432369/blog/610412
In this chapter, we will create a real scene for the Flappy Bird project.The game scene consists of several objects with common attributes and functions.However, these objects are rendered in different ways and behave differently.
Ordinary
Objects directly render their assigned textures. Complex objects may require multiple texture combinations to render.
Create Game Objects
First create the AbstractGameObject class and add the following code:
This class stores the position, size, origin, scaling factor, and rotation angle of the object.The class also contains two methods, update() and render(), which are called in the controller and renderer, respectively.Because each object we create needs to participate in collision detection, we also include a Body type member variable for BOX2D. In update(), if the body is not equal to null, we need to use BOX2D for physical simulation, and then we use the position and rotation angle of the body object to update the object.Position and rotation angle.For rendering methods, we provide a specific implementation for each object, so we define render() as abstract.package com.art.zok.flappybird.game.object; import com.badlogic.gdx.graphics.g2d.SpriteBatch; import com.badlogic.gdx.math.MathUtils; import com.badlogic.gdx.math.Vector2; import com.badlogic.gdx.physics.box2d.Body; public abstract class AbstractGameObject { public Vector2 position; public Vector2 dimension; public Vector2 origin; public Vector2 scale; public float rotation; public Body body; public AbstractGameObject() { position = new Vector2(); dimension = new Vector2(1, 1); origin = new Vector2(); scale = new Vector2(1, 1); rotation = 0; } public void update(float deltaTime) { if(body != null) { position.set(body.getPosition()); rotation = body.getAngle() * MathUtils.radiansToDegrees; } } public abstract void render(SpriteBatch batch); }
This is a problem because BOX2D is an extension in LIBGDX, so we need to add the related library files before we can eliminate the errors in the above code.Adding a BOX2D extension can be divided into the following steps:
- Copy gdx-box2d.jar to the FlappyBird project (libs file).
- Copy gdx-box2d-native.jar to the FlappyBird-desktop project.
- Copy libgdx-box2d.so under three folders, armeabi, armeabi-v7a, and x86, to the appropriate folder in the FlappyBird-android project.
- Add new library files added to each project to the build path.
Create Brid Object
First, there is no doubt that the Bird object is an animated object. To create an animation, we need to use the Animation class.Animation's constructor requires a set of animation frames as parameters, which are used in Bird's In the constructor, we first generate a random integer in the range [0-3] as a parameter to the init() method.In the init() method, we first select an animation resource as a Bird object from three optional resources using the parameters passed in.Then we created a birdAnimation animation object with a period of 0.1 seconds and set it as a cycle Pattern .Next, we set the size and position of the object. These magic numbers are calculated proportionally and have little value to learn from. You can also set other values.package com.art.zok.flappybird.game.object; import com.art.zok.flappybird.game.Assets; import com.badlogic.gdx.Gdx; import com.badlogic.gdx.graphics.g2d.Animation; import com.badlogic.gdx.graphics.g2d.SpriteBatch; import com.badlogic.gdx.graphics.g2d.TextureAtlas.AtlasRegion; import com.badlogic.gdx.graphics.g2d.TextureRegion; import com.badlogic.gdx.physics.box2d.World; import com.badlogic.gdx.utils.Array; public class Bird extends AbstractGameObject { protected enum WAVE_STATE { WAVE_FALLING, WAVE_RISE } private Array<AtlasRegion> birds; private float animDuration; private Animation birdAnimation; private TextureRegion currentFrame; private float max_wave_height; private float min_wave_height; private WAVE_STATE waveState = WAVE_STATE.WAVE_RISE; public Bird() { init((int) (Math.random() * 3)); } // Initialization public void init(int selected) { if (selected == 1) { birds = Assets.instance.bird.bird0; } else if (selected == 2) { birds = Assets.instance.bird.bird1; } else { birds = Assets.instance.bird.bird2; } birdAnimation = new Animation(0.1f, birds); birdAnimation.setPlayMode(Animation.PlayMode.LOOP); dimension.set(3.72f, 2.64f); position.set(-dimension.x * 1.5f, dimension.y / 2); max_wave_height = position.y + 0.7f; min_wave_height = position.y - 0.7f; } @Override public void update(float deltaTime) { super.update(deltaTime); if (body == null) { if (waveState == WAVE_STATE.WAVE_FALLING) position.y -= 0.05f; else if (waveState == WAVE_STATE.WAVE_RISE) { position.y += 0.05f; } if (position.y < min_wave_height) { waveState = WAVE_STATE.WAVE_RISE; } else if (position.y > max_wave_height) { waveState = WAVE_STATE.WAVE_FALLING; } } } @Override public void render(SpriteBatch batch) { animDuration += Gdx.graphics.getDeltaTime(); currentFrame = birdAnimation.getKeyFrame(animDuration); batch.draw(currentFrame.getTexture(), position.x - dimension.x / 2, position.y - dimension.y / 2, dimension.x / 2, dimension.y / 2, dimension.x, dimension.y, scale.x, scale.y, rotation, currentFrame.getRegionX(), currentFrame.getRegionY(), currentFrame.getRegionWidth(), currentFrame.getRegionHeight(), false, false); } }
In ren
In the der method, we first get the texture of the current frame based on the time elapsed by the animation, then use the SpriteBatch.draw method to render the texture of the frame. Note that we pass position.x - dimension.x / 2 and position.y - dimension.y / 2 for the draw method, that is, the rectangular area rendered always has position.This is central for a reason. Later, when we use the BOX2D simulation, the rotation angle obtained is based on the position, so for convenience, we use the position position position to represent the central position of the Bird object.
From the official Flappy Bird game, we know that the Bird object has a fluctuating animation state when the game is not started.So here we will divide each object into two states: not opened (simulation) and already modeled.We added two enumeration constants, WAVE_FALLING, to the Bird object for which WAVE_RISE serves the animation.In the init() method, we initialize the max_wave_height and min_wave_height s values to represent the maximum and minimum heights of the wave animation, respectively.In the update() method, if the body equals null to indicate that the simulation has not started, a wave animation is performed, which is achieved by the conversion of two wave states to each other and the continuous change of the y-axis coordinate position.
Test Bird Class
We must do some preparatory work before testing the Bird class.First, modify the FlappyBirdMain.Create() method:
public void create() {
Assets.instance.init(new AssetManager());
//Set logging level
Gdx.app.setLogLevel(Application.LOG_DEBUG);
worldController = new WorldController();
worldRenderer = new WorldRenderer(worldController);
paused = false;
}
The initialization resource method Assets.instance.init() must be called from the beginning because the WorldController instance created below requires the use of resource content.
Modify the resume() method of the same class:
@Override
public void resume() {
paused = false;
Assets.instance.init(new AssetManager());
}
In Android systems, when an application is brought into the background, it is very likely that the memory resources occupied by the application will be reclaimed by the system. We should reload the resources when we return to the foreground.
Modify the WorldController class:
We added a bird member variable and a private initBird() method to WorldController, and we created a Bird object for the member variable bird in the initBird() method.Because the construction and initialization of Bird objects are separate, we can reuse Bird objects with this trick instead of creating new Bird objects every time we restart.package com.art.zok.flappybird.game; import com.art.zok.flappybird.game.object.Bird; public class WorldController { private static final String TAG = WorldController.class.getName(); public Bird bird; public WorldController() { init(); } private void init() { initBird(); } private void initBird() { if(bird == null) { bird = new Bird(); } else { bird.init((int) (Math.random() * 3)); } } public void update(float deltaTime) { bird.update(deltaTime); } }
In the update() method, we call the bird.update() method to update the Bird object.
Modify the WorldRenderer class:
This time, a lot of code has been added to WorldRenderer. First, we save a reference to the constructor's worldController instance object in a member variable.We then created the SpriteBatch object in the init() initialization method and the Orthographic Camera orthogonal projection camera instance object with a viewport size set to Constants.VIEWPORT_WIDTH and Consttants.VIEWPORT_HEIGHT of 50*50 meters.Next, set the camera's initial position to (0, 0, 0), which is the origin of the world coordinates, and finally update the camera's projection matrix.package com.art.zok.flappybird.game; import com.art.zok.flappybird.util.Constants; import com.badlogic.gdx.graphics.OrthographicCamera; import com.badlogic.gdx.graphics.g2d.SpriteBatch; import com.badlogic.gdx.utils.Disposable; public class WorldRenderer implements Disposable { private OrthographicCamera camera; private SpriteBatch batch; private WorldController worldController; public WorldRenderer(WorldController worldController) { this.worldController = worldController; init(); } private void init() { batch = new SpriteBatch(); camera = new OrthographicCamera(Constants.VIEWPORT_WIDTH, Constants.VIEWPORT_HEIGHT); camera.position.set(0, 0, 0); camera.update(); } public void render() { renderWorld(batch); } private void renderWorld (SpriteBatch batch) { batch.setProjectionMatrix(camera.combined); batch.begin(); worldController.bird.render(batch); batch.end(); } public void resize(int width, int height) { // Update camera Viewport Size camera.viewportWidth = Constants.VIEWPORT_HEIGHT * width / height; camera.update(); } @Override public void dispose() { batch.dispose(); } }
We're Wo
The rldRenderer class adds a private renderWorld() method, and then the render() method
Called in, this method is used to render all objects in the game.First we associate the projection matrix for the SpriteBatch object, then we call the begin() and end() methods of the object, and between them we call the render() method of the worldController.bird object to render the bird object.
Also, we added two lines of code to the resize() method, first calculating the latest value of camera.viewportWidth, then updating the projection matrix of camera.This is actually the remedy for the inconsistent unit length of the viewport left over by us.First imagine that no matter how the window size changes, we always keep the height of the viewport at 50 meters. When the window size changes, we calculate the latest width of the viewport by counting how many meters per pixel in the vertical direction (Constants.VIEWPORT_HEIGHT/height).
Finally, we released the SpriteBatch object in the dispose method.
Now you can launch the desktop application test code to see if it works. Here is a screenshot:
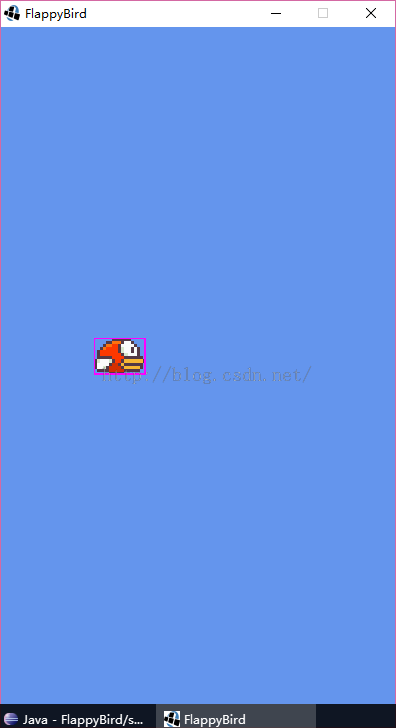
Because the video can't be transmitted, you can only see the screenshots. The real window should be that the bird can wave its wings and fluctuate up and down.
Create Land Object
According to the analysis at the time Bird was created, Land moves horizontally to the left at a fixed speed, just as it did when the simulation started.However, since after starting the game, we need to hand over the entire physical simulation (simulation) process to BOX2D, but before we start, we need to do it manually, so although Land is in the same state, it still needs to be handled in different situations.First of all, Land has only one texture. Second, let Land move based on the principle that Land texture is drawn seamlessly three times from a fixed X-axis coordinate to the right, each time at the same width as the current screen. Record the distance Land moves to the left, and when the moving distance is greater than or equal to one screen width, the land is drawn seamlesslyThe position is reset to the initial x-axis position.
First in the constructor, we get the Land texture resource and save it to the member variable land.Next we calculate a viewWidth value, which we can see from the expression that represents the width of the current viewport.But there is a big problem here. First of all, the Land object is only created at the beginning, so the value of viewWidth only represents the width of the viewport at startup, and viewWidth is not updated when the window size is changed during run.So here we need to set the desktop window size to be non-adjustable. Another important reason why the window is not adjustable is that the background picture of Flappy Bird is displayed in the window with a full screen. If the window size can be changed, the background may be stretched, so to avoid distortion, the window size cannot be changed at willChange.To make the window non-resizable, simply open the Main startup class of the FlappyBird-desktop project and add a line cfg.resizable = false for the configuration parameter cfg; that's all.package com.art.zok.flappybird.game.object; import com.art.zok.flappybird.game.Assets; import com.art.zok.flappybird.util.Constants; import com.badlogic.gdx.Gdx; import com.badlogic.gdx.graphics.g2d.SpriteBatch; import com.badlogic.gdx.graphics.g2d.TextureAtlas.AtlasRegion; public class Land extends AbstractGameObject { private static final float LAND_VELOCITY = -15f; // Constant left movement at 15m/s public static final float LAND_HEIGHT = 10.3f; private AtlasRegion land; private float leftMoveDist; private float viewWidth; public Land() { land = Assets.instance.land.land; viewWidth = Constants.VIEWPORT_HEIGHT * Gdx.graphics.getWidth() / Gdx.graphics.getHeight(); init(); } public void init() { float startPosX = -viewWidth / 2; dimension.set(viewWidth, LAND_HEIGHT); position.set(startPosX, -Constants.VIEWPORT_HEIGHT / 2); } private void wrapLand() { if (leftMoveDist >= viewWidth) { if (body == null) { position.x += leftMoveDist; } leftMoveDist = 0; } } @Override public void update(float deltaTime) { wrapLand(); // Convert land super.update(deltaTime); // Update application body object if (body == null) { // If there is no body object to update automatically position.x += LAND_VELOCITY * deltaTime; } leftMoveDist += Math.abs(LAND_VELOCITY * deltaTime); } @Override public void render(SpriteBatch batch) { batch.draw(land.getTexture(), position.x, position.y, origin.x, origin.y, dimension.x, dimension.y, scale.x, scale.y, rotation, land.getRegionX(), land.getRegionY(), land.getRegionWidth(), land.getRegionHeight(), false, false); batch.draw(land.getTexture(), position.x + viewWidth, position.y, origin.x, origin.y, dimension.x, dimension.y, scale.x, scale.y, rotation, land.getRegionX(), land.getRegionY(), land.getRegionWidth(), land.getRegionHeight(), false, false); batch.draw(land.getTexture(), position.x + 2 * viewWidth, position.y, origin.x, origin.y, dimension.x, dimension.y, scale.x, scale.y, rotation, land.getRegionX(), land.getRegionY(), land.getRegionWidth(), land.getRegionHeight(), false, false); } }
The initialization function init() first assigns -viewWidth/2 to the variable startPosX, which represents both the x-axis coordinates drawn by the first land texture and the initial X-axis position of the entire land object.Next we set the size and initial position of the Land object.
In the wrapLand() method, we first test whether the Land object moves to the left more than viewWidth, and if so, we should move the location of its x-axis to the right of the leftMoveDist distance.
In the update() method, we first call the wrapLand() method to test the Land location and reset it.The parent update() method is then called, but the parent update() method is only useful when the simulation starts, so it is not considered here, but you cannot forget to call it.Next, we test whether the body is equal to null, and if it is equal to null, manually move the x-axis to the left at LAND_VELOCITY=-15m/s.Finally, we update the distance the Land object moves to the left.The question we need to consider carefully above is why wrapLand() should be called on the first line of update()?Imagine that if our Land moves to the left fast enough that each frame moves a considerable distance, there will be an issue of sufficient importance if wrapLand() is called on the last line.
When update() updates this frame and the Land's position has exceeded the moving distance, we move it to the initialization position, but at this time the screen still shows the scene where the Land did not reach the specified position in the previous frame, so to avoid this delay, we first call the wrapLand() method.
Finally, in the render() method, three land textures are drawn horizontally, starting at the position position.
Test Land Object
By now, the Land object has completed the entire skeleton content and can be tested to see its state without starting to simulate.
Add code for WorldController:
This is exactly the same as the Bird object, and we've added similar code to the land object, which is not explained much here.Next, the WorldRenderer.renderWorld() method:package com.art.zok.flappybird.game; import com.art.zok.flappybird.game.object.Bird; import com.art.zok.flappybird.game.object.Land; public class WorldController { private static final String TAG = WorldController.class.getName(); public Bird bird; public Land land; public WorldController() { init(); } private void init() { initBird(); initLand(); } private void initBird() { if(bird == null) { bird = new Bird(); } else { bird.init((int) (Math.random() * 3)); } } private void initLand() { if(land == null) { land = new Land(); } else { land.init(); } } public void update(float deltaTime) { bird.update(deltaTime); land.update(deltaTime); } }
You can see that we added the rendering of the land object to renderWorld.Now you can start your app observation and testing. Here is a screenshot of the desktop platform running:private void renderWorld (SpriteBatch batch) { batch.setProjectionMatrix(camera.combined); batch.begin(); worldController.bird.render(batch); worldController.land.render(batch); batch.end(); }
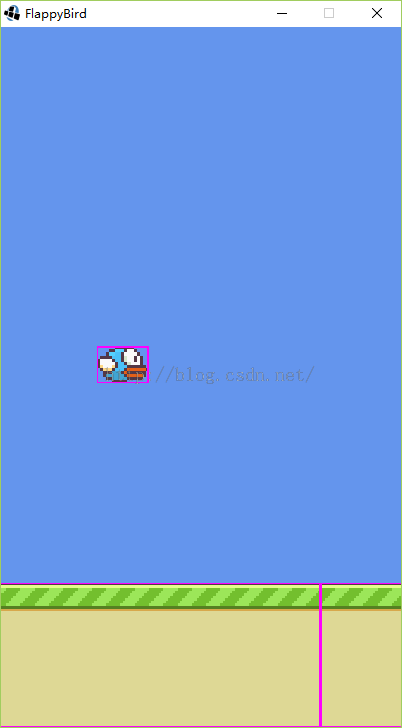
We can see that the birds and the ground are working as expected.
Create Pipes and Pipe Objects
package com.art.zok.flappybird.game.object;

import com.art.zok.flappybird.game.Assets;
import com.art.zok.flappybird.util.Constants;
import com.badlogic.gdx.Gdx;
import com.badlogic.gdx.graphics.g2d.SpriteBatch;
import com.badlogic.gdx.graphics.g2d.TextureAtlas.AtlasRegion;
import com.badlogic.gdx.math.MathUtils;
import com.badlogic.gdx.utils.Array;

public class Pipes extends AbstractGameObject {
	public static final float PIPE_DISTANCE = 17.24f;

	Pipe curPipe;
	Array<Pipe> pipes;
	private float viewWidth;

	public Pipes() {
		viewWidth = Constants.VIEWPORT_HEIGHT *
				Gdx.graphics.getWidth() / Gdx.graphics.getHeight();
		pipes = new Array<Pipes.Pipe>();
		init();
	}

	public void init() {
		pipes.clear();
		pipes.add(curPipe = new Pipe());
	}

	private void testPipeNumberIsTooLarge(int amount) {
		if (pipes != null && pipes.size > amount) {
			pipes.removeIndex(0);
		}
	}

	private void wrapPipe() {
		if (curPipe.position.x <= viewWidth - PIPE_DISTANCE) {
			pipes.add(curPipe = new Pipe());
		}
	}

	@Override
	public void update(float deltaTime) {
		wrapPipe();
		for(Pipe pipe : pipes)
			pipe.update(deltaTime);
		testPipeNumberIsTooLarge(8);
	}

	@Override
	public void render(SpriteBatch batch) {
		for(Pipe pipe : pipes) {
			pipe.render(batch);
		}
	}

	public class Pipe extends AbstractGameObject {
		private static final float PIPE_WIDTH = 5.72f;
		private static final float CHANNEL_HEIGHT = 10.56f;
		public static final float MIN_PIPE_HEIGHT = 5.27f;
		private static final float PIPE_VELOCITY = -15f; 	// Constant left movement at 15m/s

		private AtlasRegion pipe;
		private float dnPipeHeight;
		private boolean isCollected;
		public Pipe() {
			pipe = Assets.instance.pipe.pipeDownGreen;
			init();
		}

		public void init() {
			isCollected = false;
			position.set(viewWidth, Land.LAND_HEIGHT - Constants.VIEWPORT_HEIGHT / 2);
			dimension.set(PIPE_WIDTH, Constants.VIEWPORT_HEIGHT - Land.LAND_HEIGHT);

			dnPipeHeight = MathUtils.random(dimension.y -
					2 * MIN_PIPE_HEIGHT - CHANNEL_HEIGHT) + MIN_PIPE_HEIGHT;
		}

		public int getScore() {
			if(isCollected) return 0;
			else {
				isCollected = true;
				return 1;
			}
		}

		@Override
		public void render(SpriteBatch batch) {
			// down
			batch.draw(pipe.getTexture(), position.x, position.y + dnPipeHeight - Constants.VIEWPORT_HEIGHT/1.5f,
					origin.x, origin.y, dimension.x, Constants.VIEWPORT_HEIGHT/1.5f, scale.x, scale.y,
					rotation, pipe.getRegionX(), pipe.getRegionY(), pipe.getRegionWidth(),
					pipe.getRegionHeight(), false, true);

			// up
			batch.draw(pipe.getTexture(), position.x, position.y + dnPipeHeight + CHANNEL_HEIGHT,
					origin.x, origin.y, dimension.x, dimension.y/1.5f,
					scale.x, scale.y, rotation, pipe.getRegionX(), pipe.getRegionY(),
					pipe.getRegionWidth(), pipe.getRegionHeight(), false, false);
		}
	}
}
First we created a Pipes class and created a Pipe inner class for it, both of which inherit from AbstractGameObjec.However, Pipes inherits this class for the sake of a unified public method. In fact, Pipes is not an object in the game. The real object in the game is the Pipe internal class, while Pipes is only a function class that manages a set of Pipe objects.
First, let's look at the Pipe internal class, which defines the width (PIPE_WIDTH) constant of the Pipe object, the channel height (CHANNEL_HEIGHT) constant in the middle of the Pipe object, the minimum Pipe height (MIN_PIPE_HEIGHT), and the speed at which the Pipe object moves left (PIPE_VELOCITY) constant, which are mostly easy to understand.There is only one MIN_PIPE_HEIGHT to explain. We define the upper and lower pipes with the same x-axis position in the game as a Pipe object, while the height dimension.y of the Pipe object is defined as the sum of the height of the upper and lower pipes and the height of the middle channel. Here we define a dnPipeHeight membership changeThe gauge represents the random height of the tube below, since we know the total height between the three and the height of the tube below, it is easy to calculate the height of the tube above, so there is no need to define a variable for the height of the tube above.Because the length of each pipe is random, we define a minimum height MIN_PIPE_HEIGHT for each pipe in order to keep the height of both tubes above and below each Pipe object non-zero.
Similarly, in Pipe's constructor, we first save the texture resources, where we only use one resource.Then in the init() method, we initialize the member variable isCollected to false, where we use Pipe objects as props. From the analysis of the original game, we know that each time we pass a Pipe object, we get a score, so later our scoring system treats Pipe objects as props.Next, set the position and size.Where the viewWidth value is initialized in an external class and Pipe is a non-static internal class, you can safely use it.Next, we get the random height dnPipeHeight of the tube below the Pipe object. To get the random number, we first need to determine the range of random numbers. The following figure can explain this:
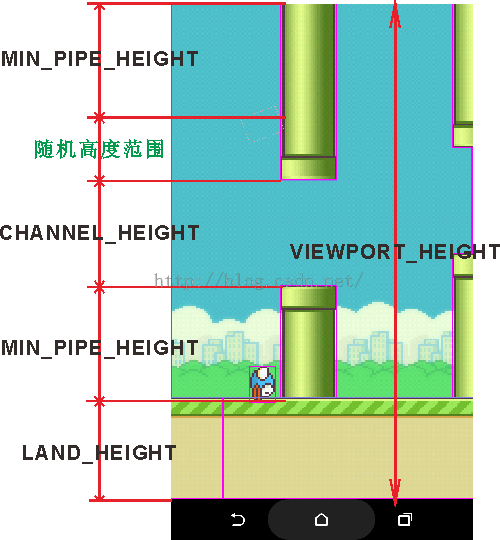
In the figure above, only one extreme scenario is illustrated, where the tube below gets the minimum height and the tube above gets the minimum height plus the maximum random height.From the figure above, we can get a random height calculation method for the dnPipeHeight of the Pipe object.The getScore() method is easy to understand and returns 1 point if it is not collected, indicating that a Pipe object has passed and 0 if it has been collected.
Analyzing the Pipe object of the original game, the Pipe object will not move until the simulation starts, so we do not need to override the update() method of the parent class here.
The render() method draws the upper and lower tubes.Most of them are simple and need to be explained, because there is only one pipe texture resource, so we must unify the height and width of the texture drawing to make it look the same, so here we set its drawing height to Constants.VIEWPORT_HEIGHT/1.5f.
Next we need to analyze the Pipes class. If you understand the principles of the Pipes class, Pipes is very easy to understand.He simply manages a set of Pipe objects, evaluates viewWidth in the constructor, then creates a list object of Pipe objects in init(), and adds the first object.The wrap() method works by creating a new Pipe object at x-axis equal to viewWidth if the last Pipe object created moves to the left PIPE_DISTANCE distance, because viewWith is beyond the camera's viewport, so we don't see it at first, but only when the game really startsTo.The testPipeNumberIsTooLarge() method is designed to release memory occupied by Pipe objects that are out of range in a timely manner.update() and render() update and render the managed Pipe object, respectively.
Testing Pipes and Pipe Objects
Because we haven't added BOX2D emulation yet, the Pipe object is invisible temporarily, so in order to test if the code of the Pipe object works properly, we rewrite the update() method of the Pipe internal class:
@Override
		public void update(float deltaTime) {
			super.update(deltaTime);
			if(body == null) {
				position.x += PIPE_VELOCITY * deltaTime;
			}
		}
Next, add the appropriate member variables for WorldCotroller and modify the method:
The method is exactly the same, so there is no need to explain it.The following is the rendering process for adding a Pipes object to the WorldRenderer.renderWorld() method:package com.art.zok.flappybird.game; import com.art.zok.flappybird.game.object.Bird; import com.art.zok.flappybird.game.object.Land; import com.art.zok.flappybird.game.object.Pipes; public class WorldController { private static final String TAG = WorldController.class.getName(); public Bird bird; public Land land; public Pipes pipes; public WorldController() { init(); } private void init() { initBird(); initLand(); initPipes(); } private void initBird() { if(bird == null) { bird = new Bird(); } else { bird.init((int) (Math.random() * 3)); } } private void initLand() { if(land == null) { land = new Land(); } else { land.init(); } } private void initPipes() { if(pipes == null) { pipes = new Pipes(); } else { pipes.init(); } } public void update(float deltaTime) { bird.update(deltaTime); land.update(deltaTime); pipes.update(deltaTime); } }
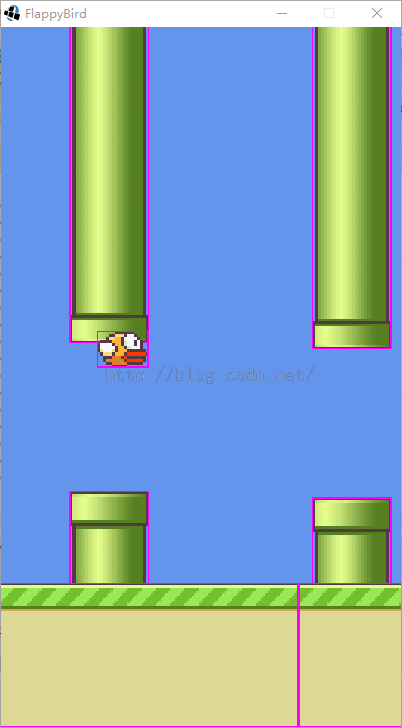
Start your desktop application now and test it:private void renderWorld (SpriteBatch batch) { batch.setProjectionMatrix(camera.combined); batch.begin(); worldController.bird.render(batch); worldController.land.render(batch); worldController.pipes.render(batch); batch.end(); }
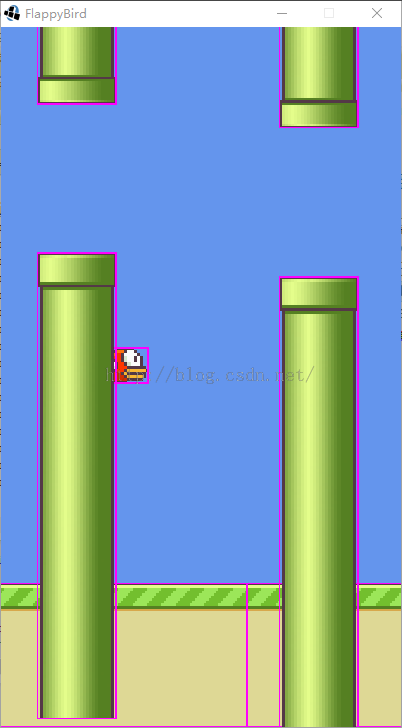
private void renderWorld (SpriteBatch batch) {
    	batch.setProjectionMatrix(camera.combined);
		batch.begin();
		worldController.pipes.render(batch);
		worldController.land.render(batch);
		worldController.bird.render(batch);
		batch.end();
    }
Add Background
We have two texture backgrounds available, so each time we start, we need to randomly select one and display it full screen at the bottom of the whole window.
For consistency, we should also manage the background texture as an object in WorldController.So modify the WorldController class to get background resources and then modify the WorldRenderer.renderWorld() method again to add background rendering code:
First we add a member variable background to the WorldController and then initialize it in the init() method, where we randomly obtain a background texture using the Array<AtlasRegion>.random() method.Next, modify the WorldRenderer.renderWorld() method:public Bird bird; public Land land; public Pipes pipes; public AtlasRegion background; private void init() { background = Assets.instance.decoration.bg.random(); initBird(); initLand(); initPipes(); }
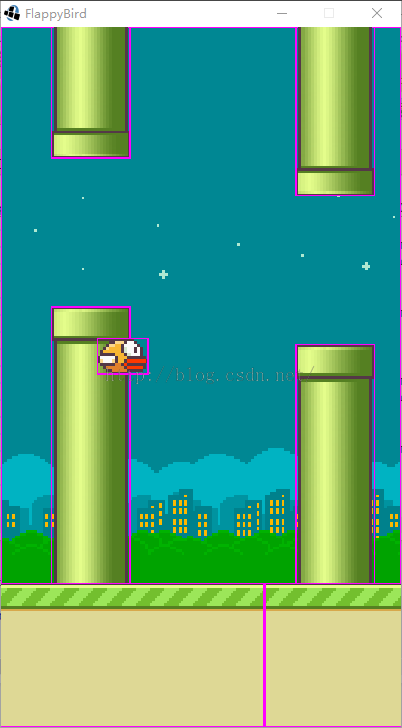
Because the background is the lowest object, we need to put the background in front of the drawing.Here, the parameters of the draw() method are the lower left corner of the viewport and the width and height of the viewport, which always tiles the background throughout the window.The final test run application is shown in the following image:private void renderWorld (SpriteBatch batch) { batch.setProjectionMatrix(camera.combined); batch.begin(); batch.draw(worldController.background, -camera.viewportWidth / 2, -camera.viewportHeight / 2, camera.viewportWidth, camera.viewportHeight); worldController.pipes.render(batch); worldController.land.render(batch); worldController.bird.render(batch); batch.end(); }
Reprinted at: https://my.oschina.net/u/2432369/blog/610412