catalogue
- Lianshengde HLK-W806 (I): development environment configuration, compilation and burning instructions under Ubuntu 20.04
- Lianshengde HLK-W806 (II): description of development environment configuration, compilation and burning under Win10
- Lianshengde HLK-W806 (III): key free automatic download and reset
- Lianshengde HLK-W806 (IV): ST7735 LCD driven by software SPI and hardware SPI
- Lianshengde HLK-W806 (V): report on W801 development board
W801
Today, I received the W801 development board, which has been waiting for two weeks. The appearance is basically the same as that of the W806 development board, but the component layout has been adjusted. The physical comparison between W801 and W806 development boards
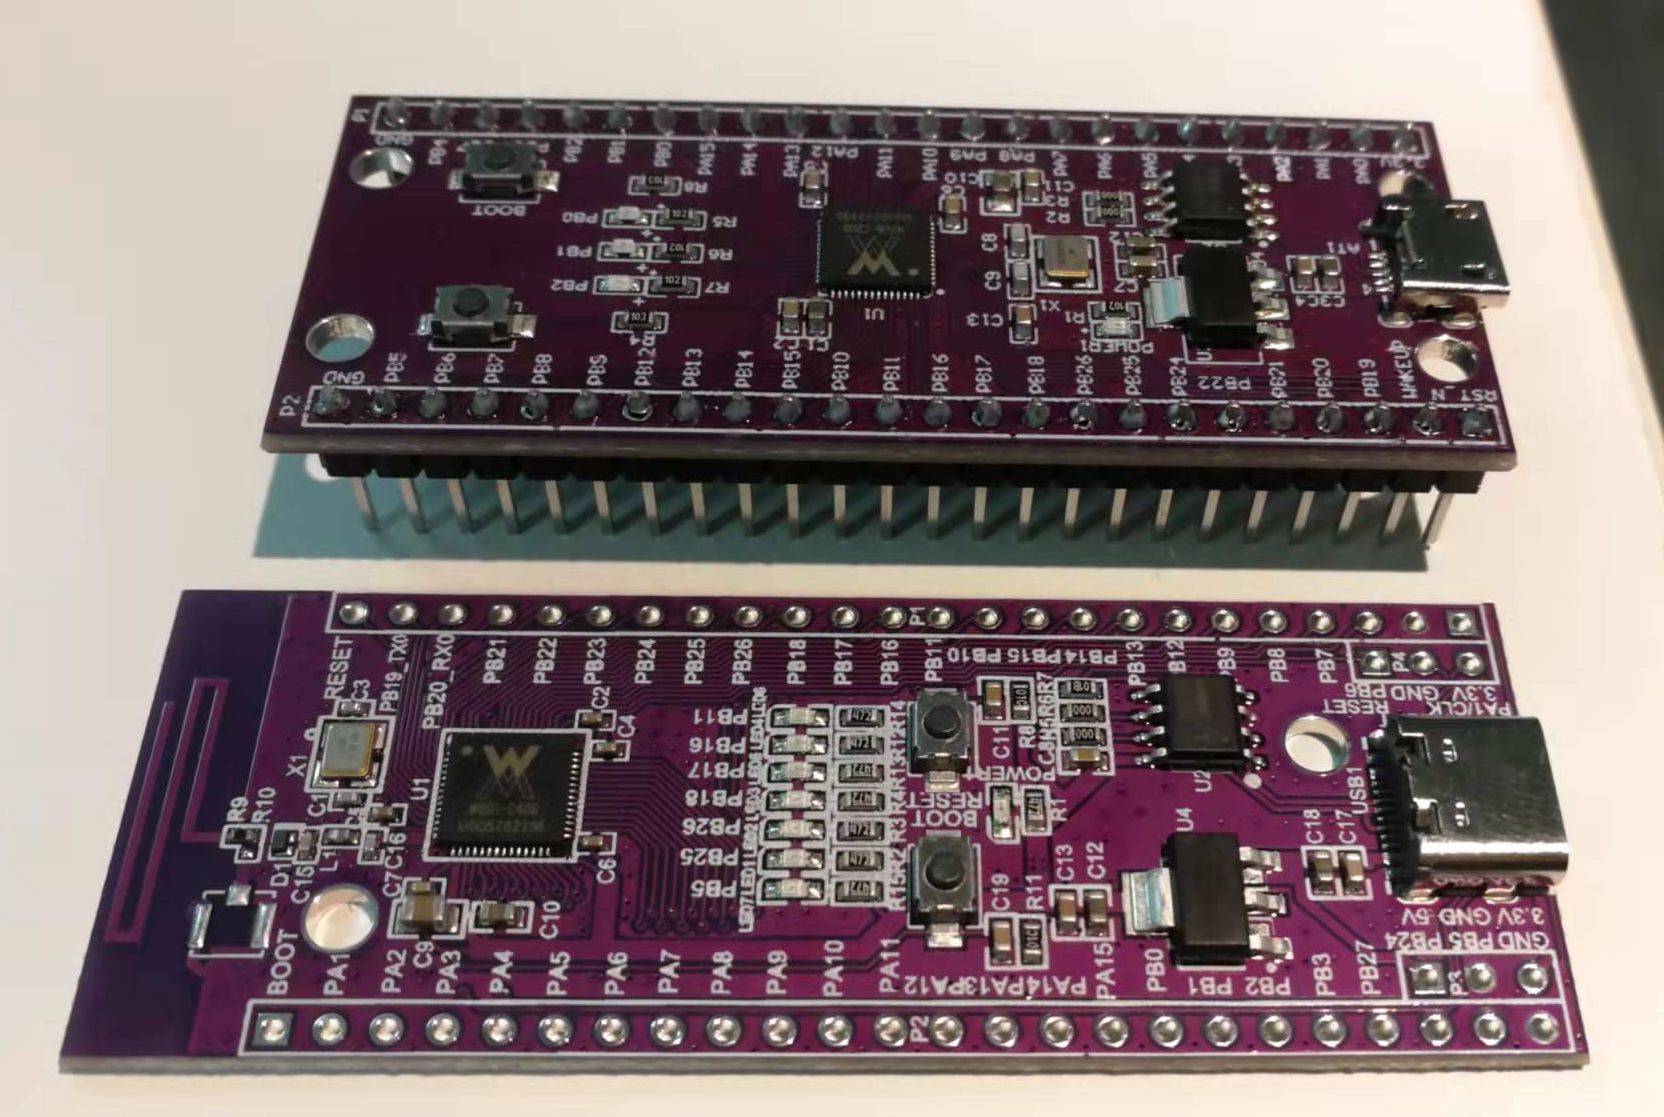
Comparison between W801 and W806
The two chip cores are exactly the same, and the chip layout is basically the same. You can roughly understand the configuration of W801 by looking at the differences
Specification for W801
- The wireless part is added to the overview: "support 2.4G ieee802.11b/g/n Wi Fi communication protocol; support BT/BLE dual-mode working mode and BT/BLE4.2 Protocol"
- W801 has built-in 2MB Flash, twice as much as W806, and other MCU features are consistent
Added WIFI and Bluetooth description
- Wi Fi features
- Support GB15629.11-2006, IEEE802.11 b/g/n
- Support Wi Fi WMM / wmm-ps / WPA / WPA2 / WPS
- Support EDCA channel access mode
- Support 20/40M bandwidth working mode
- Support STBC, GreenField, short GI and reverse transmission
- Support AMPDU and AMSDU
- It supports IEEE802.11n MCS 0~7 and MCS32 physical layer transmission rate gears, and the transmission rate is up to 150Mbps
- Short Preamble is supported when sending at 2/5.5/11Mbps rate
- HT immediate compressed block ACK, Normal Ack and No Ack response modes are supported
- Support CTS to self
- Support Station, soft AP and soft AP / Station functions
- Bluetooth features
- Integrated Bluetooth baseband processor / protocol processor, supporting BT/BLE dual-mode working mode and BT/BLE4.2 protocol
- Low power mode
- Support Wi Fi energy-saving mode power management
PIN pin
The PIN pin frequency and driving capability column are added to the specification of W801. The maximum frequency of each PIN is different, ranging from 10MHz to 80MHz. From the later function description, it is consistent with W806. Therefore, it is speculated that this frequency description is also applicable to W806
W806 and W801 are not PIN pin compatible. The corresponding functions of pins #5 to #9 are different. The specific differences are as follows
- W801 has PB23 without WAKEUP, W806 has WAKEUP without PB23, and w801 has moved one bit from #5 to #9
- W801 is ANT at #14, and the corresponding W806 is empty at #14
- W801 adds VRP in #23 PA5_ Ext multiplexing
- W801 adds VRP in #24 PA6_ Ext multiplexing
Differences in W801 development board
On board LED
- W806
The three LED s on the board correspond to pb0, PB1 and Pb2 respectively, which are the PIN pins corresponding to PWM multiplexing, - W801
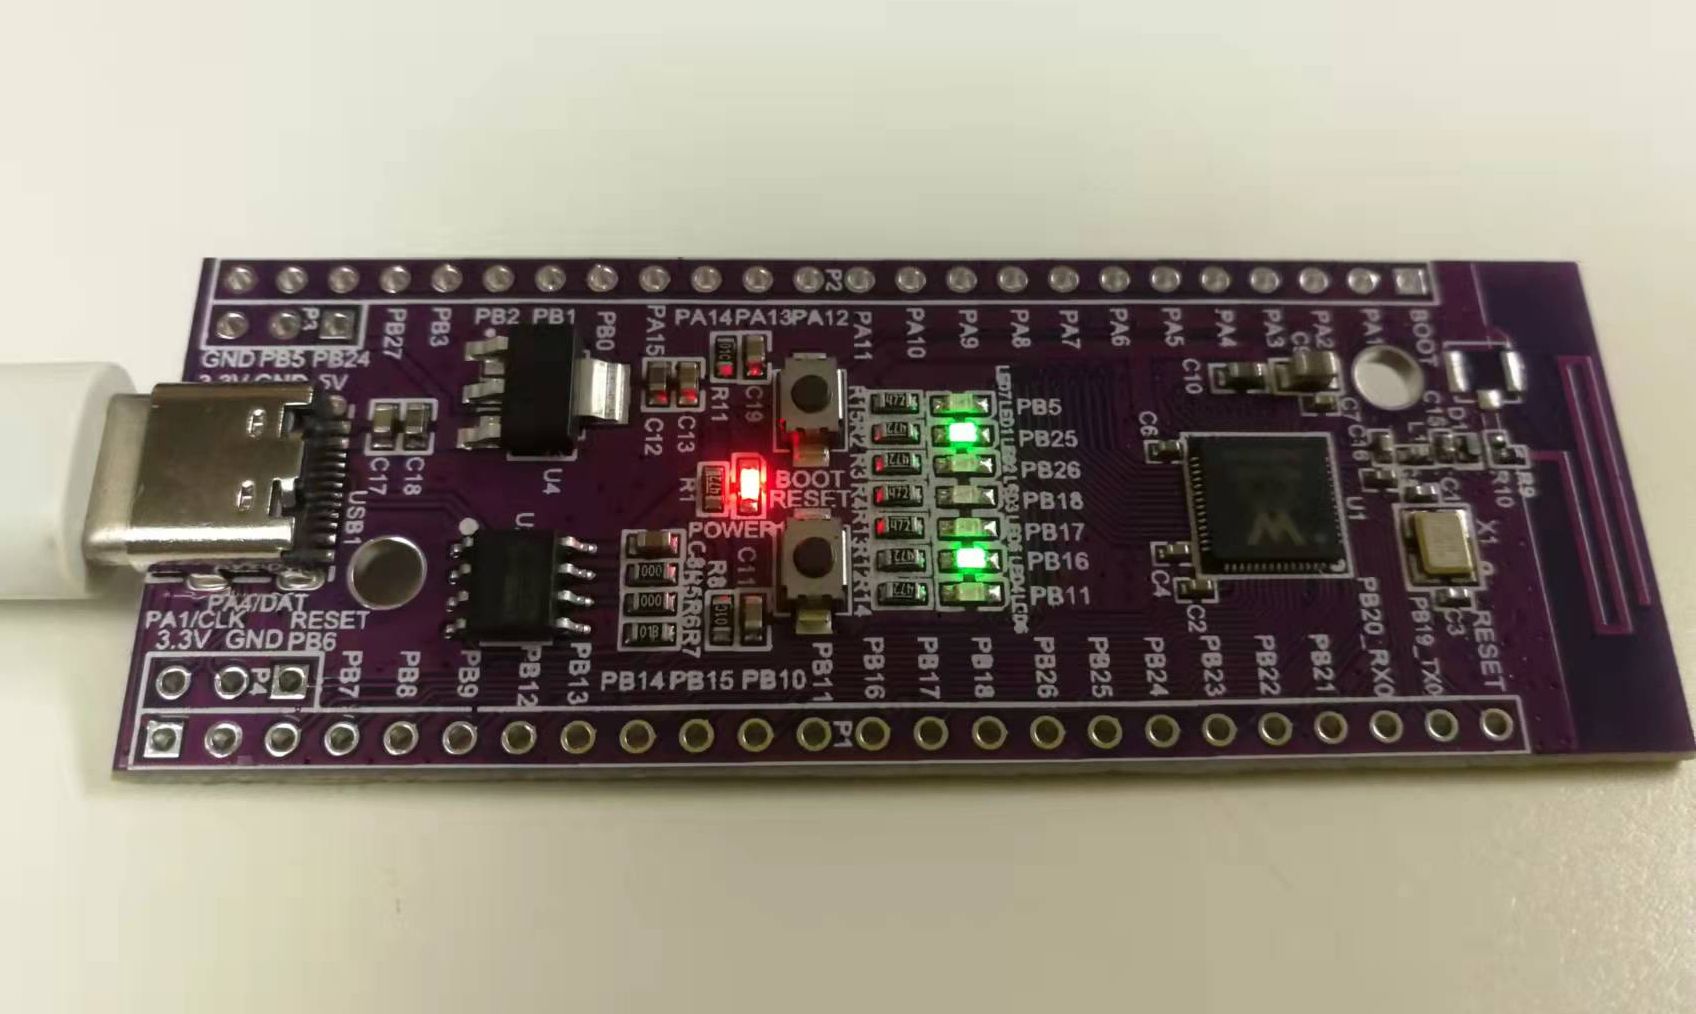
There are seven LED s on board, corresponding to pb5, PB25, pb26, pb18, pb17, PB16 and pb11 respectively, but there are only PB25 and PB16 corresponding to PWM multiplexing, so it is impossible to demonstrate the water lamp like the W806
Interface
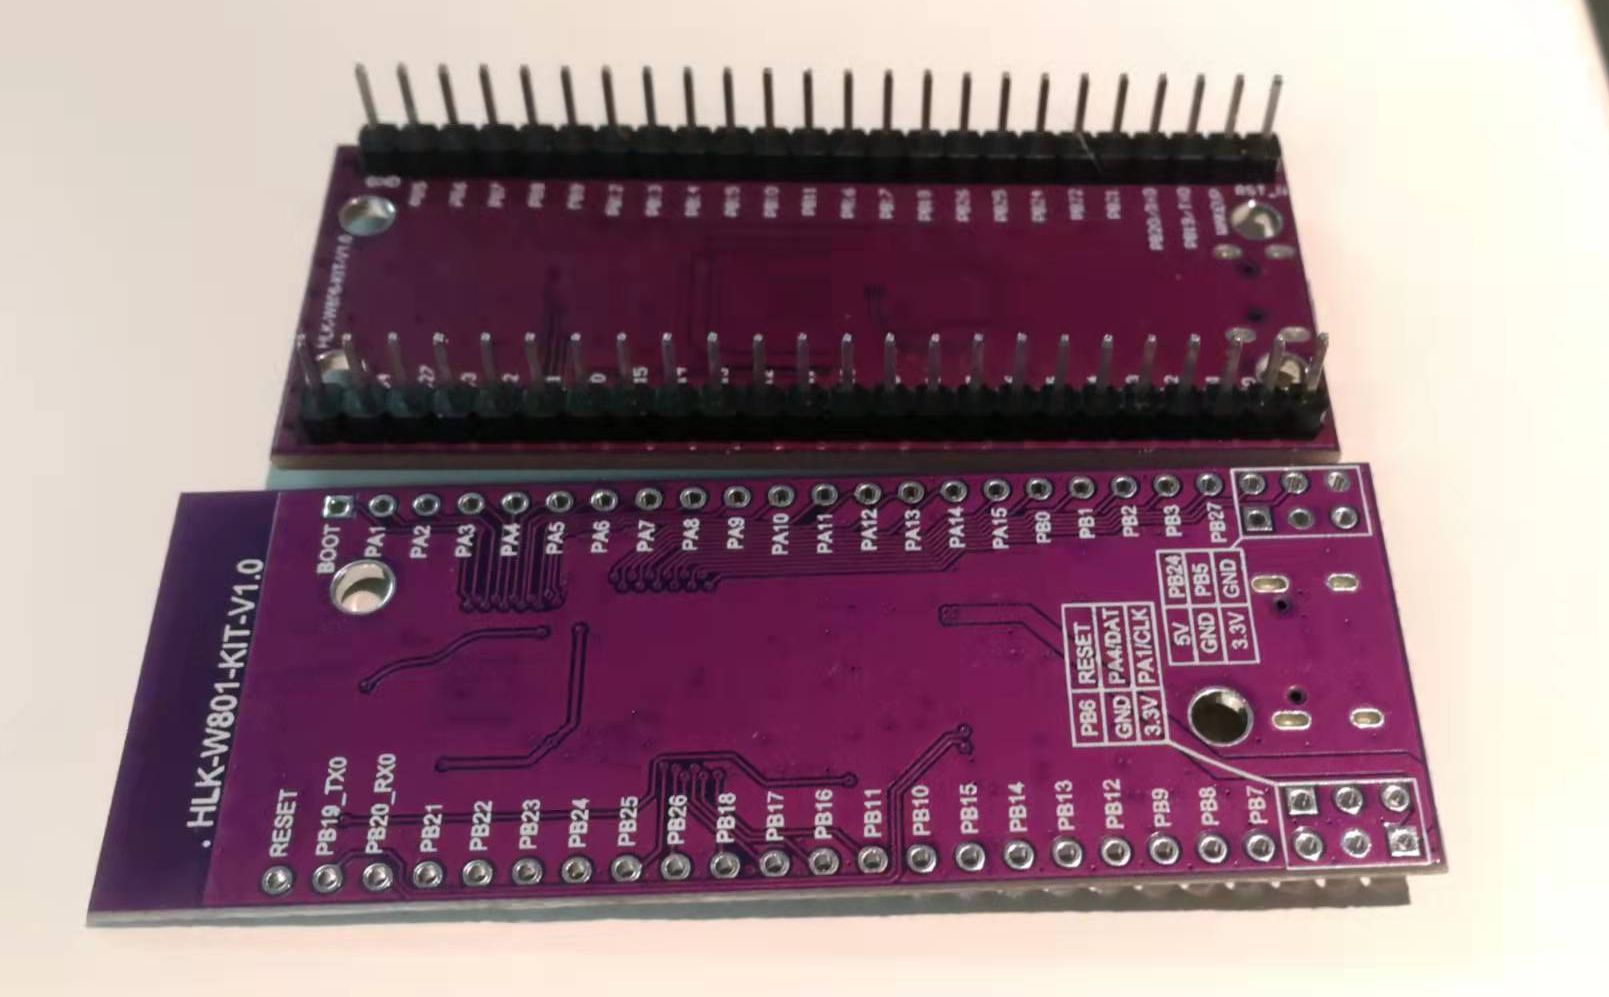
In addition to replacing MicroUSB with Type-C, W801 also adds Reset, 5V and multiple groups of 3.3V and GND cable leads. This is good. There is no 5V lead out on W806, which is inconvenient if there are 5V peripherals
antenna
The W801 adds an on-board antenna, so it is longer than the W806
Burning and downloading of W801
The code part and the available code of W806 can run on W801. The wireless part needs to add support for this part of peripherals in the SDK. Here is the burning and downloading of W801
There are some differences between the W801 development board and the W806 in downloading. The W801 has built-in RTS control of the serial port, which brings some problems. For the time being, I can't judge whether it is a design problem or whether it belongs to my wrong way of use:
- After the W801 development board is connected to USB, it will normally start running the on-chip burning program
- When connecting the W801 development board with a serial port program, you must lower the RTS, otherwise the development board will immediately stop running. For example, cutecom and minicom can't see the printf output of W801
- When the serial port is connected and the RTS is pulled down, the W801 development board is actually reset, so there will be problems if you want to open a terminal to access the log in the middle of the program
- When the serial port program is disconnected, it will not be reset, and the W801 development board will continue to run
When downloading and burning W801 using the SDK of W806, you need to modify the - rs parameter in rules.mk from at to rts to write to the W801 development board
run:all
	@$(WM_TOOL) -c $(DL_PORT) -rs rts -ds $(DL_BAUD) -dl $(FIRMWAREDIR)/$(TARGET)/$(TARGET).fls -sl str -ws 115200

monitor:
	@$(WM_TOOL) -c $(DL_PORT) -sl str -ws 115200

list:
	@$(WM_TOOL) -l

down:
	@$(WM_TOOL) -c $(DL_PORT) -rs rts -ds $(DL_BAUD) -dl $(FIRMWAREDIR)/$(TARGET)/$(TARGET).fls

image:all
	@$(WM_TOOL) -c $(DL_PORT) -rs at -ds $(DL_BAUD) -dl $(FIRMWAREDIR)/$(TARGET)/$(TARGET).img

flash:all
	@$(WM_TOOL) -c $(DL_PORT) -rs rts -ds $(DL_BAUD) -dl $(FIRMWAREDIR)/$(TARGET)/$(TARGET).fls

erase:
	@$(WM_TOOL) -c $(DL_PORT) -rs at -eo all
Burn command make flash
...
make[1]: Leaving directory '/home/milton/wm-sdk-w806/platform/drivers'
LINK     W806.elf
OBJCOPY  W806.bin
generate normal image completed.
generate normal image completed.
compress binary completed.
generate compressed image completed.
build finished!
connecting serial...
serial connected.
wait serial sync...
serial sync sucess.
mac 58-6D-CD-C1-CC-AA.
start download.
0% [####] 100%
download completed.
If you want to separately control the W801 to enter the download mode, you need to use the following steps
- Connect serial port
- Pull down RTS and immediately
- Input the binary character 0x1B continuously at an interval of 10ms, that is, the code corresponding to Esc
- At this time, W801 will enter the download mode, echo the following characters, and then output character C all the time
Secboot V0.6\r\n
CCCCCCCCCCCCCCCC
Python code for converting W801 to download mode
import serial
import time

port = serial.Serial(
    "/dev/ttyUSB0",
    baudrate=115200,
    rtscts=True,
    timeout=0)

if port.isOpen():
    print('opened')
else:
    print('open failed')

packet = bytearray()
packet.append(0x1B)
port.rts = False

while True:
    for i in range(0, 100):
        port.write(packet)
        time.sleep(0.01)
    data = port.read_all()
    print(data)
    if len(data) == 0 or data == b'enter main\r\n':
        print('.')
        continue
    else:
        break

print('pass')

while True:
    data = port.read_all()
    print(data)
    time.sleep(1)