I. Introduction to pixi.js
pixi.js is a very fast 2D sprite rendering engine. It can help us display, animate and manage interactive graphics. In this way, we can easily implement an application or complete a game using javascript and other HTML5 technologies. It has a semantic, concise API, and contains many useful functions. For example, it supports texture atlas and provides a streamlined system built by animation wizards (interactive images). It also provides us with a complete picture of the scene, and we can create a hierarchy of nested elves (that is, nested elves among them). It also allows us to add mouse and touch events to the genie. Moreover, the most important thing is that pixi. JS can be used according to our actual needs, well adapted to the personal coding style, and can be seamlessly integrated with the framework.
The API of pixi.js is actually an improvement of the old Macromedia/Adobe Flash API. flash proficient developers will have the same familiarity back home. Other wizard rendering frameworks that have used similar API s are CreateJS,Starling, Sparrow and Apple's SpriteKit. The advantage of pixi.js is its versatility: it's not a game engine. This is excellent because it allows us to play freely, do our own things, and even use it to write our own game engine. Before learning pixi. js, we need to have some knowledge of HTML,CSS,Javascript. Because it will be very helpful for us to learn pixi. js.
II. pixi.js Installation
1. Go to github installation
You can go to github and install it on it. Here . Can also be in Here Download and install.
2. Installation with npm
npm can also be used to install. First you need to install node.js.
When the installation of node.js is completed, the installation of NPM is automatically completed. Then you can install pixi.js globally through npm. The order is as follows:
npm install pixi.js -g
//It can also be abbreviated as
npm i pixi.js -g
Or you can install pixi.js under the directory of the current project. The order is as follows:
npm install pixi.js -D //perhaps
npm install pixi.js --save -dev
//It can also be abbreviated as
npm i pixi.js -D
3. Start using pixi.js
1. Introducing pixi.js
After installing pixi.js, we can use it. First create a basic. html file in your project directory. Then in your html file, use the script tag to load the JS file. The code is as follows:
<script src="/pixi.min.js"></script>
Alternatively, you can use CDN to introduce this js file. As follows:
<script src="https://cdnjs.cloudflare.com/ajax/libs/pixi.js/5.1.3/pixi.min.js"></script>
<!--Or use bootstrap Of cdn To introduce-->
<script src="https://cdn.bootcss.com/pixi.js/5.1.3/pixi.min.js"></script>
If you use es6's modularization to load pixi.js, you need to pay attention, because pixi.js does not export by default. So the correct way of introduction should be as follows:
import * as PIXI from 'pixi.js'
2. A simple example
Well, the next step is to write some js code to see if pixi.js is working. The code is as follows:
const type = "WebGL";
if (!PIXI.utils.isWebGLSupported()) {
    type = "canvas";
}
PIXI.utils.sayHello(type);
If you can see the flag shown in the following figure in the browser console, it will prove that pixi.js loaded successfully.

Let's analyze the meaning of the above code. First, we define a variable whose value is the string "webGL", and then we have an IF statement to determine if webGL is supported, then we change the value of this variable to canvas. Then call pixi.js to encapsulate the method of printing this value on the console, that is, the sayHello method.
3. Create your own pixi application and stage
Now, we can happily start using pixi.js. First, we can create a rectangular area that can display pictures. pixi.js has an Application object to help us create it. It automatically creates an HTML tag for canvas. It also automatically calculates how your image can be displayed in the canvas element. Then, you need to create a special Pixi container object called stage. As you can see, this stage element is treated as a root container, and then you can use Pixi to display what you want to show in this root container. Here is the code you need to create a Pixi application object and a stage object.
//Create a pixi application object
let app = new PIXI.Application({width: 256, height: 256});
//Add this application object element to the dom document
document.body.appendChild(app.view);
The above code runs in the browser, and the effect is as shown in the figure: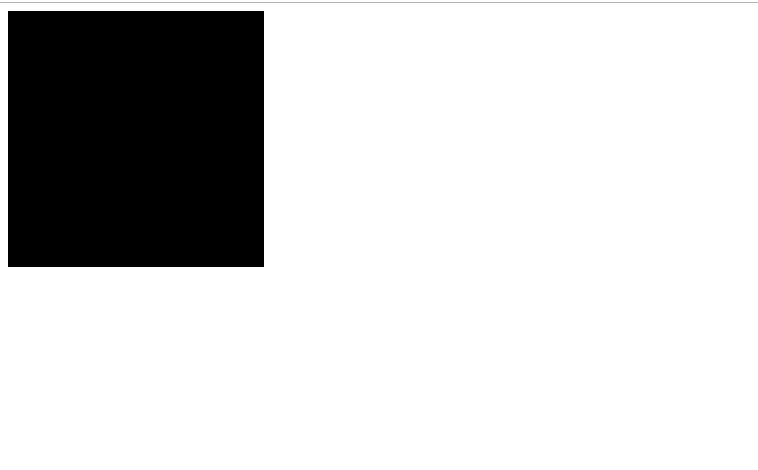
Well, what the above code stands for is that we created a canvas element in HTML DOM with a background color of black (default color) 256 in width and 256 in height (pixel by default). Yes, it's a black rectangle. We can see that PIXI.Application is a constructor that decides which image to render based on whether the browser supports canvas or webGL. Functions can pass either no parameters or an object as a parameter. If no parameters are passed, the default parameters are used. This object, we can call it an option object. For example, we passed the width and height attributes.
4. attribute
Of course, we can also use more attributes, such as the following code:
let app = new PIXI.Application({
    width: 256,         //default:800
    height: 256,        //default:600
    antialias: true,    //default:false
    transparent: false, //default:false
    resolution: 1       //default:1
});
What exactly do these attributes mean? antialias attributes make font boundaries and graphics smoother (webGL anti-aliasing is not available on all platforms, you need to test it on your game platform.) The transparent attribute sets the transparency of the entire canvas element. The resolution attribute makes it easier for platforms with different resolutions and different pixels to run. Just set the value of this property to 1 to handle most projects. To know all the details of this property, you can look at this project. Mat Grove'sexplanation The code.
pixi.js is rendered by default through WebGL. Because webGL is very fast, and we can also use some spectacular visual effects that we will learn. Of course, if you need to use Canvas compulsively instead of webGL rendering. We can set the value of forceCanvas to true. As follows:
forceCanvas:true
After you create the canvas element, if you want to change its background color, you need to set the app.renderer.backgroundColor attribute to an arbitrary hexadecimal color value ("0X" plus any six characters between "0"~"f"). For example:
app.renderer.backgroundColor = 0x061639;
If you want to get the width and height of canvas, you can use the app.renderer.view.width and app.renderer.view.height attributes.
Of course, we can also change the size of canvas by using the renderer.resize method and passing in the values of the width and height attributes. However, in order to ensure that the size fits the resolution of the platform correctly, we need to set the value of autoResize to true. As follows:
app.renderer.autoResize = true;
app.renderer.resize(512, 512);//The first 512 represents width and the second 512 represents height.
If you want canvas to fill the entire browser's window, you can provide a css style, and then set the size of canvas to the browser's window size. As follows:
app.renderer.view.style.position = "absolute";
app.renderer.view.style.display = "block";
app.renderer.autoResize = true;
app.renderer.resize(window.innerWidth, window.innerHeight);
However, if you do, make sure that you use the following css code to initialize margin and padding for all HTML elements to zero.
 * {
    margin:0;
    padding:0;
}
The asterisk * in the code above is the CSS Universal Selector, which means "all tags in HTML documents".
If you want canvas scaled down to any browser window size, you can use custom scaleToWindow Function. Clickable Here See more application object configuration properties.
IV. core knowledge
1.pixi Elf
Now we have a renderer, or we can call it a canvas. We can start adding pictures to the canvas. Any content we want to display must be added to a special pixi object called stage. We can use the stage as follows:
//app is an instantiated application object
let stage = app.stage;//Now the stage variable is the stage object.
Stage is a special pixi container object. We can think of it as an empty box, then combine it with whatever we add, and store whatever we add. The stage object is the root container of all visible objects in the scene. Whatever we put on the stage will appear on the canvas. Now our box is still empty. There's nothing in it, but we'll put something in it soon. Clickable Here See more information about pixi container objects.
Important note: Because stage is a pixi container. So it has the same attribute method as any other container. Although stages have width and height attributes, they do not refer to the size of the rendering window. The stage width and height attributes are just to tell us what area is occupied by what's in it -- more information about it is in front.
So what should we put on the stage? It's some special image objects called elves. Elves are basically pictures that we can control with code. We can control their location, size, and other useful properties for animation and interaction. Learning how to make and control a sprite is really an important thing about learning how to use pixi.js. If we know how to make fairies and add them to the stage, we are only one step away from making games.
pixi has a wizard class, which is a multi-functional way to make game elves. There are three main ways to create them:
1. Create from a single image file.
2. Create with a Sprite Map. Sprite is a big picture of all the images you need for your game.
3. Define the size and location of the image from the texture atlas (a JSON file in Sprite).
We will learn these three ways. But before that, let's look at the pictures we need to understand, and then use pixi to display them.
2. Loading the image into the texture cache
Pixi uses webGL to render pictures on the GPU, so pictures need to be in a format that the GPU can handle. Images rendered using webGL are called textures. Before you let the wizard display images, you need to convert ordinary images into WebGL textures. In order for everything to work behind the scenes quickly and effectively, Pixi uses texture caching to store and reference all the textures needed by the wizard. Texture names are strings that match the file positions of the images they refer to. This means that if you have a texture loaded from "images/cat.png", you can find it in the texture cache, as follows:
PIXI.utils.TextureCache["images/cat.png"];
Texture is stored in WebGL compatible format, which is very effective for Pixi's renderer. Then, you can use Pixi's Prite class to create new wizards using textures.
let texture = PIXI.utils.TextureCache["images/anySpriteImage.png"];
let sprite = new PIXI.Sprite(texture);
But how to load the image file and convert it to texture? Use Pixi's built-in loader object. Pixi's powerful loader object is all you need to load any type of image. The following is how to use it to load the image and call a function named setup after the image is loaded.
PIXI.loader.add("images/anyImage.png").load(setup);
function setup() {
  //This code will run when the loader loads the image
}
If you use loader to load images, this is Suggestions from the pixi development team . We should create wizards by introducing the image resources in the loader's resources object, as follows:
let sprite = new PIXI.Sprite(
    //Multiple image resource paths in the array
    PIXI.loader.resources["images/anyImage.png"].texture
);
Here is an example of a complete code that we can write to load images, call the setup function, and then create wizards from the loaded images.
PIXI.loader.add("images/anyImage.png").load(setup);
function setup() {
  let sprite = new PIXI.Sprite(
    PIXI.loader.resources["images/anyImage.png"].texture
  );
}
This is a common format for loading and creating images. We can also use the add method of chain call to load multiple images at the same time, as follows:
PIXI.loader.add("images/imageOne.png").add("images/imageTwo.png").add("images/imageThree.png").load(setup);
Of course, a better way is to list all the files to be loaded in a single add method in an array, as follows:
PIXI.loader.add(["images/imageOne.png","images/imageTwo.png","images/imageThree.png"]).load(setup);
Of course, the loader also allows us to load JSON files. That's what we'll learn later.
3. Show Elves
Now that we have loaded the picture and made it into a fairy, we need to use the stage.addChild method to add the fairy to the stage of pixi. As follows:
//cat represents a wizard variable
app.stage.addChild(cat);
Note: Keep in mind that stage is the main container element for all added sprites. And we won't see any of the spirits we build unless we add them to the stage.
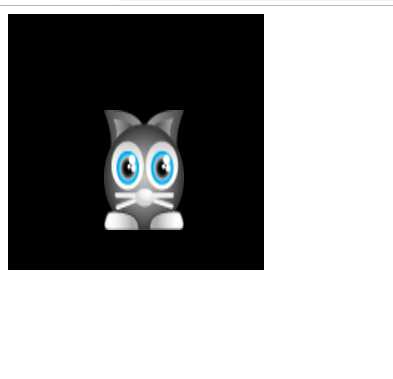
Okay, let's look at an example of how to use code to learn to display a single image on the stage. Let's assume that under the directory examples/images, you will find a cat map with a width of 64 PX and a height of 64 px. As follows:

The following is a JavaScript code that needs to load a picture, create a wizard, and display all the JavaScript code on the stage of pixi:
//Create a pixi application object
let app = new PIXI.Application({
    width: 256,
    height: 256,
    antialias: true,
    transparent: false,
    resolution: 1
  }
);
//Add the canvas element to the body element
document.body.appendChild(app.view);
//Load the image and run it using the setup method
//The path of "images/cat.png" needs to be adjusted according to its own situation.
PIXI.loader.add("images/cat.png").load(setup);
//When the image is loaded, the setup method executes
function setup() {
  //Create a cat wizard, "images/cat.png" path needs to be adjusted according to their own circumstances
  let cat = new PIXI.Sprite(PIXI.loader.resources["images/cat.png"].texture);
  //Add cat wizards to the stage
  app.stage.addChild(cat);
}
When the code runs on the browser, you will see as shown in the figure:

If we need to remove the elves from the stage, we can use the removeChild method. As follows:
//Path with wizard parameters
app.stage.removeChild(anySprite)
But usually setting the wizard's visible property to false will be a simpler and more effective way to make the wizard disappear. As follows:
 //anySprite is a wizard object, such as cat in the previous example
 anySprite.visible = false;
4. Use aliases
Of course, we can also create some short, better readable aliases for our frequent use of Pixi objects and methods. For example, do you want to add a PIXI prefix to all Pixi objects? If not, give it a short alias. For example, the following is an alias created for the TextureCache object.
let TextureCache = PIXI.utils.TextureCache;
Then, use the alias instead of the original alias, as follows:
//The path of "images/cat.png" needs to be adjusted according to its own situation.
let texture = TextureCache["images/cat.png"];
Using aliases gives you the added benefit of writing concise code: it helps you cache Pixi's common APIs. If Pixi's API changes in future versions - maybe he will! You will need to update these objects and methods in one place, and you will only use them at the beginning of the project instead of all the instances! So when Pixi's development team wants to change it, you can do it in one step! Let's see how to rewrite the code for loading and displaying images after changing all Pixi objects and methods to aliases.
    //alias
    let Application = PIXI.Application;
    let loader = PIXI.loader;
    let resources = PIXI.loader.resources;
    let Sprite = PIXI.Sprite;
    //Create an application object
    let app = new Application({
        width: 256,
        height: 256,
        antialias: true,
        transparent: false,
        resolution: 1
      }
    );
    //Add the canvas Pixi automatically created for you to the HTML document
    document.body.appendChild(app.view);
    //Run the "setup" function after loading the image and completing it
    loader.add("images/cat.png").load(setup);
    //The "setup" function will run after the image is loaded
    function setup() {
      //Create a cat wizard class
      let cat = new Sprite(resources["images/cat.png"].texture);
      //Add cat elves to the stage
      app.stage.addChild(cat);
    }
The examples in most tutorials will be handled using Pixi's alias. Unless otherwise specified, you can assume that all the code below uses these aliases. That's all we need to know about loading images and creating sprites.
5. More information about loading
The format shown above is recommended as a standard template for loading and displaying images. Therefore, we can safely ignore the next few paragraphs, and jump directly to the next part of the "location elf". But Pixi's loader objects are very complex, and even if you don't use them regularly, you need to pay attention to some features. Let's look at some of the most useful ones.
(1) Generating wizards from plain JavaScript Image objects or Canvas
In order to optimize and improve efficiency, it is always best to pre-load the texture creation wizard into Pixi's texture cache. However, if for some reason you need to make textures from regular JavaScript Image objects, you can use Pixi's BaseTexture and Texture classes to achieve:
//The parameter is any JavaScript Image object
let base = new PIXI.BaseTexture(anyImageObject);
let texture = new PIXI.Texture(base);
let sprite = new PIXI.Sprite(texture);
If you want to make textures from any existing canvas element, you can use BaseTexture.fromCanvas:
//The parameter is any canvas element
let base = new PIXI.BaseTexture.fromCanvas(anyCanvasElement);
If you want to change the texture displayed by the wizard, use the texture attribute. Set it to any text object as follows:
anySprite.texture = PIXI.utils.TextureCache["anyTexture.png"];
If major changes occur in the game, this technology can be used to interactively change the appearance of the elves.
(2). Assign names to load files
You can assign a unique name to each resource you want to load. Just provide the name (string) as the first parameter in the add method. For example, here's how to name the cat image catImage.
//The first parameter is the alias of the assignment, and the second parameter is the image path.
PIXI.loader.add("catImage", "images/cat.png").load(setup);
This creates an object called catImage in loader.resources. This means that a wizard can be created by referencing the catImage object, as follows:
//texture attribute under catImage object
let cat = new PIXI.Sprite(PIXI.loader.resources.catImage.texture);
However, it is not recommended to use this feature! This is because using it requires remembering all the names specified for each loaded file and ensuring that the same name is not used accidentally many times. As in the previous example, using file path names is simpler and less error-prone.
(3) Monitor loading progress
Pixi's loader has a special progress event that calls a customizable function that runs every time a file is loaded. Progress events are invoked by the loader's on method, as follows:
//Load ProgressHandler as a function of processing progress
PIXI.loader.on("progress", loadProgressHandler);
The following is how to use the on Method in the load chain and call the user-defined function loadProgressHandler each time the file is loaded.
    //Using on method
    PIXI.loader.add([
      "images/one.png",
      "images/two.png",
      "images/three.png"
    ]).on("progress", loadProgressHandler).load(setup);
    //loadProgressHandler function
    function loadProgressHandler() {
      console.log("loading");
    }
    //setup function
    function setup() {
      console.log("setup");
    }
Each time one of the files is loaded, the progress event calls loadProgressHandler to display "load" in the console. When all three files are loaded, the setup function runs. The following is the output of the above code in the console:
loading
loading
loading
setup
That's good, but it's going to be better. We can also accurately find the loaded files and the percentage of the total number of currently loaded files. You can do this simply by adding optional loader and resource parameters to the loadProgressHandler, as follows:
function loadProgressHandler(loader, resource) {
    //Get loaded files from resouce or the percentage of loaded files
}
Then, you can use resource.url to find the currently loaded file. (If you want to find an optional name that may have been assigned to a file, use resource.name as the first parameter in the add method.) You can then use loader. programs to find the percentage of total resources currently loaded. Here are some code to do this.
    PIXI.loader.add([
      "images/one.png",
      "images/two.png",
      "images/three.png"
    ]).on("progress", loadProgressHandler).load(setup);
    function loadProgressHandler(loader, resource) {
      //Display the file path currently loaded
      console.log("loading: " + resource.url);
      //Displays the percentage of current file loads
      console.log("progress: " + loader.progress + "%");
      //If the first parameter provides an optional name for the file
      //So in the add method, you have to receive them as follows
      //console.log("loading:"+resource.name);
    }
    function setup() {
      console.log("All files loaded");
    }
The following is what this code will display in the console at run time:
loading: images/one.png
progress: 33.333333333333336%
loading: images/two.png
progress: 66.66666666666667%
loading: images/three.png
progress: 100%
All files loaded
That's great, because we can create load progress bars based on it.
Note: We can also access other properties on resource objects. resource.error will tell you any possible errors that occur when you try to load a file. resource.data allows you to access the original binary data of the file.
6. More information about loader
Pixi's loader has rich functions and configurability. Let's get a quick look at its usage and get started. The loader's linkable add method contains four basic parameters:
add(name, url, optionObject, callbackFunction);
The following is a simple document describing these parameters:
1.name (string): The name of the resource to load. If it is not used, the url is automatically used.
2.url (string): The address of this resource, relative to the baseUrl of the loader.
3.options (object literal): loading options.
4.options.crossOrigin (Boolean): Is the request cross-domain? The default is automatic determination.
5.options.loadType: How should resources be loaded? The default value is Resource.LOAD_TYPE.XHR.
6.options.xhrType: How should the data being loaded be executed when using XHR? The default value is Resource.XHR_RESPONSE_TYPE.DEFAULT.
CallbackFunction: The function (callback function) to be called when the resource is loaded.
The only parameter that needs to be passed in is url (the file to be loaded). Here are some examples of how files can be loaded using the add method. This is the "general grammar" of the document called loader:
//The first parameter is the name of the loading resource, the second parameter is the resource path, and the third parameter can not be passed, that is, the loading option, and the fourth parameter is the callback function.
PIXI.loader.add('key', 'http://...', function () {});
PIXI.loader.add('http://...', function () {});
PIXI.loader.add('http://...');
These are examples of loader's "object grammar":
PIXI.loader.add({
        name: 'key2',
        url: 'http://...'
}, function () {})
PIXI.loader.add({
  url: 'http://...'
}, function () {})
PIXI.loader.add({
  name: 'key3',
  url: 'http://...'
  onComplete: function () {}
})
PIXI.loader.add({
  url: 'https://...',
  onComplete: function () {},
  crossOrigin: true
})
You can also pass an object or a URL or an array of both to the add method:
PIXI.loader.add([
    {name: 'key4', url: 'http://...', onComplete: function () {} },
    {url: 'http://...', onComplete: function () {} },
    'http://...'
]);
Note: If you need to reset the loader to load a new batch of files, call the reset method of the loader: PIXI.loader.reset().
Pixi's loader has many more advanced functions, including options that allow us to load and parse all types of binary files. It's not something we do every day, and it's beyond what we're learning at the moment, so we can. Get more information from the GitHub project.
7. Location Elves
Now that we know how to create and display fairies, let's see how to place and adjust their size. In the previous example, cat sprite has been added to the upper left corner of the stage. The x position of cat is 0, and the y position is 0. You can change the location of cat by changing the values of the X and y attributes of cat. By setting the X and y attribute values of cat to 96, cat can be centered in the stage.
cat.x = 96;
cat.y = 96;
After creating the wizard, add the above two lines of code to any location in the setup function.
function setup() {
    //Creating cat Wizards
    let cat = new Sprite(resources["images/cat.png"].texture);
    //Change the Elf's Position
    cat.x = 96;
    cat.y = 96;
    //Add the cat wizard to the stage so that you can see it
    app.stage.addChild(cat);
}
Note: In this example, Sprite is an alias for PIXI. Sprite, TextureCache is the alias of PIXI.utils.TextureCache and resources is the alias of PIXI.loader.resources. Later, aliases are used, and from now on, all Pixi objects and methods in the sample code are in the same format.
These two lines of code move cat 96 pixels to the right and 96 pixels downward. The results are as follows:

The upper left corner (left ear) of cat represents its X and Y anchors. To move cat to the right, increase the value of its X attribute. To move cat down, increase the value of its y attribute. If cat's x value is 0, it will be on the far left side of the stage. If y is zero, it will be at the top of the stage. As shown in the following figure:

Instead of setting the wizard's x and y attributes separately, you can set them together in a single line of code, as follows:
//That is to say, call the set method and pass in the modified x and y parameters.
sprite.position.set(x, y)
Let's take a look at the results of the above sample code modification:
As you can see, the results are the same.
8. Size and proportion
We can change the size of the width and height attributes of the wizard. Here is an example of setting cat to 80-pixel width and 120-pixel height.
    cat.width = 80;
    cat.height = 120;
Add these two lines of code to the setup function as follows:
    function setup() {
        //Creating cat Wizards
        let cat = new Sprite(resources["images/cat.png"].texture);
        //Change the Elf's Position
        cat.x = 96;
        cat.y = 96;
        //Change the size of the elves
        cat.width = 80;
        cat.height = 120;
        //Add the cat wizard to the stage so that you can see it
        app.stage.addChild(cat);
    }
The effect is shown as follows:
We will see that the cat's position (upper left corner) has not changed, but its width and height have changed. As shown in the following figure:

The wizard also has scale.x and scale.y attributes, which can change the widths and heights of the wizard proportionally. The following is how to set the scale of cat to half size:
    cat.scale.x = 0.5;
    cat.scale.y = 0.5;
Scale is a number between 0 and 1, representing the percentage of the size of a fairy. 1 for 100% (original size) and 0.5 for 50% (half size). You can double the size of a sprite by setting its scale to 2, as follows:
    cat.scale.x = 2;
    cat.scale.y = 2;
Pixi provides another concise way to use the scale.set method to set the wizard's zoom ratio in a line of code.
    //Notice what the parameters mean.
    cat.scale.set(0.5, 0.5);
If you like it, use it like this. Let's look at a complete example:
    //alias
    let Application = PIXI.Application;
    let loader = PIXI.loader;
    let resources = PIXI.loader.resources;
    let Sprite = PIXI.Sprite;
    //Create an application object
    let app = new Application({
        width: 256,
        height: 256,
        antialias: true,
        transparent: false,
        resolution: 1
    });
    //Add the canvas Pixi automatically created for you to the HTML document
    document.body.appendChild(app.view);
    //Run the "setup" function after loading the image and completing it
    loader.add("/static/page/PIXIJS/images/cat.png").load(setup);
    //The "setup" function will run after the image is loaded
    function setup() {
        //Creating cat Wizards
        let cat = new Sprite(resources["/static/page/PIXIJS/images/cat.png"].texture);
        //Change the Elf's Position
        cat.position.set(96, 96);
        //Change the size of the elves
        cat.scale.set(0.5,0.5);
        //Or use it this way
        //cat.scale.x=0.5
        //cat.scale.y=0.5
        //Add the cat wizard to the stage so that you can see it
        app.stage.addChild(cat);
    }
The operation effect is shown as follows:

9. rotation
We can also rotate the elf's rotation property by setting it to a value in radians. As follows:
cat.rotation = 0.5;
But where does the rotation take place? We can see from the figure below that the upper left corner of the elf represents its x and y positions. This point is called anchor point. If the rotation property of the wizard is set to 0.5, the rotation will revolve around the wizard's anchor. We will also know what impact this will have on our cat elves.

We will see that the anchor point, cat's left ear, is the center of the imaginary circle around which cat rotates. What if you want the elves to rotate around its center? Change the wizard's anchor to center it, as follows:
    //Anchor is anchor
    cat.anchor.x = 0.5;
    cat.anchor.y = 0.5;
The anchor.x and anchor.y values represent the percentage of texture size, ranging from 0 to 1 (0% to 100%). Setting it to 0.5 can center the texture at that point. The position of the point itself will not change, but the texture locates on it in the same way. The next picture shows what happens to the rotating elf if the anchor is centered.

We'll see the elf texture moving up and left. This is an important side effect to remember! Like position and scale, we can also use the following line of code to set the x and y values of anchors:
    //Pay attention to the parameters
    cat.anchor.set(x, y);
Elves also have pivot attributes, which act in a manner similar to anchor. Pivot sets the location of the x / y origin of the elf. If you change the pivot point and rotate the wizard, it will rotate around the origin. For example, the following code will point the wizard pivot.x to 32 and its pivot.y to 32.
    //Pay attention to the significance of parameters
    cat.pivot.set(32, 32);
Assuming that the wizard is 64x64 pixels, the wizard will now rotate around its center. But remember: if you change the pivot of the elf, you also change its x / y origin. So what's the difference between anchor and pivot? They are really similar! Anchor uses a normalized value of 0 to 1 to move the origin of the wizard image texture. Pivot uses pixel values to move the origins of the wizard's X and y. Which one should we use? It's up to us to decide. You can use whatever you like. Let's take a look at a complete example of using these two attributes.
First example. Second example. Third example.
10. Making Elves from Sprite Images of Elves
Now, we also know how to make a wizard from a single image file. However, as a game designer, Sprite Diagram (also known as Wizard Diagram) is often used to make wizards. Pixi has some convenient built-in methods to help us accomplish this task. Sprite is a single image file that contains sub-images. Subimages represent all graphics to be used in the game. The following is an example of a block image, which contains game characters and game objects as sub-images.

The whole Sprite image is 192x 192 pixels. Each image is located in its own 32 x 32 pixel grid cell. Storing and accessing all game graphics on a block is a very efficient processor and memory way to process graphics, which Pixi has optimized. We can capture sub-images from Sprite by defining rectangular areas of the same size and location as the sub-images we want to extract. The following is an example of a rocket sub image extracted from a sprite image.

Let's look at the code to do this. First, as in the previous example, use Pixi's loader to load the tileset.png image.
    //Note that the path here is adjusted according to the actual situation.
    loader.add("images/tileset.png").load(setup);
Next, after loading the image, use the rectangular block of Sprite to create the image of the genie. The following is the code to extract the sub-image, create the rocket wizard and locate it and display it on the canvas.
    function setup() {
        //Creating "tileset" wizard from texture
        let texture = TextureCache["images/tileset.png"];
        //Create a rectangular object that defines the location
        //And the size of the sub-image to be extracted from the texture
        //` Rectangle is an alias for `PIXI.Rectangle'. Note the parameters here. They will be detailed later. The values of the parameters are related to the actual situation.
        let rectangle = new Rectangle(192, 128, 64, 64);
        //Tell the texture to use the rectangular block
        texture.frame = rectangle;
        //Create a sprite from the texture
        let rocket = new Sprite(texture);
        //Location rocket elves on canvas canvas
        rocket.x = 32;
        rocket.y = 32;
        //Add Rocket Elves to the Stage
        app.stage.addChild(rocket);
        //Rendering the Stage
        app.renderer.render(app.stage);
    }
How does this work? Pixi has a built-in Rectangle object (PIXI.Rectangle), which is a common object used to define rectangular shapes. It has four parameters. The first two parameters define the x and y positions of the rectangle. The last two define its width and height. This is the format for defining the new Rectangle object.
let rectangle = new PIXI.Rectangle(x, y, width, height);
A rectangular object is just a data object. It's up to us to decide how to use it. In our example, we use it to define the location and region of the sub-image on the block to be extracted. Pixi texture has a useful property called frame, which can be set to any Rectangle object. Frame cuts the texture to a rectangular size. Here's how to use frame to tailor the texture to the size and position of the rocket.
    let rectangle = new Rectangle(192, 128, 64, 64);
    texture.frame = rectangle;
Then we can use the clipped texture to create the wizard:
let rocket = new Sprite(texture);
Then it starts to run. Pixi offers a more convenient way to help us accomplish this task - let's move on.
11. Use texture atlas
If we are developing large and complex games, we need a quick and effective way to create sprites from Sprite. This is where texture atlases are really useful. Texture atlas are JSON data files, which contain the position and size of sub-images on matched block PNG images. If you use a texture atlas, all you need to know about the sub-image to be displayed is its name. Sprite images can be arranged in any order, and JSON files will track their size and location for us. This is really convenient, because it means that the size and location of Sprite images will not be hard coded into our game program. If we make changes to Sprite, such as adding images, resizing or deleting them, then we just need to republish the JSON file, and our game will use that data to display the correct image. We don't need to make any changes to the game code.
Pixi and a popular name Texture Packer The standard JSON texture atlas format output by software tools is compatible. Texture Packer's "basic" license is free. Let's see how to use it to make a texture atlas and load it into Pixi. (We can also avoid using Texture Packer. Similar tools (for example Shoebox or spritesheet.js ) PNG and JSON files can be output in standard format compatible with Pixi.)
First, you need to collect a single image file used in the game.

Note: (All images in this article are created by Lanea Zimmerman. You can be in here Find more of her works. Thank you, Lanea Zimmerman!
Next, open texture packer, and select JSON Hash as the framework type. Drag the image into the Texture Packer workspace. (We can also point Texture Packer to any folder that contains images.) It will automatically arrange the images on a single Sprite map and provide them with names that match the original image name.
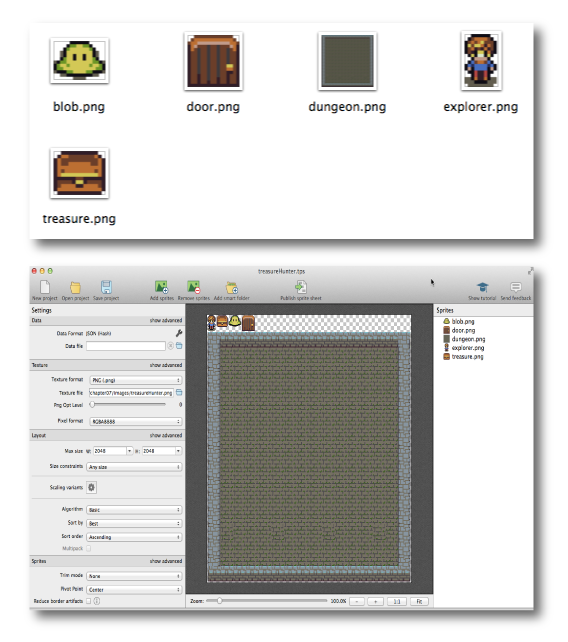
Note: (If you use a free version of Texture Packer, set Algorithm to Basic, Trim mode to None, Extrude to 0, Size constraints to Any size, and then slide PNG Opt Level to the left to 0. These are basic settings that allow free versions of Texture Packer to create files without any warnings or errors.)
When finished, click the Publish button. Select the file name and storage location, and then save the published file. Ultimately, two files will be obtained: a PNG file and a JSON file. In this example, the file names are treasureHunter.json and treasureHunter.png. For simplicity, just save both files in a folder called images. (JSON files can be considered as additional metadata for image files, so it makes sense to keep both files in the same folder.) The JSON file describes the name, size and location of each sub-image in the atlas. As an excerpt from a file below, the Blob Monster subimage is described.
    "blob.png":
    {
        "frame": {"x":55,"y":2,"w":32,"h":24},
        "rotated": false,
        "trimmed": false,
        "spriteSourceSize": {"x":0,"y":0,"w":32,"h":24},
        "sourceSize": {"w":32,"h":24},
        "pivot": {"x":0.5,"y":0.5}
    },
The treasureHunter.json file also contains "dungeon.png", "door.png", "exit.png" and "explorer.png" attributes, each of which has similar data. Each of these sub-images is called a frame. It's really helpful to have this data, because there's no need to know the size and location of each sub-image in the texture map set. Just know the wizard's frame ID. The frame ID is just the name of the original image file, such as "blob.png" or "explorer.png".
One of the many advantages of using a texture atlas is that you can easily add 2 pixels of padding around each image (this is what Texture Packer does by default.) This is important to prevent the possibility of texture leakage. Texture haemorrhage (note: haemorrhage is the proper term for typesetting and image processing, which means leaving space around the main content for printing or cutting) is an effect that occurs when the edges of adjacent images on a block appear next to the elves. The reason for this is that the computer's GPU (Graphics Processing Unit) decides how to round decimal pixel values. Should it be rounded up or down? Each GPU is different. Setting aside 1 or 2 pixel spacing around the image on GPU can make all the images display consistently.
Note: (If there are two pixels filling around the graph and a strange "deviation from one pixel" fault is still found in the Pixi display mode, please try to change the texture zooming mode algorithm. The methods are as follows:
texture.baseTexture.scaleMode = PIXI.SCALE_MODES.NEAREST;
. These failures sometimes occur due to GPU floating-point rounding errors.)
Now that we know how to create texture atlases, let's see how to load them into game code.
ps: Picture resources related to the above examples can be clicked here Download.
The following picture shows a texture atlas I created using Texture Packer:


Clickable Here (JSON), Here (png) Download the created texture atlas JSON file and PNG file.
12. Loading Texture Atlas
Pixi's loader can be used to load the texture map set. If the JSON is generated with Texture Packer, the loader automatically reads the data and creates textures for each frame. Here's how to load treasureHunter.json with loader. When it loads successfully, the setup method will execute.
    //Paths are related to actual projects
    loader.add("images/treasureHunter.json").load(setup);
Now, each image on the texture atlas is a single texture in the Pixi cache. We can access each texture in the cache using the same name as in Texture Packer ("blob.png", "dungeon.png", "explorer.png", etc.).
13. Create wizards from loaded texture atlases.
Pixi offers three ways to create wizards from texture atlases:
1. Use TextureCache:
   let texture = TextureCache["frameId.png"],
   sprite = new Sprite(texture);
2. If the loader of pixi is used to load the texture map set, then the resources attribute of the loader is used.
let sprite = new Sprite(resources["images/treasureHunter.json"].textures["frameId.png"]);
3. There's so much to write to create a sprite! So it's recommended to create an alias called id for textures objects in texture maps, just like this:
let id = PIXI.loader.resources["images/treasureHunter.json"].textures;
Now you can instantiate an elf like this:
let sprite = new Sprite(id["frameId.png"]);
That's really great!
Here are three different ways to create and display dungeons, explorers, and treasure wizards in setup functions.
//Define these three variables for later use
let textureId;
//Dungeon
let dungeon;
//Explorer
let explorer;
//A treasure house
let treasure;
//setup function
function setup(){
    //There are three different ways to create and display Wizards
    //First, use a texture alias, TextureCache is an alias for PIXI.utils.TextureCache
    let dungeonTexture = TextureCache['dungeon.png'];
    //Sprite is an alias for PIXI.Sprite
    dungeon = new Sprite(dungeonTexture);
    //Call the addChild method to add the wizard to the stage
    app.stage.addChild(dungeon);
    //Second, use resources to create, but also pay attention to the parameters according to the actual situation to write.
    explorer = new Sprite(resources["images/treasureHunter.json"].textures['explorer.png']);
    //Set the explorer's coordinates, that is, set the position of the explorer, the explorer in the middle of the stage, the x-direction distance arbitrarily set.
    explorer.x = 68;
    explorer.y = app.stage.height / 2 - explorer.height / 2;
    app.stage.addChild(explorer);
    //Create an alias for all texture atlases
    textureId = PIXI.loader.resources['images/treasureHunter.json'].textures;
    treasure = new Sprite(textureId["treasure.png"]);
    //Set the coordinates of the treasure
    treasure.x = app.stage.width - treasure.width - 48;
    treasure.y = app.stage.height / 2 - treasure.height / 2;
    //Add treasure elves to the stage
    app.stage.addChild(treasure);
}
The following figure shows the results of the above code:

The stage size is 512 x 512 pixels, and you can see the app.stage.height and app.stage.width attributes used to align wizards in the code above. Here's how the y position of the browser is centered vertically:
explorer.y = app.stage.height / 2 - explorer.height / 2;
Learning to use texture atlas to create and display wizards is an important basic operation. So before proceeding, let's write code to add the rest of the wizards: blobs and exit, so that you can generate the scenario shown below:

The following is the complete code for all of these operations. It also includes HTML code, so you can view everything in the appropriate context. (can be in here Download the code.) Note that the blobs wizard has been created, added to the stage in the loop, and assigned random locations.
    <!DOCTYPE html>
    <html lang="en">
    <head>
        <meta charset="UTF-8">
        <meta name="viewport" content="width=device-width,initial-scale=1.0">
        <meta http-equiv="X-UA-Compatible" content="ie=edge">
        <title>Creating Elves from Texture Maps</title>
    </head>
    <body>
        <script src="https://www.eveningwater.com/static/data/web/PixiJS/source/dist/pixi.min.js"></script>
        <script>
            //alias
            let Application = PIXI.Application,
                Container = PIXI.Container,
                loader = PIXI.loader,
                resources = PIXI.loader.resources,
                TextureCache = PIXI.utils.TextureCache,
                Sprite = PIXI.Sprite,
                Rectangle = PIXI.Rectangle;
            //Create pixi application objects
            let app = new Application({
                width: 512,
                height: 512,
                antialiasing: true,
                transparent: false,
                resolution: 1
            });
            //Add application objects to dom
            document.body.appendChild(app.view);
            //Load the json file and execute the setup function after loading. Note the json file path here, as well as the following
            loader.add("./texture.json").load(setup);
            //Define some variables that need to be used
            let dungeon, explorer, treasure, door, textureId;
            function setup() {
                //Here are three different ways to create an elf
                //First kind
                let dungeonTexture = TextureCache["dungeon.png"];
                dungeon = new Sprite(dungeonTexture);
                app.stage.addChild(dungeon);
                //Second kinds
                explorer = new Sprite(
                    resources["./texture.json"].textures["explorer.png"]
                );
                explorer.x = 68;
                //Location of explorers
                explorer.y = app.stage.height / 2 - explorer.height / 2;
                app.stage.addChild(explorer);
                //Third kinds
                textureId = PIXI.loader.resources["./texture.json"].textures;
                treasure = new Sprite(textureId["treasure.png"]);
                //Location of the Treasure
                treasure.x = app.stage.width - treasure.width - 48;
                treasure.y = app.stage.height / 2 - treasure.height / 2;
                app.stage.addChild(treasure);
                //Create exit Wizard
                door = new Sprite(textureId["door.png"]);
                door.position.set(32, 0);
                app.stage.addChild(door);
                //Making Bubble Elves
                let numberOfBlobs = 6,//Number
                    spacing = 48,//position
                    xOffset = 150;//Offset distance
                //Making Elves Based on the Number of Bubble Elves
                for (let i = 0; i < numberOfBlobs; i++) {
                    let blob = new Sprite(textureId["blob.png"]);
                    let x = spacing * i + xOffset;
                    //Location of randomly generated bubbles
                    let y = randomInt(0, app.stage.height - blob.height);
                    // Set the location of the bubble monster
                    blob.x = x;
                    blob.y = y;
                    //Add Bubble Monster to the Stage
                    app.stage.addChild(blob);
                }
            }
            //Random Generated Functions
            function randomInt(min, max) {
                return Math.floor(Math.random() * (max - min + 1)) + min;
            }
        </script>
    </body>
    </html>
We can see in the code above that all blobs are created using a for loop. Each blobs is evenly distributed along the x-axis as follows:
    let x = spacing * i + xOffset;
    blob.x = x;
The spacing value is 48, and the xOffset value is 150. This means that the x position of the first Blob is 150. This shifts it 150 pixels from the left of the stage. The x value of each subsequent blob will be 48 pixels larger than the blob created in the previous iteration of the loop. This creates a uniformly distributed monster line along the dungeon floor from left to right.
Each blob is also assigned a random y position. The following is the code to perform this operation:
    let y = randomInt(0, stage.height - blob.height);
    blob.y = y;
Any random number between 0 and 512 can be assigned to the y position of the blob, 512 being the value of stage.height. This works with the help of a custom function called random Int. Random Int returns a random number in the range between any two numbers you provide.
    //Notice what the parameters mean.
    randomInt(lowestNumber, highestNumber);
This means that if you want a random number between 1 and 10, you can get it as follows:
let randomNumber = randomInt(1, 10);
Following is the definition of random Int function that completes all these operations:
    function randomInt(min, max) {
        return Math.floor(Math.random() * (max - min + 1)) + min;
    }
Random Int is a good tool function for games, and it is often used when writing games.
14. Mobile Elves
We now know how to display the elves, but how to move them? It's easy: use Pixi's code to create loops, which are called game loops. Any code placed in the game loop will be updated 60 times per second. You can write the following code to move the cat wizard to the right at a rate of 1 pixel per frame.
    function setup() {
        //Start the game cycle and create a function like this
        //Pixi's `ticker'provides a delta parameter
        app.ticker.add(delta => gameLoop(delta));
    }
    function gameLoop(delta){
        //It's cat Elf Mobile 1px
        cat.x += 1;
    }
If we run this code, we will see the genie gradually move to the right of the stage.

This is because every time gameLoop runs, it adds 1 to the x position of cat.
cat.x += 1;
Each function you put into Pixi ticker is executed 60 times per second. You can see that there is a delta in the function. What is it? The value of delta represents the partial delay of the frame. It can be added to the location of the cat so that the speed of the cat is independent of the frame rate. Here is the code:
cat.x += 1 + delta;
Whether or not to add this incremental value is largely an aesthetic choice. And only when your animation strives to maintain a consistent display rate of 60 frames per second will the effect really be significant (for example, if it runs on a slow device, this may happen). The rest of the examples in this article will not use this increment, but you can use it as you want in your own work. You don't have to use Pixi's code to create game loops. If you want, you can use the request Animation Frame, as follows:
function gameLoop() {
    //Execute the game loop function every 60 seconds
    requestAnimationFrame(gameLoop);
    //Mobile cat Wizard
    cat.x += 1;
}
//Start the game cycle
gameLoop();
Which way to adopt depends on our own preferences. This is all the operation of mobile elves! Simply change any sprite attributes in a small increment within the loop, and they will be animated over time. If you want the wizard to set the animation in the opposite direction (to the left), just assign it a negative value, such as - 1.
The following is the complete code for the above example:
    //alias
    let Application = PIXI.Application,
        Container = PIXI.Container,
        loader = PIXI.loader,
        resources = PIXI.loader.resources,
        TextureCache = PIXI.utils.TextureCache,
        Sprite = PIXI.Sprite,
        Rectangle = PIXI.Rectangle;
    //Create application objects
    let app = new Application({
        width: 256,
        height: 256,
        antialias: true,
        transparent: false,
        resolution: 1
    });
    //Add application objects to dom
    document.body.appendChild(app.view);
    // Loading image resources
    loader.add("images/cat.png").load(setup);
    //Define cat Wizard
    let cat;
    function setup() {
        //Creating cat Wizards
        cat = new Sprite(resources["images/cat.png"].texture);
        cat.y = 96;
        app.stage.addChild(cat);
        //Start the game cycle
        app.ticker.add(delta => gameLoop(delta));
    }
    function gameLoop(delta) {
        // Move 1 pixel
        cat.x += 1;
        //Increments can also be used
        //cat.x += 1 + delta;
    }
Note: (cat variables need to be defined outside the setup and gameLoop functions so that they can be accessed in both functions.)
We can also animate the proportion, rotation or size of the elves - anyway! We'll see more examples of how to set up animations for elves.
15. Use speed attributes
In order to facilitate themselves and add some flexibility to the game, it is better to use two speed attributes (vx and vy) to control the movement speed of the elves. VX is used to set the speed and direction of the elf on the x-axis (horizontal). Vy is used to set the elf's speed and direction on the y axis (vertical). Rather than directly changing the X and y values of the wizard, update the speed variables first, and then assign these speed values to the wizard. This is an additional module for interactive game animation.
The first step is to create vx and vy attributes on the wizard and assign them initial values.
    cat.vx = 0;
    cat.vy = 0;
Setting the values of vx and vy to zero means that the genie is not moved (i.e., static). Then, in the game loop, update the speed values of vx and vy we want to move, and assign them to the x and y attributes of the wizard. Following is an example code that uses this method to make the wizard move 1 pixel to the lower right of each frame:
    function setup() {
        //Creating cat Wizards
        cat = new Sprite(resources["images/cat.png"].texture);
        cat.y = 96;
        cat.vx = 0;
        cat.vy = 0;
        app.stage.addChild(cat);
        //Start the game cycle
        app.ticker.add(delta => gameLoop(delta));
    }
    function gameLoop(delta){
        //Speed of updating cat Wizard
        cat.vx = 1;
        cat.vy = 1;
        //Assign the velocity attribute value to the location of the cat wizard, i.e. x and y coordinates
        cat.x += cat.vx;
        cat.y += cat.vy;
    }
When the above code is run, the cat wizard moves one pixel to the lower right of each frame. As shown in the following figure:

Want the cat wizard to move in different directions? Let the cat wizard move to the left, then set the value of vx to a negative number, such as - 1. To move it up, set the value of vy to a negative number, such as - 1. To make the cat wizard move faster, you just need to set the values of vx and vy a little larger, like 3, 5, - 2, - 4. (Negative sign represents direction).
We will see how to modularize the speed of the wizard by using the speed values of vx and vy. It is very helpful to the keyboard and mouse control system of the game, and it is easier to implement physical simulation.
16. Game Status
Considering the style, and in order to help modularize the code, I suggest that the game cycle be constructed as follows:
    //Define a variable to set the start state of the game
    let state = play;
    app.ticker.add((delta) => { gameLoop(delta)});
    //Start the game cycle
    function gameLoop(delta){
        //Change game status
        state(delta);
    }
    function play(delta){
        cat.vx = 1;
        cat.x += cat.vx;
    }
We'll see gameLoop calling the state function 60 times per second. What is the state function? It is assigned to play. This means that the play function runs 60 times per second. The following example shows how to reconstruct the code of the previous example with a new pattern:
    //To facilitate the use of variables by other functions, global variables are defined.
    let cat;
    let state;
    function setup() {
      //Creating cat Wizards
      cat = new Sprite(resources["images/cat.png"].texture);
      cat.y = 96;
      cat.vx = 0;
      cat.vy = 0;
      app.stage.addChild(cat);
      //Start setting game status
      state = play;
      //Start the game cycle
      app.ticker.add(delta => gameLoop(delta));
    }
    function gameLoop(delta){
      //Update the current game status
      state(delta);
    }
    function play(delta) {
      //Let cat move 1 pixel per frame
      cat.vx = 1;
      cat.x += cat.vx;
    }
Yeah, maybe it's a little unpleasant. (head-swirler) But instead of scaring us, take a minute or two to think about how these functions are connected. As we'll see, building game loops like this will make things like switching game scenes and checkpoints very easy.
17. Keyboard controls movement
With just a little more work, we can build a simple system to use the keyboard to control the wizard. To simplify our code, we recommend using a custom function called keyboard to listen for and capture keyboard events. As follows:
    function keyboard(value) {
        let key = {};
        key.value = value;
        key.isDown = false;
        key.isUp = true;
        key.press = undefined;
        key.release = undefined;
        //Keyboard press to start operation
        key.downHandler = event => {
          if (event.keyCode === key.value) {
            if (key.isUp && key.press)key.press();
            key.isDown = true;
            key.isUp = false;
            event.preventDefault();
          }
        };
        //Keyboard Press End
        key.upHandler = event => {
          if (event.keyCode === key.value) {
            if (key.isDown && key.release)key.release();
            key.isDown = false;
            key.isUp = true;
            event.preventDefault();
          }
        };
        //Events of Binding Monitoring
        const downListener = key.downHandler.bind(key);
        const upListener = key.upHandler.bind(key);
        window.addEventListener("keydown", downListener, false);
        window.addEventListener("keyup", upListener, false);
        //Monitoring of Untied Incidents
        key.unsubscribe = () => {
          window.removeEventListener("keydown", downListener);
          window.removeEventListener("keyup", upListener);
        };
        return key;
    }
The keyboard function is easy to use and can create a new keyboard object like this:
let keyObject = keyboard(keyValue);
One of its parameters is the key value you want to listen to. You can click here to view a list of keyboard values. The press and release methods are then assigned to the keyboard object as follows:
    keyObject.press = () => {
        //key object pressed
    };
    keyObject.release = () => {
      //key object released
    };
Keyboard objects also have Boolean properties of isDown and isUp, which are used to check the status of each key. But don't forget to use unsubscribe to delete event listeners:
keyObject.unsubscribe();
In the example folder, see how the keyboard movement. HTML file uses the keyboard function to control the wizard diagram by using the keyboard direction keys. Run it, and then use the left and right buttons to move the cat on the stage.

The following is all the code:
    let cat;
    let state;
    function setup(){
        //Creating cat Wizards
        cat = new Sprite(resource["./images/cat.png"].texture);
        //Setting the coordinates of the cat Wizard
        cat.y = 96;
        cat.vx = 0;
        cat.vy = 0;
        //Add to the stage
        app.stage.addChild(cat);

        //Keyboard key event attention parameter is the actual corresponding keyboard key, is an integer number
        let left = keyboard("arrowLeft");
        let right = keyboard("arrowRight");
        let up = keyboard("arrowUp");
        let down = keyboard("arrowDown");

        //When you press the left key to change the speed to the left, that is, to change vx to a negative value, where vy is unchanged
        left.press = () => {
            cat.vx = -5;
            cat.vy = 0;
        }
        //Initialization speed when releasing left direction key
        left.release = () => {
            //If the right key is not pressed, and the vy speed of cat is 0
            if(!right.isDown && cat.vy === 0){
                cat.vx = 0;
            }
        }
        //When you press the right key
        right.press = () => {
            cat.vx = 5;
            cat.vy = 0;
        }
        //When the right key is released
        right.release = () => {
            if(!left.isDown && cat.vy === 0){
                cat.vx = 0;
            }
        }
        //When the top direction key is pressed
        up.press = () => {
            cat.vy = -5;
            cat.vx = 0;
        }
        //When releasing the top directional key
        up.release = () => {
            if(!down.isDown && cat.vx === 0){
                cat.vy = 0;
            }
        }
        //When you press down the direction key
        down.press = () => {
            cat.vy = 5;
            cat.vx = 0;
        }
        //When releasing the direction key
        down.release = () => {
            if(!up.isDown && cat.vx === 0){
                cat.vy = 0;
            }
        }
        state = play;
        //Start the game cycle
        app.ticker.add((delta) => {
            gameLoop(delta);
        })
    }
    function gameLoop(delta){
        //Update game status
        state(delta);
    }
    function play(delta){
        cat.x += cat.vx;
        cat.y += cat.vy;
    }
18. Elves Grouping
(1) Implication of Elves Grouping
Fairy grouping allows us to create game scenes and manage similar fairies as a unit. Pixi has an object called Container, which we can use to perform some operations. Let's see how it works. Suppose you want to show three kinds of elves: cats, hedgehogs and tigers. Create them and set their location - but don't add them to the stage.
    //The cat
    let cat = new Sprite(id["cat.png"]);
    cat.position.set(16, 16);
    //The hedgehog
    let hedgehog = new Sprite(id["hedgehog.png"]);
    hedgehog.position.set(32, 32);
    //The tiger
    let tiger = new Sprite(id["tiger.png"]);
    tiger.position.set(64, 64);
Next, create an animals container to group them all, as follows:
let animals = new Container();
Then add these wizards to the grouping container using the addChild method
    animals.addChild(cat);
    animals.addChild(hedgehog);
    animals.addChild(tiger);
Finally, add groups to the stage
app.stage.addChild(animals);
Note: (The stage object is also a Container. It is the root container of all Pixi elves.
The effect of the above code is shown in the following figure:

We can't see the animals grouping that contains the wizard map. It's just a container.

Now, we can think of this animals grouping as a unit. We can also think of Container as a special Genie without texture. If you need to get a list of all the sperm wizards that animals contains, you can use the children array to get it.
    console.log(animals.children)
    //Displays: Array [Object, Object, Object]
It tells us that animals has three elves. Because animals is like any other Sprite, you can change its x and y values, alpha, scale, and all other sprite properties. Any property values that we change on the parent container will affect the sperm in a relative way. Therefore, if the x and y positions of animals are set, all sperm Elves will reposition relative to the upper left corner of animals. What happens if you set the x and y positions of animals to 64?
animals.position.set(64, 64);
The entire wizard group will move 64 pixels to the lower right. As shown in the following figure:

animals also have their own size, which is based on the area occupied by the included elves. We can find its width and height as follows:
    console.log(animals.width);
    //Displays: 112
    console.log(animals.height);
    //Displays: 112

What happens if you change the width or height of animals?
    animals.width = 200;
    animals.height = 200;
All sperm wizards will scale to match the change. As shown in the following figure:

We can nest as many containers as we need in other containers to create deep structures as needed. However, DisplayObject (such as Sprite or another Container) can only belong to one parent at a time. If you use addChild to make a wizard a child of another object, Pixi automatically deletes it from the current parent. This is a useful management that we need not worry about.
(2) Local and global location
When an elf is added to a container, its x and y are positioned relative to the upper left corner of the elf group, which is the elf's local location. For example: What do you think is the location of the cat wizard in the following figure?

Let's get its value:
    console.log(cat.x);
    //Displays:16
16? Yes! That's because cat is only 16 pixels offset from the top left corner of the packet. 16 is the location of cat.
Elves also have a global position, of course. The global position is the distance from the upper left corner of the stage to the elf's anchor (usually worth the distance from the elf's upper left corner). We can get the global location of the sprite through the toGlobal method. As follows:
    //Method on the Father Elf, Afferent Elf Location Parameters
    parentSprite.toGlobal(childSprite.position)
The above code means that if we want to find the global location of the cat wizard in the animals grouping, we have to write the code as follows:
    console.log(animals.toGlobal(cat.position));
    //Displays: Object {x: 80, y: 80...};
Then it gives us a position value of x and y, which is 80. To be more precise, the global position of cat is relative to the upper left corner of the stage.
If you don't know what the Father Container of the Elf is? How can we find the global location of the elves? Each wizard has a parent attribute to tell us what its parent container (or group of father wizards) is. If an elf is added to the stage correctly, the stage is the father container of the elf. In the above example, the parent container of the cat wizard is the animals wizard group. That means you can get the global location of cat by writing the following code.
cat.parent.toGlobal(cat.position);
Even if we don't know who the cat wizard's parent container is, it will execute as well. Of course, there's a better way to calculate the elf's global location, and it's usually the best way, so listen! If we want to know the distance from the elf to the upper left corner of canvas, and we don't know or care who the elf's parent container is, we can use the getGlobalPosition method. The following shows how to get the global location of the tiger wizard:
    tiger.getGlobalPosition().x
    tiger.getGlobalPosition().y
In the example we have written, it will return our values of x and y to 128. More specifically, getGlobalPosition returns a very precise value: when the elf's local location changes, it also returns us the exact global location.
What if you want to change the global position to the local position? We can use the toLocal method. It works in a similar way, usually in the following format:
sprite.toLocal(sprite.position, anyOtherSprite)
The toLocal method can be used to find a distance between a genie and another arbitrary genie. The following code shows how to locate tiger relative to hedgehog.
    tiger.toLocal(tiger.position, hedgehog).x
    tiger.toLocal(tiger.position, hedgehog).y
The above code returns an x value of 32 and a y value of 32. We can see in the example diagram that the upper left corner of tiger and the upper left corner of hedgehog are 32 pixels apart.
(3) Grouping Elves with ParticleContainer
Pixi has an additional, high-performance way of grouping wizards called Particle Container (PIXI. particles. Particle Container). Any fairy in Particle Container can render two to five times faster than a regular Container. This is a great way to improve game performance. ParticleContainer can be created like this:
let superFastSprites = new PIXI.particles.ParticleContainer();
Then use the addChild method to add wizards to it, just like adding wizards to a common Container.
If we use ParticleContainer, we have to make some compromises. Elves in a Particle Container have only a few basic attributes: x,y,width,height,scale,pivot,alpha, visible -- that's all. Moreover, it contains wizards that cannot have their own nested sub-ParticleContainer or use Pixi's advanced visual effects, such as filters and blending modes. Each Particle Container can only use one texture (therefore, if you want a sprite with a different look). But these compromises are usually worthwhile for the tremendous performance gains. Furthermore, Containers and ArticleContainers can also be used in the same project, so you can fine-tune the optimization.
Why are sprites in the Particle Container so fast? Because the location of the wizard is calculated directly on the GPU. The Pixi development team is working hard to get as many Sprite maps as possible processed on the GPU, so the most promising features of the latest version of Pixi's ArticleContainer must be much more than those described here. View current ParticleContainer document For more information.
Wherever you create a ParticleContainer, there are four attribute parameters to provide: size,properties,batchSize,autoResize.
let superFastSprites = new ParticleContainer(maxSize, properties, batchSize, autoResize);
The default value of maxSize is 1500. So, if you need to include more wizards, set this value to a larger number. The properties parameter is an object that contains five Boolean values to be set: scale, position,rotation,uvs,alphaAndTint. The default value of position is true, and the default value of the other four parameters is false. This means that in ParticleContainer, to change scale,rotation,uvs,alphaAndTint, you have to set these properties to true, as follows:
    let superFastSprites = new ParticleContainer(size,
        {
          rotation: true,
          alphaAndtint: true,
          scale: true,
          uvs: true
        }
    );
However, if you don't think you need to use these attributes, set them to false to maximize performance. What is the uvs attribute? Set it to true only if there is a particle that changes its texture during animation. (all sprite textures must also be on the same sprite map to work.) (Note: UV mapping is a term for 3D graphics display, referring to the X and Y coordinates of textures (images) mapped to a 3D surface. U is the X axis and V is the Y axis. WebGL has used x, y and z to locate 3D space, so U and V are chosen to represent X and y of 2D image texture.)
19.pixi drawing geometry
(1) description.
Using image texture is one of the most useful methods for making elves, but it also has its own low-level rendering tools. They can be used to make rectangles, shapes, lines, complex polygons and text. Fortunately, it uses almost the same API as the Canvas Drawing API, so if you're familiar with canvas, there's no real new knowledge. But the biggest advantage is that, unlike the Canvas Drawing API, shapes drawn using Pixi are rendered on the GPU by WebGL. Pixi can take advantage of all the undeveloped capabilities. Let's take a quick look at how to make some basic shapes. Here's the graphics we're going to use to create.

(2) rectangle.
All shapes are initialized by creating an instance of Pixi's Graphics class (PIXI.Graphics).
let rectangle = new Graphics();
Then, the beginFill method with the hexadecimal color code value is used to set the filling color of the rectangle. Here's how to set it to light blue.
rectangle.beginFill(0x66CCFF);
If you want to set a contour for the shape, use the method. Following is an example of setting a red contour with a 4-pixel wide alpha value of 1 for a rectangle:
    //The first parameter is the width of the contour line, the second parameter is the color value of the contour line, and the third parameter is the alpha value.
    rectangle.lineStyle(4, 0xFF3300, 1);
Draw Rect method is used to draw a rectangle. Its four parameters are x, y, width and height.
rectangle.drawRect(x, y, width, height);
endFill method is used to end the drawing. Just like Canvas Drawing API Same! The following is all the code needed to draw a rectangle, change its position and add it to the stage.
    let rectangle = new Graphics();
    rectangle.lineStyle(4, 0xFF3300, 1);
    rectangle.beginFill(0x66CCFF);
    rectangle.drawRect(0, 0, 64, 64);
    rectangle.endFill();
    rectangle.x = 170;
    rectangle.y = 170;
    app.stage.addChild(rectangle);
The above code can create a blue red box rectangle with 64 width and height at (170, 170).
(3) round.
Use the drawCircle method to create a circle. Its three parameters are x, y and radius.
drawCircle(x, y, radius)
Unlike rectangles and sprites, the x and y positions of a circle are also the centers (dots). Here is the code for making a purple circle with a radius of 32 pixels.
    let circle = new Graphics();
    circle.beginFill(0x9966FF);
    circle.drawCircle(0, 0, 32);
    circle.endFill();
    circle.x = 64;
    circle.y = 130;
    app.stage.addChild(circle);
(4) Elliptical shape
As an aspect of the Canvas Drawing API, Pixi allows you to draw ellipses using the drawEllipse method.
drawEllipse(x, y, width, height);
The x/y position defines the upper left corner of the ellipse (assuming that the ellipse is surrounded by an invisible rectangular boundary box - the upper left corner of the box will represent the x/y anchor position of the ellipse). The following code draws a yellow ellipse, 50 pixels wide and 20 pixels high.
    let ellipse = new Graphics();
    ellipse.beginFill(0xFFFF00);
    ellipse.drawEllipse(0, 0, 50, 20);
    ellipse.endFill();
    ellipse.x = 180;
    ellipse.y = 130;
    app.stage.addChild(ellipse);
(5) Rounded rectangle
Pixi also allows you to make rounded rectangles using the drawRoundedRect method. The last parameter, cornerRadius, is a number (in pixels) that determines how many rounded corners should be set.
drawRoundedRect(x, y, width, height, cornerRadius)
Here is the code to draw a rectangle with a fillet of 10 pixels.
    let roundBox = new Graphics();
    roundBox.lineStyle(4, 0x99CCFF, 1);
    roundBox.beginFill(0xFF9933);
    roundBox.drawRoundedRect(0, 0, 84, 36, 10)
    roundBox.endFill();
    roundBox.x = 48;
    roundBox.y = 190;
    app.stage.addChild(roundBox);
(6) line segment
From the previous example, we already know how to draw a line segment using the lineStyle method. Like the Canvas Drawing API, we can use the moveTo and lineTo methods to draw the start and end points of line segments. The following code draws a 4-pixel wide, white diagonal.
    let line = new Graphics();
    line.lineStyle(4, 0xFFFFFF, 1);
    line.moveTo(0, 0);
    line.lineTo(80, 50);
    line.x = 32;
    line.y = 32;
    app.stage.addChild(line);
PIXI.Graphics objects (such as lines) have x and y values, just like sprites, so after drawing them, they can be placed anywhere on the stage.
(7). Polygons
We can also use the drawPolygon method to connect wires together and fill them with colors to make complex shapes. DraPolygon's parameters are path arrays of x/y points, which define the positions of each point in the shape.
    let path = [
        point1X, point1Y,
        point2X, point2Y,
        point3X, point3Y
    ];
    graphicsObject.drawPolygon(path);
DraPolygon connects these three points together to form a shape. Here's how to use draw Polygon to connect three lines together to form a red triangle with a blue border. Draw a triangle at position (0,0) and use its x and y attributes to move it to a position on the stage.
    let triangle = new Graphics();
    triangle.beginFill(0x66FF33);
    triangle.drawPolygon([
        -32, 64,
        32, 64,
        0, 0
    ]);
    triangle.endFill();
    triangle.x = 180;
    triangle.y = 22;
    app.stage.addChild(triangle);
20. Display text
Text objects (PIXI.Text) are used to display text on the stage. In the simplest form, this can be done:
    let message = new Text("Hello Pixi!");
    app.stage.addChild(message);
This will show the word "Hello, Pixi" on the canvas. Pixi's Text objects inherit from the Sprite class, so they contain all the same attributes, such as x, y, width, height, alpha and rotation. As with other elves, place text on the stage and resize it. For example, you can use position.set to set the X and Y positions of messages, as follows:
message.position.set(54, 96);

This will provide us with basic, styleless text. However, if you want to become more fashionable, use Pixi's TextStyle(PIXI.TextStyle) function to define custom text styles. The following is an example code:
    let style = new TextStyle({
        fontFamily: "Arial",
        fontSize: 36,
        fill: "white",
        stroke: '#ff3300',
        strokeThickness: 4,
        dropShadow: true,
        dropShadowColor: "#000000",
        dropShadowBlur: 4,
        dropShadowAngle: Math.PI / 6,
        dropShadowDistance: 6,
    });
This creates a new style object that contains all the text styles to use. See here for a complete list of all style attributes available. To apply styles to text, add style objects as the second parameter of the Text function, as follows:
let message = new Text("Hello Pixi!", style);

If you want to change the content of a text object after it is created, you can use the text attribute.
message.text = "Text changed!";
If you want to redefine style attributes, you can use style attributes.
message.style = {fill: "black", font: "16px PetMe64"};
Pixi uses the Canvas Drawing API to render text as invisible temporary canvas elements to create text objects. It then transforms the canvas into a WebGL texture so that it can be mapped to the wizard. This is why you need to wrap the color of the text in a string: this is the color value of the Canvas Drawing API. Like any canvas color value, you can use common color words such as "red" or "green" or rgba, hsla or hex color patterns. Pixi can also wrap long lines of text. Set the wordWrap style attribute of the text to true, and then set wordWrapWidth to the maximum length (in pixels) that the text line should reach. Use the align property to set the alignment of multiple lines of text. The following example:
message.style = {wordWrap: true, wordWrapWidth: 100, align: center};
Note: Alignment does not affect single line text.
If you want to use a custom font file, you can use the CSS@font-face rule to link the font file to the HTML page running the Pixi application.
    @font-face {
        font-family: "fontFamilyName";
        src: url("fonts/fontFile.ttf");
    }
Add this @font-face rule to the CSS stylesheet of the HTML page.
Pixi also supports bitmap fonts . Pixi's loader can also be used to load bitmap font XML files, just like JSON or image files.
21. Collision detection
(1) Introducing collision detection
We now know how to make various graphic objects, but what can we do with them? One interesting thing is to build a simple collision detection system. You can use a custom function called hitTestRectangle to check if two rectangular Pixi wizards are in contact.
hitTestRectangle(spriteOne, spriteTwo)
If they overlap (i.e., collide), hitTestRectangle returns true. We can use hitTestRectangle with the if statement to check for collisions between two elves, as follows:
    if (hitTestRectangle(cat, box)) {
        //There's a collision
    } else {
        //There's no collision
    }
As we can see, hit test rectangle is the threshold for a wide range of game design. Run the collisionDetection.html file in the examples folder to get a working example of how to use hitTestRectangle. Use the direction keys on the keyboard to move the cat. If the cat touches the box, it turns red, and then "hit!" is displayed by a text object.

We've seen all the code that creates all these elements, and the keyboard control system that moves the cat. The only new thing is the use of hitTestRectangle inside the play function to check for collisions.
    function play(delta) {
        //Use the cat wizard's speed attribute to move
        cat.x += cat.vx;
        cat.y += cat.vy;
        //Check whether the cat and box wizards collide
        if (hitTestRectangle(cat, box)) {
          //Change text if collision occurs
          //The box turns red
          message.text = "hit!";
          box.tint = 0xff3300;
        } else {
          //If there is no collision, reset text and box color
          message.text = "No collision...";
          box.tint = 0xccff99;
        }
    }
Since the play function is called 60 times per second by game loops, the if statement constantly checks for collisions between cats and boxes. If hitTestRectangle returns true, the text message object uses text to display "hit!":
message.text = "Hit!";
Then, by setting the tint attribute of the box to the hexadecimal red value, the color of the box is changed from green to red.
box.tint = 0xff3300;
If there is no collision, the text and the box will remain in their original state:
    message.text = "No collision...";
    box.tint = 0xccff99;
This code is very simple, but all of a sudden it creates a seemingly fully active interactive world. It's almost like magic! And, perhaps surprisingly, we now have all the skills we need to start making games with Pixi!
(2) Collision detection function
But what about the hittestrectangle function? What does it do and how does it work? The details of how such collision detection algorithms work are beyond the scope of this paper. (If you really want to know, you can understand the use of this book.) Most importantly, know how to use it. However, for reference only, just in case, you can also refer to the complete definition of hitTestRectangle function. We can figure out what it is doing from the notes.
    function hitTestRectangle(r1, r2) {
        //Define the variables we'll need to calculate
        let hit, combinedHalfWidths, combinedHalfHeights, vx, vy;
        //hit will determine whether there's a collision
        hit = false;
        //Find the center points of each sprite
        r1.centerX = r1.x + r1.width / 2;
        r1.centerY = r1.y + r1.height / 2;
        r2.centerX = r2.x + r2.width / 2;
        r2.centerY = r2.y + r2.height / 2;
        //Find the half-widths and half-heights of each sprite
        r1.halfWidth = r1.width / 2;
        r1.halfHeight = r1.height / 2;
        r2.halfWidth = r2.width / 2;
        r2.halfHeight = r2.height / 2;
        //Calculate the distance vector between the sprites
        vx = r1.centerX - r2.centerX;
        vy = r1.centerY - r2.centerY;
        //Figure out the combined half-widths and half-heights
        combinedHalfWidths = r1.halfWidth + r2.halfWidth;
        combinedHalfHeights = r1.halfHeight + r2.halfHeight;
        //Check for a collision on the x axis
        if (Math.abs(vx) < combinedHalfWidths) {
          //A collision might be occurring. Check for a collision on the y axis
          if (Math.abs(vy) < combinedHalfHeights) {
            //There's definitely a collision happening
            hit = true;
          } else {
            //There's no collision on the y axis
            hit = false;
          }
        } else {
          //There's no collision on the x axis
          hit = false;
        }
        //`hit` will be either `true` or `false`
        return hit;
    };
22. Case study: treasure hunter games
So far, we have all the skills we need to start making games. What? Don't you believe me? Let me prove it to you! Let's see how to make a simple game of collecting objects and avoiding enemies, called Treasure Hunter.

Treasure Hunter is a good example of one of the simplest complete games that can be made with tools learned so far. Use the arrow keys on the keyboard to help the Explorer find the treasure and take it to the exit. Six Blob monsters move up and down between the walls of the dungeon. If they meet the explorer, they become translucent and the blood flow progress bar in the upper right corner shrinks. If all the blood is used up, "You Lost!" will be displayed on the stage. ; if the Explorer arrives at the exit with the treasure, "You Won!" is displayed. Although it's a basic prototype, Treasure Hunter contains most of the elements you find in large games: texture atlas graphics, interactivity, collisions, and multiple game scenarios. Let's take a look at how the game is assembled so that it can be used as a starting point for one of our games.
(1) Code structure
Open the treasureHunter.html file and you will see that all the code is in a large file. Here is an overview of how to organize all the code:
    //A function that creates pixi applications and loads all texture atlases is called setup
    function setup() {
        //Game Elves Creation, Start Game Status, Start Game Cycle
    }
    function gameLoop(delta) {
      //Running the game cycle
    }
    function play(delta) {
      //All the game magic is here.
    }
    function end() {
      //The final code of the game
    }
    //Tool functions needed for games:
    //`keyboard`, `hitTestRectangle`, `contain`and `randomInt`
Think of this as a blueprint for your game code, and let's see how each part works.
(2) Initialize the game with setup function
After loading the texture image, the setup function runs. It runs only once and allows you to perform one-time setup tasks for the game. Here is a good place to create and initialize objects, wizards, game scenes, fill data arrays or parse loaded JSON game data. The following is a brief view of the setup function and its tasks in Treasure Hunter.
    function setup() {
        //Create Game Start Scene Groups
        //Creating Door Elves
        //Creating players is also Explorer elves
        //Creating a Treasure Box Elf
        //Create enemies
        //Create blood volume progress bar
        //Add some text display needed for the game
        //Create end-of-game scenario grouping
        //Keyboard Controller for Allocating Players
        //Setting the game status
        state = play;
        //Start the game cycle
        app.ticker.add(delta => gameLoop(delta));
    }
The last two lines of code, state = play; and gameLoop may be the most important. Adding gameLoop to the toggle switch of Pixi can open the game engine and call the play function in the continuous loop. But before we look at how it works, let's first look at what specific code in the setup function does.
a. Creating game scenes
The setup function creates two container groups called gameScene and gameOverScene, respectively. These are added to the stage.
    gameScene = new Container();
    app.stage.addChild(gameScene);
    gameOverScene = new Container();
    app.stage.addChild(gameOverScene);
All the Wizards belonging to the main game are added to the gameScene group. Text that should be displayed above the game at the end of the game will be added to the gameOverScene group.

Although it was created in the setup function, gameOverScene should not be visible when the game is first started, so its visible property is initialized to false.
gameOverScene.visible = false;
We will see that when the game ends, the visible property of gameOverScene is set to true to display the text that appears at the end of the game.
b. Making dungeons, doors, explorers and treasure elves
Players, exits, treasure boxes and dungeons are all spirits from texture maps. Importantly, they are all added as gameScene's sperm.
    //Creating Elves from Texture Atlas
    id = resources["images/treasureHunter.json"].textures;
    //Dungeon
    dungeon = new Sprite(id["dungeon.png"]);
    gameScene.addChild(dungeon);
    //Door
    door = new Sprite(id["door.png"]);
    door.position.set(32, 0);
    gameScene.addChild(door);
    //Explorer
    explorer = new Sprite(id["explorer.png"]);
    explorer.x = 68;
    explorer.y = gameScene.height / 2 - explorer.height / 2;
    explorer.vx = 0;
    explorer.vy = 0;
    gameScene.addChild(explorer);
    //Treasure
    treasure = new Sprite(id["treasure.png"]);
    treasure.x = gameScene.width - treasure.width - 48;
    treasure.y = gameScene.height / 2 - treasure.height / 2;
    gameScene.addChild(treasure);
Putting them all in the gameScene grouping makes it easier for us to hide the gameScene and display the game OverScene at the end of the game.
c. Making Bubble Elves
Six blob monsters are created in a loop. Each blob is assigned a random initial position and speed. The vertical velocity of each blob is multiplied by 1 or - 1 alternately, which is why each blob moves in the opposite direction to its neighbor. Each created blob monster is pushed into an array called a blob.
    //Number of Bubblebugs
    let numberOfBlobs = 6;
    //Horizontal Position Value of Bubblebug
    let spacing = 48;
    //Bubble eccentricity offset
    let xOffset = 150;
    //Bubble speed
    let speed = 2;
    //Bubble Monster Moving Direction
    let direction = 1;
    //An array stores all bubbles
    let blobs = [];
    //Start creating bubble monsters
    for (let i = 0; i < numberOfBlobs; i++) {
        //Create a bubble monster
        let blob = new Sprite(id["blob.png"]);
        //Separate each Blob horizontally according to the `spacing'value
        //xOffset to determine the point on the left side of the screen
        //The first Blob should be added to it
        let x = spacing * i + xOffset;
        //Give Bubble Monster a Random Vertical Position
        let y = randomInt(0, stage.height - blob.height);
        //Set the location of the bubble monster
        blob.x = x;
        blob.y = y;
        //Set the vertical velocity of the bubble monster. Direction will be 1 or
        //`-1. "1" means the enemy will move downward, and "1" means the Bubble Monster will move downward.
        //Promote. Multiply "direction" and "speed" to determine the bubbles
        //vertical direction
        blob.vy = speed * direction;
        //The next Bubble is in the opposite direction.
        direction *= -1;
        //Add Bubblebugs to the array
        blobs.push(blob);
        //Add Bubblebugs to gameScene Groups
        gameScene.addChild(blob);
    }
d. Making blood volume progress bar
When we play treasure hunters, I think we should find that when our explorers touch any enemy, the width of the blood progress bar in the upper right corner of the screen decreases. So how is this blood volume progress bar made? It's just two rectangles overlapping in the same place: a black rectangle at the back and a red rectangle at the front. They are all grouped in the healthBar group. healthBar is added to the gameScene group and then positioned on the stage.
    //Create blood volume progress bar
    healthBar = new PIXI.Container();
    healthBar.position.set(stage.width - 170, 4)
    gameScene.addChild(healthBar);
    //Create a black rectangle
    let innerBar = new PIXI.Graphics();
    innerBar.beginFill(0x000000);
    innerBar.drawRect(0, 0, 128, 8);
    innerBar.endFill();
    healthBar.addChild(innerBar);
    //Create a red rectangle
    let outerBar = new PIXI.Graphics();
    outerBar.beginFill(0xFF3300);
    outerBar.drawRect(0, 0, 128, 8);
    outerBar.endFill();
    healthBar.addChild(outerBar);
    healthBar.outer = outerBar;
We have seen an attribute called outer added to the healthBar. It simply refers to outerBar (red rectangle) for easy access later.
healthBar.outer = outerBar;
We don't have to; however, why not? This means that if we want to control the width of the red outerBar, we can write some smoothing code as shown below:
healthBar.outer.width = 30;
That's neat and readable, so we'll keep it!
e. Making Text Tips
At the end of the game, according to the results of the game, some text shows "You won!" or "You lost!". This is achieved by using a text wizard and adding it to gameOverScene. Since GameOverScene's visible property was set to false at the start of the game, we can't see this text. This is the code for the setup function, which creates the message text and adds it to gameOverScene.
    let style = new TextStyle({
        //Font type
        fontFamily: "Futura",
        //font size
        fontSize: 64,
        //Font color
        fill: "white"
      });
    message = new Text("The End!", style);
    message.x = 120;
    message.y = app.stage.height / 2 - 32;
    gameOverScene.addChild(message);
(3) Start the game
All the game logic and code that moves the wizard occurs inside the play function, which runs in a continuous loop. This is an overview of the play function:
    function play(delta) {
        //Mobile Explorers and Include them in Dungeons
        //Mobile Bubble Monster
        //Detection of Bubble Crashes with Explorers
        //Detection of collisions between explorers and treasure boxes
        //Detection of collision between treasure box and exit
        //Decide whether the game will win or lose
        //At the end of the game, change the state of the game to end
    }
Let's find out how all these functions work.
(4) Mobile Explorers
The Explorer uses keyboard control, and the code to perform this operation is very similar to the previously learned keyboard control code. The keyboard object modifies the explorer's speed and adds it to the position of the explorer in the play function.
    explorer.x += explorer.vx;
    explorer.y += explorer.vy;
a. Range of motion
But the new function is that the explorer's movements are contained in the walls of the dungeon. The green outline shows the limits of the explorer's movement.

This is done with the help of a custom function called contain.
contain(explorer, {x: 28, y: 10, width: 488, height: 480});
Contain contains two parameters. The first parameter is the wizard that you want to be included, and the second parameter is an arbitrary object, containing the x,y,width,height attributes, in order to define a rectangular region. In this example, the contain object defines an area that is only slightly offset from the stage and smaller than the stage, which matches the size of the dungeon wall.
The following is the contain function that completes these tasks. This function checks whether the wizard has exceeded the boundary of the contain object. If it goes beyond, the code moves the wizard back to the boundary. The contain function also returns the collision variable, whose values depend on "top","right","bottom","left", depending on which side of the hit boundary. (If the elves do not touch any boundaries, the collision will be uncertain.)
    function contain(sprite, container) {
        let collision = undefined;
        //Left
        if (sprite.x < container.x) {
          sprite.x = container.x;
          collision = "left";
        }
        //upper
        if (sprite.y < container.y) {
          sprite.y = container.y;
          collision = "top";
        }
        //right
        if (sprite.x + sprite.width > container.width) {
          sprite.x = container.width - sprite.width;
          collision = "right";
        }
        //lower
        if (sprite.y + sprite.height > container.height) {
          sprite.y = container.height - sprite.height;
          collision = "bottom";
        }
        //Returns the collision value
        return collision;
    }
You'll see how to use collision return values in the previous code to bounce back and forth between the upper and lower underground walls of the Blob monster.
(4) Moving monsters
The play function also moves Blob monsters, keeps them in the dungeon wall, and checks whether each monster collides with the player. If Blob hits the top or bottom of the dungeon, it will go in the opposite direction. All this is done with the help of the forEach loop, which traverses each Blob wizard in each frame of the Blobs array.
    blobs.forEach(function(blob) {
        //Mobile Bubble Monster
        blob.y += blob.vy;
        //Check the screen boundaries of bubbles
        let blobHitsWall = contain(blob, {x: 28, y: 10, width: 488, height: 480});
        //If the bubble monster hits the top or bottom of the stage, the direction reverses.
        //Its direction
        if (blobHitsWall === "top" || blobHitsWall === "bottom") {
          blob.vy *= -1;
        }
        //Collision detection if any enemy touches the Explorer
        //Set the Explorer Hit value of the explorer to true
        if(hitTestRectangle(explorer, blob)) {
          explorerHit = true;
        }
    });
We can see in the code above how the return value of the contain function is used to rebound the blob from the wall. A variable named blobHitsWall is used to capture the return value:
let blobHitsWall = contain(blob, {x: 28, y: 10, width: 488, height: 480});
Blobhitswall is usually undefined. However, if the blob touches the top wall, the value of blobHitsWall will be "top". If the blob touches the bottom wall, the value of blobHitsWall will be "bottom". If both cases are true, the direction of the blob can be reversed by reversing the speed of the blob. Here is the code to do this:
    if (blobHitsWall === "top" || blobHitsWall === "bottom") {
        //Reverse direction by changing the velocity to a negative value
        blob.vy *= -1;
    }
Multiply the vy (vertical velocity) value of the blob by -1 to reverse its direction of motion.
(5) Collision detection
The code in the previous loop uses the hitTestRectangle function to determine if any enemy has touched the explorer.
    if(hitTestRectangle(explorer, blob)) {
        explorerHit = true;
    }
If hitTestRectangle returns true. That means a collision will occur and the value of the explorerHit variable will be true. If the value of explorerHit is true, the play function will make the Explorer translucent and reduce the width of the blood progress bar by one pixel. (The specific reduction depends on each person's own definition.)
    if(explorerHit) {
        //Make the Explorer translucent
        explorer.alpha = 0.5;
        //Reduce the width of the blood volume progress bar
        healthBar.outer.width -= 1;
    } else {
        //Make the Explorer completely transparent if he can't be hit again
        explorer.alpha = 1;
    }
If explorerHit is false, the alpha attribute of explorer is kept at 1, which makes it completely opaque. The play function also checks for collisions between the treasure box and the explorer. If a collision occurs, the treasure will be placed in the explorer's position with a slight offset. This makes it look like an explorer is carrying a treasure.

The following is the code to complete the work:
    if (hitTestRectangle(explorer, treasure)) {
        //The number of 8 can be a little bigger.
        treasure.x = explorer.x + 8;
        treasure.y = explorer.y + 8;
    }
(6). Arrive at the exit and end the game
There are two ways to end the game: if the Explorer carries the treasure box and reaches the exit, it means you win, or if you don't have a blood bar, it means you fail. In order to win the game, the Explorer just needs to touch the exit, if that happens. Then set the state of the game to the end of the end, and then the message, which is the text message prompt, shows "You won!"
    if (hitTestRectangle(treasure, door)) {
        state = end;
        message.text = "You won!";
    }
If there is no blood bar, you will lose the game. The state of the game is also set to end, and then the message, which is a text message prompt, shows "You lost!"
    if (healthBar.outer.width < 0) {
        state = end;
        message.text = "You lost!";
    }
So what exactly does the following code mean?
state = end;
Let's remember from the previous example that gameLoop updates functions called states at a rate of 60 times per second. This is gameLoop that performs this operation:
    function gameLoop(delta){
        //Update the current game status
        state(delta);
    }
We will also remember that we initially set the state value to play, which is why the play function runs circularly. By setting the state to end, we tell the code that we want another function called end to run in a loop. In larger games, you can also have tileScene status, as well as the status of each game level, such as leveOne, levelTwo and levelThree.
What is the end function?
    function end() {
        //Game scenes are not displayed, game end scenes are displayed
        gameScene.visible = false;
        gameOverScene.visible = true;
    }
It just flips the visibility of the game scene. This hides gameScene and displays gameOverScene content at the end of the game. This is a very simple example of how to switch game states, but you can have any number of game states in the game and fill as much code as you need. Just change the value of state to any function that you want to run in the loop. And that's what treasure hunters are all about! With just a little more work, you can turn this simple prototype into a complete game - try it!
23. More about Elves
So far, we have learned how to use many useful wizard attributes, such as x, y, visible and rotation, which allow us to control the location and appearance of wizards in a large way. But Pixi Sprites also has many more interesting and useful attributes. This is the complete list. How does Pixi's class inheritance system work? (What are classes and inheritance? Click this link to find.) Pixi's sprites are based on an inheritance model that follows this chain:
DisplayObject > Container > Sprite
Inheritance simply means that the classes in the back of the chain use the attributes and methods of the classes in the front of the chain. This means that even if Sprite is the last class in the chain, it has all the same attributes as DisplayObject and Container in addition to its own unique attributes. The most basic class is DisplayObject. Any DisplayObject can be presented on the stage. Containers are the next class in the inheritance chain. It allows DisplayObject to act as a container for other DisplayObjects. The third is the Sprite category. Elves can be displayed on the stage or as containers for other elves.
PS: This article is based on official tutorials and translates and adds personal understanding and examples. This article summarizes in my own Personal website Above).