Service registration and discovery, service discovery is mainly used to achieve automatic registration and discovery of individual micro-service instances. It is the core of micro-service governance. To learn Spring Cloud Alibaba, first of all, you need to understand the service registration and discovery component in the framework, Nacos.
1. Spring Cloud Service Registration and Discovery Components
1.Spring Cloud Eureka Closed Source Wind Waves
In the sub-project of Spring Cloud, Spring Cloud Netflix provides Eureka for service discovery, which consists of two components: the service side discovery component (Eureka Server) and the client side discovery component (Eureka Client).The service discovery mechanism for Eureka is shown in the diagram.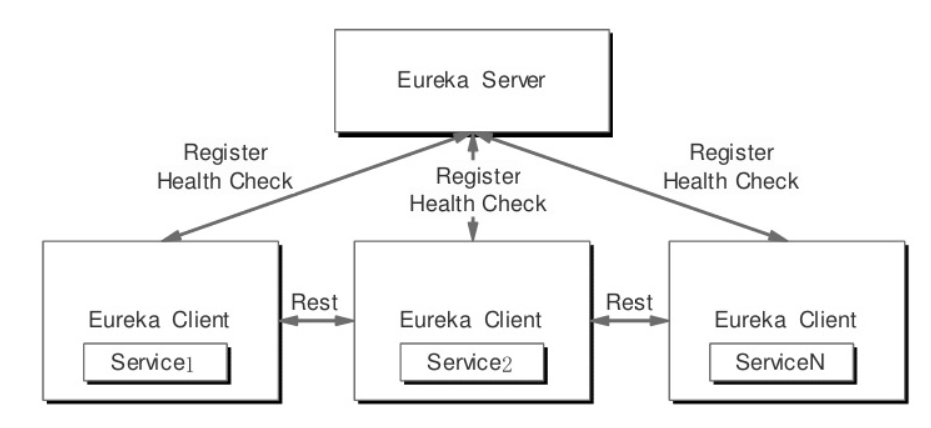
When a client service runs embedded in the program's code, such as annotations, the client discovers that the component registers its services with the registry and periodically sends a heartbeat to update the service. If three consecutive heartbeats fail to discover the service, Eureka removes the service node from the service registry.The registration information in the registry is used to restore calls between services and can be invoked directly by the service name.
In 2012, Netflix opened Euerka to open source and Euerka was widely used in Spring Cloud. However, in June 2018, Netflix announced that Euerka 2.0 was closed source. Currently, the community is integrating version 1.0. After closing source, service discovery chooses which component, the answer is Nacos.
2. Alibaba Open Source Nacos
Alibaba officially positioned Nacos as a "dynamic service discovery, configuration management, and service management platform that makes it easier to build native cloud applications".Nacos supports services discovery, integrated configuration center, and service data management.
2. Nacos Local Installation and Startup
Nacos can be obtained from both source and distribution packages. Here we download the source and build it.
Download the source code from Github and compile it
git clone https://github.com/alibaba/nacos.git
cd nacos/
mvn -Prelease-nacos clean install -U
ls -al distribution/target/

// change the $version to your actual path
cd distribution/target/nacos-server-$version/nacos/bin
Start Nacos Service
Linux/Unix/Mac System
Start command (standalone stands for single machine mode, non-cluster mode):
sh startup.sh -m standalone
Windows System
Start command:
`
cmd startup.cmd
`
Or double-click startup.cmd to run the file
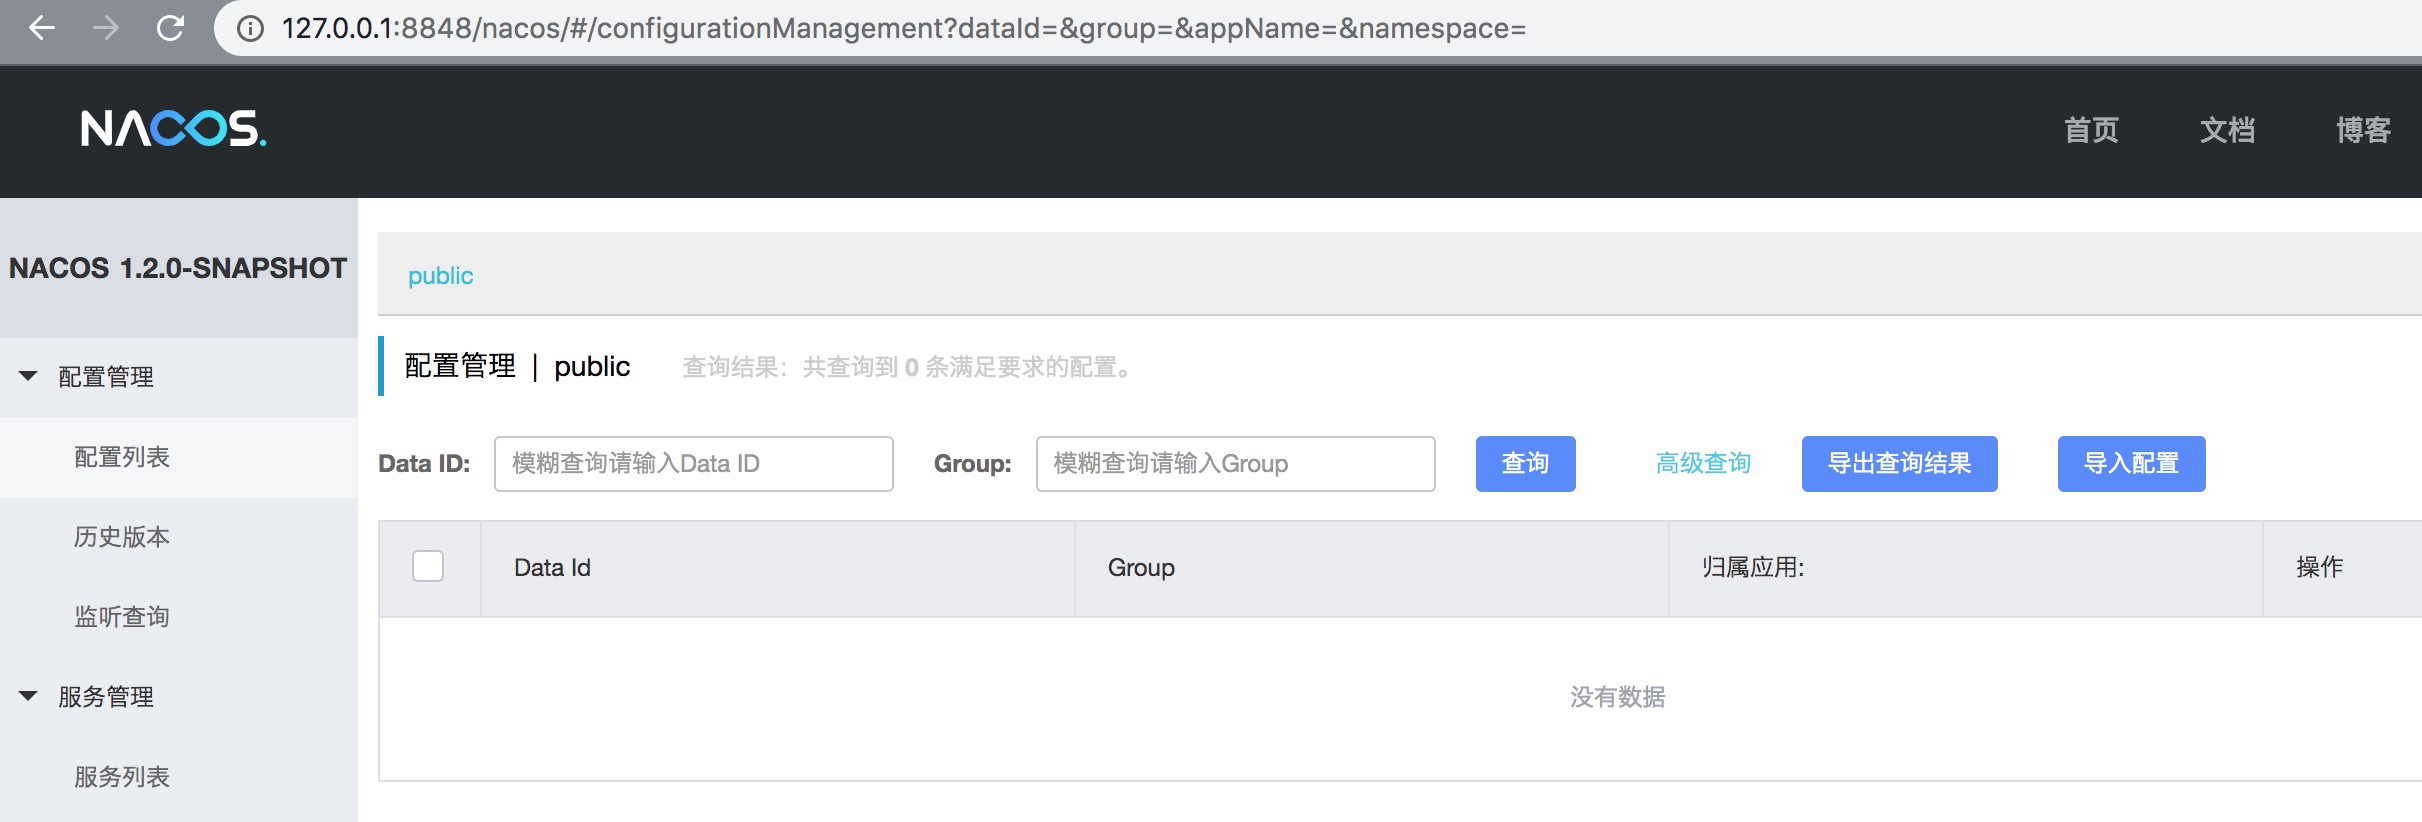
After the application starts, access http://127.0.0.1:8848/nacos/ , Nacos 0.8 already supports simple login, default username/password is: nacos/nacos.
3. Integrated Spring Cloud Service Discovery
If you're not familiar with the creation of Spring Cloud projects, take a look at the previous post.
View of Latest Version Relationships Version Note Wiki
Create a service provider
1. Create a new Spring Boot project named nacos-spring-cloud to add Nocos dependencies. Note that version 0.2.x.RELEASE corresponds to Spring Boot version 2.x and version 0.1.x.RELEASE corresponds to Spring Boot version 1.x.
    <dependencyManagement>
        <dependencies>
            <dependency>
                <groupId>org.springframework.cloud</groupId>
                <artifactId>spring-cloud-starter-alibaba-nacos-discovery</artifactId>
                <version>0.2.2.RELEASE</version>
            </dependency>
            <dependency>
                <groupId>com.alibaba.nacos</groupId>
                <artifactId>nacos-client</artifactId>
                <version>1.1.0</version>
            </dependency>
        </dependencies>
    </dependencyManagement>
2. Add a module, nacos-spring-cloud-provider. As a service provider, the Pom file is configured as follows
    <dependencies>
        <dependency>
            <groupId>org.springframework.boot</groupId>
            <artifactId>spring-boot-starter-web</artifactId>
        </dependency>

        <dependency>
            <groupId>org.springframework.cloud</groupId>
            <artifactId>spring-cloud-starter-alibaba-nacos-discovery</artifactId>
            <exclusions>
                <exclusion>
                    <groupId>com.alibaba.nacos</groupId>
                    <artifactId>nacos-client</artifactId>
                </exclusion>
            </exclusions>
        </dependency>
        <dependency>
            <groupId>com.alibaba.nacos</groupId>
            <artifactId>nacos-client</artifactId>
        </dependency>
        <dependency>
            <groupId>org.hibernate</groupId>
            <artifactId>hibernate-validator</artifactId>
            <version>5.1.0.Final</version>
        </dependency>
    </dependencies>
3. Create a startup class and add a Restful-type method to it as a service implementation.
@SpringBootApplication
@EnableDiscoveryClient
@RestController
public class NacosProviderApplication {

    public static void main(String[] args) {
        SpringApplication.run(NacosProviderApplication.class, args);
    }

    @RequestMapping(value = "/hello/{string}", method = RequestMethod.GET)
    public String echo(@PathVariable String string) {
        return "Hello " + string;
    }
}
4. Modify the configuration file and register it with the Nacos console.
server.port=8070
spring.application.name=service-provider
spring.cloud.nacos.discovery.server-addr=127.0.0.1:8848
5. Start the project and view the Nacos console.
Create service consumers
1. Add a new module, nacos-spring-cloud-consumer, as a service consumer.
2. Add a Restful-type method to the startup class, and the Pom file relies on the following:
<properties>
        <spring-cloud-openfeign.version>2.0.0.RELEASE</spring-cloud-openfeign.version>
        <spring-cloud-netflix.version>2.0.0.RELEASE</spring-cloud-netflix.version>
    </properties>

    <dependencies>
        <dependency>
            <groupId>org.springframework.boot</groupId>
            <artifactId>spring-boot-starter-web</artifactId>
        </dependency>

        <dependency>
            <groupId>org.springframework.cloud</groupId>
            <artifactId>spring-cloud-starter-netflix-ribbon</artifactId>
            <version>${spring-cloud-netflix.version}</version>
        </dependency>

        <dependency>
            <groupId>org.springframework.cloud</groupId>
            <artifactId>spring-cloud-starter-openfeign</artifactId>
            <version>${spring-cloud-openfeign.version}</version>
        </dependency>

        <dependency>
            <groupId>org.springframework.cloud</groupId>
            <artifactId>spring-cloud-starter-alibaba-nacos-discovery</artifactId>
            <exclusions>
                <exclusion>
                    <groupId>com.alibaba.nacos</groupId>
                    <artifactId>nacos-client</artifactId>
                </exclusion>
            </exclusions>
        </dependency>
        <dependency>
            <groupId>com.alibaba.nacos</groupId>
            <artifactId>nacos-client</artifactId>
        </dependency>
    </dependencies>
3. Create startup classes and test methods to invoke the provider's services.
@SpringBootApplication
@EnableDiscoveryClient
public class NacosConsumerApplication {

    public static void main(String[] args) {
        SpringApplication.run(NacosConsumerApplication.class, args);
    }

    @LoadBalanced
    @Bean
    public RestTemplate restTemplate() {
        return new RestTemplate();
    }

}
Call the service through RestTemplate:
@RestController
public class TestController {

    @Autowired
    private RestTemplate restTemplate;

    @RequestMapping(value = "/hello/{str}", method = RequestMethod.GET)
    public String echo(@PathVariable String str) {
        return restTemplate.getForObject("http://service-provider/hello/" + str, String.class);
    }
}
4. Modify configuration files and subscribe to services
server.port=8080
spring.application.name=service-consumer
spring.cloud.nacos.discovery.server-addr=127.0.0.1:8848
5. Start the project and view the Nacos console.
6. Test the service call and return normally.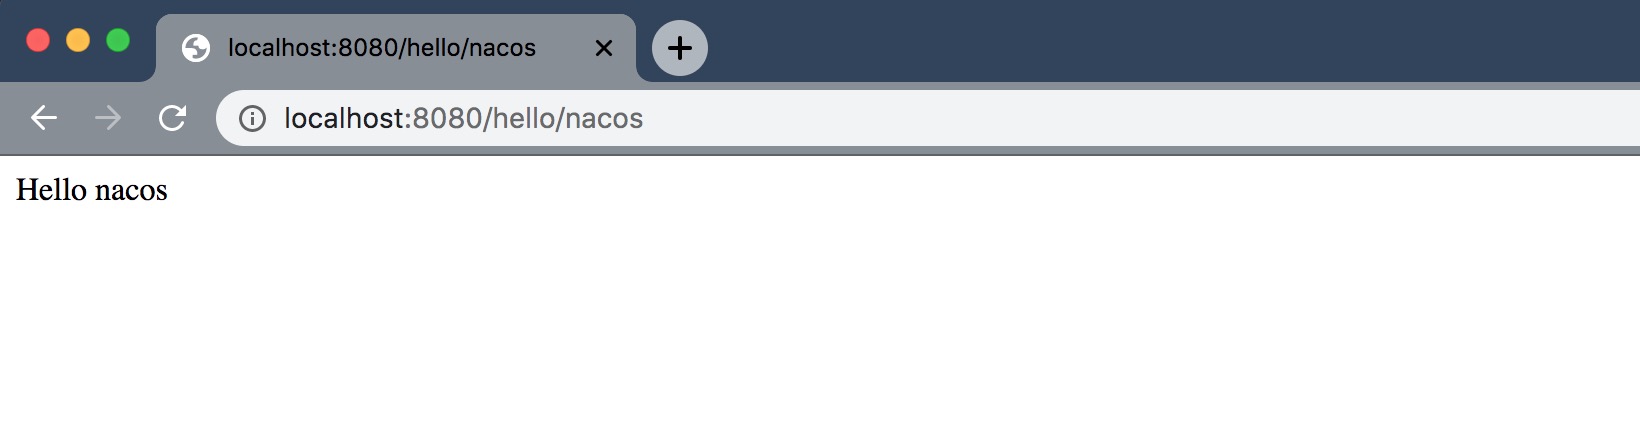
4. Summary
This tutorial uses a simple example to build a Nacos-based Spring Cloud service discovery. You can see that the Nacos console also has configuration management capabilities. The next section will learn about configuration management for Nacos.