LAMP schema parsing
Components of the LAMP platform:
- L: Linux operating system, which is the basic part of the whole LAMP architecture, provides the operating system to support the Web site, and provides better stability and compatibility for other components.
- A: Apache website server, as the front end of LAMP architecture, has powerful functions and good stability.
- M: MySQL database server, which is the back end of LAMP architecture, is a widely used database system. In the application of enterprise website and business system, all kinds of account information, product information and customer information can be stored in MySQL database.
- P: PHP, Perl, Python Web programming language, now the most common is the PHP language. Python language is now mostly used for automated operations and maintenance.
This article explains the architecture of Linux+apache+mariadb+PHP combination. The architecture diagram is as follows:
As shown in the figure, the main experience of a complete access process server is: Apache handles requests > applications accessing PHP through CGI interface > PHP applications calling PHP interpreter to execute PHP code > PHP programs accessing database > and finally returns a response to the client.
apache mainly implements the following functions:
- Processing http requests, building response messages and other self-service;
- Configuration lets Apache support PHP program response
- Configuring Apache's method of dealing with php programs specifically, such as handing php programs over to fcgi through reverse proxy
mariadb mainly implements the following functions:
- Provide PHP program for data storage;
- Provide PHP programs to read data (usually from a performance point of view, try to achieve the database read-write separation).
php mainly implements the following functions:
- Provide apache access interface, namely CGI or Fast CGI(FPM);
- Provide an interpreter for PHP programs;
- Provides the basic environment for connection functions of mairadb databases.
LAMP Server Deployment Personal Blog
Environmental preparation:
- centos7
- php-5.4
- httpd-2.4
- mariadb-server-5.5
- php-mysql-5.4
- wordpress
- Installation package
[root@centos7 ~]# yum -y install httpd php mariadb-server php-mysql
- Close the firewall and selinux
[root@centos7 ~]# systemctl stop firewalld; setenforce 0
- Configuring Virtual Host
[root@centos7 ~]# vim /etc/httpd/conf.d/vhost.conf <VirtualHost *:80> DocumentRoot "/app/blog/htdocs" #Accessed root directory CustomLog "logs/blog.com_access_log" combined #Open log <Directory "/app/blog/htdocs"> Require all granted #Accessible to all </Directory> </VirtualHost> [root@centos7 ~]# systemctl restart httpd - Configure the database
[root@centos7 ~]# vim /etc/my.cnf [mysqld] …… skip_name_resolve #Disallow domain name resolution to solve the problem of slow access to remote hosts [root@centos7(nanyibo) ~]# systemctl restart mariadb.service - Preparing website source code
[root@centos7 blog]# mkdir -pv /app/blog
[root@centos7 blog]# tar xvf wordpress-4.9.4-zh_CN.tar.gz -C /app/blog/
[root@centos7 blog]# mv wordpress wordpress-4.9.4
[root@centos7 blog]# ln -sv wordpress-4.9.4 htdocs #Create links to facilitate future project changes
[root@centos7 ~]# cd /app/blog/
[root@centos7 blog]# setfacl -m u:apache:rwx htdocs/ #Setting expectations
- Users who create connected databases for websites
[root@centos7 ~]# mysql
MariaDB [(none)]> create database wpdb;
MariaDB [(none)]> grant all on wpdb.* to 'wpuser'@'172.18.153.%' identified by 'wppass';
-
Enter IP Address Test in Browser

Set up here, you can click Installation, no demonstration.
Now we use the http protocol, the web page display is not safe, so we do our own simulation CA center, and sign our own web page certificate.
8. Simulate the CA Center
[root@centos7 ~]# yum -y install mod_ssl  #Install dependency packages
[root@centos7 ~]# cd /etc/pki/CA
[root@centos7 ~]# (umask 066;openssl genrsa -out private/cakey.pem 4096) #Generating the public key of CA
[root@centos7 ~]# openssl req -new -x509 -key private/cakey.pem -out cacert.pem -days 3650 #Generating Private Key of CA
Country Name (2 letter code) [XX]:CN
State or Province Name (full name) []:HeNan
Locality Name (eg, city) [Default City]:ZhengZhou
Organization Name (eg, company) [Default Company Ltd]:cyn.com
Organizational Unit Name (eg, section) []:opt
Common Name (eg, your name or your server's hostname) []:ca.cyn.com #This item is different. Write it at will.
Email Address []:
[root@centos7 ~]# touch index.txt
[root@centos7 ~]# echo 00 > serial
9. Certificate yourself
[root@centos7 ~]# mkdir /etc/httpd/conf.d/ssl
[root@centos7 ~]# cd /etc/httpd/conf.d/ssl
[root@centos7 ~]# (umask 066;openssl genrsa -out httpd.key 1024)
[root@centos7 ~]# openssl req -new -key httpd.key -out httpd.csr
Country Name (2 letter code) [XX]:CN
State or Province Name (full name) []:HeNan
Locality Name (eg, city) [Default City]:ZhengZhou
Organization Name (eg, company) [Default Company Ltd]:cyn.com
Organizational Unit Name (eg, section) []:opt
Common Name (eg, your name or your server's hostname) []:bbs.cyn.com#This item is different from CA
Email Address []:
Please enter the following 'extra' attributes
to be sent with your certificate request
A challenge password []:
An optional company name []:
[root@centos7 ~]# openssl ca -in httpd.csr -out httpd.crt -days 365
Certificate Details:  #Certificate information
        ...
        Subject:
            countryName               = CN
            stateOrProvinceName       = HeNan
            organizationName          = cyn.com
            organizationalUnitName    = opt
            commonName                = bbs.cyn.com
        ...
Certificate is to be certified until Jun 30 12:47:06 2032 GMT (5000 days)
Sign the certificate? [y/n]:y
1 out of 1 certificate requests certified, commit? [y/n]y
Write out database with 1 new entries
Data Base Updated
[root@centos7 ~]# cp /etc/pki/CA/cacert.pem .
10. Configure https
[root@centos7 ~]# vim /etc/httpd/conf.d/ssl.conf
            SSLCertificateFile /etc/httpd/conf.d/ssl/httpd.crt
            SSLCertificateKeyFile /etc/httpd/conf.d/ssl/httpd.key
            SSLCACertificateFile /etc/pki/CA/cacert.pem
11. Browser Test Again
At this time, our own certificate has come into effect. (Red warning is because we do our own CA center, which is authentically denied by others.) So red warning)
12. Now put cacert.pem in windows, the suffix is cacert.crt, and httpd.crt in windows, double-click the installation certificate
Then go to the browser settings and set the certificate to trust certificate
Look at the details of the certificate again.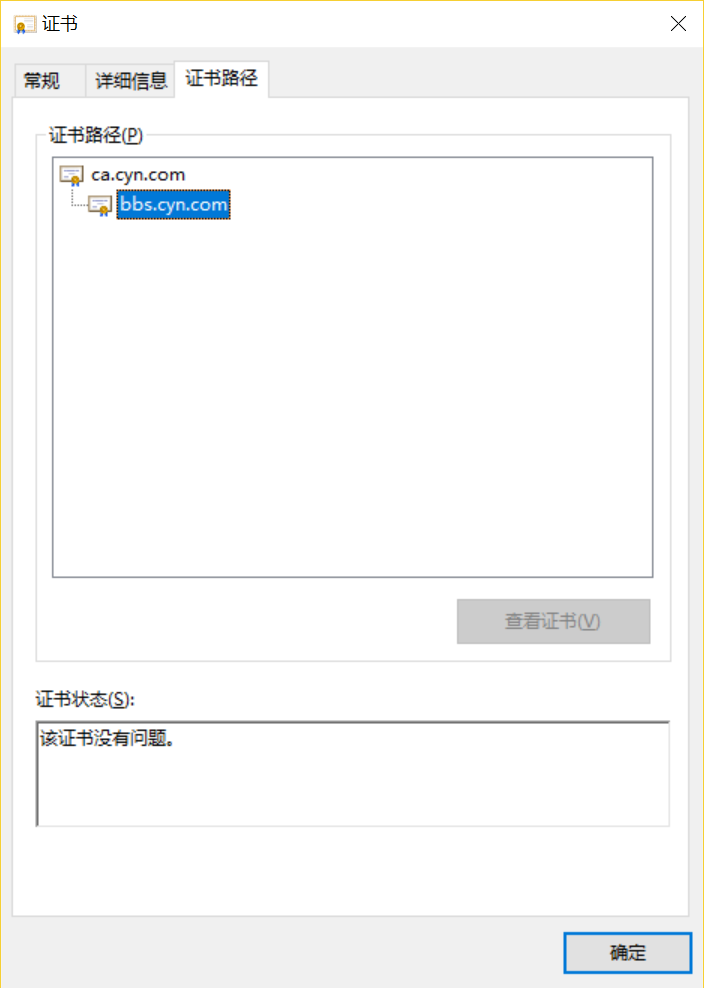
12. The browser input checks the https again. If the word "unsafe" does not appear, the CA certificate we made will be valid.
13. Since it's a personal blog, we can also encrypt this page.
[root@centos7 ~]# vim /etc/httpd/conf.d/vhost.conf
<VirtualHost *:80>
DocumentRoot "/app/blog/htdocs"
CustomLog "logs/blog.com_access_log" combined
AllowOverride none
AuthType Basic
AuthName "Please login"
AuthUserfile "/etc/httpd/conf/.htpasswd"
Require user xiaofan  #Landing user
<Directory "/app/blog/htdocs">
Require all granted #Accessible to all
</Directory>
</VirtualHost>
[root@centos7 ~]# htpasswd -b -c -m /etc/httpd/conf/.htpasswd xiaofan centos #To yong'hu'she'zhi'm
Adding password for user xiaofan
If you log in again, you will be prompted to enter your user account and password.
So far, the personal blog of lamp mode has been built, and the authentication of https has been completed.