In the k8s master highly available practice scenario, the certificate of kube-apiserver needs to be updated, VIP and slave IP added, and then the certificate is re-issued.Recalling the whole process of K8S cluster building, the easiest to be confused is the configuration certificate link, so this paper combs the certificates used by K8S cluster.
1. Root Certificate
ca.pem root certificate public key file
ca-key.pem root certificate private key file
ca.csr Certificate Signature Request for Cross Signature or Re-Signature
ca-config.json uses the cfssl tool to generate configuration files that other types of certificates need to reference
Ca.pem is used to issue subsequent certificate files, so the ca.pem files need to be distributed to each server in the cluster.
Certificate generation command, default certificate generation validity period is 5 years
# echo '{"CN":"CA","key":{"algo":"rsa","size":2048}}' | cfssl gencert -initca - | cfssljson -bare ca -
# echo '{"signing":{"default":{"expiry":"43800h","usages":["signing","key encipherment","server auth","client auth"]}}}' > ca-config.json
2. flannel Certificate
Certificate generation command, default certificate generation validity period is 5 years
# cfssl gencert -ca=/etc/ssl/etcd/ca.pem -ca-key=/etc/ssl/etcd/ca-key.pem -config=/etc/ssl/etcd/ca-config.json -profile=kubernetes flanneld-csr.json | cfssljson -bare flanneld

The flanneld-csr.json file is required to generate the certificate here
# cat flanneld-csr.json
{
  "CN": "flanneld",
  "hosts": [],
  "key": {
    "algo": "rsa",
    "size": 2048
  },
  "names": [
    {
      "C": "CN",
      "ST": "FuZhou",
      "L": "FuZhou",
      "O": "k8s",
      "OU": "System"
    }
  ]
}
flannel startup file configuration
# cat /usr/lib/systemd/system/flanneld.service
[Unit]
Description=Flanneld overlay address etcd agent
After=network.target
After=network-online.target
Wants=network-online.target
After=etcd.service
Before=docker.service

[Service]
Type=notify
ExecStart=/usr/local/bin/flanneld   -etcd-cafile=/etc/ssl/etcd/ca.pem   -etcd-certfile=/etc/ssl/flanneld/flanneld.pem   -etcd-keyfile=/etc/ssl/flanneld/flanneld-key.pem   -etcd-endpoints=https://192.168.115.5,https://192.168.115.6:2379,https://192.168.115.7:2379   -etcd-prefix=/kubernetes/network
ExecStartPost=/usr/local/bin/mk-docker-opts.sh -k DOCKER_NETWORK_OPTIONS -d /run/flannel/docker
Restart=on-failure

[Install]
WantedBy=multi-user.target
RequiredBy=docker.service
3. etcd certificate
1. Server-side Certificate
server.pem etcd server-side certificate public key file
server-key.pem etcd server-side certificate private key file
server.csr Certificate Signature Request
Certificate generation command, default certificate generation validity period is 5 years
# export ADDRESS=192.168.115.5,192.168.115.6,192.168.115.7,vm1,vm2,vm3
# export NAME=server
# echo '{"CN":"'$NAME'","hosts":[""],"key":{"algo":"rsa","size":2048}}' |  cfssl gencert -config=ca-config.json -ca=ca.pem -ca-key=ca-key.pem -hostname="$ADDRESS" - | cfssljson -bare $NAME
server.pem, server-key.pem files are used to encrypt and decrypt etcd inter-cluster communications, so they are required by all etcd servers
# tail -15 /usr/lib/systemd/system/etcd.service
--initial-cluster-token=etcd-cluster-token --initial-cluster-state=new --cert-file=/etc/ssl/etcd/server.pem --key-file=/etc/ssl/etcd/server-key.pem --peer-cert-file=/etc/ssl/etcd/server.pem --peer-key-file=/etc/ssl/etcd/server-key.pem --trusted-ca-file=/etc/ssl/etcd/ca.pem --peer-trusted-ca-file=/etc/ssl/etcd/ca.pem --peer-client-cert-auth=true --client-cert-auth=true"
Restart=on-failure
LimitNOFILE=65536

[Install]
WantedBy=multi-user.target
2. Client Certificate
client.pem etcd client certificate public key file
client-key.pem etcd Client Certificate Private Key File
client.csr Certificate Signature Request
Certificate generation command, default certificate generation validity period is 5 years
# export ADDRESS=
# export NAME=client
# echo '{"CN":"'$NAME'","hosts":[""],"key":{"algo":"rsa","size":2048}}' |  cfssl gencert -config=ca-config.json -ca=ca.pem -ca-key=ca-key.pem -hostname="$ADDRESS" - | cfssljson -bare $NAME
The client.pem, client-key.pem files are used by etcdctl clients to communicate with the etcd server and can be configured as needed.
# export ETCDCTL_API=3
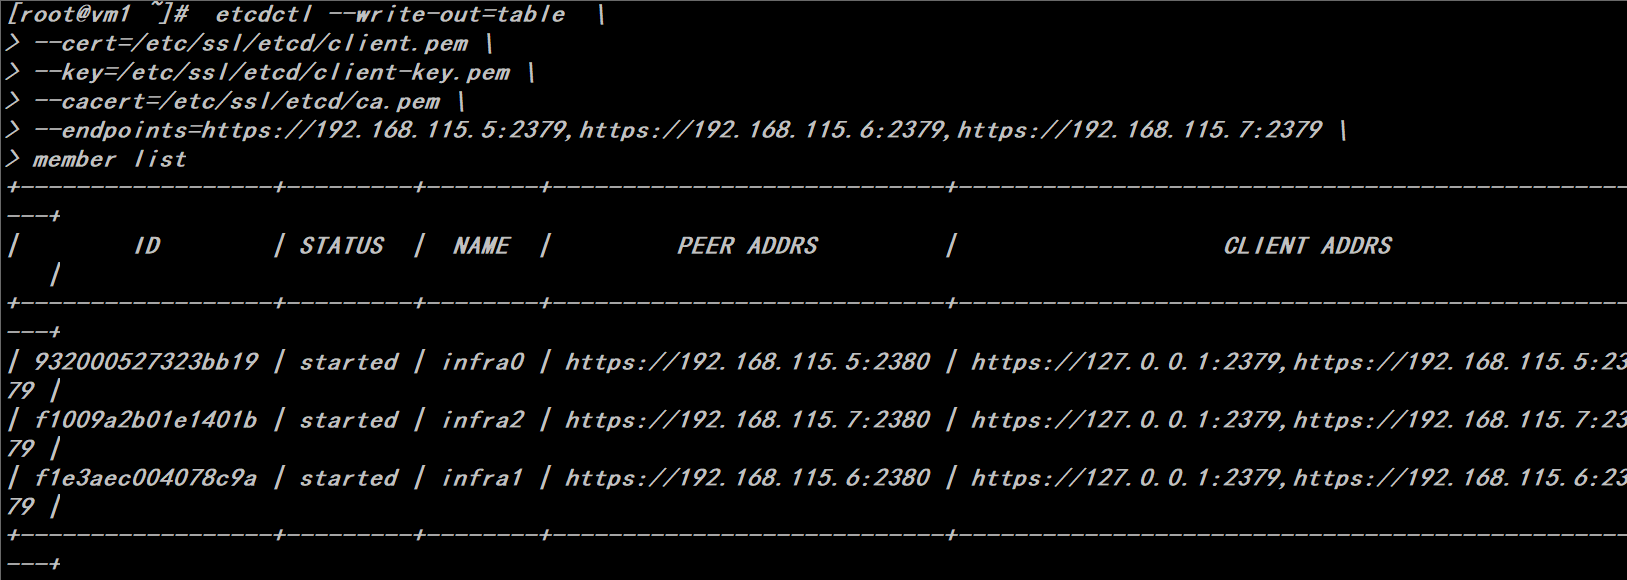
# etcdctl --write-out=table  --cert=/etc/ssl/etcd/client.pem --key=/etc/ssl/etcd/client-key.pem --cacert=/etc/ssl/etcd/ca.pem --endpoints=https://192.168.115.5:2379,https://192.168.115.6:2379,https://192.168.115.7:2379 member list

4. Master Node Certificate
Kube-apiserver certificate
Kubernetes.pem kube-apiserver certificate public key file
Kubernetes-key.pem kube-apiserver Certificate Private Key File
kuberentes.csr kube-apiserver Certificate Signature Request
Certificate generation command, default certificate generation validity period is 5 years
# cfssl gencert -ca=/etc/ssl/etcd/ca.pem -ca-key=/etc/ssl/etcd/ca-key.pem -config=/etc/ssl/etcd/ca-config.json -profile=kubernetes k8s-csr.json | cfssljson -bare kubernetes

Generating a certificate here requires a k8s-csr.json file, which defines information such as the master node's IP list
# cat k8s-csr.json
{
  "CN": "kubernetes",
  "hosts": [
    "127.0.0.1",
    "192.168.115.4",
    "192.168.115.5",
    "192.168.115.6",
    "192.168.115.7",
    "10.254.0.1",
    "kubernetes",
    "kubernetes.default",
    "kubernetes.default.svc",
    "kubernetes.default.svc.cluster",
    "kubernetes.default.svc.cluster.local"
  ],
  "key": {
    "algo": "rsa",
    "size": 2048
  },
  "names": [
    {
      "C": "CN",
      "ST": "FuZhou",
      "L": "FuZhou",
      "O": "k8s",
      "OU": "System"
    }
  ]
}
V. Node Certificate
1. kube-proxy certificate
Kube-proxy.pem kube-proxy certificate public key file
Kube-proxy-key.pem kube-proxy certificate private key file
Kube-proxy.csr kube-proxy Certificate Signature Request
Certificate generation command, default certificate generation validity period is 5 years
# cfssl gencert -ca=/etc/ssl/etcd/ca.pem -ca-key=/etc/ssl/etcd/ca-key.pem -config=/etc/ssl/etcd/ca-config.json -profile=kubernetes kube-proxy-csr.json | cfssljson -bare kube-proxy

The kube-proxy-csr.json file is required to generate the certificate here
# cat kube-proxy-csr.json
{
  "CN": "system:kube-proxy",
  "hosts": [],
  "key": {
    "algo": "rsa",
    "size": 2048
  },
  "names": [
    {
      "C": "CN",
      "ST": "FuZhou",
      "L": "FuZhou",
      "O": "k8s",
      "OU": "System"
    }
  ]
}
2. Kubelet Certificate
Kubelet-client.crt: kubectl client certificate public key file
Kubelet-client.key: kubectl client private key file
Kubelet.crt:kubelet server-side certificate public key file
Kubelet.key:kubelet server-side certificate private key file
> The kubelet-client.crt file is generated after kubelet completes the TLS bootstrapping with a validity period of one year.This certificate was signed by the controller manager, and after that, kubelet will load the certificate to establish TLS communication with apiserver, using the CN field of the certificate as the user name and the O field as the user group to initiate other requests to apiserver.
The kubelet.crt file is generated when kubelet completes TLS bootstrapping without configuration--feature-gates=RotateKubeletServerCertificate=true; it is a self-signed CA certificate independent of the apiserver CA, valid for one year; used as the kubelet 10250 api port


Reference documentation for an introduction to kubelet's first launch of TLS bootstrapping, a solution to the chicken or egg problem. https://mritd.me/2018/01/07/kubernetes-tls-bootstrapping-note/
6. Configure automatic renewal of certificates
The default signed kubectl client and kubelet server certificates only have a one-year validity period. If you want to adjust the validity period of the certificate, you can do so by setting the parameter kube-controller-manager?--experimental-cluster-signing-duration?, which has a default value of? 8760h0m0s.Let's show you how to automatically renew a certificate when it expires.If this problem is not handled properly, all node s will fail to connect after the certificate expires.
1. kcm service, where the expiration time is modified to 30 minutes for testing purposes
# egrep 'feature|experimental' /usr/lib/systemd/system/kube-controller-manager.service
  --feature-gates=RotateKubeletClientCertificate=true,RotateKubeletServerCertificate=true   --experimental-cluster-signing-duration=30m0s # systemctl  daemon-reload
# systemctl restart kube-controller-manager
2. kubelet Service
Configuration complete and restart the kubelet service after deleting the four files Kubelet-client.crt, Kubelet-client.key, Kubelet.crt, and Kubelet.key.
# egrep 'feature|rotate' /usr/lib/systemd/system/kubelet.service
  --feature-gates=RotateKubeletClientCertificate=true,RotateKubeletServerCertificate=true   --rotate-certificates=true # systemctl  daemon-reload
# systemctl restart kubelet
3. Issue certificates manually
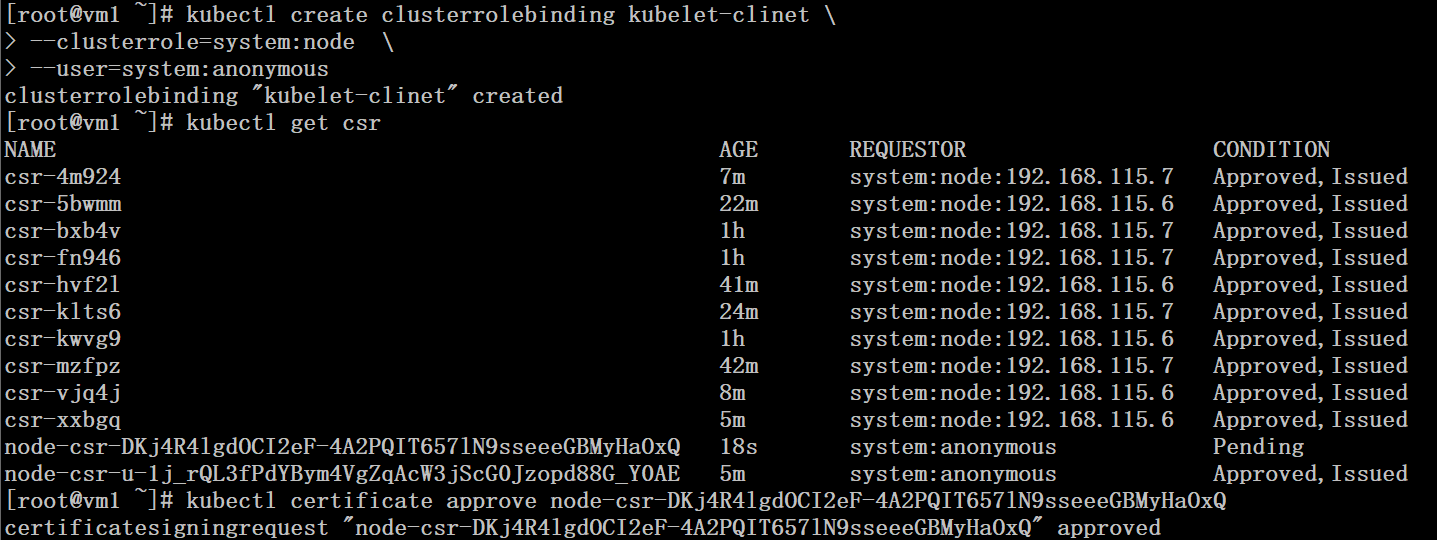
# kubectl create clusterrolebinding kubelet-clinet --clusterrole=system:node --user=system:anonymous
If the authorization for the system:anonymous user is missing, kubelet will start with the following error:
error: failed to run Kubelet: cannot create certificate signing request: certificatesigningrequests.certificates.k8s.io is forbidden: User "system:anonymous" cannot create certificatesigningrequests.certificates.k8s.io at the cluster scope
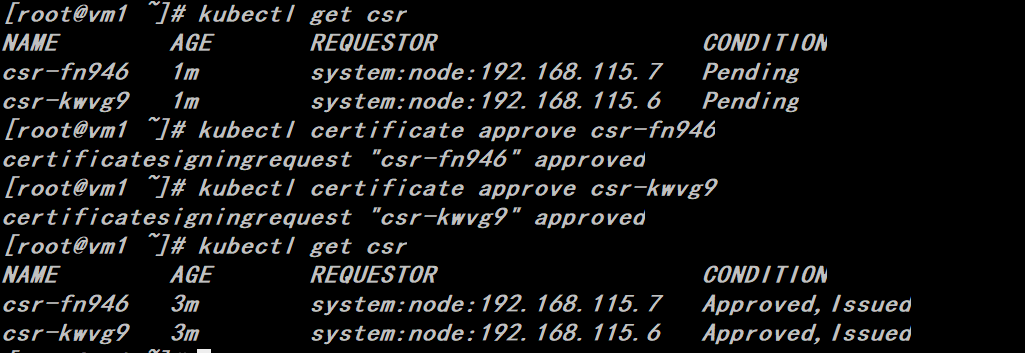
# kubectl get csr
# kubectl certificate approve csr-fn946
# kubectl certificate approve csr-kwvg9

The node will regenerate the kubectl client and kubelet server side certificates
4. Configure the automatic issuance of certificates, which is necessary in large-scale clusters
# cat rbac.yaml
apiVersion: rbac.authorization.k8s.io/v1
kind: ClusterRole
metadata:
  annotations:
    rbac.authorization.kubernetes.io/autoupdate: "true"
  labels:
    kubernetes.io/bootstrapping: rbac-defaults
  name: system:certificates.k8s.io:certificatesigningrequests:selfnodeserver
rules:
- apiGroups:
  - certificates.k8s.io
  resources:
  - certificatesigningrequests/selfnodeserver
  verbs:
  - create
---
apiVersion: rbac.authorization.k8s.io/v1
kind: ClusterRoleBinding
metadata:
  name: kubeadm:node-autoapprove-certificate-server
roleRef:
  apiGroup: rbac.authorization.k8s.io
  kind: ClusterRole
  name: system:certificates.k8s.io:certificatesigningrequests:selfnodeserver
subjects:
- apiGroup: rbac.authorization.k8s.io
  kind: Group
  name: system:nodes

# kubectl create -f  rbac.yaml
# kubectl create clusterrolebinding node-client-auto-approve-csr --clusterrole=system:certificates.k8s.io:certificatesigningrequests:nodeclient --group=system:bootstrappers # kubectl create clusterrolebinding node-client-auto-renew-crt --clusterrole=system:certificates.k8s.io:certificatesigningrequests:selfnodeclient --group=system:nodes # kubectl create clusterrolebinding node-server-auto-renew-crt --clusterrole=system:certificates.k8s.io:certificatesigningrequests:selfnodeserver --group=system:nodes

It is important to note that after deleting the Kubelet-client.crt and Kubelet-client.key files, starting the kubelet service will first generate a Kubelet-client.key file, we need to approve the crs request for this certificate, otherwise the node will not start properly.
Second, the configuration file in the kubelet.kubeconfig file will be automatically updated if the client-certificate, the location of the client-key directory, and the startup parameter of kubelet, cert-dir, are not consistent.
K8S Cluster tls Certificate Management
Label: Handle list Catalog High Availability def app request How stat
Original address: http://blog.51cto.com/ylw6006/2167592