Catalog
- 1. Development environment configuration
- 2.1 installing Code OSS
- 2.2 installation of Qt5
- 3. Project cases
- 3.1 face detection
- 3.1.1 installation of pip
- 3.1.2 install Python common machine learning package
- 3.1.3 configure Opencv for Python
- 3.1.4 face detection based on Opencv
- 3.2 two dimensional code detection (making code scanning gun)
- 4. summary
1. Development environment configuration
1.1 update source and software
After installing the system, you should first update the source, but because Jetson Nano uses Ubuntu 18.04.2 LTS system with aarch64 architecture, which is different from the Ubuntu system with AMD architecture, it is not recommended to use domestic source for source change, because there are many problems with its compatibility. Here you can use the default source of Jetson Nano directly.
Open the terminal and input the following command to update:
sudo apt-get update
sudo apt-get full-upgrade
The above update takes a long time, which often takes several hours to complete. In the middle, the update may fail due to the relationship of network speed. Do not close at this time
Because it is often necessary to use Chinese search and write necessary Chinese Notes in the development process, it is recommended to install Chinese input method for the system. Jetson Nano has its own ibus Chinese input method, but it needs a simple configuration to input Chinese. Entering the command ibus directly in the terminal will show the interface shown below, which indicates that Jetson Nano has brought its own ibus input method environment.

Here is the ibus download Pinyin input method, enter the command:
sudo apt-get install ibus-pinyin
The above download and installation will take about ten minutes. After installation, enter the system configuration System Settings interface, select Language Support,
2.1 installing Code OSS
Visual Studio Code (VS Code) is a free IDE for Windows, Mac and Linux. VS Code has gained more and more attention in recent years, and has become the preferred compiler environment for most programmers. As an open source project launched by Microsoft, it has attracted numerous third-party developers and end users and become one of the top open source projects. It has powerful functions and fast speed, and it has a simple and smooth user experience with a large number of plug-ins. It belongs to a very excellent ide.
Native VS Code is not applicable to Jetson Nano. Currently, there is no official version of VS Code for ARM devices such as Jetson Nano. However, because it is open source, anyone can compile a version. Among them, code OSS is the "VS Code" in such an embedded environment. Code OSS is based on VS Code. It is not only a code editor, but also has built-in resource manager function and rich third-party plug-ins for managing the whole project folder instead of a single script. In fact, code OSS has almost all the complete functions of VS Code, so using it as a code editor to edit code, such as python, will make the whole development process more convenient. The following describes the specific installation methods.
Open chromium browser: download
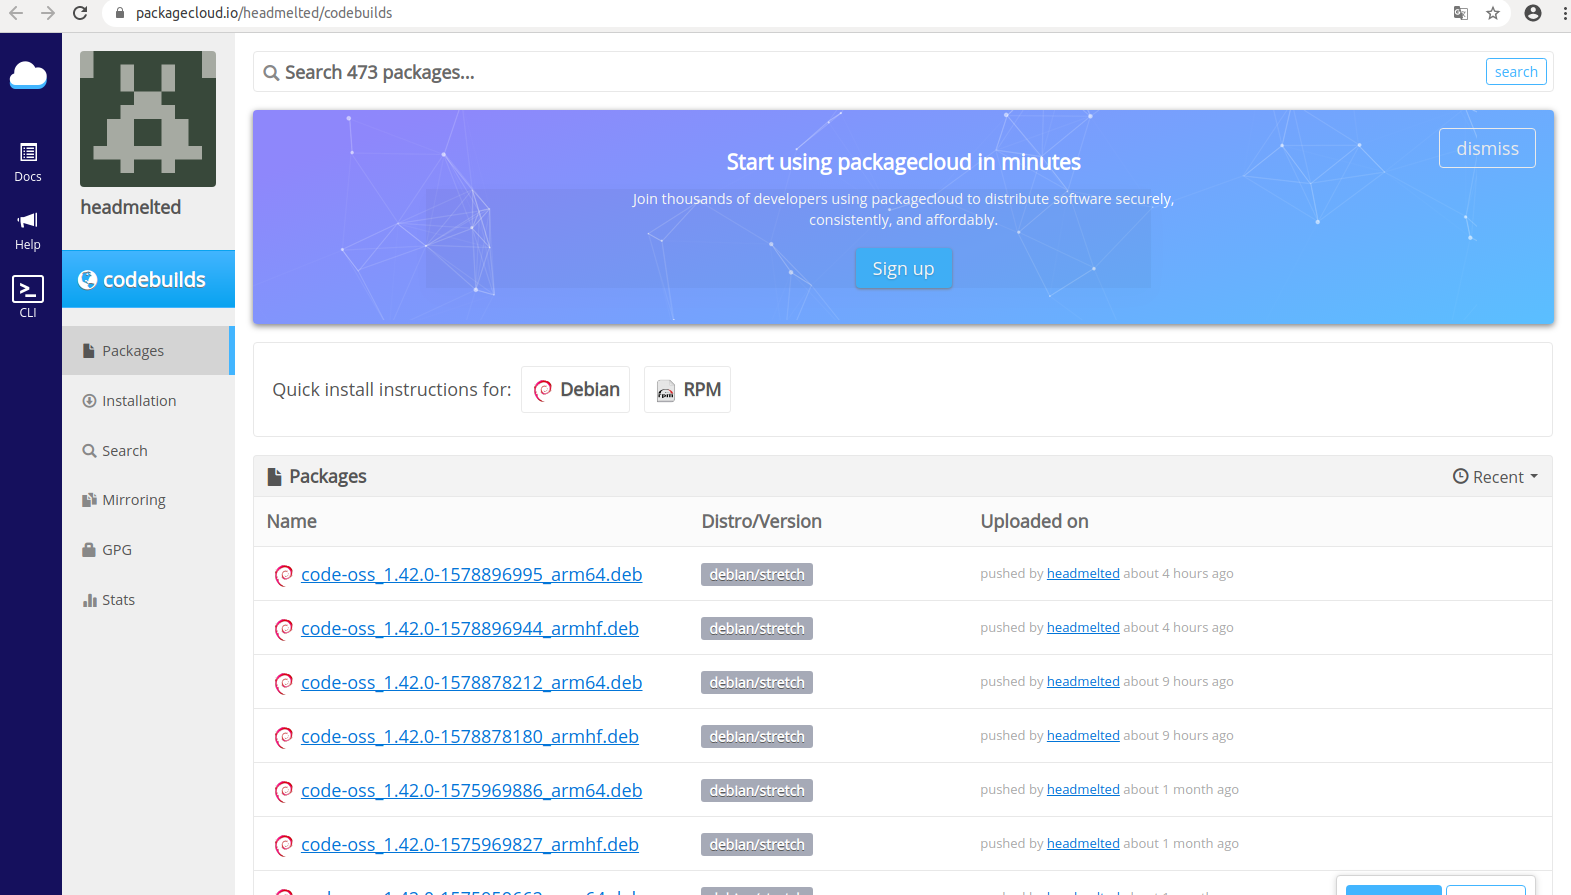
Click Packsges to view the listed package names. Select the one with the suffix of arm64(aarch64), as shown in the following figure:
Click to enter the details page and find the corresponding wget command, as shown in the following figure:
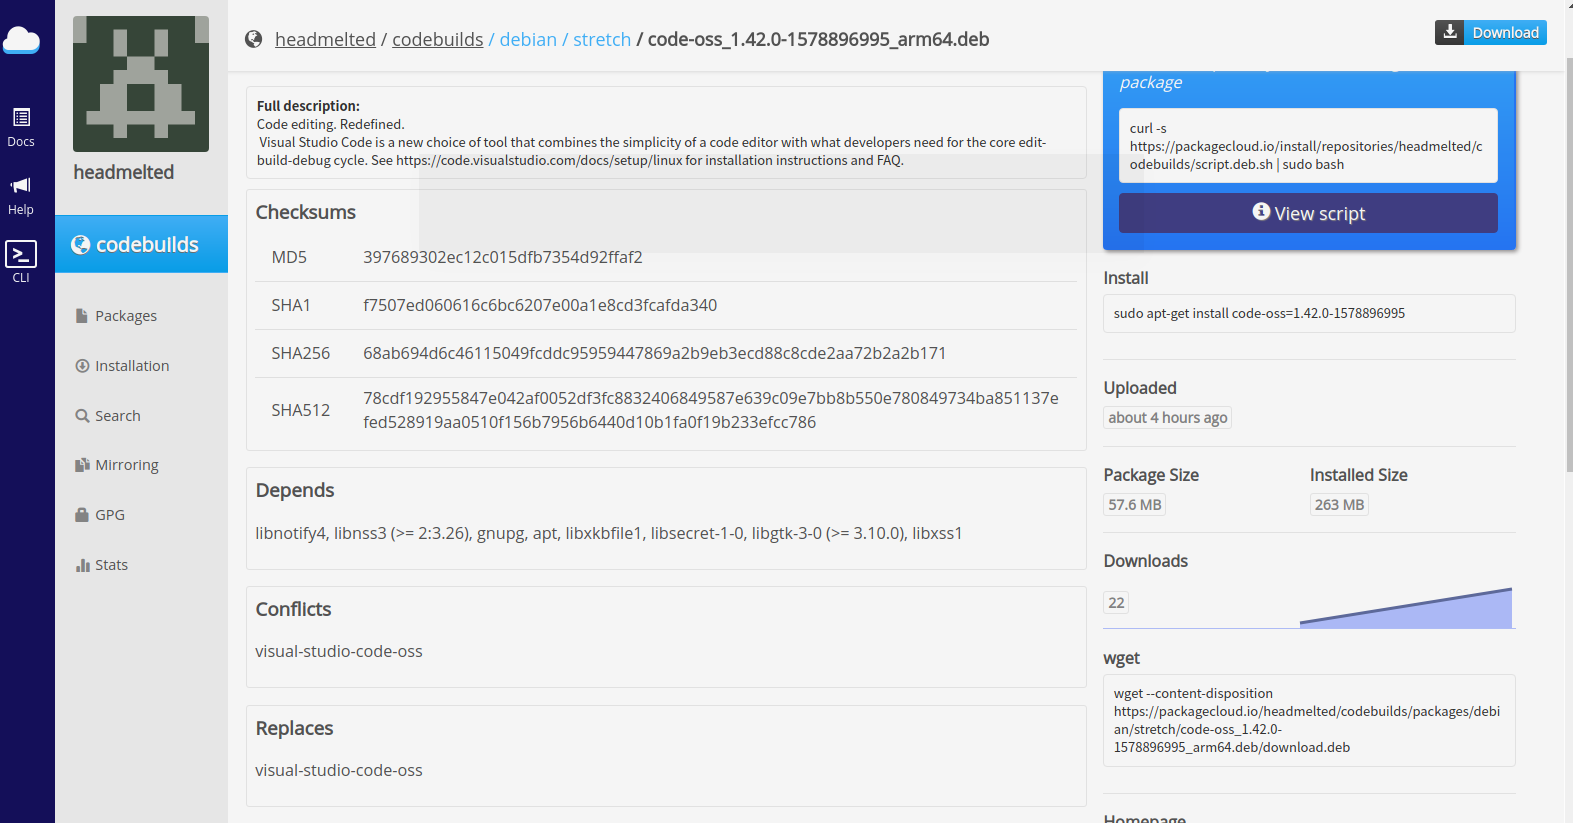
This command demonstrates how to download the installation package as follows:
wget --content-disposition https://packagecloud.io/headmelted/codebuilds/packages/debian/stretch/code-oss_1.42.0-1575969886_arm64.deb/download.deb
Copy the command to the terminal and press enter to download the installation package. As shown in the figure below:

At this time, the installation package has been downloaded to the home root directory. You can view the downloaded deb installation package through the file explorer, as shown below: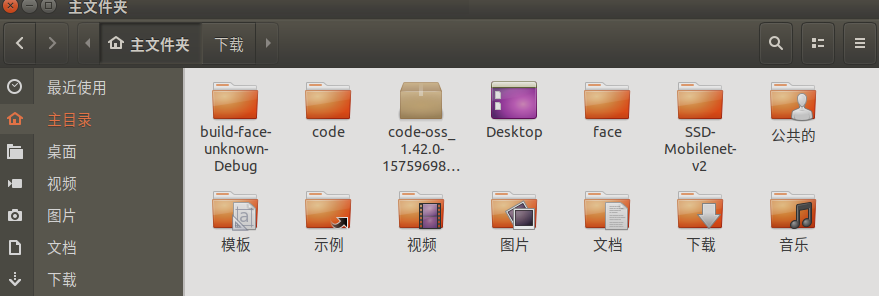
Enter the following command in the terminal to complete the final installation:
sudo dpkg -i code-oss_1.42.0-1575969886_arm64.deb
After installation, you can search Code OSS in the search, and the Code OSS application will pop up, which is the Python programming IDE we need. Click the application to open it as shown in the following figure: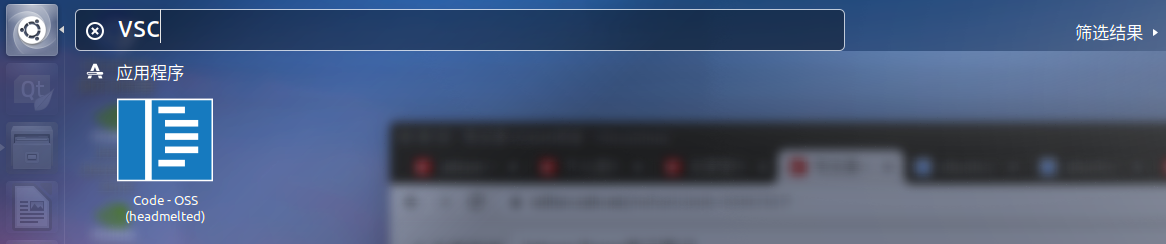
The following is a simple demonstration of how to use Code OSS to execute Python scripts.
First, install the python plug-in in Code OSS. The installation method of the plug-in is exactly the same as that of normal VS Code. Readers who are not familiar with VS Code can first familiarize themselves with the basic usage of VS Code on the desktop PC and then switch to the Jetson Nano environment. The plug-in installation is as shown in the following figure. Search python, C / C + +, Chinese - > in the Extensions panel for localization. Select the first pop-up plug-in for installation:
Next, create a new code folder in the home directory, which is used to store Python code scripts. Then open the random folder name you just created in Code OSS, create a new file, press ctrl+s to save the file, name the file main.py, and enter the following code:
a = 36
b = 64
print(a+b)
Then press ctrl+F5 to run the script. The effect is as follows: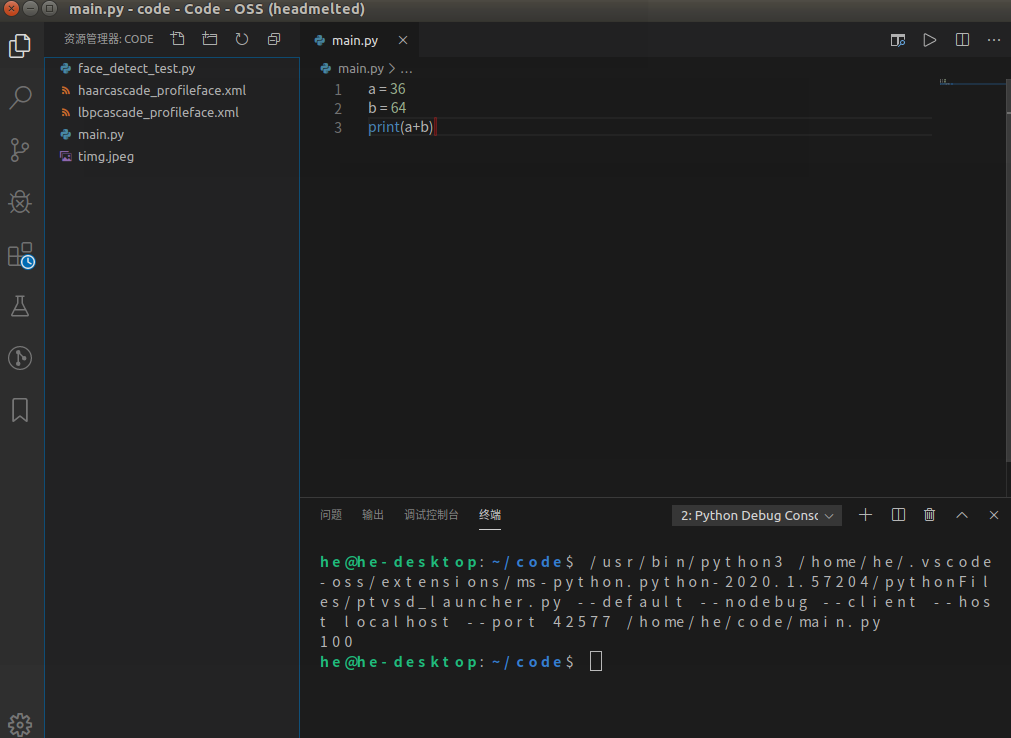
At this point, you have finished installing and running the Python editor.
2.2 installation of Qt5
In the actual product deployment stage, considering the factors such as terminal device speed, stability, memory occupation, etc., we usually use C + + to develop the final product, and only in the product model design stage can we use python to develop the algorithm. Therefore, we need a compiler that can develop C + + in Jetson Nano to facilitate our development of landing products. VS Code itself can develop C + + applications, but code OSS does not support c + +, so we need to install an excellent C + + compiler to complete the C + + development task. Qt is recommended in this paper.
Qt is a cross platform C + + development library, mainly used to develop Graphical User Interface (GUI) programs, of course, you can also develop command-line interface (CUI) programs without interface. Qt is developed by pure C + +, so using it to develop C + + applications has natural advantages. There are many operating systems supported by Qt, such as Windows, Linux, Unix, Android, iOS, WinPhone, QNX, VxWorks and so on. Of course, Qt also fully supports the Ubuntu environment of Jetson Nano.
QT installation under Jetson Nano is relatively simple. You only need to enter the command:
sudo apt-get install qt5-default qtcreator -y
At this time, Qt5.9.5 is installed.
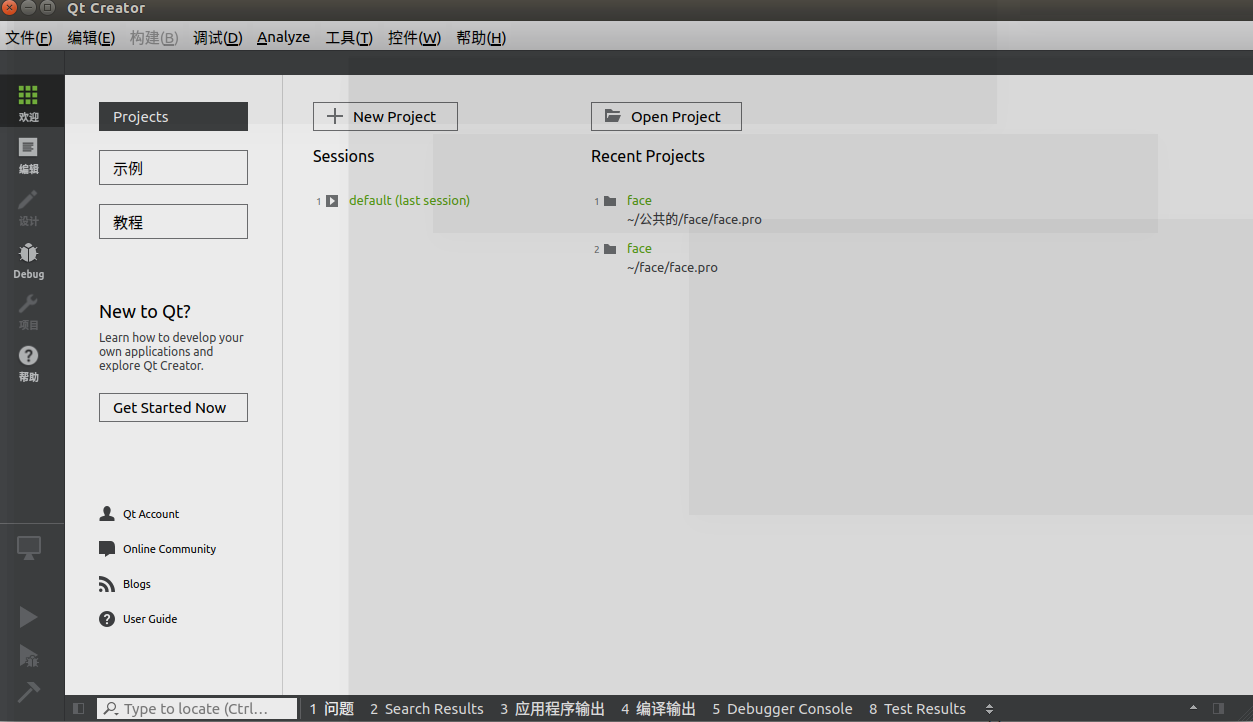
After installation, search Qt in the search menu, and then Qt Creator will appear, which is the IDE of Qt. Open it. Next, I'll show you how to create a simple C + + console program.
Open Qt Creator, as shown in the following figure:
Click New Project to create a New Project. Here, select Qt console Application under Application to create a Qt version of C + + console program:
And then the project was named random
Then click next by default to complete the project creation. As you can see, Qt has created a C + + file, main.cpp, for us to write c + + code, and a QTtest.pro configuration file to configure for the whole project. The effect is shown in the following figure:
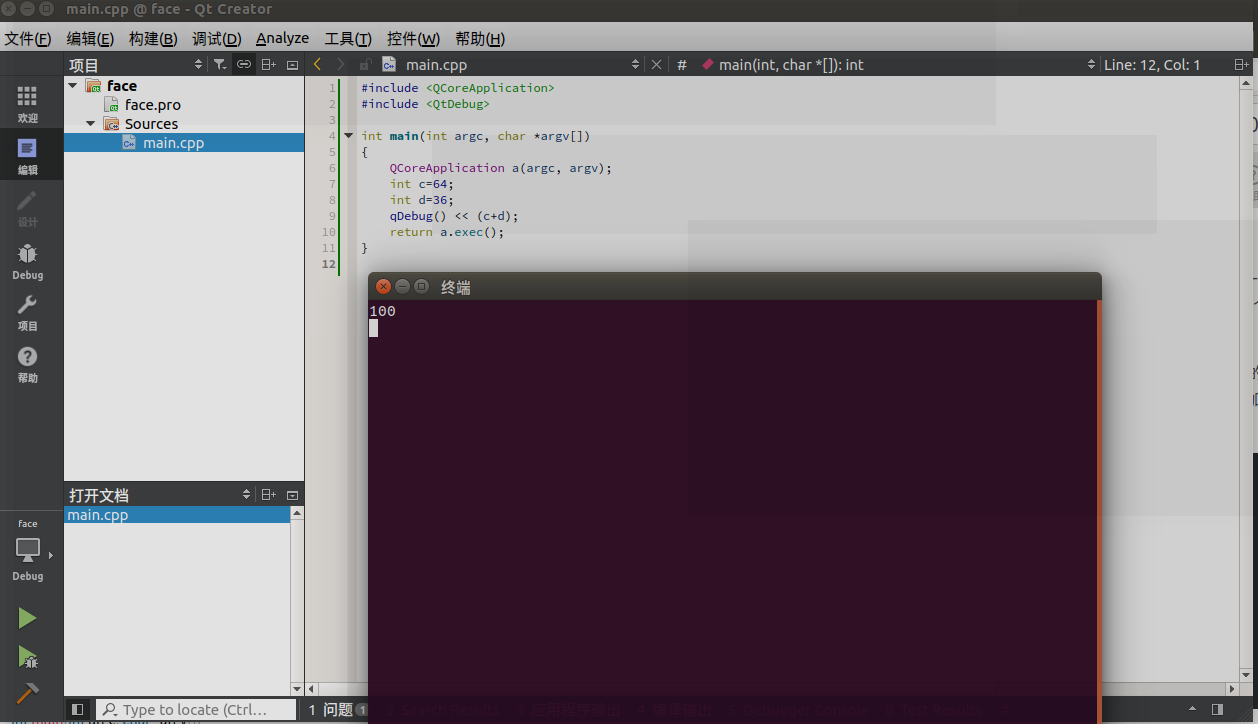
At this time, you can directly press ctrl+r to run the project, but since we do not have any output code, the pop-up terminal does not output any value. We modify the code of main.cpp to add two integers and output the result. The completion code is as follows:
#include <QCoreApplication>
#include <QtDebug>

int main(int argc, char *argv[])
{
    QCoreApplication a(argc, argv);
    int c=64;
    int d=36;
    qDebug() << (c+d);
    return a.exec();
}
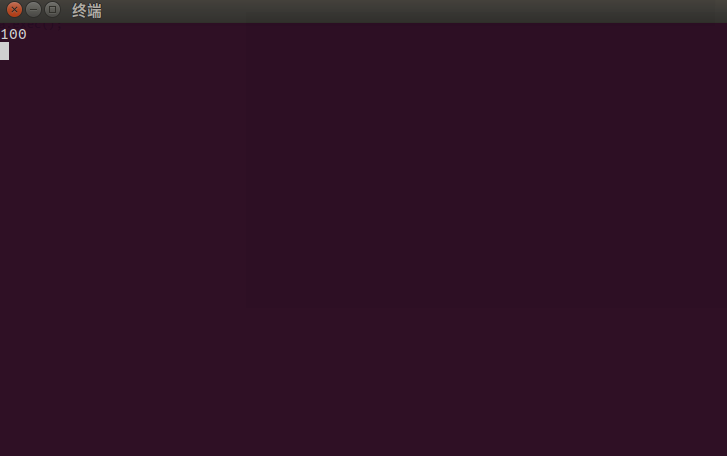
At this time, press ctrl+r again to run the project output terminal as shown in the following figure:
For the detailed use of Qt Creator, please learn the relevant tutorials by yourself. This part of resources is also very mature. It is a necessary process to master the use of Qt and C + + for the development of actual embedded products. In this paper, the interface programming of Qt, especially Qt, is not introduced in detail.
Finally, let's take a look at the build face unknown debug executable project generated in the home directory, and generate the debug version of the executable program in this folder. Enter the folder through the terminal cd command, and then input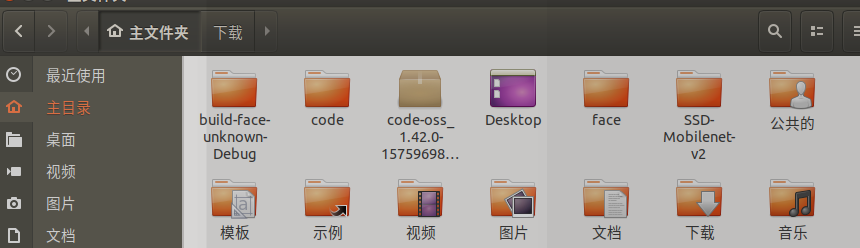
. / face corresponds to your filename
The program will be executed directly, as shown in the following figure:
In other words, in essence, we have successfully deployed and developed an application. The application function is very simple and only realizes the addition of two fixed integers. Although it is simple, it combs a common form of our normal development of artificial intelligence products, that is, we first use python script to verify the algorithm in VS Code, then use QT to write the corresponding C + + application, and finally generate binary executable program. The final binary executable program is our "product", and the executable program code is encapsulation Rising, invisible, and capable of direct operation.
So far, we have completed the general development configuration of Jetson Nano. Next, we will demonstrate several small projects, so that readers can learn more about the development methods of Jetson Nano.
3. Project cases
3.1 face detection
This section first uses Python to complete the face detection algorithm, which will explain the basic methods of Python configuration and Opencv and the installation of some common Python libraries.
3.1.1 installation of pip
Since Python version 3.6 is pre installed in Jetson Nano, pip can be installed directly.
Enter the following command in the terminal for installation:
sudo apt-get install python3-pip python3-dev
After installation, PIP is version 9.01. You need to upgrade pip. Otherwise, there will be problems when installing other Python libraries later. The upgrade command is as follows:
python3 -m pip install --upgrade pip
The upgraded version is 19.0.3. Although the upgrade is completed, there is a small bug in pip3 that needs to be fixed manually.
First open the pip3 file with the following command:
sudo vim /usr/bin/pip3
Enter the character a into the insertion mode, and then you can start editing the file
from pip import main
if __name__ == '__main__':
    sys.exit(main())
Revised to: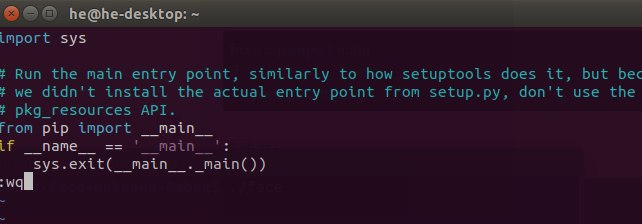
from pip import __main__
if __name__ == '__main__':
    sys.exit(__main__._main())
Then press Esc to enter command mode. Finally, press enter and press the English ":" key to enter the mode, then enter wq and press enter to save the changes and exit the editor.
3.1.2 install Python common machine learning package
sudo apt-get install python3-scipy
sudo apt-get install python3-pandas
sudo apt-get install python3-sklearn
3.1.3 configure Opencv for Python
There are two ways to install opencv in Python. One is to download the opencv source code and recompile to generate the corresponding Python package, and then copy the package to the python installation package path; the other is to directly use the command sudo PIP3 install python3 OpenCV. It should be noted that the second way is essentially to install the compiled opencv package. The version of OpenCV is fixed. If you want to use the latest opencv, such as opencv4, the second way is not appropriate. In this section, the first method is simply used for installation.
opencv4.1.1 is pre installed in the original image. You can use the following command to view the current opencv version number:
sudo opencv_version
The output results are as follows:
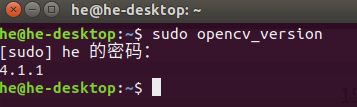
Therefore, we do not need to recompile, just use it directly.
3.1.4 face detection based on Opencv
(1) Face detection in python
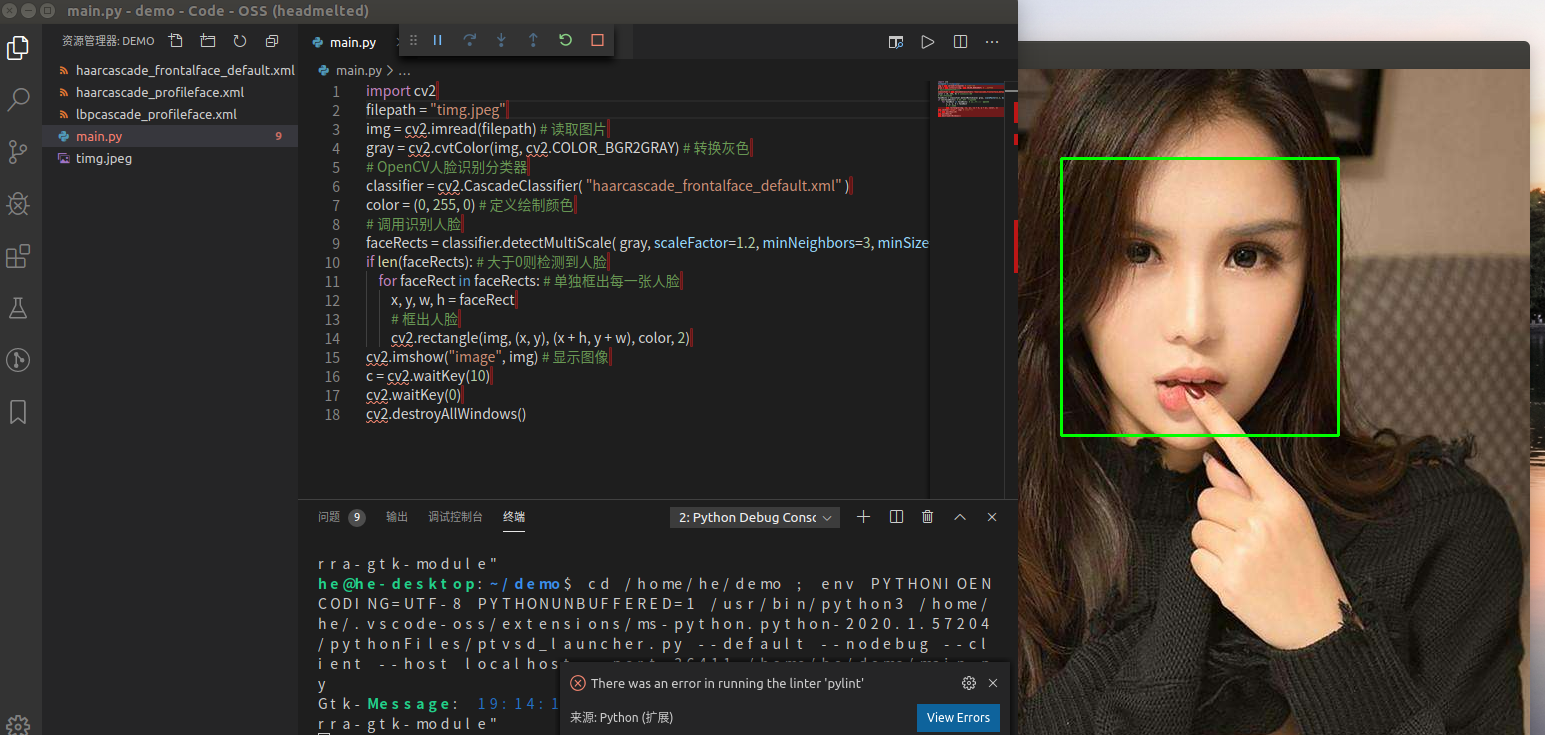
In this section, first, write a python script to detect the face in the image. Use Code OSS to open the code folder created in the??? Section. Under this folder, create a new Python script named main.py. The code is as follows:
import cv2
filepath = "test.jpg"
img = cv2.imread(filepath) # Read pictures
gray = cv2.cvtColor(img, cv2.COLOR_BGR2GRAY) # Transformation grey
# OpenCV face recognition classifier
classifier = cv2.CascadeClassifier( "haarcascade_frontalface_default.xml" )
color = (0, 255, 0) # Define paint color
# Call face recognition
faceRects = classifier.detectMultiScale( gray, scaleFactor=1.2, minNeighbors=3, minSize=(32, 32))
if len(faceRects): # Face detected if greater than 0
    for faceRect in faceRects: # Frame each face individually
        x, y, w, h = faceRect
        # Frame faces
        cv2.rectangle(img, (x, y), (x + h, y + w), color, 2)
cv2.imshow("image", img) # Display image
c = cv2.waitKey(10)
cv2.waitKey(0)
cv2.destroyAllWindows()
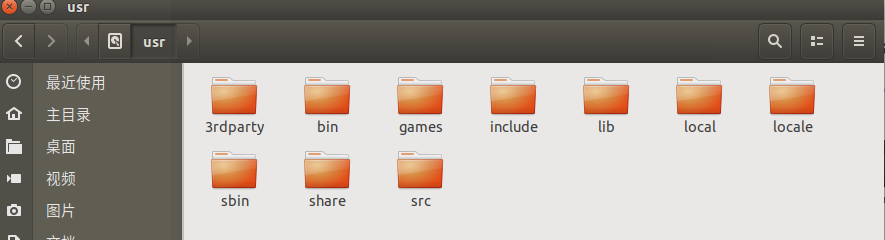
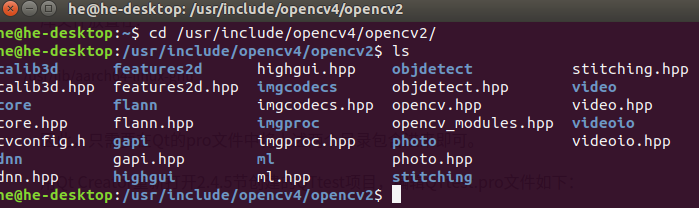
The filepath in the above code is used to store the image path that needs to be detected at present. Generally, it can be placed in the same directory as the source file. When constructing an opencv face detection classifier, a corresponding face detection configuration file is required. This file stores the relevant parameters for face detection algorithm. This file can be found from the installation directory of OpenCV: / usr/share/opencv4 /. After finding it, copy it to the source file directory.
filepath to one of the three files, add all three.
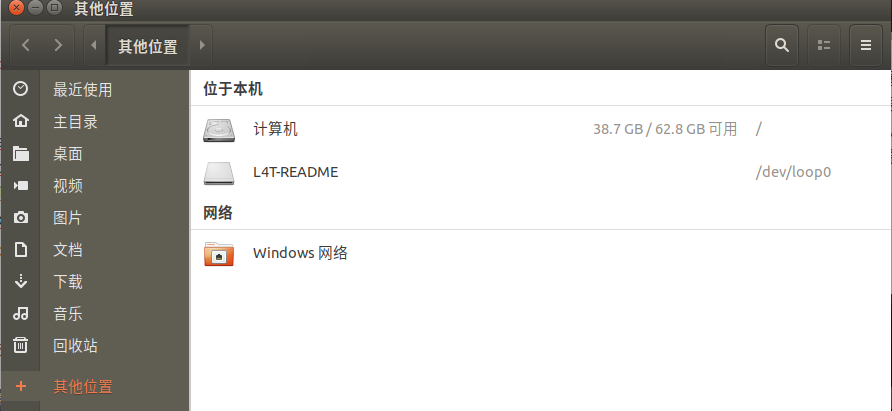
(2) How to find / usr/share/opencv4/
/Computer / usr/share/opencv4 / then click the search icon to enter
haarcascade_frontalface_default.xml

haarcascade_profileface.xml

lbpcascade_profileface.xml
Press ctrl+F5 to run, as shown below:
(3) Face detection in C + +
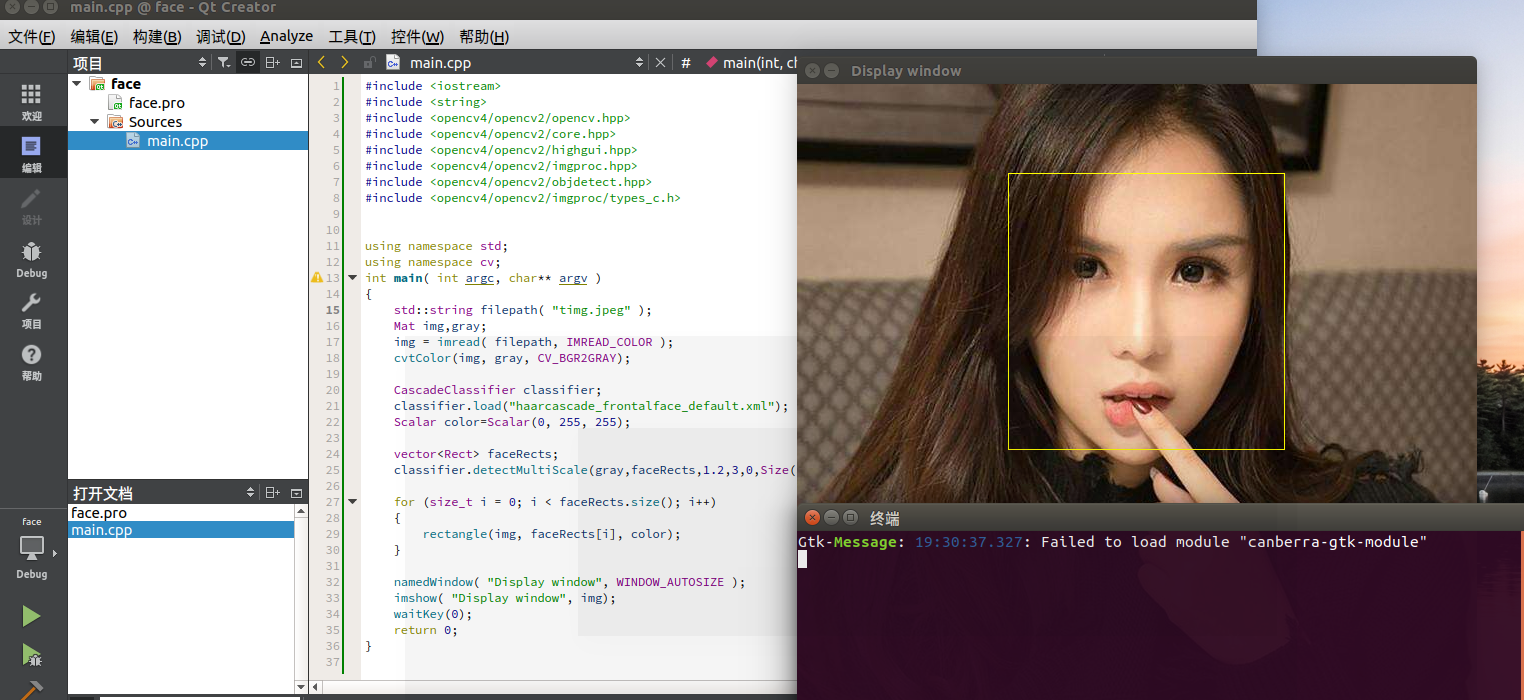
In this section, we write a C + + application to detect the face in the image and develop it with Qt5. The related implementation method is the same as python version. It mainly explains how to integrate Opencv under QT for C + + project development.
There are some additional configurations needed to develop opencv in C + +. First, look at the location of OpenCV. The location of the header file of Opencv4.1.1 pre installed by Jetson Nano is shown below:
Library files are placed in:
/usr/lib/aarch64-linux-gnu
Therefore, you only need to include the above two directories in the Qt pro file.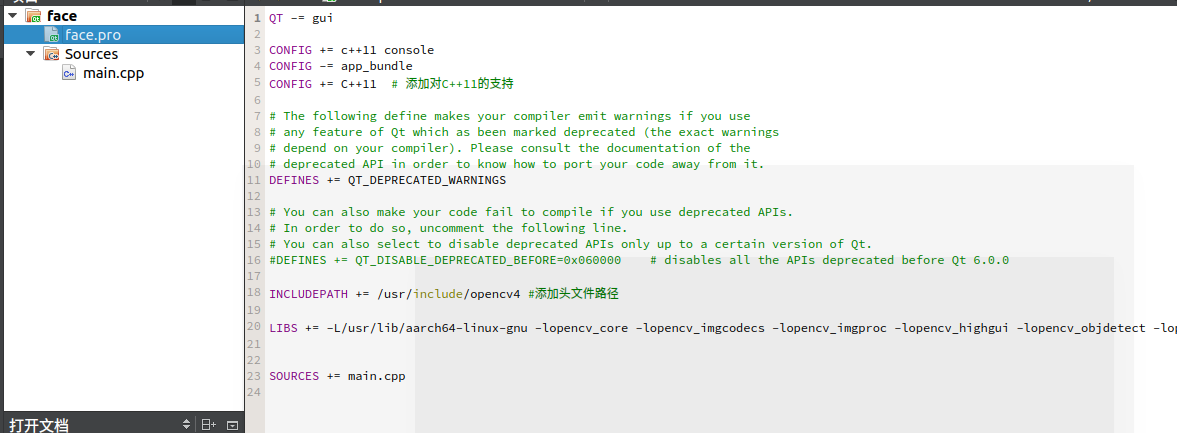
Use Qt Creator to reopen the QTtest project created in section 2.4.5. Edit the QTtest.pro file as follows:
QT -= gui

CONFIG += c++11 console
CONFIG -= app_bundle
CONFIG += C++11  # Add support for C++11

# The following define makes your compiler emit warnings if you use
# any feature of Qt which as been marked deprecated (the exact warnings
# depend on your compiler). Please consult the documentation of the
# deprecated API in order to know how to port your code away from it.
DEFINES += QT_DEPRECATED_WARNINGS

# You can also make your code fail to compile if you use deprecated APIs.
# In order to do so, uncomment the following line.
# You can also select to disable deprecated APIs only up to a certain version of Qt.
#DEFINES += QT_DISABLE_DEPRECATED_BEFORE=0x060000    # disables all the APIs deprecated before Qt 6.0.0

INCLUDEPATH += /usr/include/opencv4 #Add header file path

LIBS += -L/usr/lib/aarch64-linux-gnu -lopencv_core -lopencv_imgcodecs -lopencv_imgproc -lopencv_highgui -lopencv_objdetect  #Add libraries that need to be linked


SOURCES += main.cpp
It is important to pay attention to the methods of adding header files and lib files.
Next, modify the main.cpp file. The code is as follows:
#include <iostream>
#include <string>
#include <opencv4/opencv2/opencv.hpp>
#include <opencv4/opencv2/core.hpp>
#include <opencv4/opencv2/highgui.hpp>
#include <opencv4/opencv2/imgproc.hpp>
#include <opencv4/opencv2/objdetect.hpp>
#include <opencv4/opencv2/imgproc/types_c.h>


using namespace std;
using namespace cv;
int main( int argc, char** argv )
{
    std::string filepath( "test.jpeg" );
    Mat img,gray;
    img = imread( filepath, IMREAD_COLOR );
    cvtColor(img, gray, CV_BGR2GRAY);

    CascadeClassifier classifier;
    classifier.load("haarcascade_frontalface_default.xml");
    Scalar color=Scalar(0, 255, 255);

    vector<Rect> faceRects;
    classifier.detectMultiScale(gray,faceRects,1.2,3,0,Size(32,32));

    for (size_t i = 0; i < faceRects.size(); i++)
    {
        rectangle(img, faceRects[i], color);
    }

    namedWindow( "Display window", WINDOW_AUTOSIZE );
    imshow( "Display window", img);
    waitKey(0);
    return 0;
}
Rebuild the entire project, and then place the timg.jpeg and haarcascade ﹐ frontalface ﹐ default.xml files in the build face unknown debug folder,
The operation project rendering is as follows:
3.2 two dimensional code detection (making code scanning gun)
Now Alipay and WeChat widely use the two-dimensional code as the means of payment. In real life shopping, we often display the two-dimensional code through the mobile phone to the merchant to sweep the code. So, can we make a code scanner ourselves? With the embedded AI development board of Jetson Nano, we can make a code scanning gun ourselves.
3.2.1 read camera
In this section, we hope to be able to read the image through the camera, and analyze the two-dimensional code in the image in real time, that is to realize the function of a code scanner. This section realizes the camera reading function. Generally, there are two kinds of cameras, one is the relatively cheap csi camera (raspberry pie camera), and the other is the USB camera. It is worth noting that if the USB camera is used, the GPU of Jetson Nano will be used for image reading and rendering. If we are still doing some deep learning reasoning work at this time, it will obviously occupy some GPU resources. On the contrary, Jetson Nano will use the Gstreamer pipeline for reading and rendering of csi cameras, and will use specific hardware acceleration, so the whole processing effect will be better.
In this section, we will introduce two kinds of camera reading methods in detail. Either way, we use Opencv, a powerful image processing open source library, as the basis to perform relevant operations.
(1) Read CSI camera
Using Gstreamer to read CSI camera is mainly divided into three steps: creating Gstreamer pipeline; binding the pipeline to opencv video stream; frame by frame extraction and display. Here is the detailed code based on Python:
import cv2

# Set gstreamer pipeline parameters
def gstreamer_pipeline(
    captur_height=720, #Image height pre captured by camera
    display_width=1280, #Image width of window display
    display_height=720, #Image height of window display
    framerate=60,       #Capture frame rate
    flip_method=0,      #Rotate image or not
):
    return (
        "nvarguscamerasrc ! "
        "video/x-raw(memory:NVMM), "
        "width=(int)%d, height=(int)%d, "
        "format=(string)NV12, framerate=(fraction)%d/1 ! "
        "nvvidconv flip-method=%d ! "
        "video/x-raw, width=(int)%d, height=(int)%d, format=(string)BGRx ! "
        "videoconvert ! "
        "video/x-raw, format=(string)BGR ! appsink"
        % (
            capture_width,
            capture_height,
            framerate,
            flip_method,
            display_width,
            display_height,
        )
    )


if __name__ == "__main__":
    capture_width = 1280
    capture_height = 720
    display_width = 1280
    display_height = 720
    framerate = 60
    flip_method = 0

    # Create pipes
    print(gstreamer_pipeline(capture_width,capture_height,display_width,display_height,framerate,flip_method))

    #Pipeline and video stream binding
    cap = cv2.VideoCapture(gstreamer_pipeline(flip_method=0), cv2.CAP_GSTREAMER)

    if cap.isOpened():
        window_handle = cv2.namedWindow("CSI Camera", cv2.WINDOW_AUTOSIZE)

        # Frame by frame display
        while cv2.getWindowProperty("CSI Camera", 0) >= 0:
            ret_val, img = cap.read()
            cv2.imshow("CSI Camera", img)

            keyCode = cv2.waitKey(30) & 0xFF
            if keyCode == 27:# ESC key exit
                break

        cap.release()
        cv2.destroyAllWindows()
    else:
        print("Failed to open camera")
Next to the first part of section 3.1.4, create a new file named CSI? Camera? Test.py in code OSS, copy the above code to the file, save it, and then run the script by pressing ctrl+F5 (premise: ensure that CSI raspberry pie camera has been installed accurately). The running effect is as follows:
It can be seen that the video streaming image can be displayed normally, but due to the raspberry pie camera itself, there are still many noises in the image, and the color is also a little distorted (it is recommended to buy a better camera in the real industrial scene). Let's give the C + + version synchronously. Next to the second part of section 3.1.4, modify the main.cpp file as follows:
#include <iostream>
#include <string>
#include <opencv4/opencv2/opencv.hpp>
#include <opencv4/opencv2/core.hpp>
#include <opencv4/opencv2/highgui.hpp>
#include <opencv4/opencv2/imgproc.hpp>
#include <opencv4/opencv2/objdetect.hpp>
#include <opencv4/opencv2/imgproc/types_c.h>
#include <opencv4/opencv2/videoio.hpp>

using namespace std;
using namespace cv;

string gstreamer_pipeline (int capture_width, int capture_height, int display_width, int display_height, int framerate, int flip_method)
{
    return "nvarguscamerasrc ! video/x-raw(memory:NVMM), width=(int)" + to_string(capture_width) + ", height=(int)" +
           to_string(capture_height) + ", format=(string)NV12, framerate=(fraction)" + to_string(framerate) +
           "/1 ! nvvidconv flip-method=" + to_string(flip_method) + " ! video/x-raw, width=(int)" + to_string(display_width) + ", height=(int)" +
           to_string(display_height) + ", format=(string)BGRx ! videoconvert ! video/x-raw, format=(string)BGR ! appsink";
}

int main( int argc, char** argv )
{
    int capture_width = 1280 ;
    int capture_height = 720 ;
    int display_width = 1280 ;
    int display_height = 720 ;
    int framerate = 60 ;
    int flip_method = 0 ;

    //Create pipes
    string pipeline = gstreamer_pipeline(capture_width,
    capture_height,
    display_width,
    display_height,
    framerate,
    flip_method);
    std::cout << "Use gstreamer The Conduit: \n\t" << pipeline << "\n";

    //Pipeline and video stream binding
    VideoCapture cap(pipeline, CAP_GSTREAMER);
    if(!cap.isOpened())
    {
        std::cout<<"Failed to open camera."<<std::endl;
        return (-1);
    }

    //Create display window
    namedWindow("CSI Camera", WINDOW_AUTOSIZE);
    Mat img;

    //Frame by frame display
    while(true)
    {
        if (!cap.read(img))
        {
            std::cout<<"Capture failure"<<std::endl;
            break;
        }
        imshow("CSI Camera",img);

        int keycode = cv::waitKey(30) & 0xff ; //ESC key exit
            if (keycode == 27) break ;
    }

    cap.release();
    destroyAllWindows() ;
}
In addition, the header file "include < opencv4 / opencv2 / video. HPP > for video processing needs to be added. In addition, you need to modify the pro file to include the opencv video library corresponding to video processing. The complete pro file is as follows:
Modify pro file again
QT -= gui

CONFIG += c++11 console
CONFIG -= app_bundle
CONFIG += C++11  # Add to C++11Support

# The following define makes your compiler emit warnings if you use
# any feature of Qt which as been marked deprecated (the exact warnings
# depend on your compiler). Please consult the documentation of the
# deprecated API in order to know how to port your code away from it.
DEFINES += QT_DEPRECATED_WARNINGS

# You can also make your code fail to compile if you use deprecated APIs.
# In order to do so, uncomment the following line.
# You can also select to disable deprecated APIs only up to a certain version of Qt.
#DEFINES += QT_DISABLE_DEPRECATED_BEFORE=0x060000    # disables all the APIs deprecated before Qt 6.0.0

INCLUDEPATH += /usr/include/opencv4 #Add header file path

LIBS += -L/usr/lib/aarch64-linux-gnu -lopencv_core -lopencv_imgcodecs -lopencv_imgproc -lopencv_highgui -lopencv_objdetect -lopencv_videoio  #Add libraries that need to be linked


SOURCES += main.cpp
Save all the changes and rebuild the project and run it to get the same results. The video can be displayed correctly.
!](https://img-blog.csdnimg.cn/20200113194052838.png?x-oss-process=image/watermark,type_ZmFuZ3poZW5naGVpdGk,shadow_10,text_aHR0cHM6Ly9ibG9nLmNzZG4ubmV0L3FxXzI1OTIzMTAz,size_16,color_FFFFFF,t_70)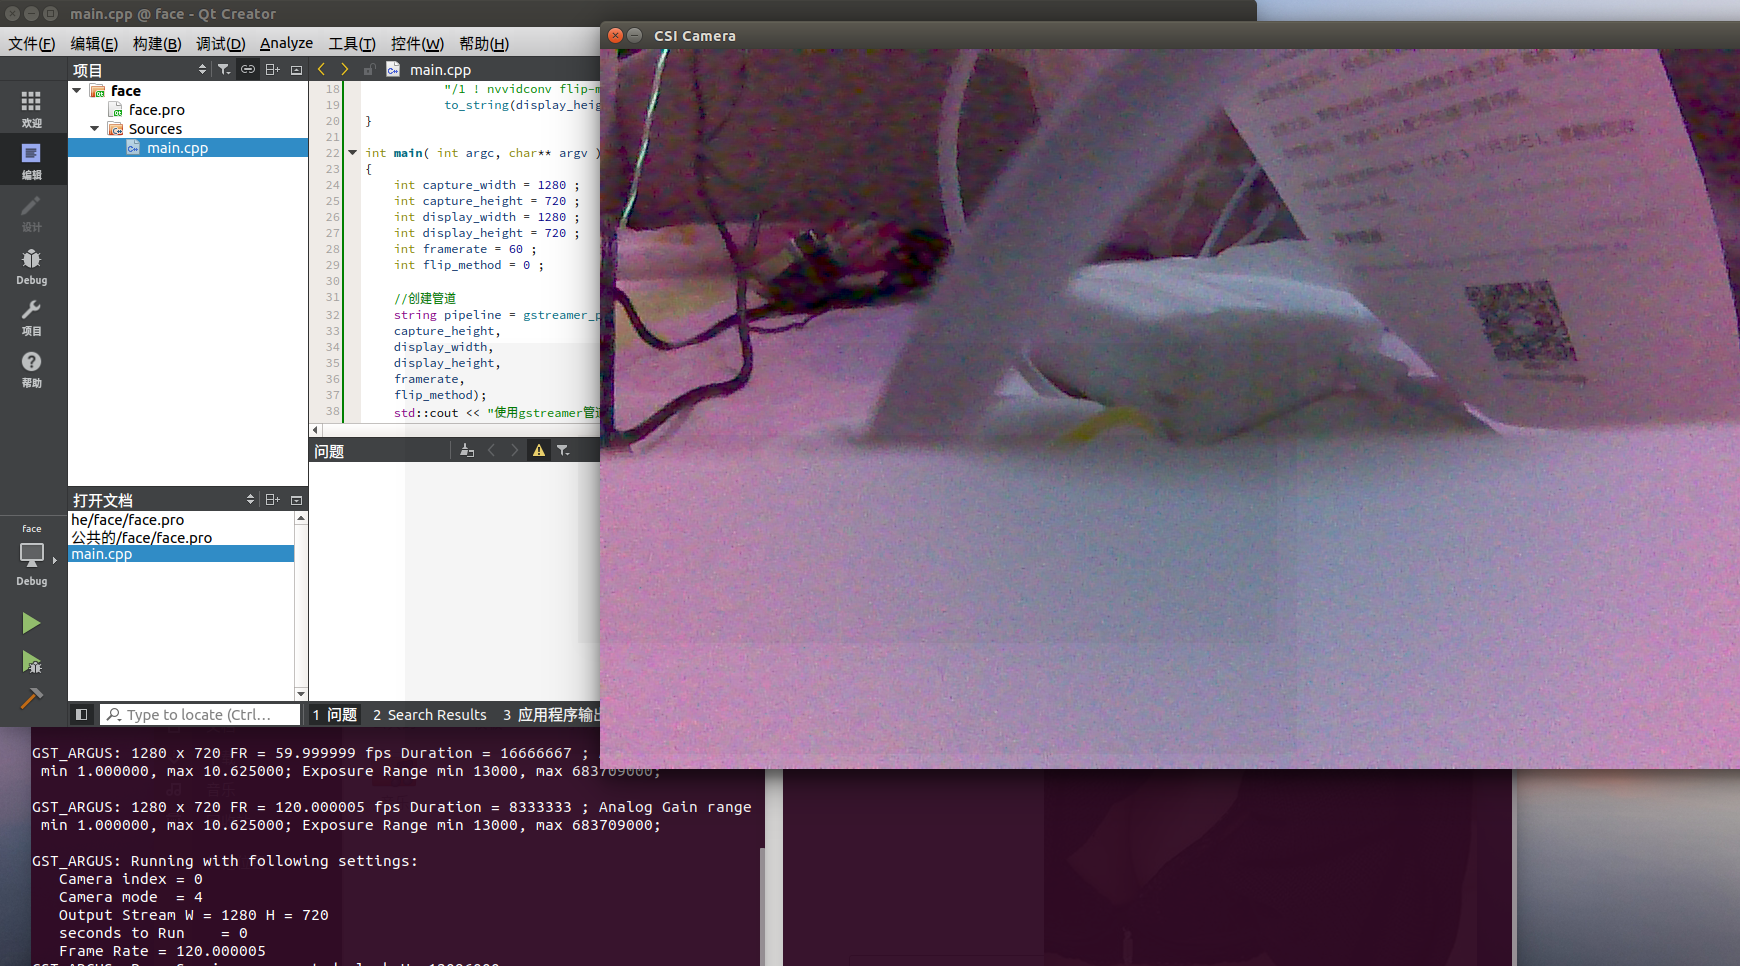
(2) Read USB camera
Compared with reading CSI camera, reading USB camera is more simple. It only needs two steps: opening camera and extracting frame by frame. However, it should be noted that the Jetson Nano does not support all USB cameras. It is recommended to select the Linux drive free USB camera when purchasing. This paper uses a 4K HD camera.
Here is the complete code of Python version:
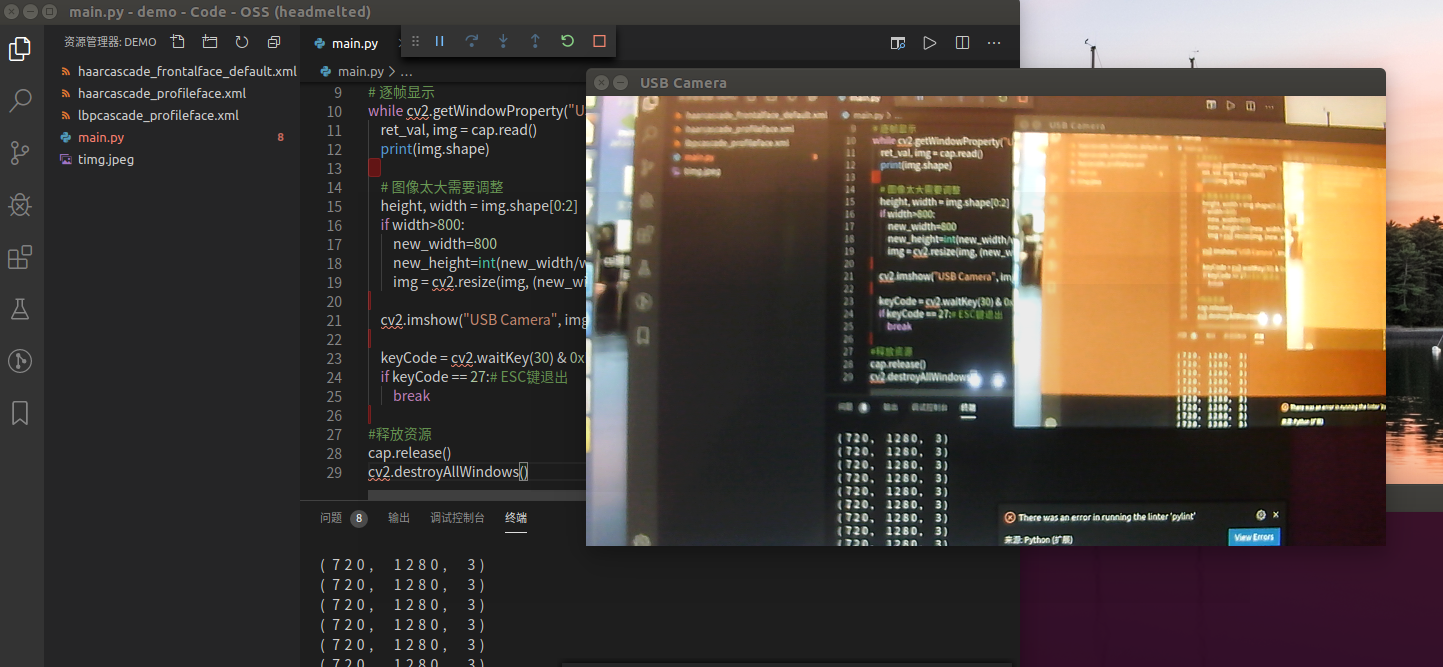
import cv2

 #Create camera capture module
cap = cv2.VideoCapture(1)

#create a window
window_handle = cv2.namedWindow("USB Camera", cv2.WINDOW_AUTOSIZE)

# Frame by frame display
while cv2.getWindowProperty("USB Camera", 0) >= 0:
    ret_val, img = cap.read()
    print(img.shape)

    # Image too large to adjust
    height, width = img.shape[0:2]
    if width>800:
        new_width=800
        new_height=int(new_width/width*height)
        img = cv2.resize(img, (new_width,new_height))

    cv2.imshow("USB Camera", img)

    keyCode = cv2.waitKey(30) & 0xFF
    if keyCode == 27:# ESC key exit
        break

#Release resources
cap.release()
cv2.destroyAllWindows()
The above code uses cap = cv2.VideoCapture(1) when opening the camera. The parameter 1 here is because the current Jetson Nano is also connected to the CSI camera, and the CSI camera's logo is 0, so the USB camera's logo is 1, which can be obtained by testing in actual use. In addition, the size of the image is limited in the above code. If the width exceeds 800, the scaled image will be displayed again. The rendering is as follows:
It can be seen that the USB 4K camera is still good for image display, with more realistic color and less noise. We will continue to use this camera for QR code detection later.
The C + + version code is given below, and the main.cpp file is modified as follows:
#include <iostream>
#include <string>
#include <opencv4/opencv2/opencv.hpp>
#include <opencv4/opencv2/core.hpp>
#include <opencv4/opencv2/highgui.hpp>
#include <opencv4/opencv2/imgproc.hpp>
#include <opencv4/opencv2/objdetect.hpp>
#include <opencv4/opencv2/imgproc/types_c.h>
#include <opencv4/opencv2/videoio.hpp>

using namespace std;
using namespace cv;

int main( int argc, char** argv )
{
    //Turn on the camera
    VideoCapture cap(1);

    //Create display window
    namedWindow("USB Camera", WINDOW_AUTOSIZE);
    Mat img;

    //Frame by frame display
    while(true)
    {
        if (!cap.read(img))
        {
            std::cout<<"Capture failure"<<std::endl;
            break;
        }
        int new_width,new_height,width,height,channel;
        width=img.cols;
        height=img.rows;
        channel=img.channels();
        cout<<width<<"  "<<height<<"  "<<channel<<endl;

        new_width=800;
        if(width>800)
        {
            new_height=int(new_width*1.0/width*height);
        }

        resize(img, img, cv::Size(new_width, new_height));
        imshow("USB Camera",img);

        int keycode = cv::waitKey(30) & 0xff ; //ESC key exit
            if (keycode == 27) break ;
    }

    cap.release();
    destroyAllWindows() ;
}
The effect is as follows:
3.2.2 QR code detection and reading
In this section, opencv will be used to realize the function of QR code detection and reading. After opencv 4.0, we have integrated two-dimensional code reading module, so we can use the latest OpenCV to realize two-dimensional code detection and reading. Two dimensional code detection and recognition are mainly divided into three steps: using QRCodeDetector() function to create a two-dimensional code detector; using detectAndDecode function to detect and recognize the two-dimensional code of the image; outputting the detection results.
Here is mainly to read each frame of the video stream image and then detect the image. For convenience, we only give a complete example for USB camera. For CSI camera, we can transfer the relevant QR code detection code according to section 3.2.1. Combined with the code of obtaining USB camera video in section 3.2.1, the complete Python version QR code detection and reading code is given:
import cv2
import numpy as np

 #Create camera capture module
cap = cv2.VideoCapture(1)

#create a window
window_handle = cv2.namedWindow("USB Camera", cv2.WINDOW_AUTOSIZE)

#Create a QR code detector
qrDecoder = cv2.QRCodeDetector()

# Frame by frame display
while cv2.getWindowProperty("USB Camera", 0) >= 0:
    ret_val, img = cap.read()
    #print(img.shape)

    # Image too large to adjust
    height, width = img.shape[0:2]
    if width>800:
        new_width=800
        new_height=int(new_width/width*height)
        img = cv2.resize(img, (new_width,new_height))

    # Two dimensional code detection and recognition
    data,bbox,rectifiedImage = qrDecoder.detectAndDecode(img)
    if len(data)>0:
        print("Decode data : {}".format(data))
        n = len(bbox)
        for j in range(n):
            cv2.line(img, tuple(bbox[j][0]), tuple(bbox[ (j+1) % n][0]), (255,0,0), 3)
    else:
        print("No QR code detected")

    #Display image
    cv2.imshow("USB Camera", img)

    keyCode = cv2.waitKey(30) & 0xFF
    if keyCode == 27:# ESC key exit
        break

#Release resources
cap.release()
cv2.destroyAllWindows()
The renderings are as follows:
The complete code of C + + version is as follows:
#include <iostream>
#include <string>
#include <opencv4/opencv2/opencv.hpp>
#include <opencv4/opencv2/core.hpp>
#include <opencv4/opencv2/highgui.hpp>
#include <opencv4/opencv2/imgproc.hpp>
#include <opencv4/opencv2/objdetect.hpp>
#include <opencv4/opencv2/imgproc/types_c.h>
#include <opencv4/opencv2/videoio.hpp>
#include <opencv4/opencv2/imgcodecs.hpp>

using namespace std;
using namespace cv;

int main( int argc, char** argv )
{
    //Turn on the camera
    VideoCapture cap(1);

    //Create display window
    namedWindow("USB Camera", WINDOW_AUTOSIZE);
    Mat img;

    //Create a QR code detector
    QRCodeDetector qrDecoder = QRCodeDetector();

    //Frame by frame display
    while(true)
    {
        if (!cap.read(img))
        {
            std::cout<<"Capture failure"<<std::endl;
            break;
        }
        int new_width,new_height,width,height,channel;
        width=img.cols;
        height=img.rows;
        channel=img.channels();
        //cout<<width<<"  "<<height<<"  "<<channel<<endl;

        //Resize image
        new_width=800;
        if(width>800)
        {
            new_height=int(new_width*1.0/width*height);
        }
        resize(img, img, cv::Size(new_width, new_height));

        //QR code detection and reading
        Mat bbox, rectifiedImage;
        std::string data = qrDecoder.detectAndDecode(img, bbox, rectifiedImage);
        if(data.length()>0)
        {
            cout << "Decode data: " << data << endl;

            int n = bbox.rows;
            for(int i = 0 ; i < n ; i++)
            {
                line(img, Point2i(bbox.at<float>(i,0),bbox.at<float>(i,1)), Point2i(bbox.at<float>((i+1) % n,0), bbox.at<float>((i+1) % n,1)), Scalar(255,0,0), 3);
            }
        }
        else
            cout << "No QR code detected" << endl;

        imshow("USB Camera",img);

        int keycode = cv::waitKey(30) & 0xff ; //ESC key exit
            if (keycode == 27) break ;
    }

    cap.release();
    destroyAllWindows() ;
}
The effect is as follows:
4. summary
4.1 using this will result in a directory@ TOC
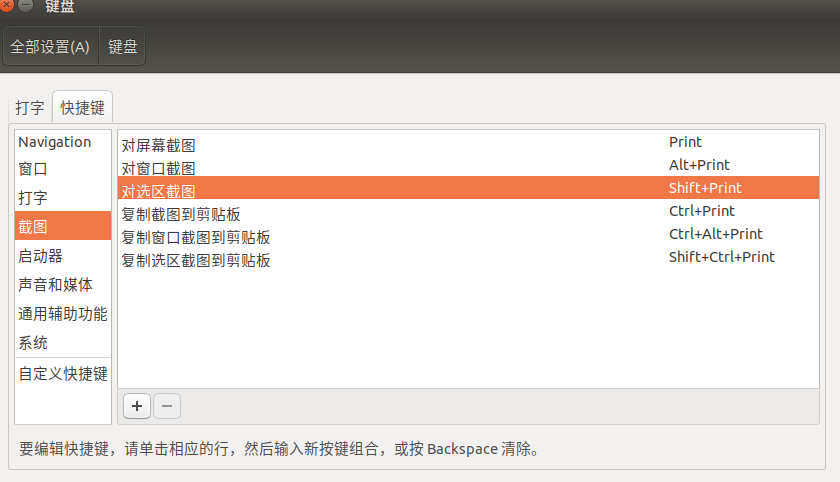
4.2 Ubuntu screenshot shortcut key settings