1, Configuration item
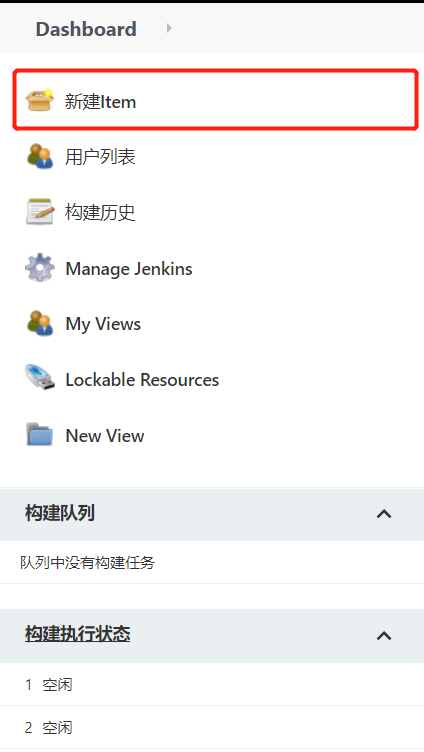
1. New item
2. Add task name
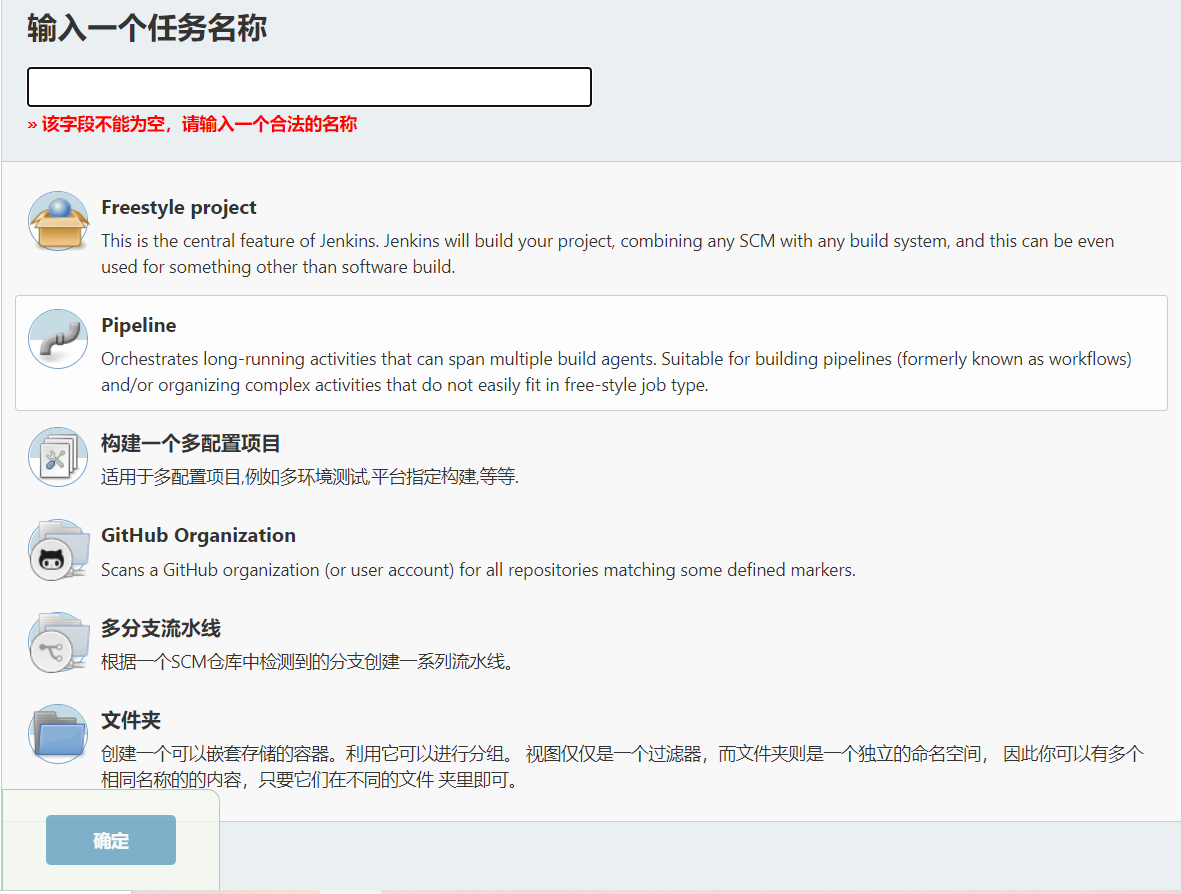
3. Choose a free style
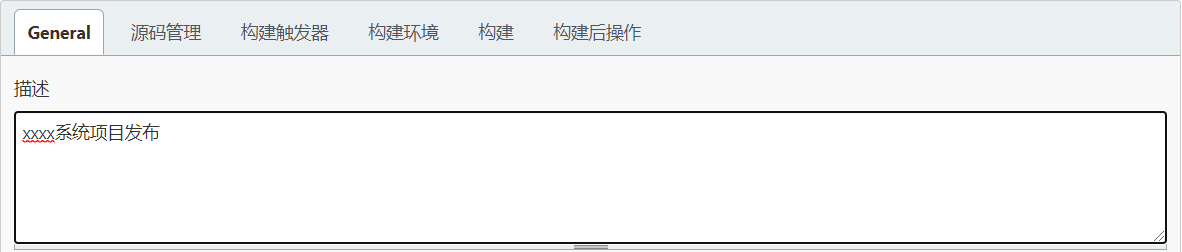
3.1. Add basic task information
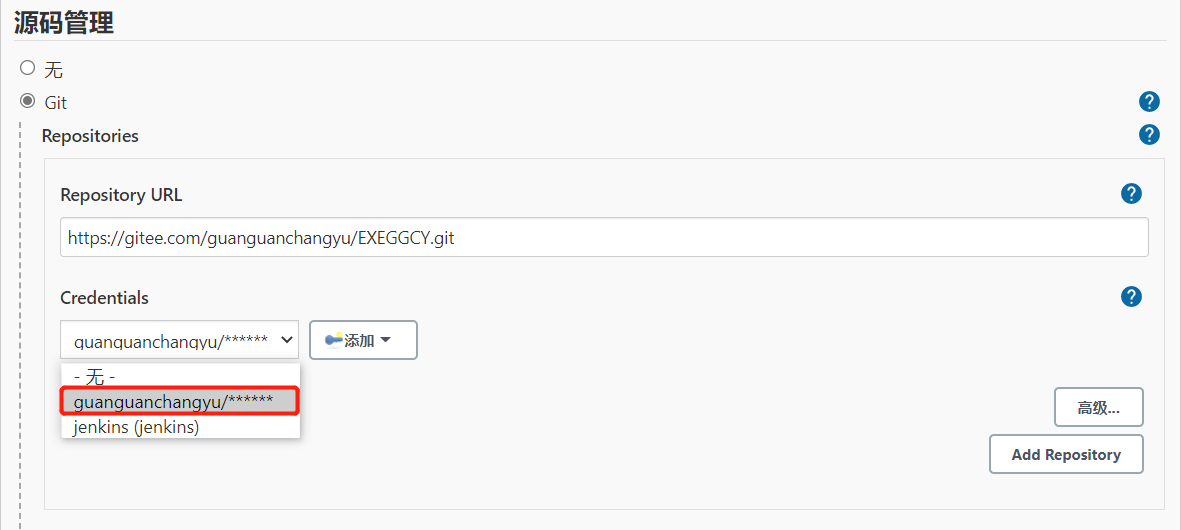
3.2 source code management
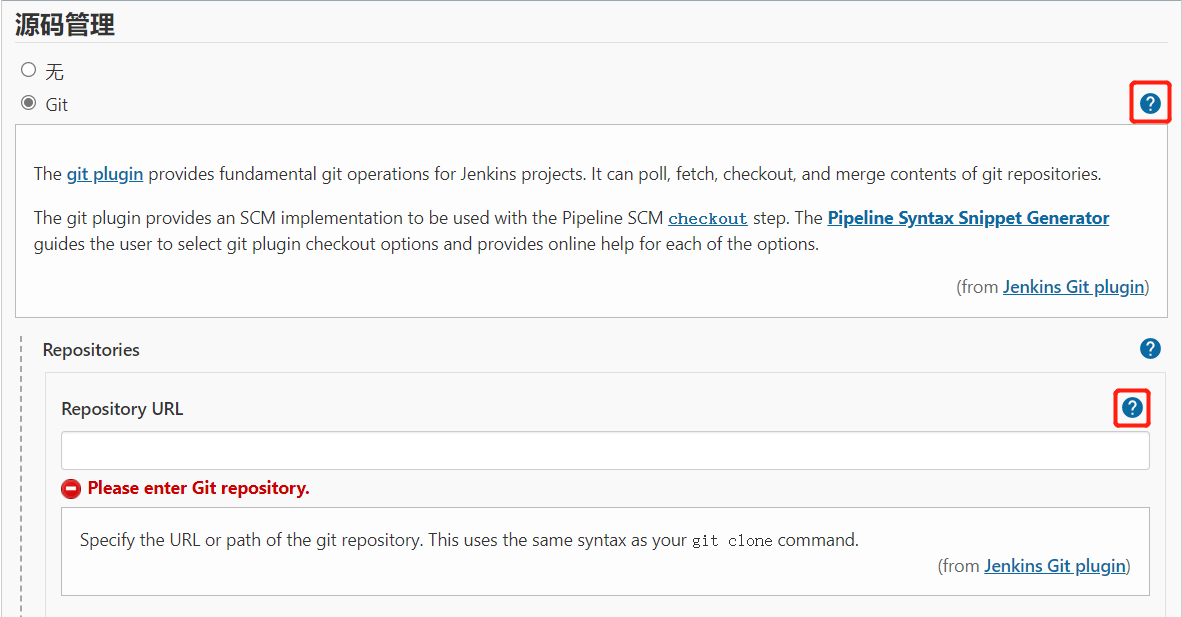
If you understand the purpose of corresponding source code management, you can choose to click the help icon in the screenshot, which has the basic information description of the corresponding level.
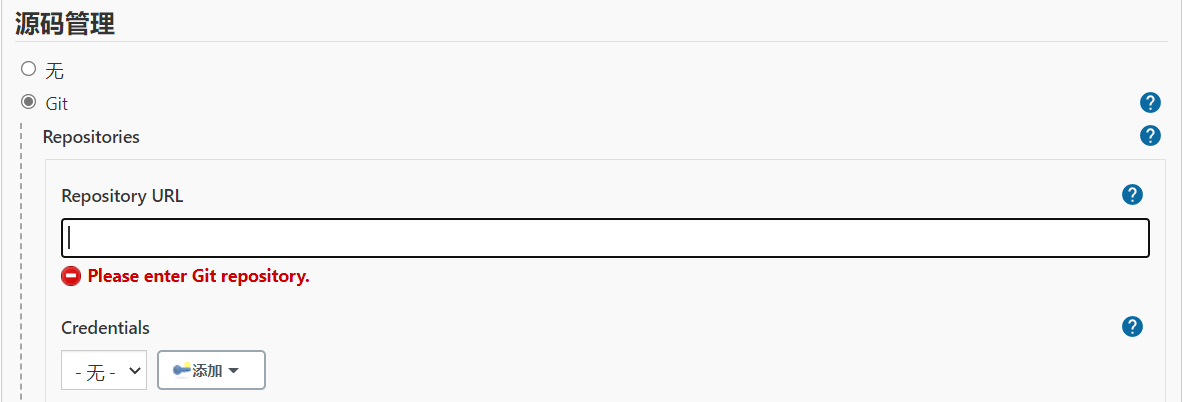
Select Git
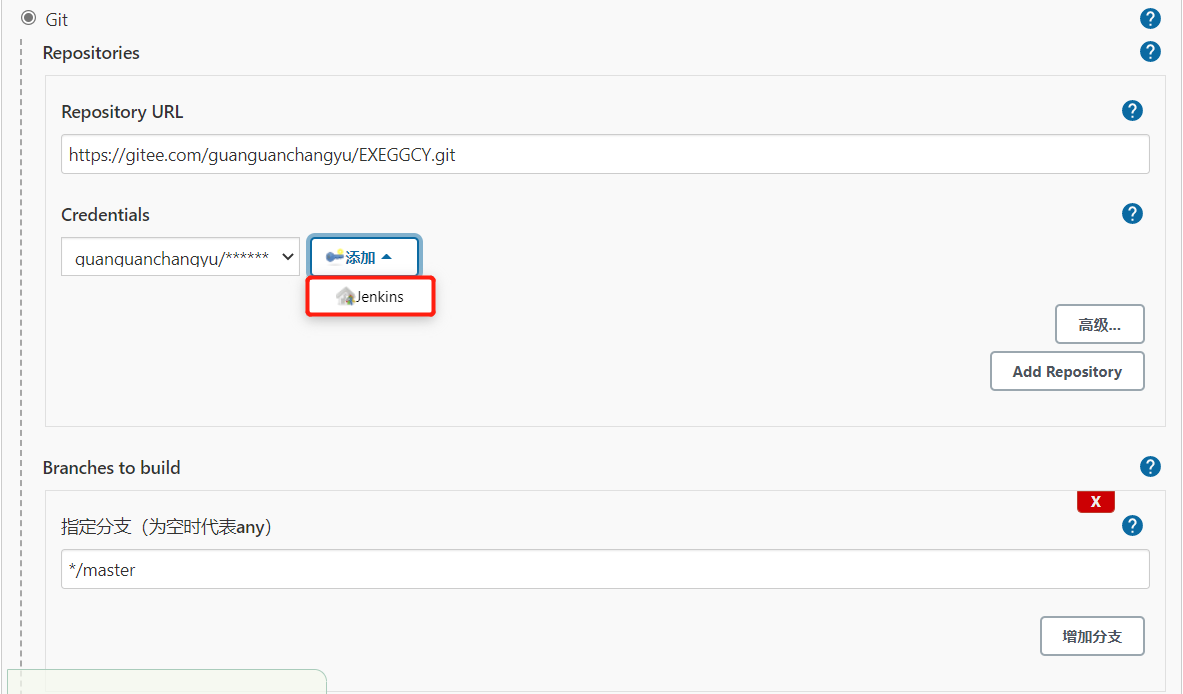
3.3. Add warehouse address
Create an Asp.net Core WebApi project locally, add it to the source code management, and push it to the remote warehouse to obtain the GIT address https://gitee.com/guanguanchangyu/EXEGGCY.git , add to the project, and the following prompt appears:
Failed to connect to repository : Command "git.exe ls-remote -h -- https://gitee.com/guanguanchangyu/EXEGGCY.git HEAD" returned status code 128:
stdout:
stderr: Logon failed, use ctrl+c to cancel basic credential prompt.
remote: [31mUsername for 'https: Incorrect username or password (access token)[0m
fatal: Authentication failed for 'https://gitee.com/guanguanchangyu/EXEGGCY.git/'
3.4. Add warehouse voucher
Method 1: user name and password
Specific filling contents
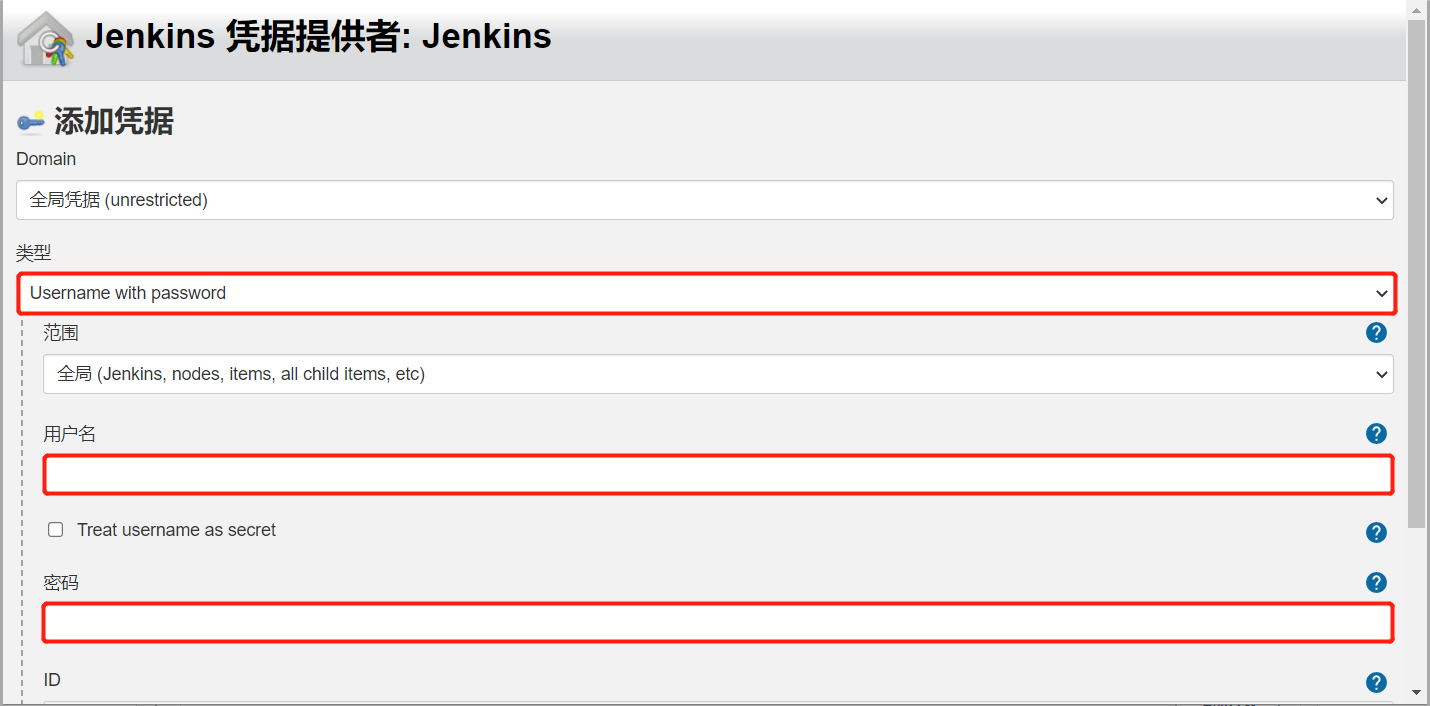
Select a voucher. If the user name and password of the account are entered correctly, the source code management warehouse will not prompt the above error message
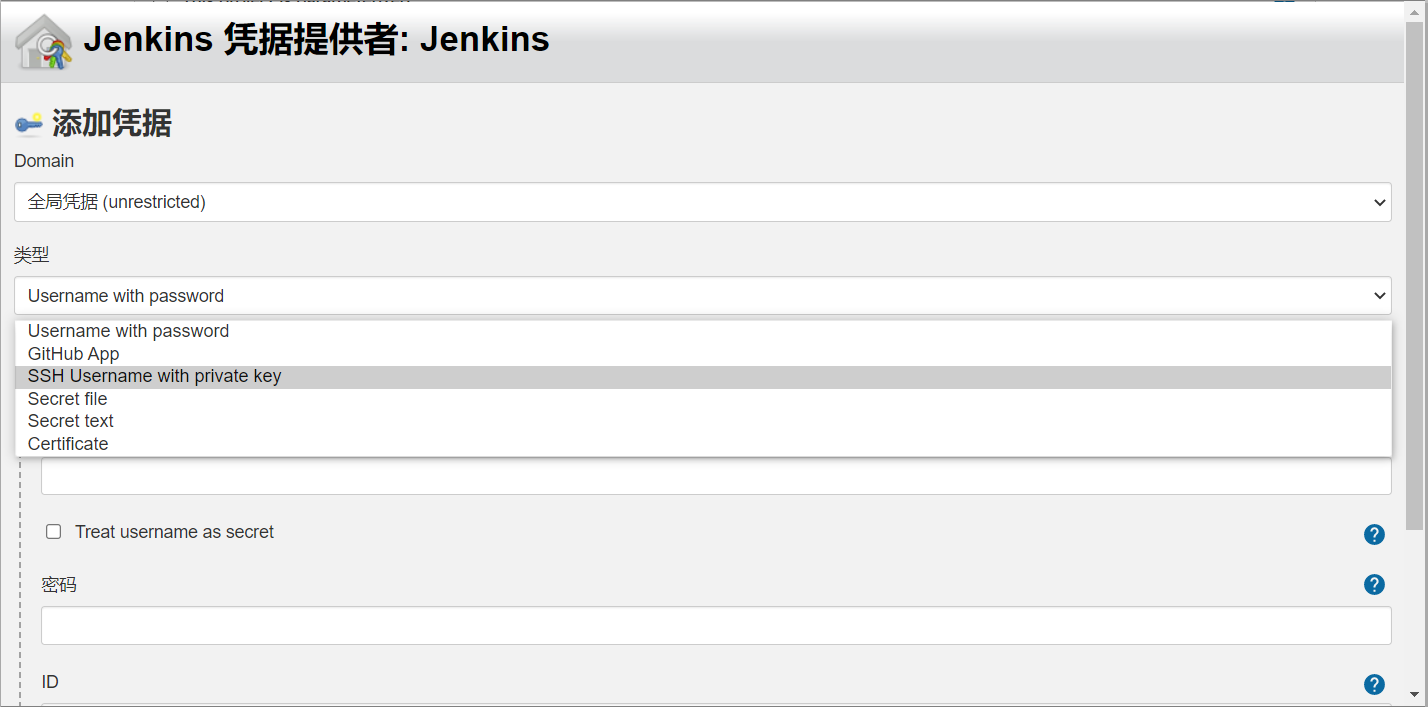
Method 2: use ssh key
After the certificate public key and private key are generated locally through SSH keyagen, the locally generated public key is added to the online personal public key or warehouse public key, and the details are searched by yourself. After the addition is successful, the local operation is processed in the source code management part configured in the corresponding project, and select voucher addition
The user name and logo shall be filled in according to the actual needs, and do not have to be consistent with the git account
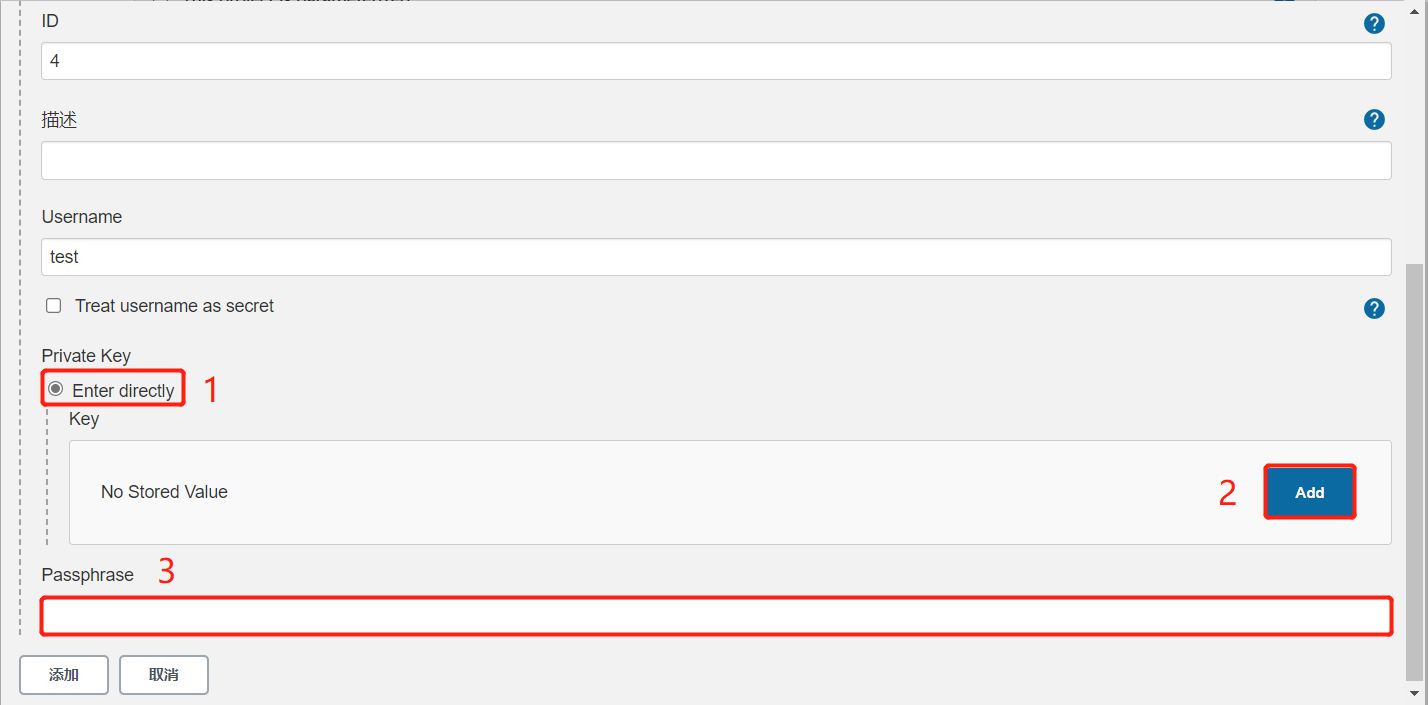
add adds the locally generated private key content
If a password is set when building a voucher, you need to add the corresponding password in the Passphrase input box. After saving successfully, you can select it
Note: for gitee, the private warehouse (2021-8-18) is not supported by default. jenkins uses ssh key for remote access
gitea created privately by individuals can be used normally. Here's a hint to avoid readers lying in the pit.
3.5 environment construction
The current project is a Core project and is not involved.
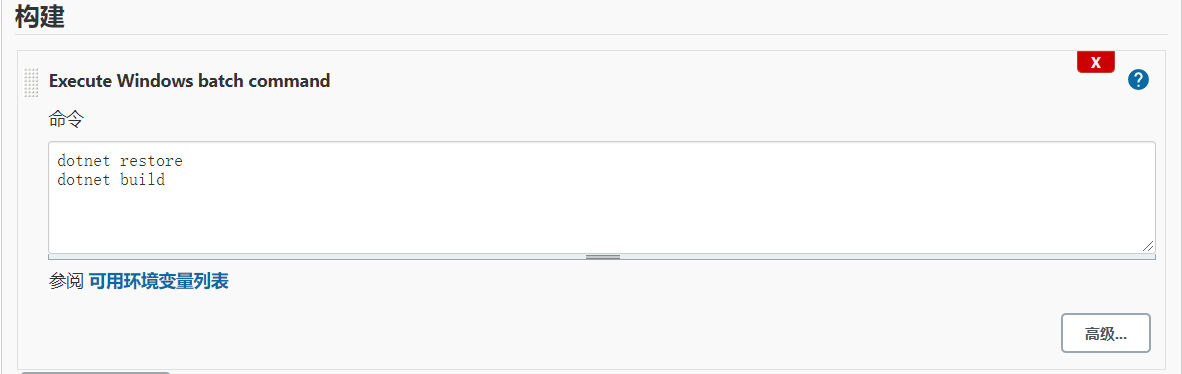
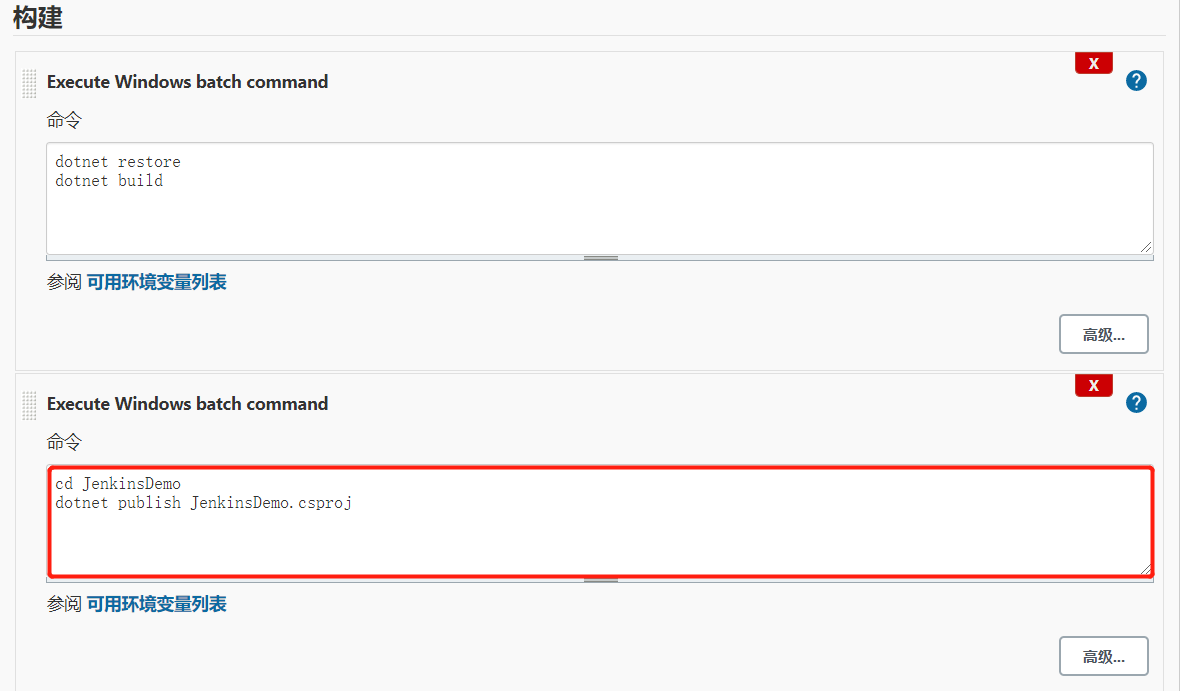
3.6 construction
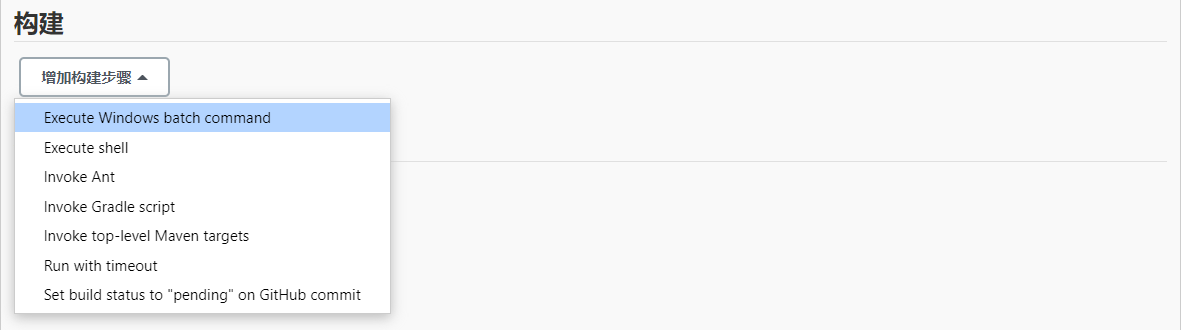
Enter the following command:
dotnet restore
dotnet build
As shown below:
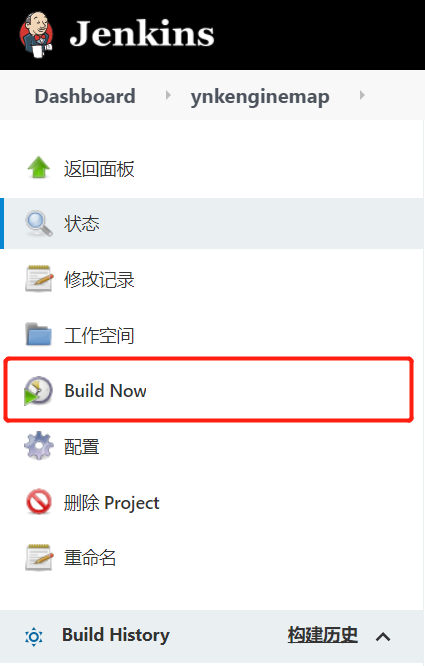
3.7 test instructions
Save the configuration, jump to the front page of the current task, and select Build Now for instruction test
View construction history
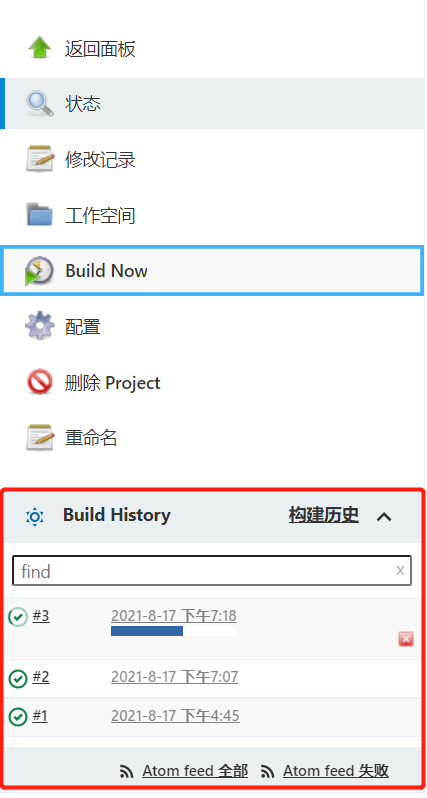
Click the latest record to view the details

Viewing the console output, you can see that the current output page is basically consistent with the actual daily development process. The specified dotnet instruction is used to restore and build the project
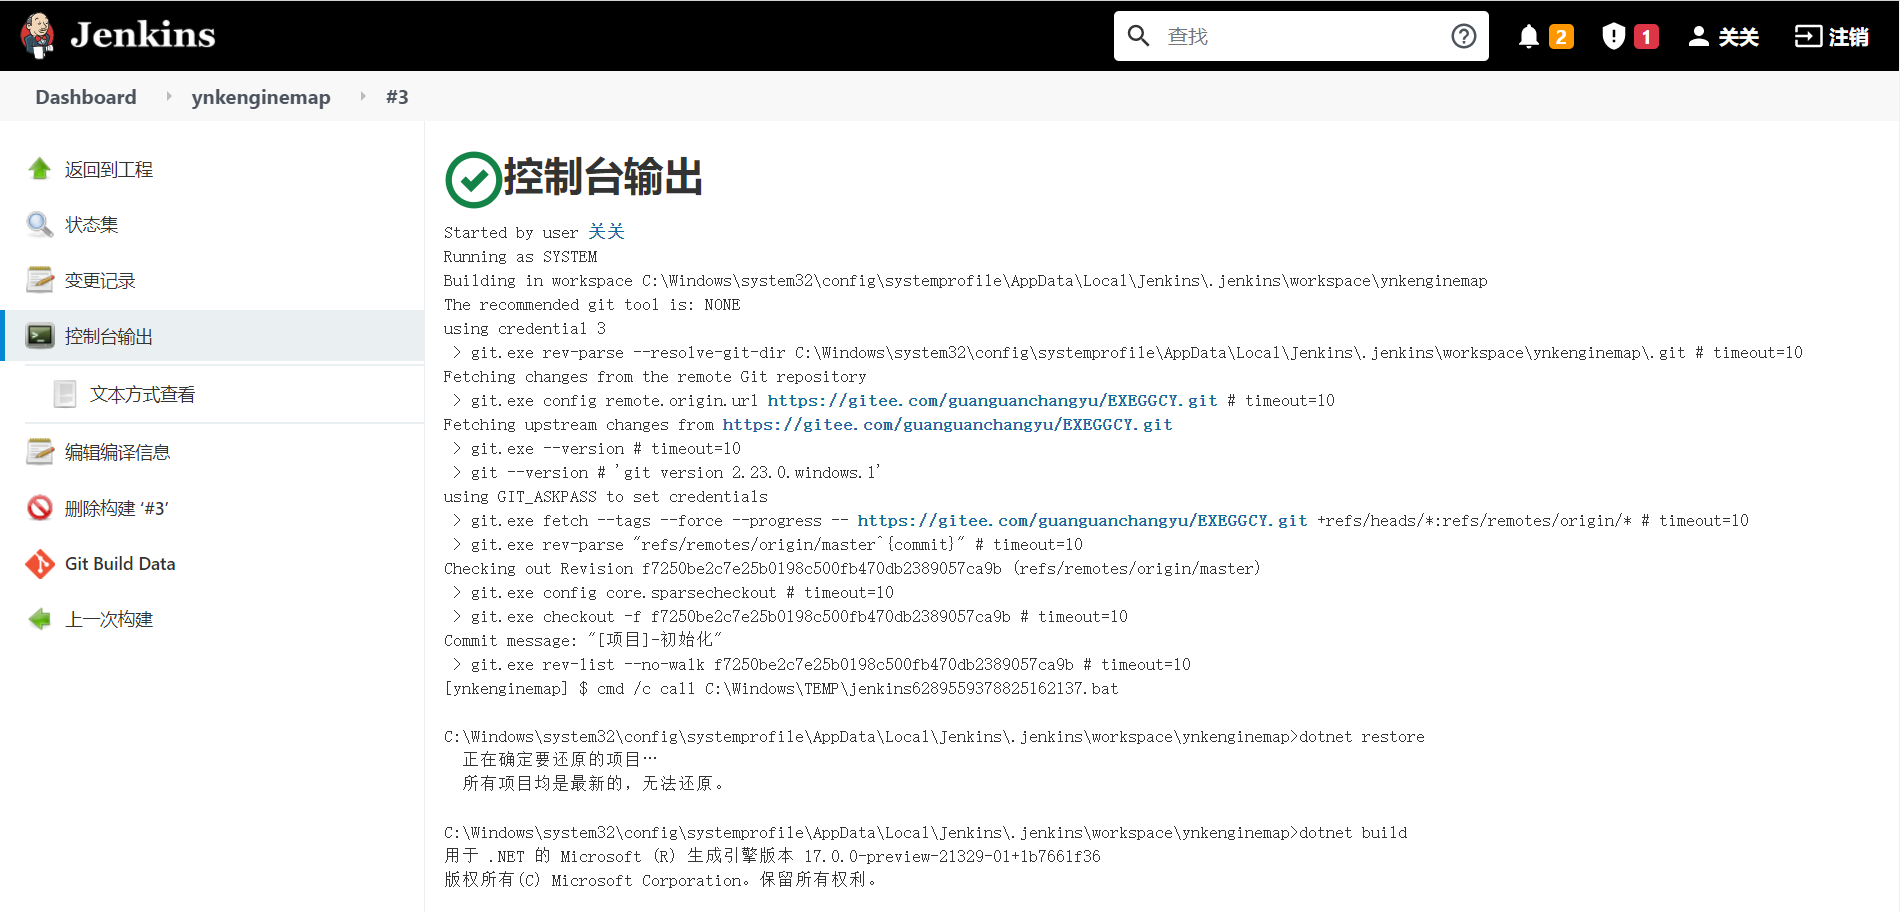
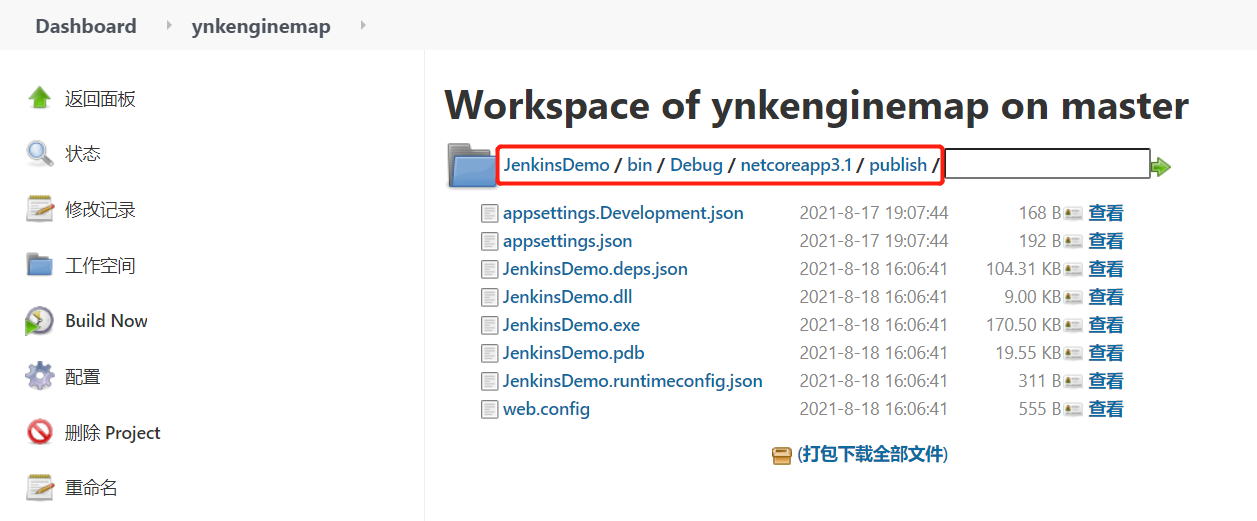
Is there a corresponding project working directory?
Yes, the working directory is called workspace in the task information home page, that is, the execution path output from the console above. It can be viewed in the project home page

C:\Windows\system32\config\systemprofile\AppData\Local\Jenkins\.jenkins\workspace\ynkenginemap is the local directory cloned from the remote warehouse. Open the corresponding directory as follows:

During operation, the instructions executed are executed in the current directory, and the same is true for the release project.
Execute the instruction dotnet publish, refer to: Instruction information Here, directly switch to the JenkinsDemo directory and execute the release instruction. The release file is output to bin\Debug\netcoreapp3.1\publish by default
After saving, view the running test effect:
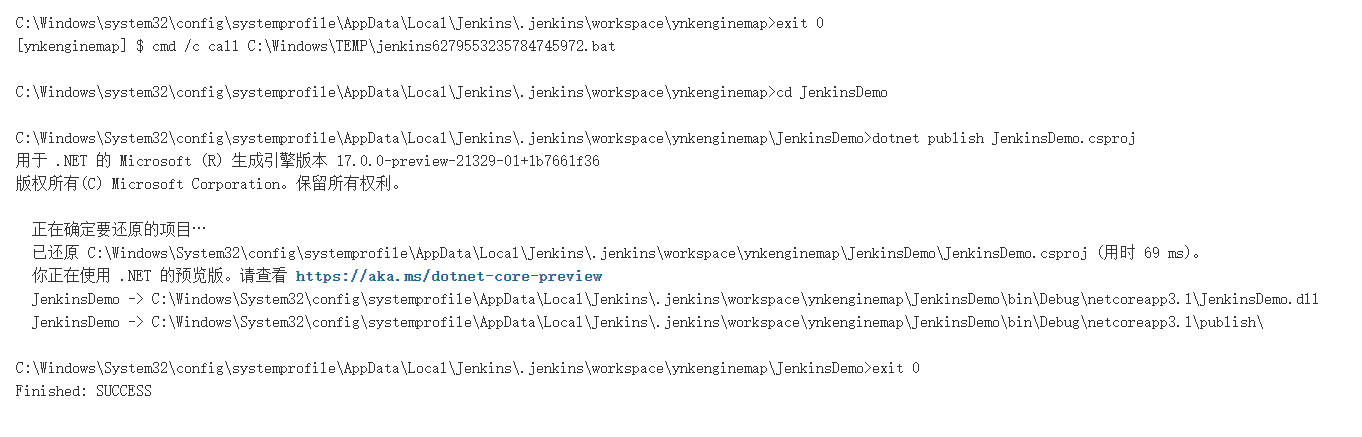
After running successfully, view the workspace. The following indicates that the project has been generated normally.
4. ssh Remote Publishing
4.1. Installing plug-ins
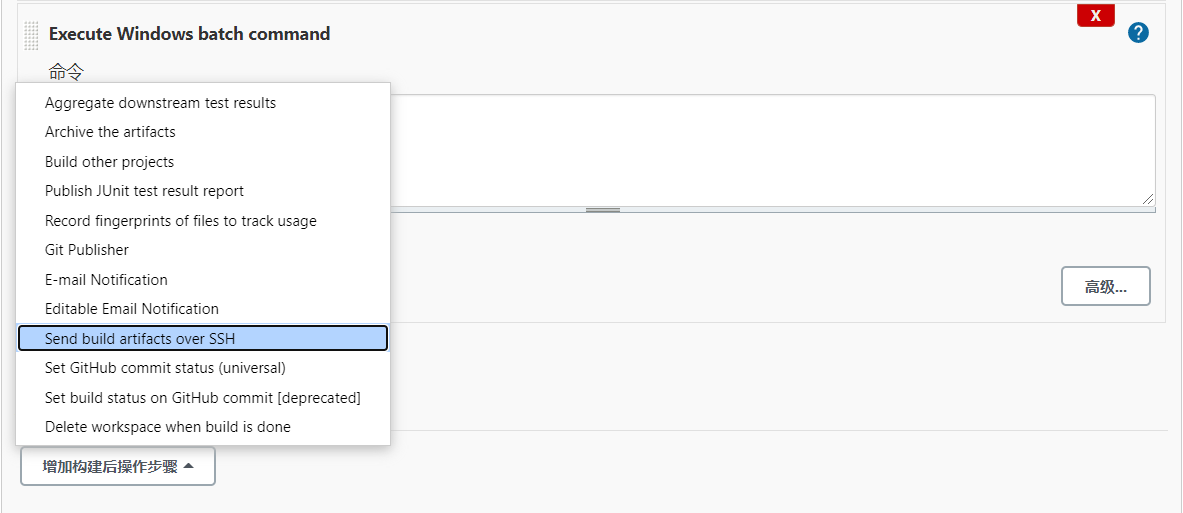
To access the remote host through ssh, you need to install Open SSH for the host of Windows system, open port 22 for the firewall, install the local Jenkins installation plug-in, install the publish over ssh plug-in, and restart the Jenkins service after installation.

After viewing the post build operations in the task, you can see the multiple options Send build artifacts over SSH, which indicates that the installation is successful.
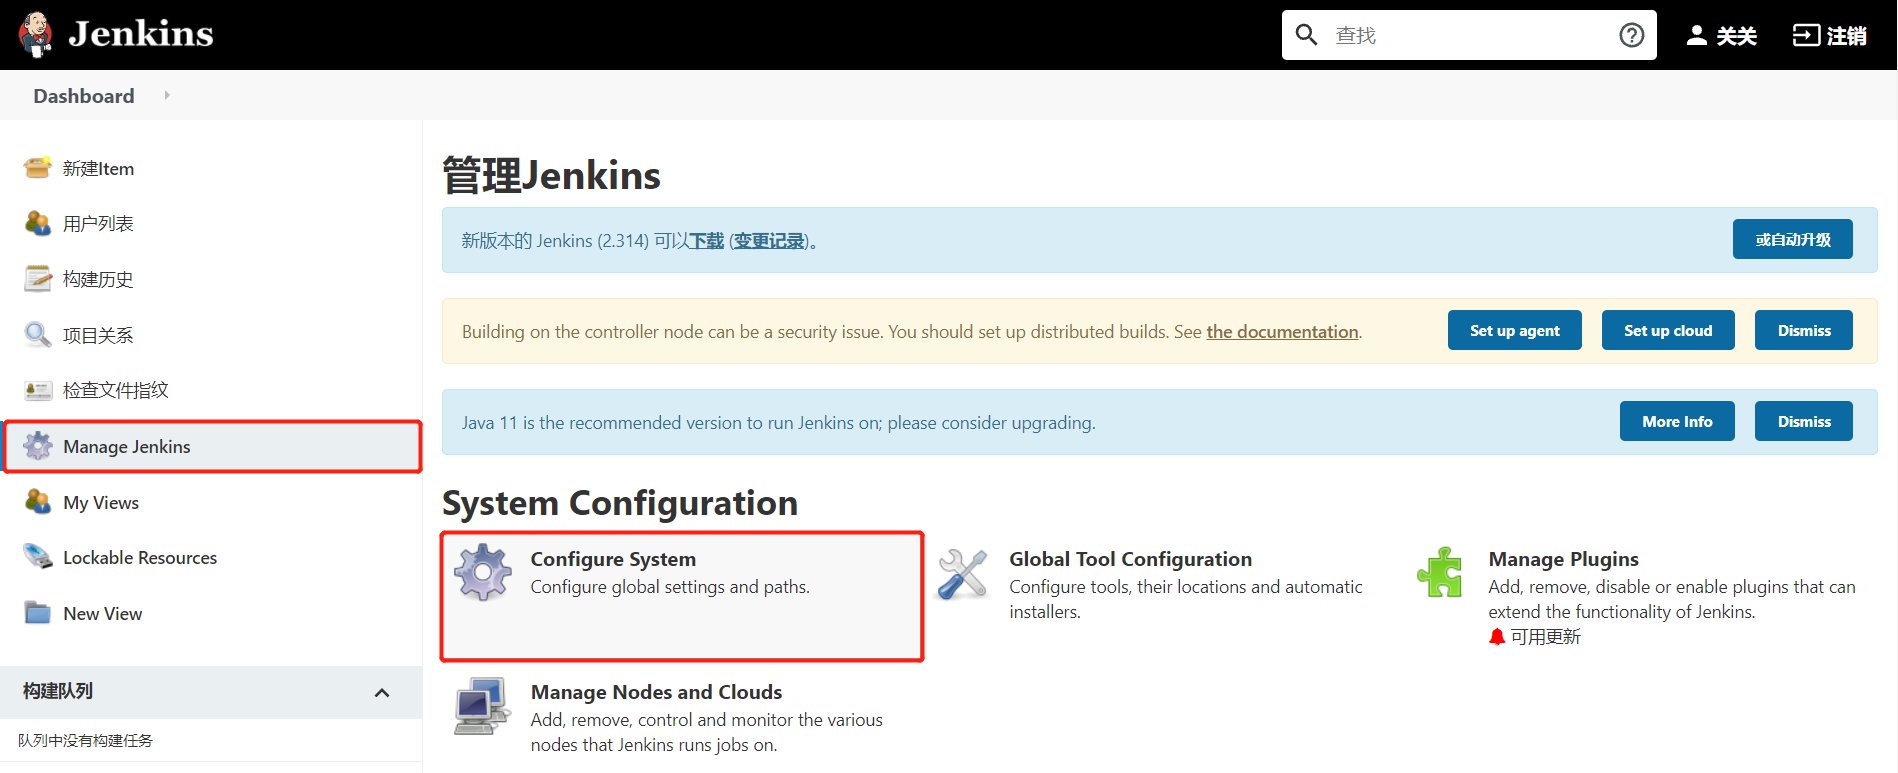
The required configuration is related to the configuration. If the user is using it for the first time, you need to go to the home page, select system configuration and add the corresponding SSH publishing configuration. The home page is as follows:
4.2 system configuration
In system configuration configure system publish over ssh, configure a remote ssh connection configuration,
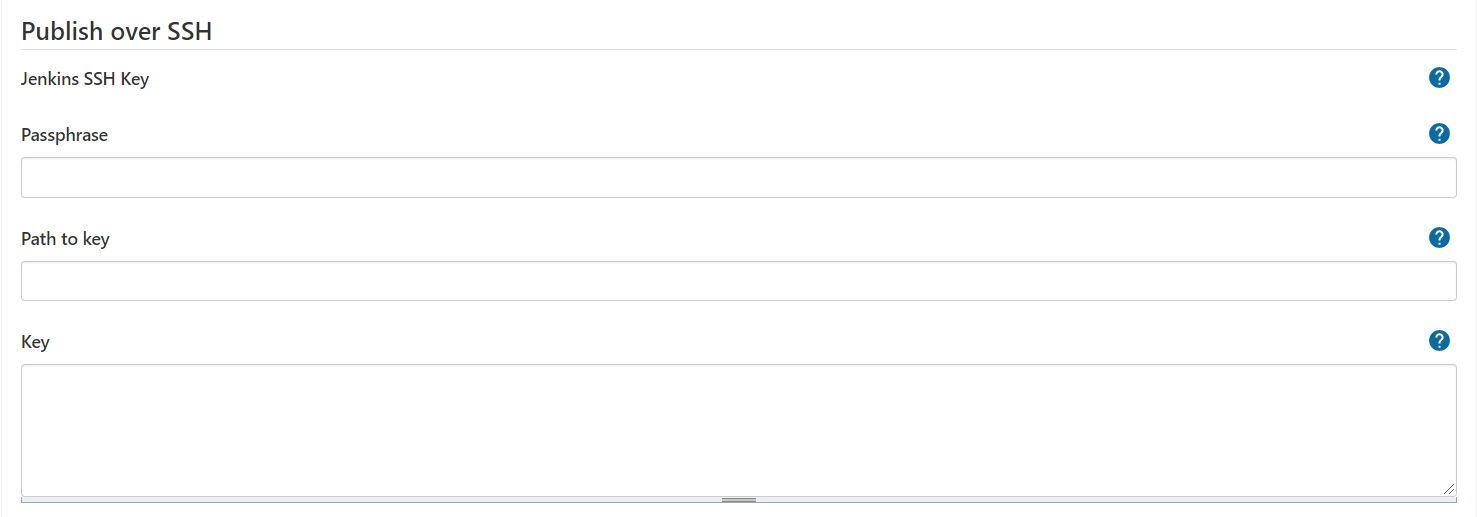
Each input box is used as follows:
Passphtase The file encryption secret key corresponding to the user's private key can be empty by default. Whether to fill it in is considered according to the actual situation.
Path to key The absolute or relative path of the file where the user's actual private key is located, and Key Consider both and choose one.
Key The actual content corresponding to the user's private key, and Path to key Choose one of the two.
Configure SSH service address:
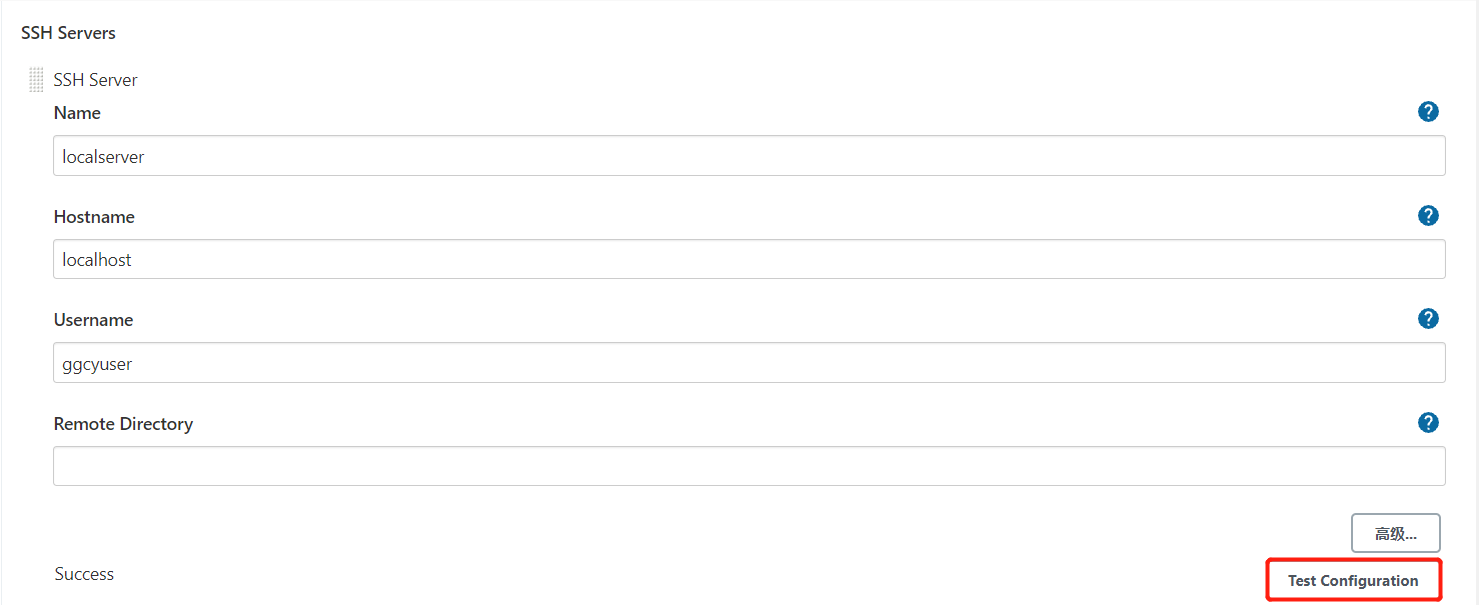
The purpose of the input box is as follows:
Name current SSH The name of the server configuration record is used as the unique identification of the record. Try not to duplicate the name.
Hostname  Generally, it belongs to the server IP,Other ports need to be specified through the advanced configuration level.
Username  When accessing the server remotely, the user name provided is generally the user name configured in advance by the server.
Remote Directory For remote access, if the access path is not the default access path, the user needs to specify it according to the actual needs( Windows For current drive letter only).
After confirming that the configuration is correct, click the Test Configuration button to test. The configuration is successful, as shown in the figure above, the returned result is Success.
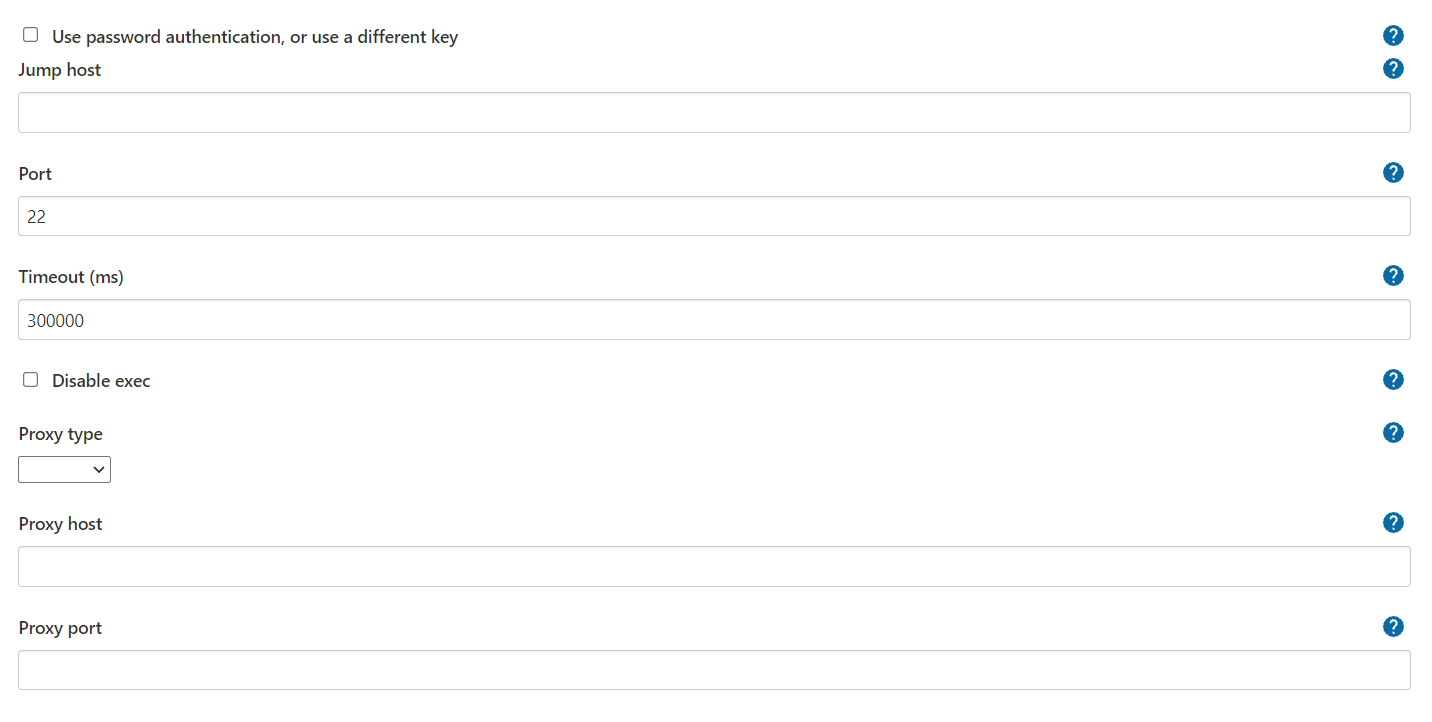
Advanced configuration
In advanced configuration, remote access through user name and password is supported. It also includes the relevant configuration when the ssh port of the server to be accessed is not port 22, as well as the input items of agent related configuration operations, which will not be discussed one by one here.
After the SSH Server configuration is correct, click save.
4.3. Add project configuration
Return to the target project, click the post build project, and select the Send build artifacts over SSH option. The effect is as follows:
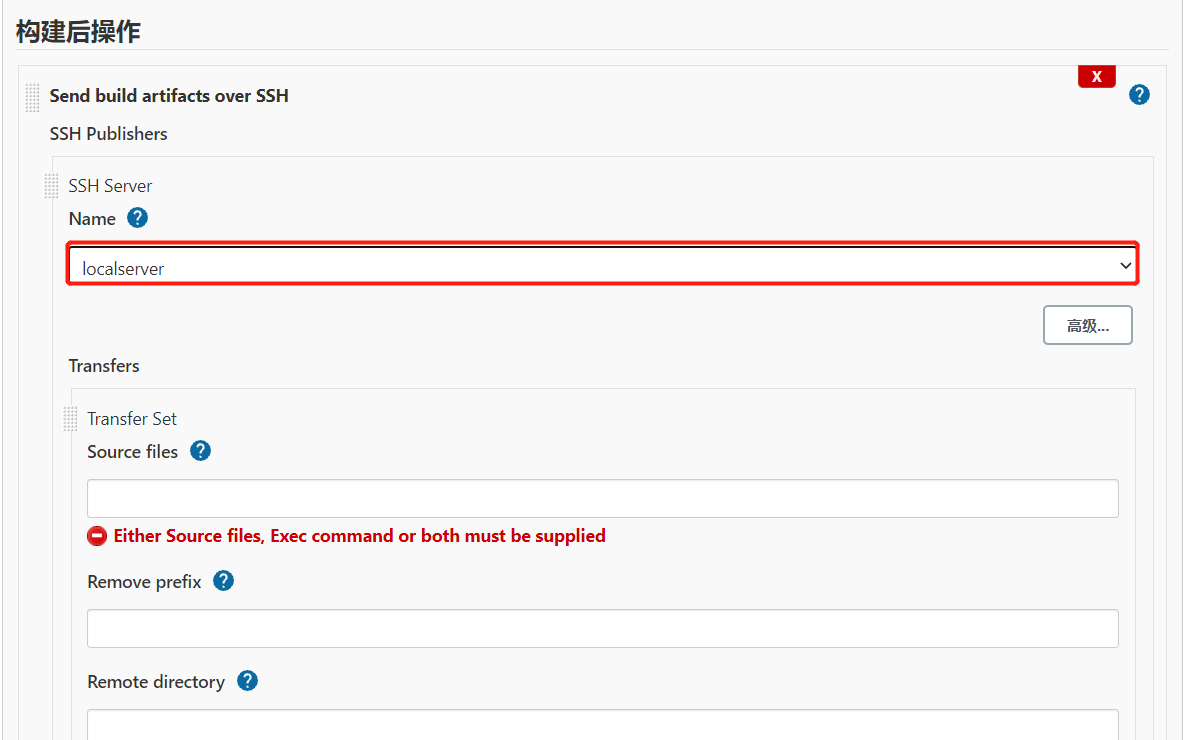
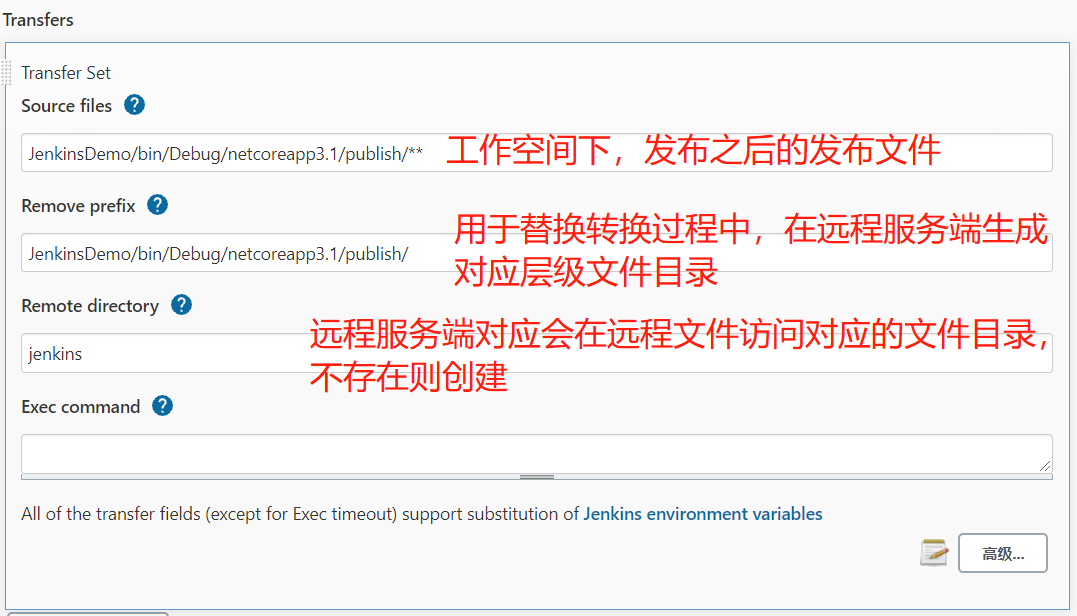
The purpose of the above conversion Transfers input is as follows:
Source files For files to be uploaded, you can use matching symbols to view the official documents.
Remove prefix Upload is a file prefix that needs to be removed to avoid generating the same directory level on the server when copying files.
Remote directory Upload to the corresponding file directory of the remote server.
Exec command  It is used to carry out subsequent instruction operations after conversion, which is convenient for subsequent construction processing operations.
Jenkins environment variables can be used to view the local address http://localhost:8060/env-vars.html /, the reader can view the relevant environment variables according to the actual deployment port. Reference link: https://plugins.jenkins.io/publish-over-ssh/
In advanced configuration, files to be excluded can be added to exclude uploaded files in the conversion process, * * indicates full-text matching.
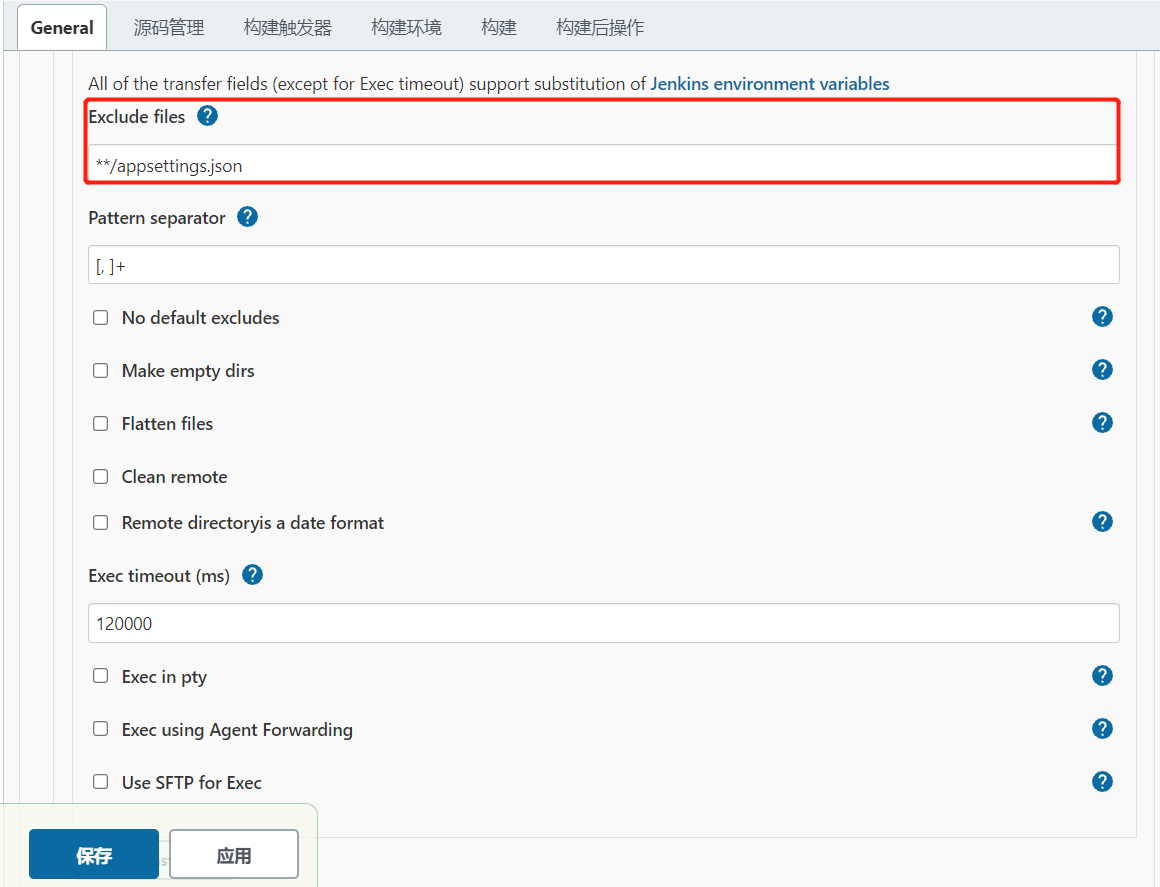
The author's case is as follows:
Click save after confirming that there is no. Go back to the project page, build immediately, and view the project console output as follows:
# Omit the above
C:\Windows\System32\config\systemprofile\AppData\Local\Jenkins\.jenkins\workspace\ynkenginemap\JenkinsDemo>exit 0
SSH: Connecting from host [LAPTOP-86GF4FKI]
SSH: Connecting with configuration [localserver] ...
SSH: Disconnecting configuration [localserver] ...
SSH: Transferred 7 file(s)
Finished: SUCCESS
Through xshell, you can see that a jenkins file directory has been generated in the corresponding working directory. The file directory contains the corresponding locally published project files.
C:\Users\ggcyuser>dir jenkins
 Driver C The volume in is Windows
 The serial number of the volume is 22 DB-1BE1

 C:\Users\ggcyuser\jenkins Directory of

2021/10/06  20:35    <DIR>          .
2021/10/06  20:35    <DIR>          ..
2021/10/06  20:35               168 appsettings.Development.json
2021/10/06  20:35           106,809 JenkinsDemo.deps.json
2021/10/06  20:35             9,216 JenkinsDemo.dll
2021/10/06  20:35           174,592 JenkinsDemo.exe
2021/10/06  20:35            20,016 JenkinsDemo.pdb
2021/10/06  20:35               three hundred and eleven JenkinsDemo.runtimeconfig.json
2021/10/06  20:35               555 web.config
               7 Files        311,667 byte
               2 Directories 34,109,632,512 Available bytes
At this time, readers may ask, what if the file directory that needs remote access is not the root directory where the current account is located?
In fact, this problem is handled by case, mainly for the default user directory and non default directory of the remote account.
Default user directory
The child directory switching in the default space can be handled through the configured SSH Servers. The following input fields are mentioned in configuring SSH Servers:
Remote Directory For remote access, if the access path is not the default access path, the user needs to specify it according to the actual needs( Windows For current drive letter only).
If users have actual needs, they can configure the directory of a specific directory in the current field. It should be noted that the author's test result is that the SSH Server method is only applicable to the drive letter of the Current Windows Server, and cross drive letter operation is not supported.
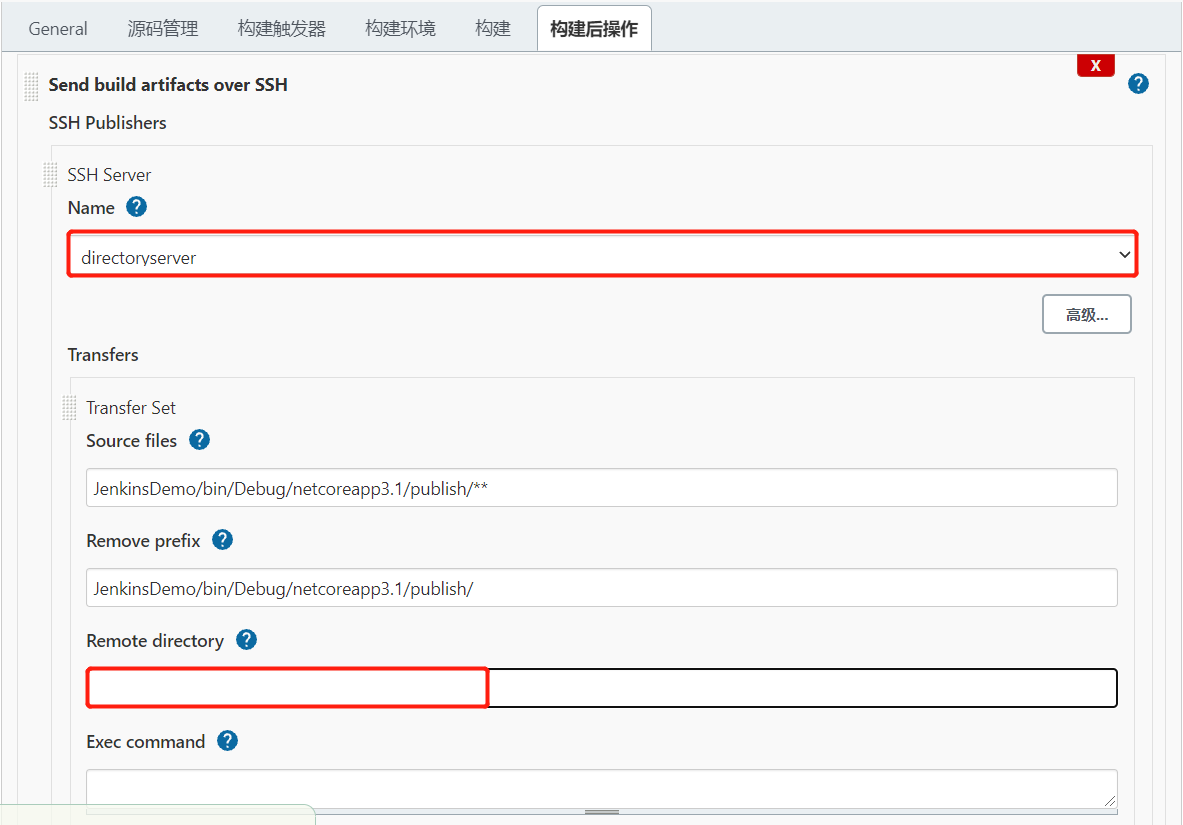
For convenience, the author selects a non default directory, sets it as jenkins in the server, and configures a new SSH Severs. The specific contents are as follows:
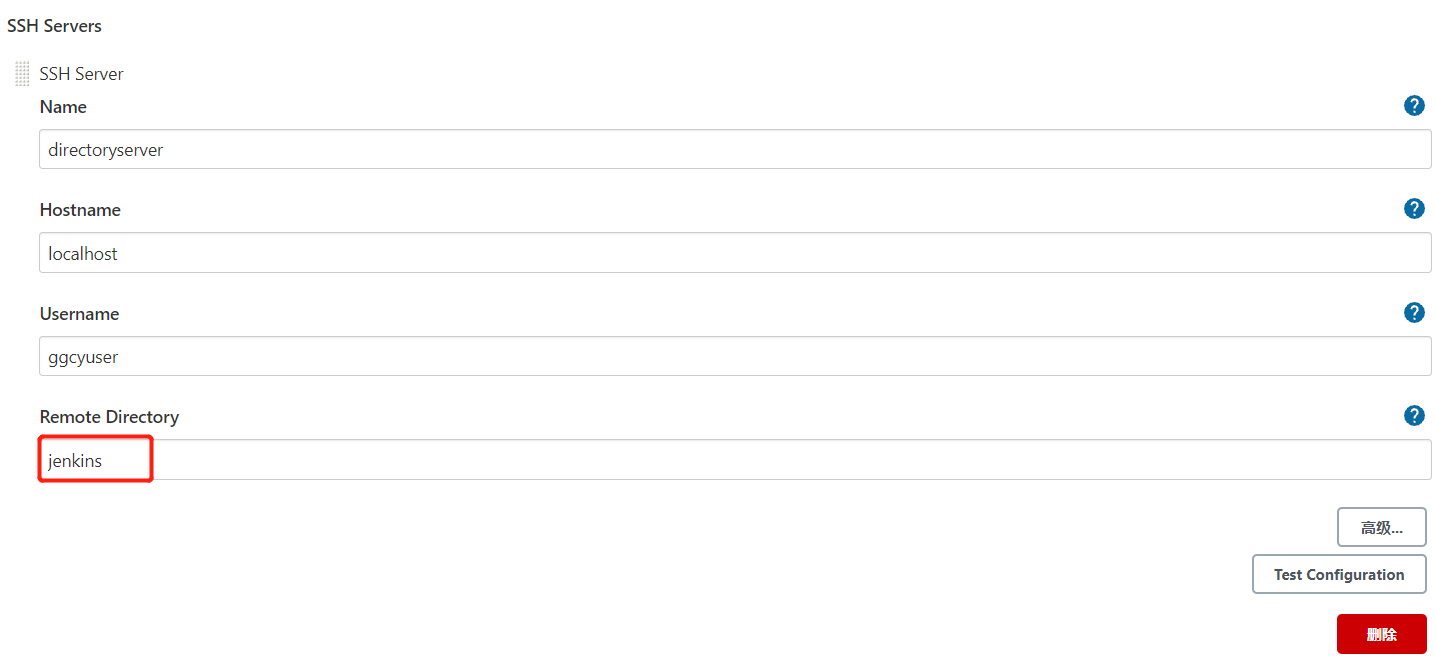
Modify the corresponding SSH Server in the project configuration to the currently configured directoryserver:
After saving, build, and the console output is as follows:
# Omit the above
C:\Windows\System32\config\systemprofile\AppData\Local\Jenkins\.jenkins\workspace\ynkenginemap\JenkinsDemo>exit 0
SSH: Connecting from host [LAPTOP-86GF4FKI]
SSH: Connecting with configuration [directoryserver] ...
SSH: Disconnecting configuration [directoryserver] ...
SSH: Transferred 7 file(s)
Finished: SUCCESS
Non default directory
Although the directory cannot be switched directly, it can be considered to copy the uploaded file to the specified directory through instructions after the file is uploaded. At this time, you need to use the Exec command input box to input the converted file and other processing operations.
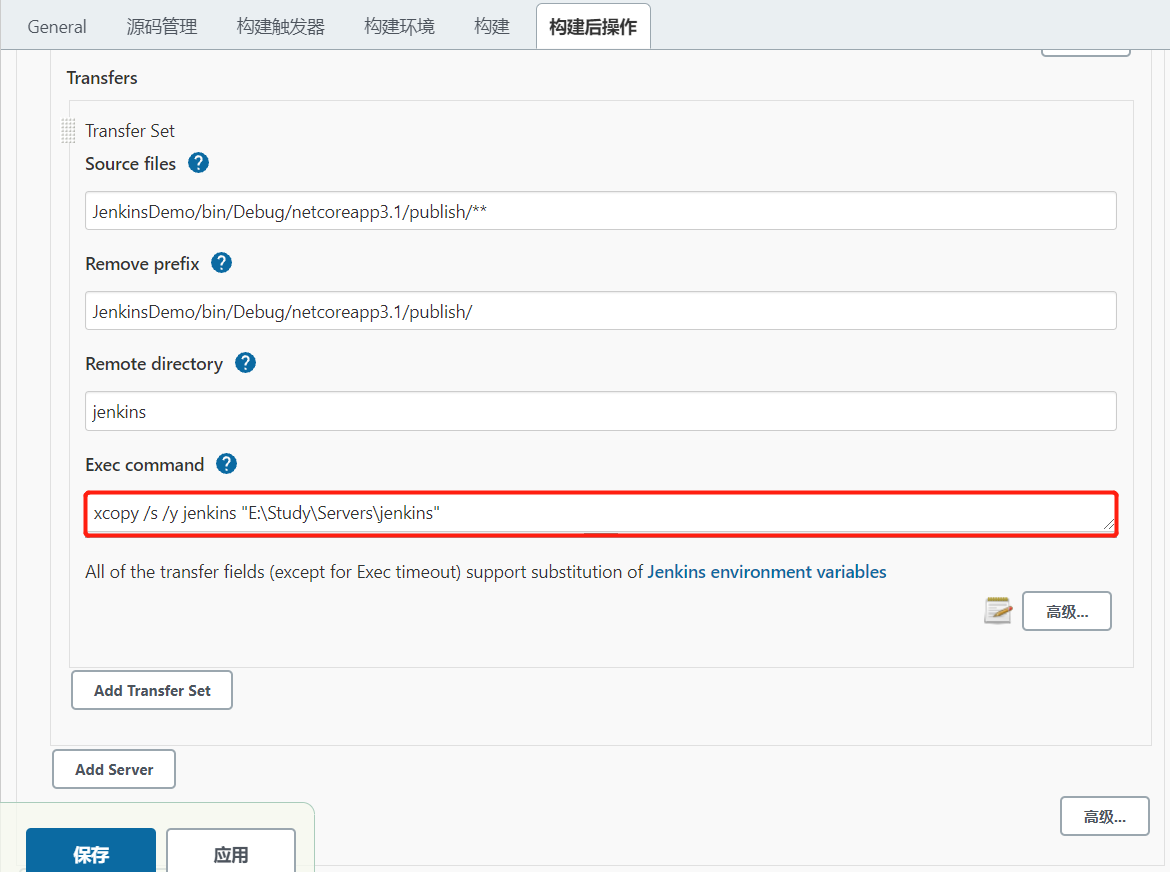
The current instruction xcopy /s /y jenkins "E:\Study\Servers\jenkins" means to copy and forcibly overwrite the target folder file when it exists. It can be used normally in xshell. After saving, run Build Now. View the console output results as follows:
# Omit the above
C:\Windows\System32\config\systemprofile\AppData\Local\Jenkins\.jenkins\workspace\ynkenginemap\JenkinsDemo>exit 0
SSH: Connecting from host [LAPTOP-86GF4FKI]
SSH: Connecting with configuration [localserver] ...
SSH: EXEC: completed after 201 ms
SSH: Disconnecting configuration [localserver] ...
SSH: Transferred 7 file(s)
Finished: SUCCESS
The above is the author's description of the operation and skills of the user-defined construction project.
2, Reference link
[1] Official documents:
https://www.jenkins.io/zh/doc/
[2] File directory copy:
https://blog.csdn.net/ak47007tiger/article/details/95749419
[3] Remote OpenSSH configuration:
https://blog.csdn.net/qq_28806349/article/details/120624802
https://blog.csdn.net/qq_28806349/article/details/120626333