Jenkins automated test (build) platform construction
Automated test process
Before building the platform, we should first ask ourselves: what are the functions of the platform I need to build and what goals do I want to achieve?
In my understanding, the execution process (goal) of the automated construction platform is:
- We submit the code to code hosting tools, such as github, gitlab, gitee, etc.
- Jenkins needs to be able to detect our submission.
- After Jenkins detects the submission, it will automatically pull the code, run the test, build and package it.
- After Jenkins performs the test and build, he sends the build results to the relevant personnel.
- Jenkins needs to be able to show us the analysis of the test run.
You can also add Automated Deployment -- adding successful builds to web containers.
Automated test setup
With a general goal, we can achieve it step by step.
Code warehouse construction
Common code hosting platforms include GitHub, Gitlab, Gitee, etc. I chose Gitlab.
Gitlab can be hosted on gitlab's website or set up a local gitlab warehouse.
For more stable access, I chose to build a gitlab warehouse on my alicloud server.
Steps:
-
Gitlab is installed on the server. It can be installed through the pagoda or manually. After installation, open the corresponding port to access gitlab.
-
Create an account, log in, and create a project
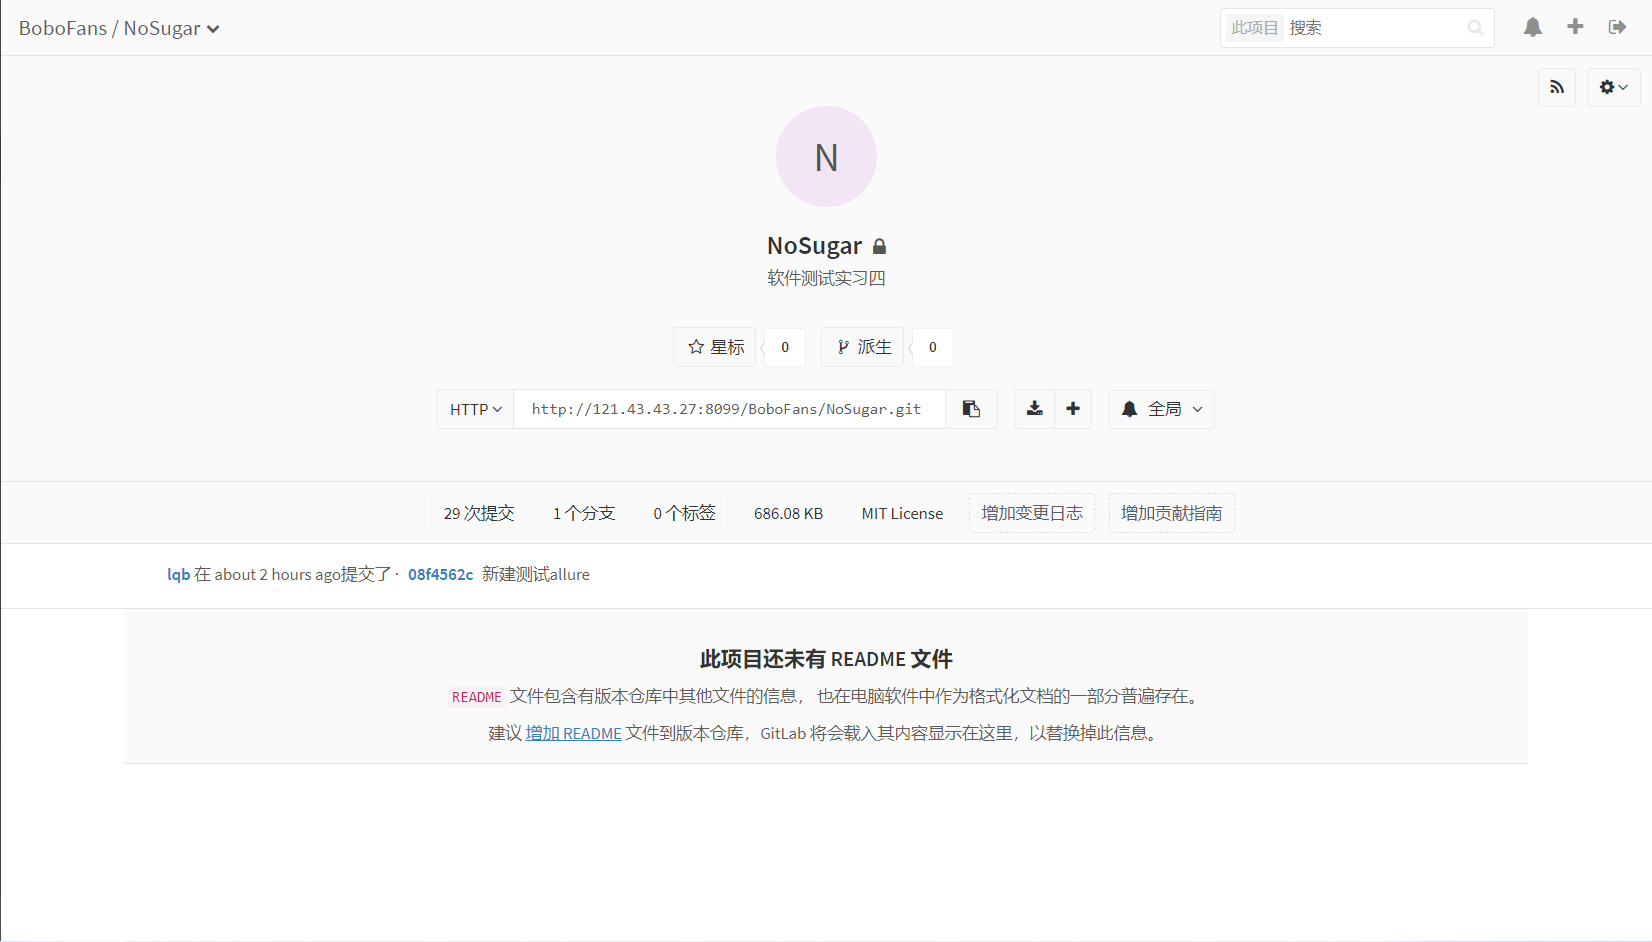
-
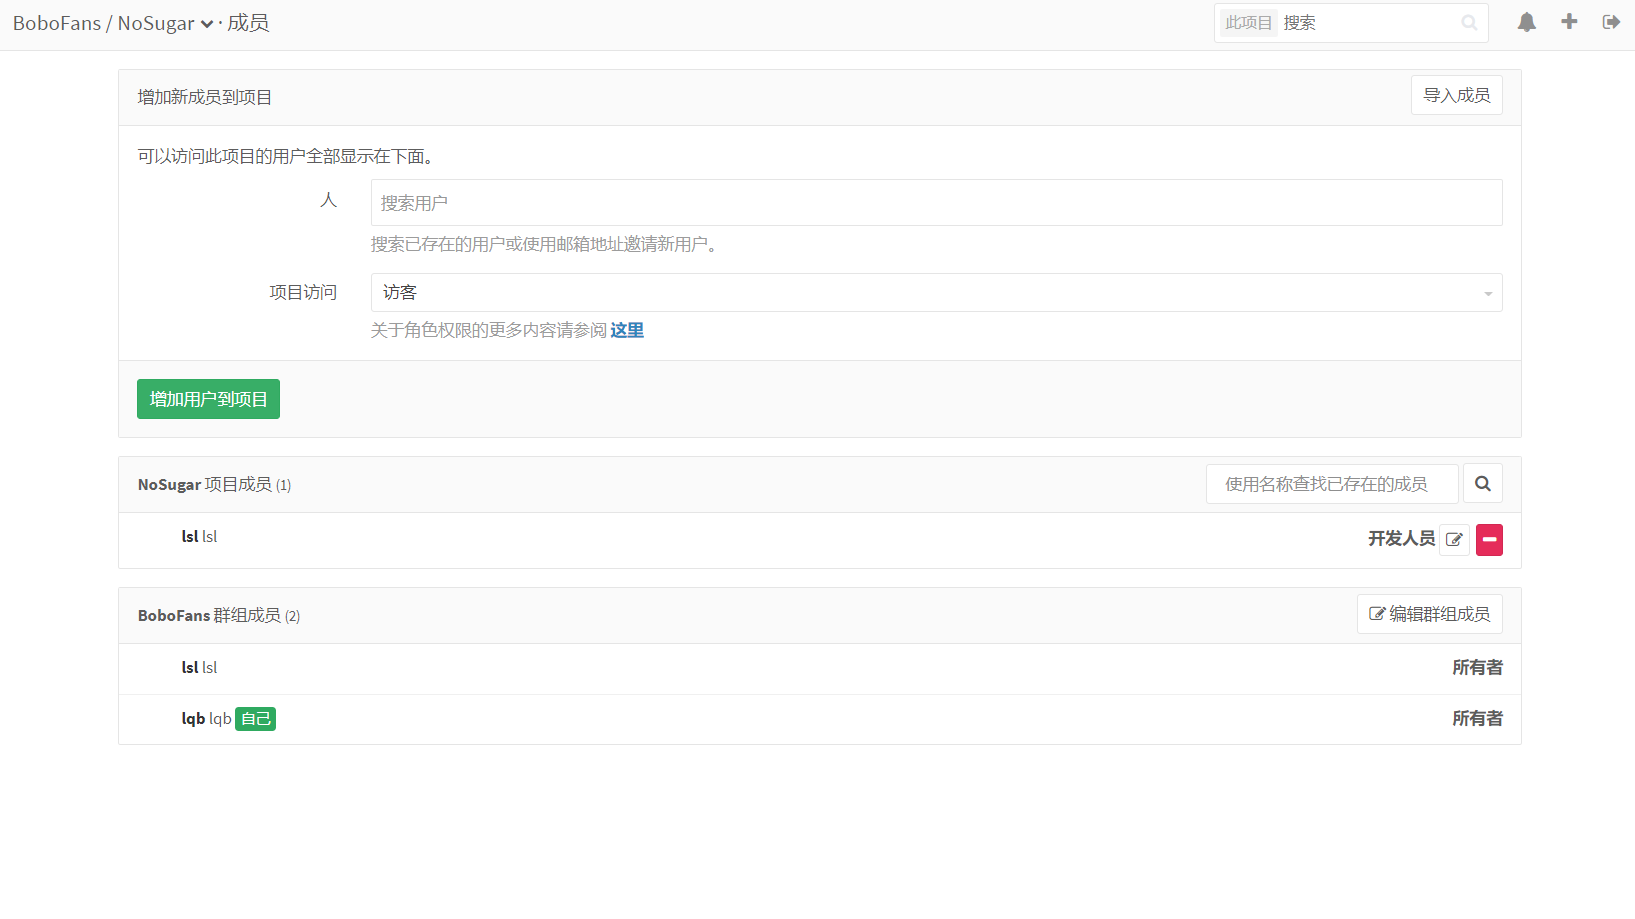
In order for us to submit code to the project, we need SSH authentication. Add the SSH public key of the local host to the remote project. In addition, if the remote project is private, add accessible user groups.

Jenkins installation
Download Jenkins' war package, put it in Tomcat's webapps path, and then restart Tomcat.
Open the corresponding port, and then you can access it.
When Jenkins starts for the first time, an administrator account and password will be generated. Be sure to remember.
Jenkins plug-in installation
Many plug-ins will be used in the following configuration process, which are listed here. It will not be explained during configuration.
Git ,GitLab ,Email Extension ,Allure Jenkins Plugin,Maven Integration plugin
Please refer to the blog: [Jenkins plug-in complete and purpose introduction]( (19 messages) introduction to jenkins plug-ins and their uses _pansaky's blog CSDN blog _jenkinsplug-ins)
Jenkins configuring maven
- Installing maven
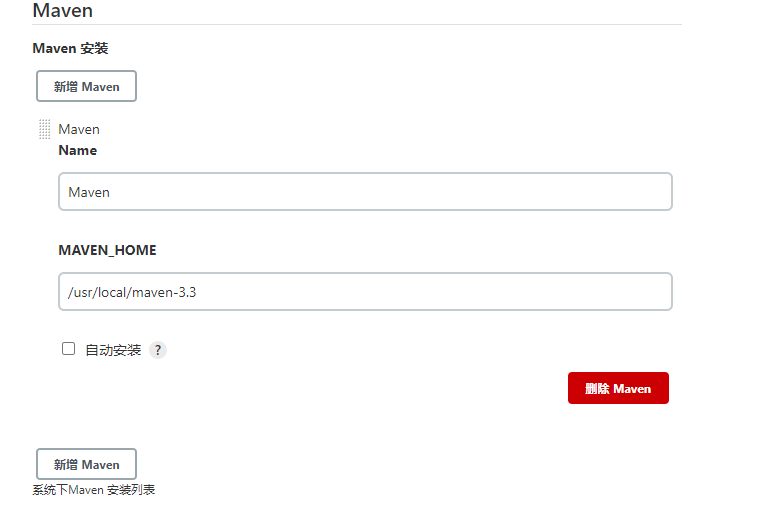
Add Maven in system management -- > global tool configuration. If Maven is already installed on the server, specify MAVEN_HOME.
If it is not installed, you can select the version and let Jenkins install it by himself.
-
Download maven plug-in
In system management - > plug-in management, search and install Maven Integration plugin.

-
Create a maven task

Jenkins association code warehouse
Add a code warehouse in the configuration -- > source code management of the maven task created above.
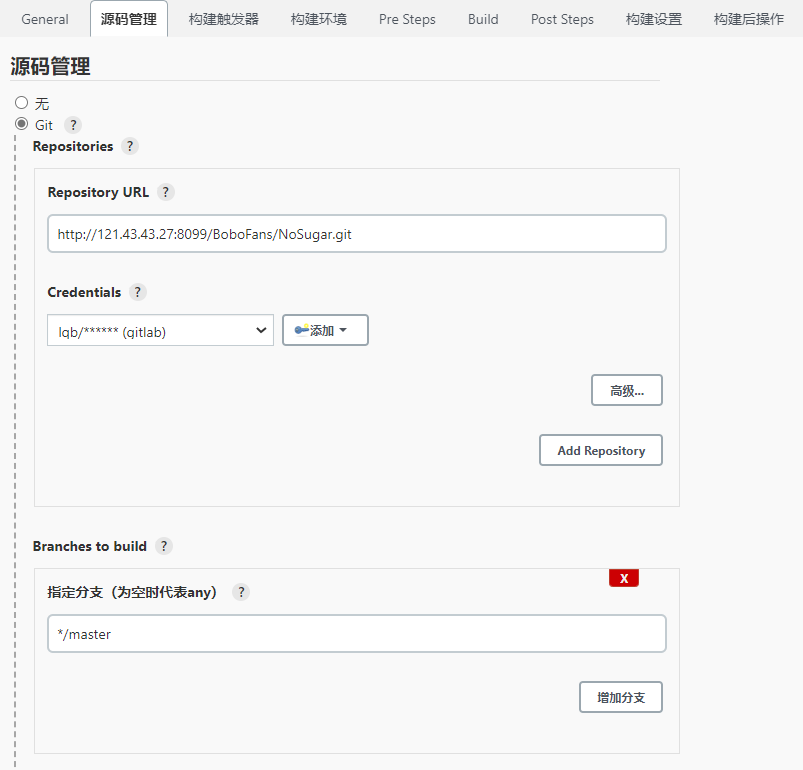
Here, you need to authenticate and add Credentials:
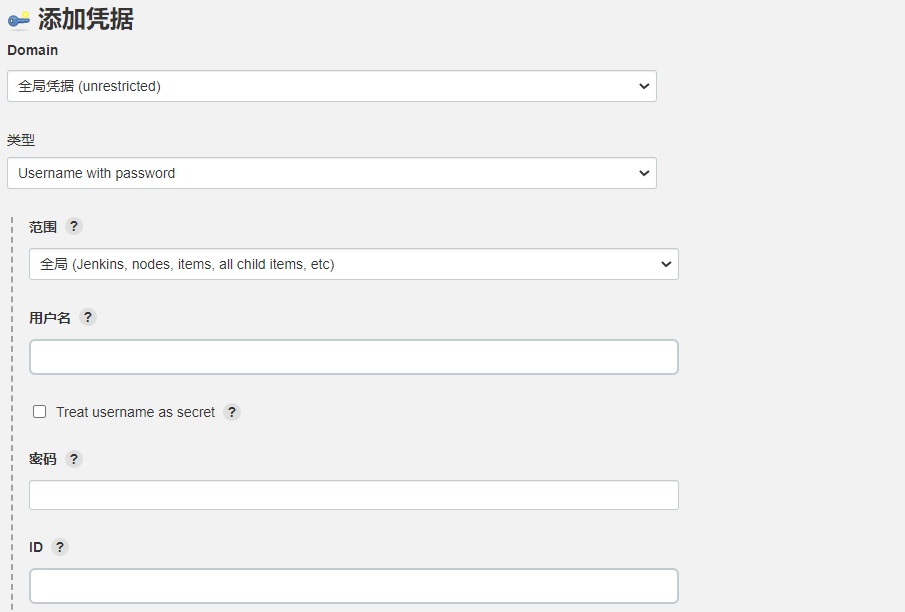
Enter the user name and password. Then select the Credential you just added.
In this way, we associate Jenkins to the code warehouse, and Jenkins can pull code from the code warehouse.
Gitlab commit triggers Jenkins auto build
-
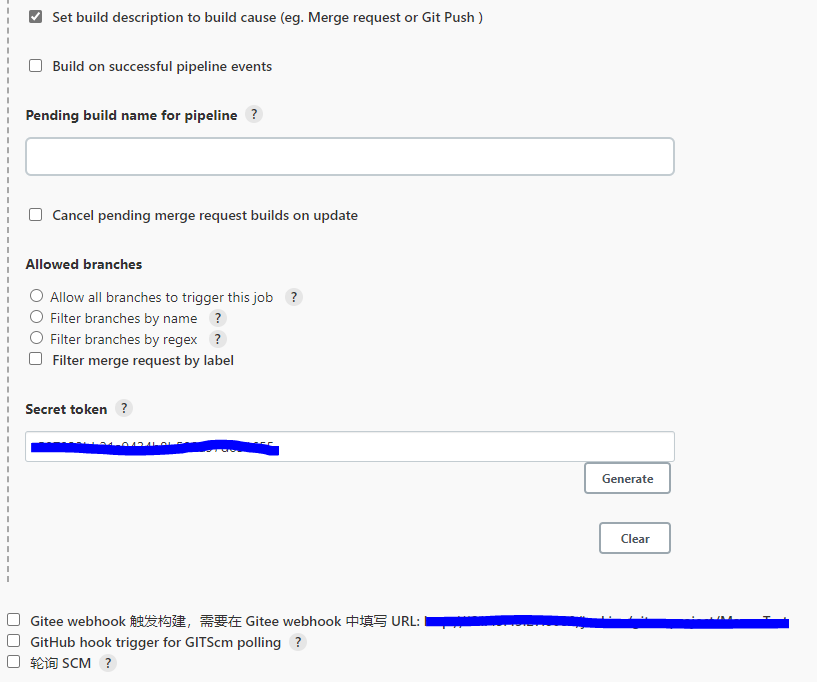
Configure Jenkins triggers
In configure -- > build trigger, select Build when a change is pushed to GitLab. GitLab webhook URL:***
This URL is used when configuring Gitlab hooks.
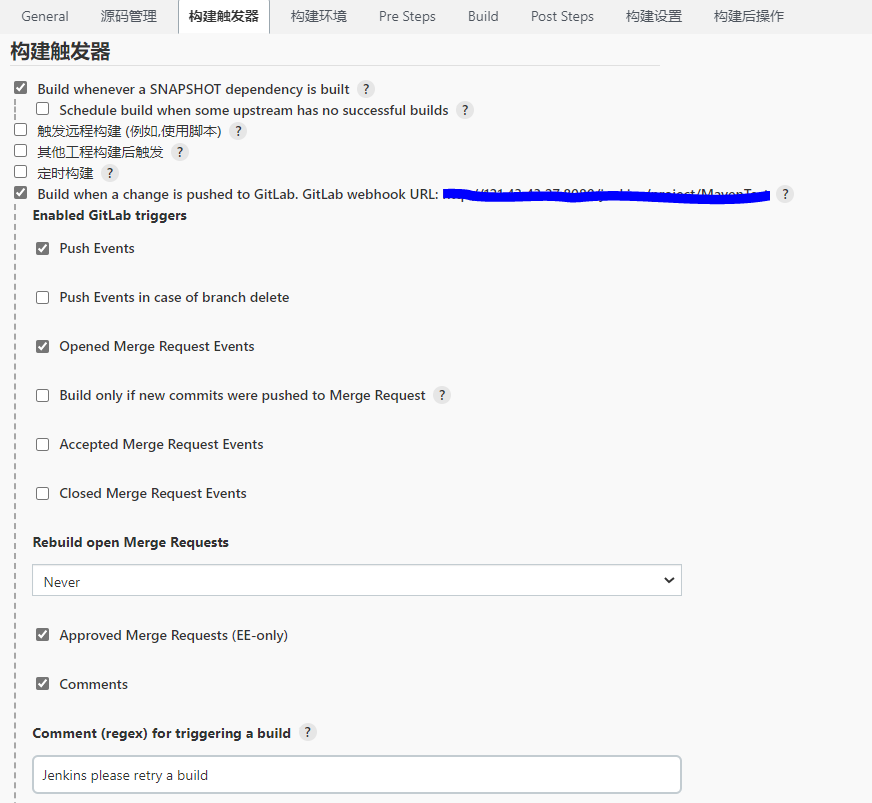
Continue. In the build trigger -- > advanced, click generate to generate a secret token.
This token is also used when configuring the web hook.

After configuration, click apply and save.
-
Configure Gitlab web hook
What is a web hook? It's like a fishhook when there's a 🐟 When you get there, just pull it.
We can configure a URL. When Gitlab detects an event (such as a new submission), it will send a message to the configured URL.
Fishing guy, don't sleep, there's a fish on the hook!
Enter the link of Jenkins trigger in the link, and enter the secret token for the private authorization code.
After configuring the hook, test it. If HTTP 200 is returned, it will be successful.
-
Configure Build
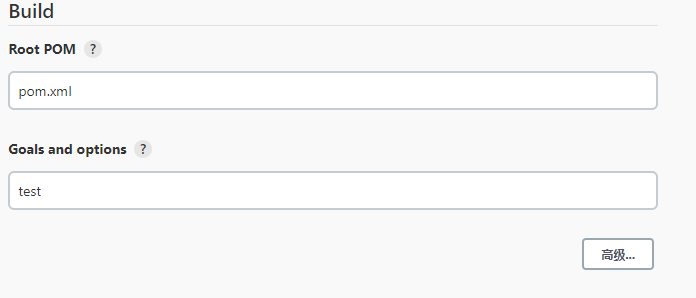
The above configuration completes the automatic drop-down of submitted code, but how to Build it, you also need to configure Build:
Since maven is used to build, the root pom uses the pom file of the maven project.
The following Goals and options are the instructions to be executed during construction. We want to run the test every time we build, so fill in the test instruction.
This is similar to how we execute the maven test instruction locally.
-
Test it
We have now completed the automatic build after gitlab submission to test:
Submit a test code to the gitlab repository. If it is successful, you should be able to see that the build is triggered: (I use the executed example)
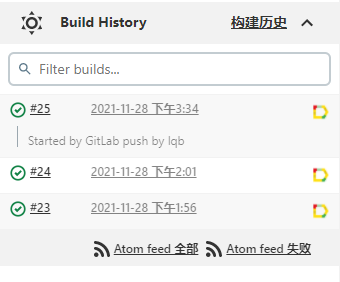
Then you can see the console output of the build:
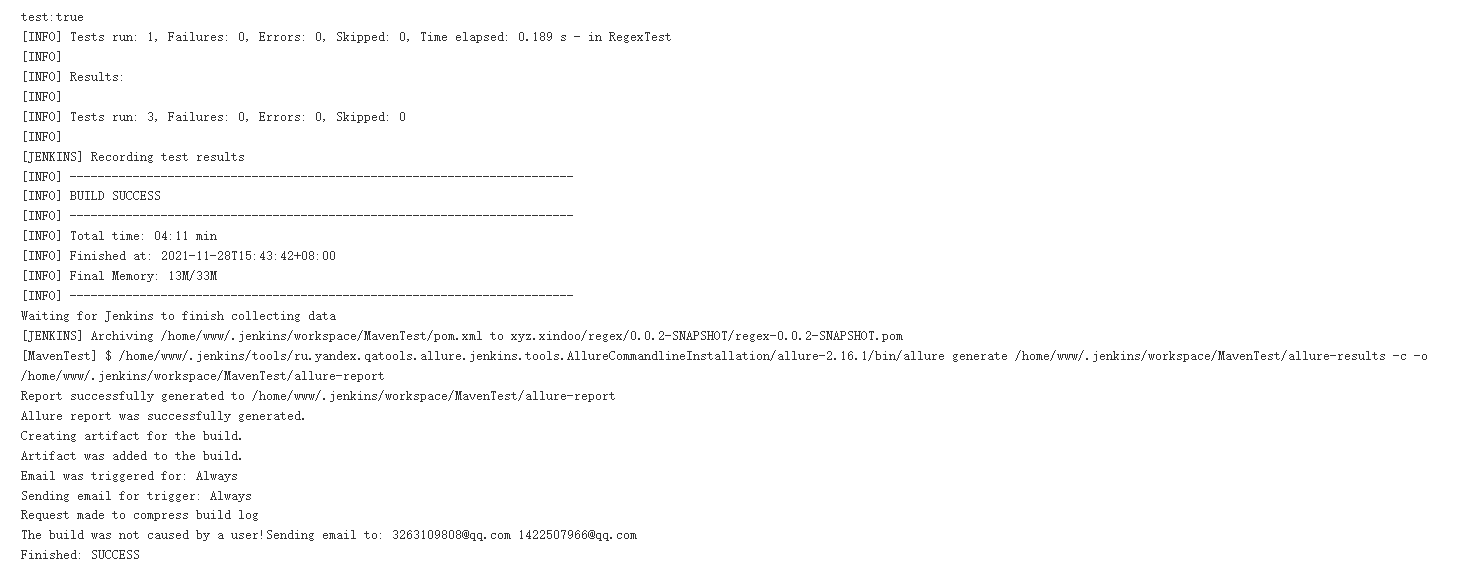
This represents the realization of our automatic build function.
Generate test report
I used Allure to generate test reports.
-
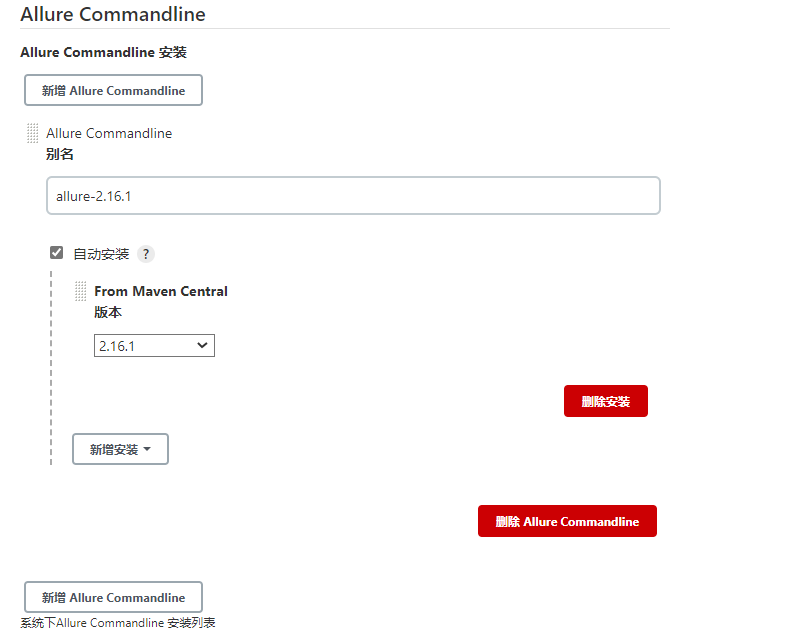
Install Allure Commandline
After we use the Allure project test, an allure results file will be generated, which records the test information.
The function of Allure Commandline is to parse these information and generate a visual web interface.
Similar to maven installation, you can specify a local or allow Jenkins to install it himself.
-
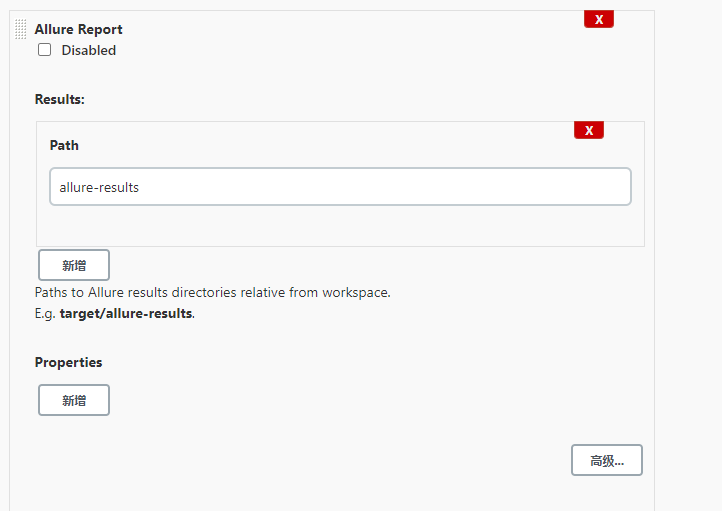
Configure post build actions
After Jenkins uses maven to build, in order to realize the visualization of test results, it is also necessary to configure Allure to collect test information.
You can add an Allure Report after it is built. The Path is filled with the location of the visualization page generated by Allure.
-
test
After adding Allure, you can see the visual test report when executing the test.
Note that in order for Allure to take effect, we need to add an Allure plug-in in our maven project, so that we can collect test information during testing.
Here is a working pom:
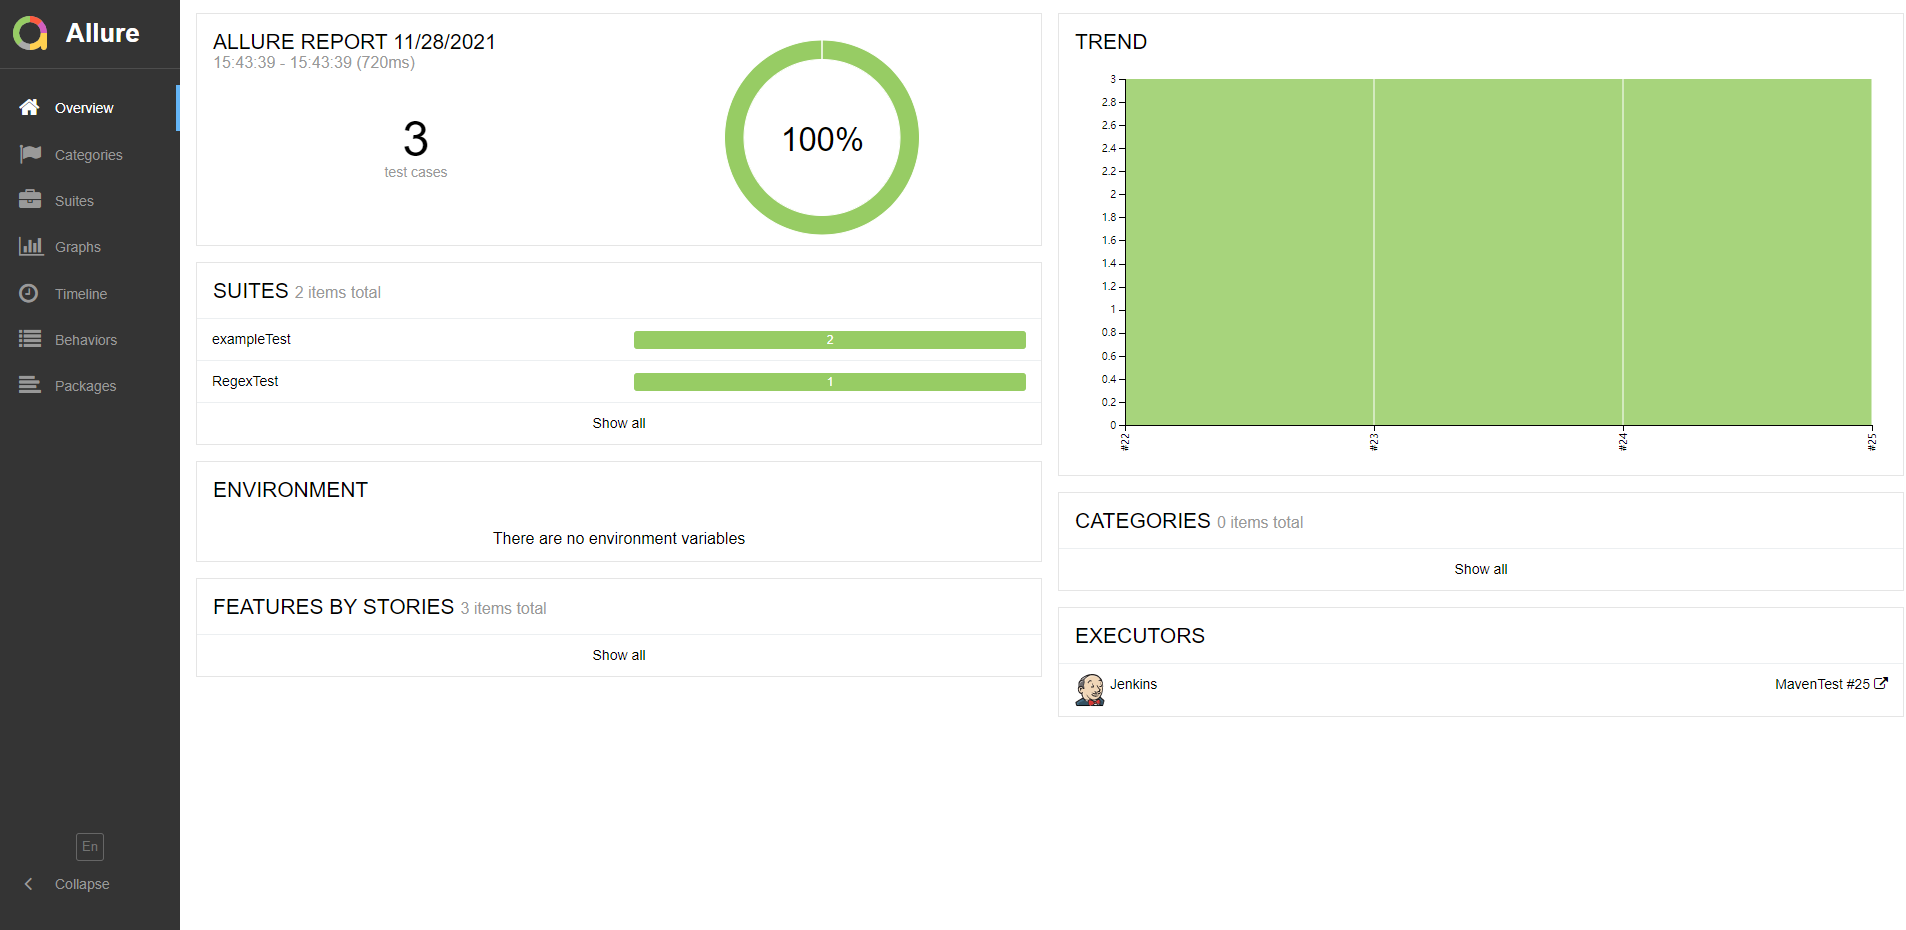
<properties>
        <project.build.sourceEncoding>UTF-8</project.build.sourceEncoding>
        <maven.compiler.target>1.8</maven.compiler.target>
        <maven.compiler.source>1.8</maven.compiler.source>
        <junit.version>5.7.1</junit.version>
        <aspectj.version>1.8.10</aspectj.version>
    </properties>

    <dependencies>
        <dependency>
            <groupId>javax.servlet</groupId>
            <artifactId>javax.servlet-api</artifactId>
            <version>4.0.1</version>
            <scope>provided</scope>
        </dependency>
        <dependency>
            <groupId>org.junit.jupiter</groupId>
            <artifactId>junit-jupiter-api</artifactId>
            <version>${junit.version}</version>
            <scope>test</scope>
        </dependency>
        <!--        allure-->
        <dependency>
            <groupId>io.qameta.allure</groupId>
            <artifactId>allure-junit5</artifactId>
            <version>RELEASE</version>
            <scope>test</scope>
        </dependency>

        <dependency>
            <groupId>org.junit.jupiter</groupId>
            <artifactId>junit-jupiter-engine</artifactId>
            <version>${junit.version}</version>
            <scope>test</scope>
        </dependency>
    </dependencies>

    <build>
        <plugins>
            <plugin>
                <groupId>org.apache.maven.plugins</groupId>
                <artifactId>maven-war-plugin</artifactId>
                <version>3.3.1</version>
            </plugin>
            <plugin>
                <artifactId>maven-surefire-plugin</artifactId>
                <version>2.22.1</version>
                <configuration>
                    <testFailureIgnore>false</testFailureIgnore>
                    <argLine>
                        -javaagent:"${settings.localRepository}/org/aspectj/aspectjweaver/${aspectj.version}/aspectjweaver-${aspectj.version}.jar"
                    </argLine>
                    <systemProperties>
                        <property>
                            <name>junit.jupiter.extensions.autodetection.enabled</name>
                            <value>true</value>
                        </property>
                    </systemProperties>
                </configuration>
                <dependencies>
                    <dependency>
                        <groupId>org.junit.platform</groupId>
                        <artifactId>junit-platform-surefire-provider</artifactId>
                        <version>1.2.0</version>
                    </dependency>
                    <dependency>
                        <groupId>org.aspectj</groupId>
                        <artifactId>aspectjweaver</artifactId>
                        <version>${aspectj.version}</version>
                    </dependency>
                </dependencies>
            </plugin>
            <plugin>
                <groupId>io.qameta.allure</groupId>
                <artifactId>allure-maven</artifactId>
                <version>2.10.0</version>
                <configuration>
                    <reportVersion>2.4.1</reportVersion>
                </configuration>
            </plugin>
        </plugins>
    </build>
push the project that uses Allure. After construction, the Allure Report file will be generated:
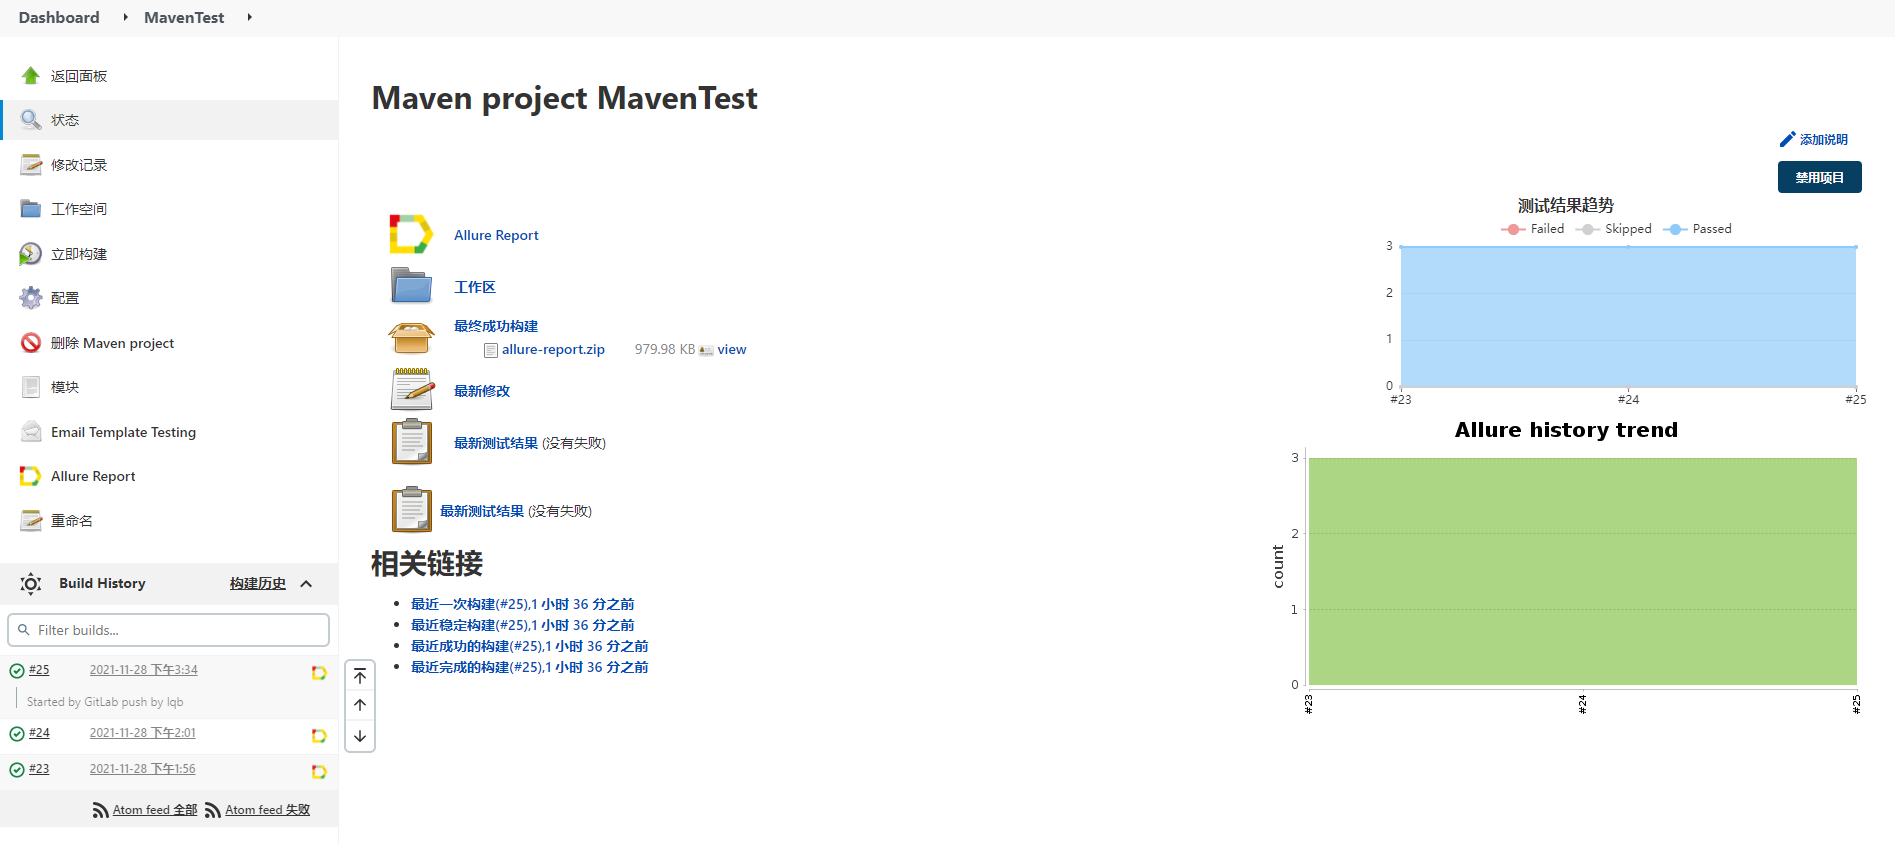
Click to view the Allure Report file:
Email notification
The last step! Configure email notification, send email to relevant personnel after construction, and report the construction status.
-
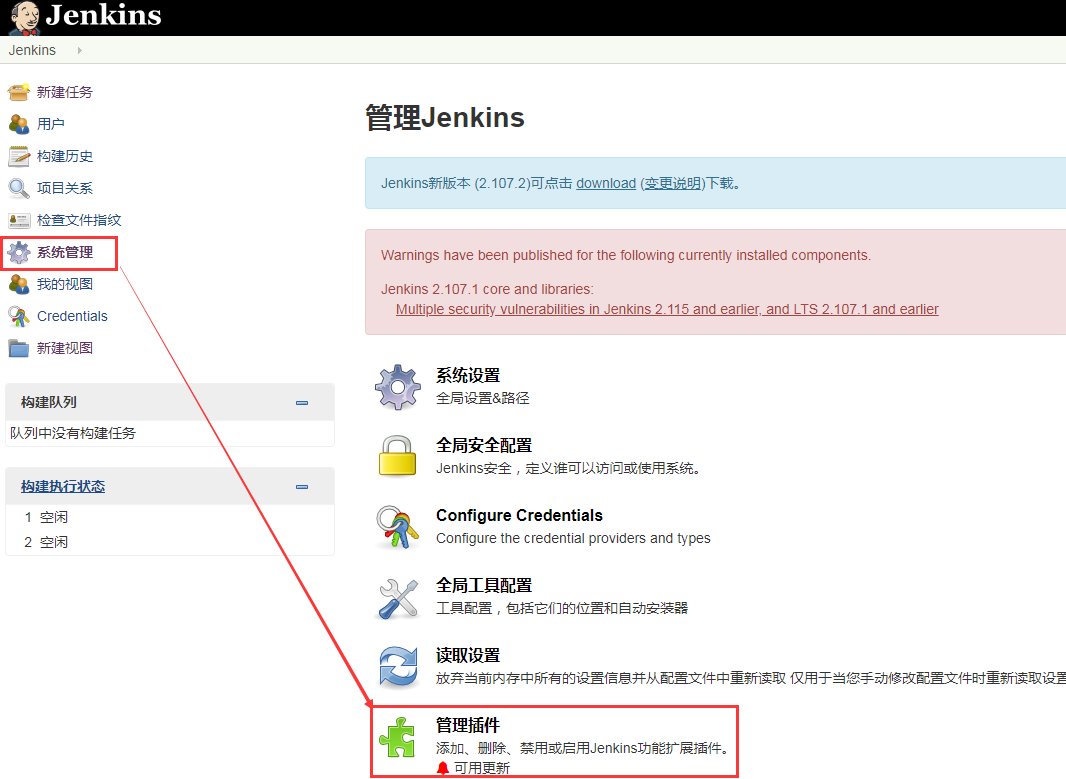
Install mail plugin
Since Jenkins' built-in e-mail function is weak, it is recommended to install a special e-mail plug-in here, but the following will also introduce how to configure Jenkins' built-in e-mail function.
You can select Email Extension Plugin plug-in through system management → management plug-in → optional plug-in to install:
-
Configure mail
It can be configured either in system management - > system settings or in work settings. It just means that the configuration under system settings is global.
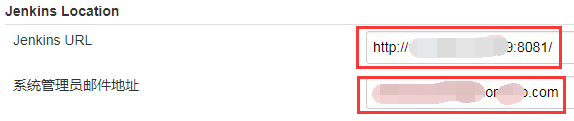
- Set jenkins address and administrator email address
-
Set sender and other information
PS: the sender's e-mail address here should be consistent with the e-mail address of the system administrator (of course, a special sender's e-mail can also be set, but it does not affect the use. It can be set according to the specific situation)
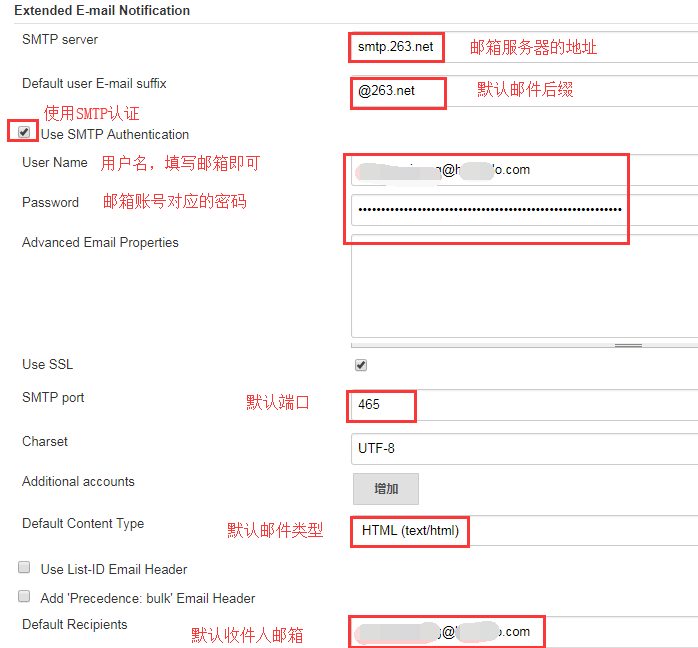
Multiple people can be added to the default recipient mailbox in the figure above, separated by English half width commas.
-
Configure message content template
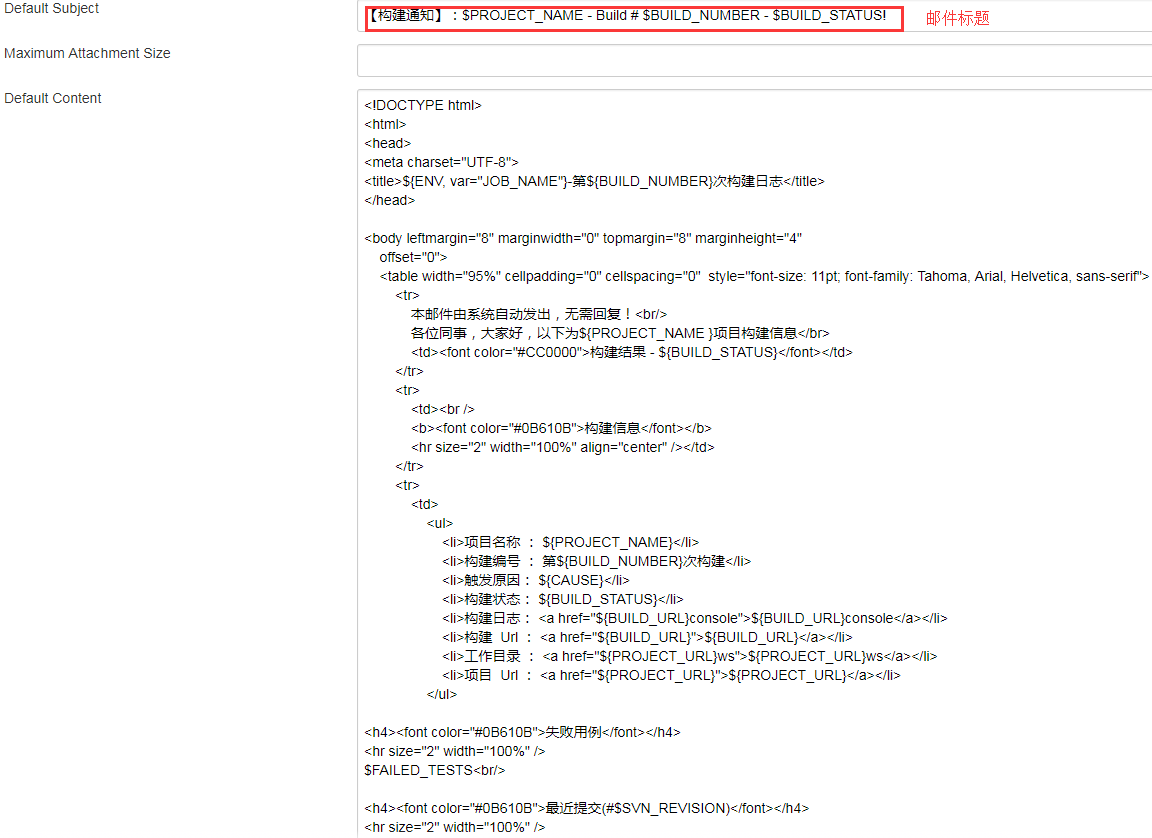
<!DOCTYPE html> <html> <head> <meta charset="UTF-8"> <title>${ENV, var="JOB_NAME"}-The first ${BUILD_NUMBER}Secondary build log</title> </head> <body leftmargin="8" marginwidth="0" topmargin="8" marginheight="4" offset="0"> <table width="95%" cellpadding="0" cellspacing="0" style="font-size: 11pt; font-family: Tahoma, Arial, Helvetica, sans-serif"> <tr> This email is sent automatically by the system without reply!<br/> Hello, colleagues, the following is ${PROJECT_NAME }Project construction information</br> <td><font color="#CC0000 "> build result - ${build_status} < / font ></td> </tr> <tr> <td><br /> <b><font color="#0b610b "> build information < / font ></b> <hr size="2" width="100%" align="center" /></td> </tr> <tr> <td> <ul> <li>Project Name: ${PROJECT_NAME}</li> <li>Build No.: page ${BUILD_NUMBER}Secondary construction</li> <li>Trigger reason: ${CAUSE}</li> <li>Build status: ${BUILD_STATUS}</li> <li>Build log: <a href="${BUILD_URL}console">${BUILD_URL}console</a></li> <li>structure Url : <a href="${BUILD_URL}">${BUILD_URL}</a></li> <li>Working directory: <a href="${PROJECT_URL}ws">${PROJECT_URL}ws</a></li> <li>project Url : <a href="${PROJECT_URL}">${PROJECT_URL}</a></li> <li>system allure Test report:<a href="${PROJECT_URL}${BUILD_NUMBER}/allure">${PROJECT_URL}${BUILD_NUMBER}/allure</a></li> </ul> <h4><font color="#0b610b "> failure case < / font > < / H4 > <hr size="2" width="100%" /> $FAILED_TESTS<br/> <h4><font color="#0B610B">Recently submitted(#$GIT_REVISION)</font></h4> <hr size="2" width="100%" /> <ul> ${CHANGES_SINCE_LAST_SUCCESS, reverse=true, format="%c", changesFormat="<li>%d [%a] %m</li>"} </ul> Detailed submission: <a href="${PROJECT_URL}changes">${PROJECT_URL}changes</a><br/> </td> </tr> </table> </body> </html> -
Set mail trigger mechanism
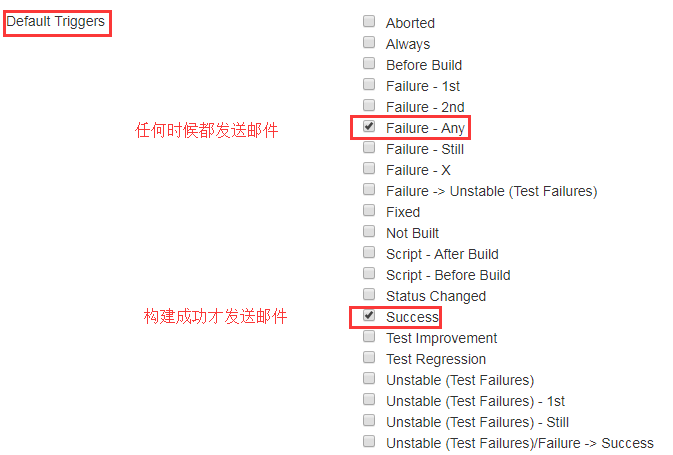
After the above steps are completed, click apply and save.
-
Configure Jenkins' built-in mail function
The configuration contents are as follows. The configuration is the same as that of the Email Extension Plugin. You can check the test configuration by sending test Mail button to test whether the configuration successfully sends mail, as shown in the following figure:

After completing the above system settings, click save.
-
Configure post build operation module
Enter the post build operation module, and then you will see the following contents. The specific configuration information is marked in the figure:
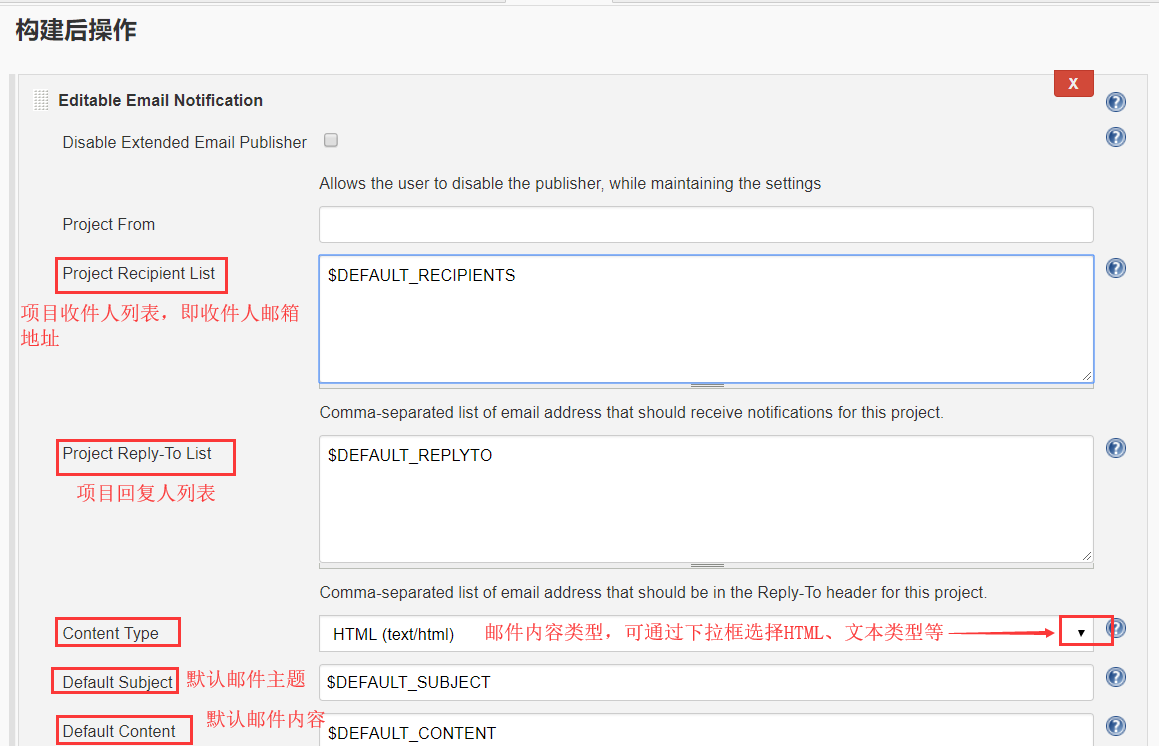
Connected to the above figure:
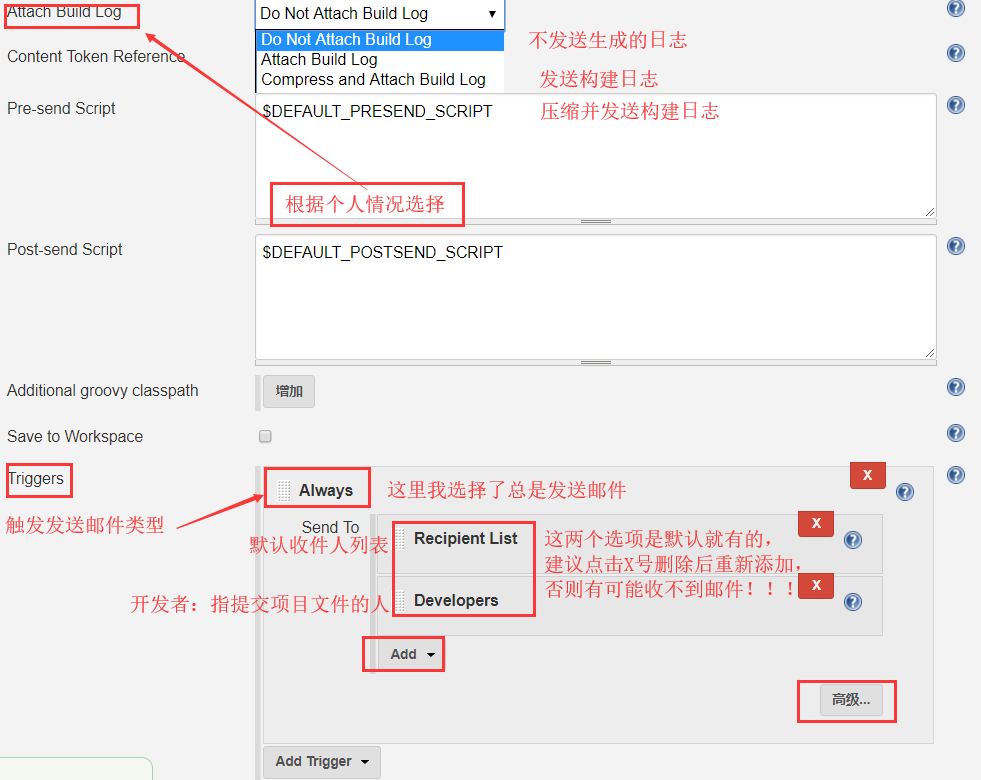
You can configure the content by default. The mail content type can be selected according to your own configuration. The recipient list can be configured from the default recipient option in the previous system settings.
-
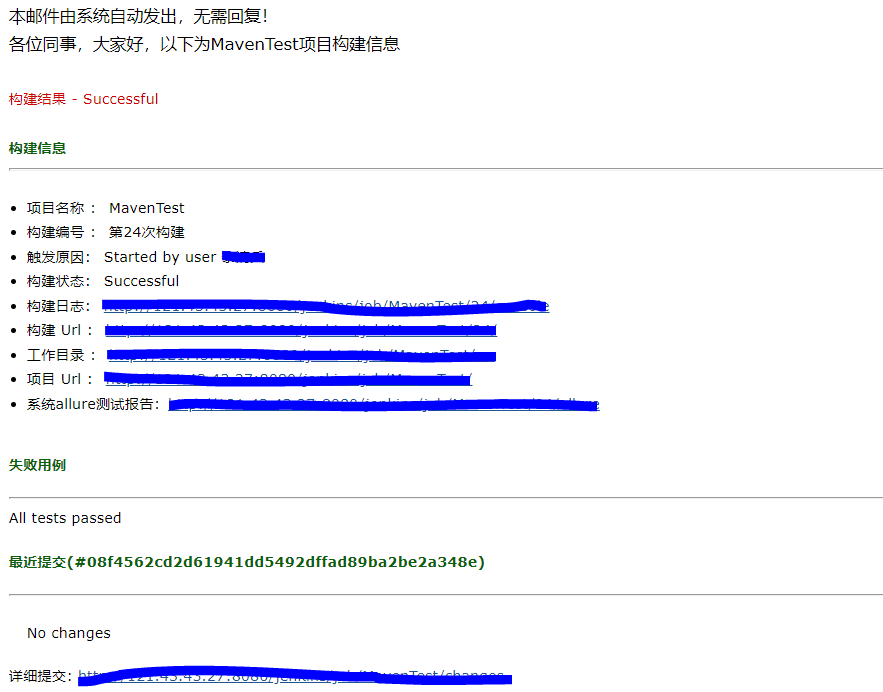
test
After building, you should receive an email:
Understanding of Jenkins
I don't have time to write. I'll have time to make it up later (that's no more).
Reference reference
Mail section: Lao Zhang
The process of building the platform also refers to the blogs of many bloggers, which are not recorded one by one. Thank the bloggers for their blog posts.
This blog is more like resource integration, but there are many places not mentioned. Welcome to add!
Can be reproduced, but please quote!