1, Simple entry level tree menu implementation (pure background logic)
1. Introduction
(1) Development environment
IDEA + JDK1.8 + mysql 1.8
SpringBoot 2.2.6 + mybatis-plus
Here, it is only developed in the background (json data is returned), which will be explained in the subsequent presentation of the front page.
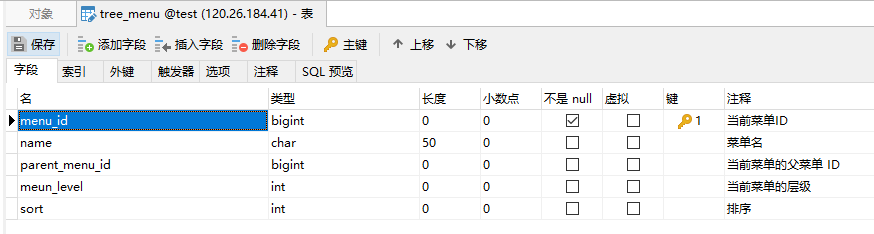
(2) Data sheet
As follows, for reference only, fields such as modification time, creation time and logical deletion can be added.
DROP DATABASE IF EXISTS test;

CREATE DATABASE test;

USE test;

/* Menu used to test the tree (take products for example) */
CREATE TABLE tree_menu(
    menu_id             bigint NOT NULL AUTO_INCREMENT COMMENT "Current menu ID",
    name                char(50) COMMENT "menu name",
    parent_menu_id      bigint COMMENT "Parent menu of the current menu ID",
    meun_level          int COMMENT "Current menu level",
    sort                int COMMENT "sort",
    PRIMARY KEY (menu_id)
) ENGINE=InnoDB DEFAULT CHARSET=utf8mb4 COMMENT="Tree menu";
(3) Insert test data
For data visualization, insert data as follows, and each piece of data represents a menu bar.
Note:
Parent menu menu ID starts from 0, which means the first level menu (no parent menu).
The menu level starts from 1, where 1 represents the first level menu and 2 represents the second level menu.
INSERT INTO tree_menu(menu_id, name, parent_menu_id, meun_level, sort)
VALUES
    (1, 'Kitchen utensils', 0, 1, 0),
        (2, 'tool', 1, 2, 0),(3, 'Cooking tools', 1, 2, 0),(4, 'tableware', 1, 2, 0),
          (5, 'Kitchen knife', 2, 3, 0),(6, 'scissors', 2, 3, 0),(7, 'Fruit knife', 2, 3, 0),
          (8, 'Frying pan', 3, 3, 0),(9, 'Pressure cooker', 3, 3, 0),(10, 'Pan', 3, 3, 0),
          (11, 'chopsticks', 4, 3, 0),(12, 'bowl', 4, 3, 0),(13, 'Fruit tray', 4, 3, 0),

    (14, 'Household Electric Appliances', 0, 1, 0),
        (15, 'Big appliances', 14, 2, 0),(16, 'Household appliances', 14, 2, 0),
          (17, 'television', 15, 3, 0),(18, 'Computer', 15, 3, 0),(19, 'Washing machine', 15, 3, 0),(20, 'Refrigerator', 15, 3, 0),
          (21, 'electric fan', 16, 3, 0),(22, 'Vacuum cleaner', 16, 3, 0),(23, 'Water dispenser', 16, 3, 0),(24, 'Humidifier', 16, 3, 0),

    (25, 'Digital', 0, 1, 0),
        (26, 'Camera photography', 25, 2, 0),(27, 'Video entertainment', 25, 2, 0),(28, 'Education and learning', 25, 2, 0),
          (29, 'Digital camera', 26, 3, 0),(30, 'SLR camera', 26, 3, 0),(31, 'video camera', 26, 3, 0),(32, 'Polaroid', 26, 3, 0),
          (33, 'MP3/MP4/MP5/PSP', 27, 3, 0),(34, 'Loudspeaker box', 27, 3, 0),(35, 'Microphone', 27, 3, 0),
          (36, 'Student tablet', 28, 3, 0),(37, 'Repeater', 28, 3, 0),(38, 'Electronic dictionary', 28, 3, 0),(39, 'Point reader', 28, 3, 0)
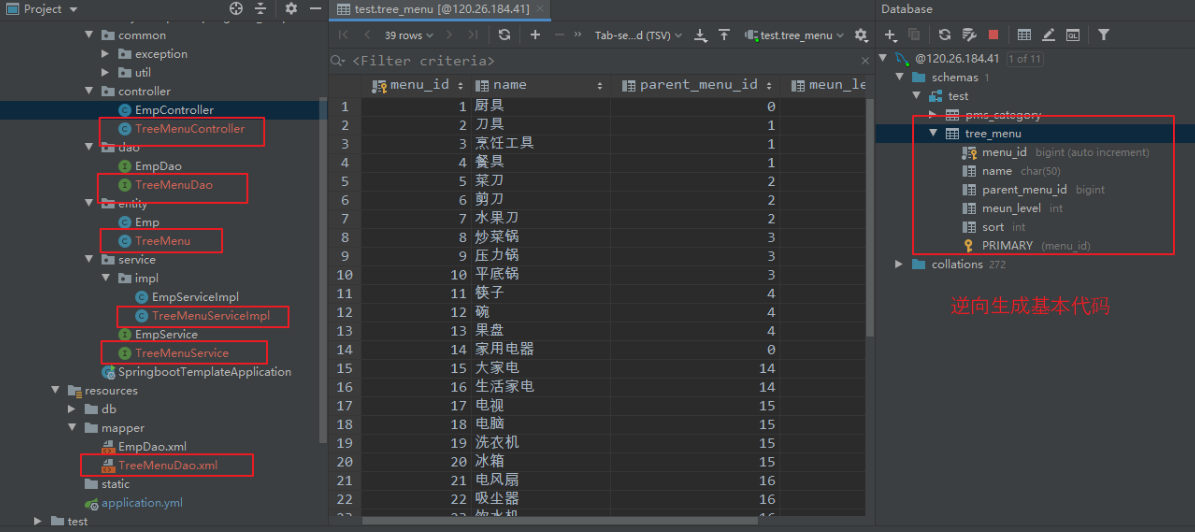
2. Building a basic development environment
(1) Use the Easycode plug-in to reverse generate the relevant code from the data table.
Reference address:
https://www.cnblogs.com/l-y-h/p/12781586.html#_label0_2
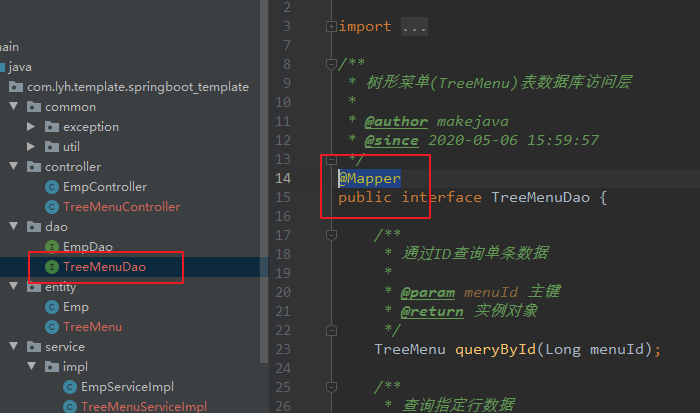
(2) Test whether the code can be called successfully.
Step 1: annotate treemenuedao with @ Mapper.
Step 2: start the service and access treemeucontroller.
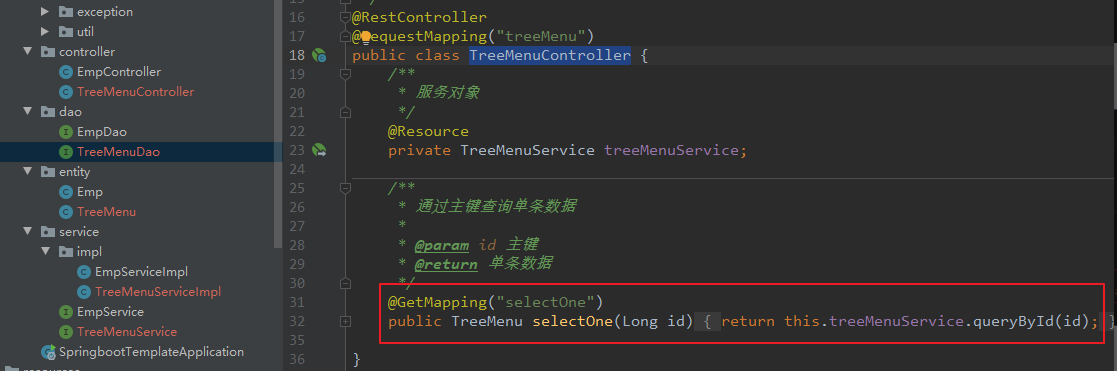
Step 3: visit http://localhost:9000/treeMenu/selectOne?id=1. If the query is successful, the code generated in reverse is OK.

3. Implement tree menu (return json data)
(1) Implementation ideas:
Each record contains the current menu ID and the parent menu ID of the current menu.
To find out the tree structure of the menu, you can implement it according to these two ID s.
Ideas:
First, query all the menu data from the database at one time.
Then navigate to the first level menu and recursively traverse all its submenus.
(2) Query all data at once.
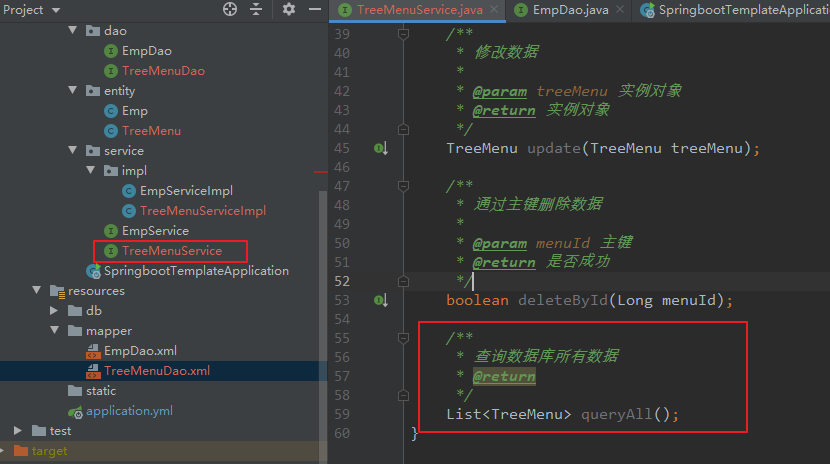
Step 1: add a method to query all data in the service.
/**
 * Query all data in the database
 * @return
 */
List<TreeMenu> queryAll();
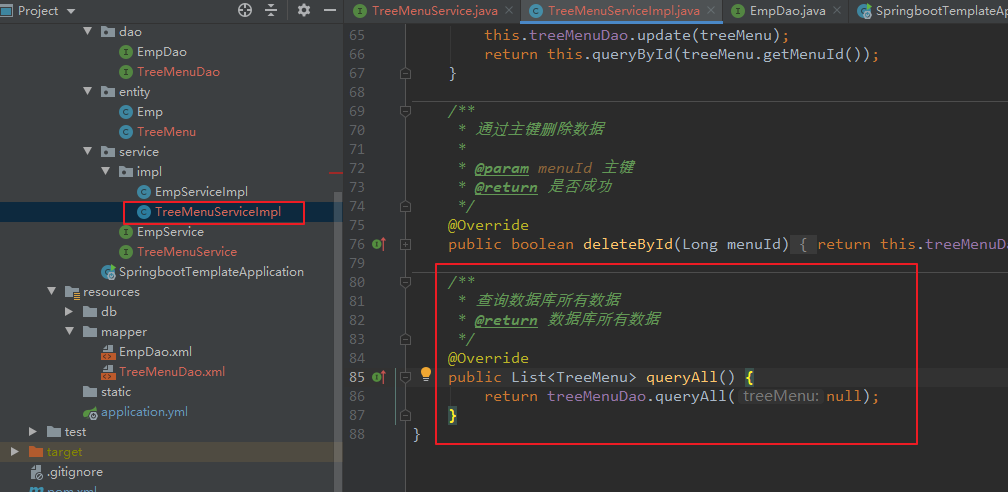
Step 2: override this method in the implementation class of service.
/**
 * Query all data in the database
 * @return All data in the database
 */
@Override
public List<TreeMenu> queryAll() {
    return treeMenuDao.queryAll(null);
}
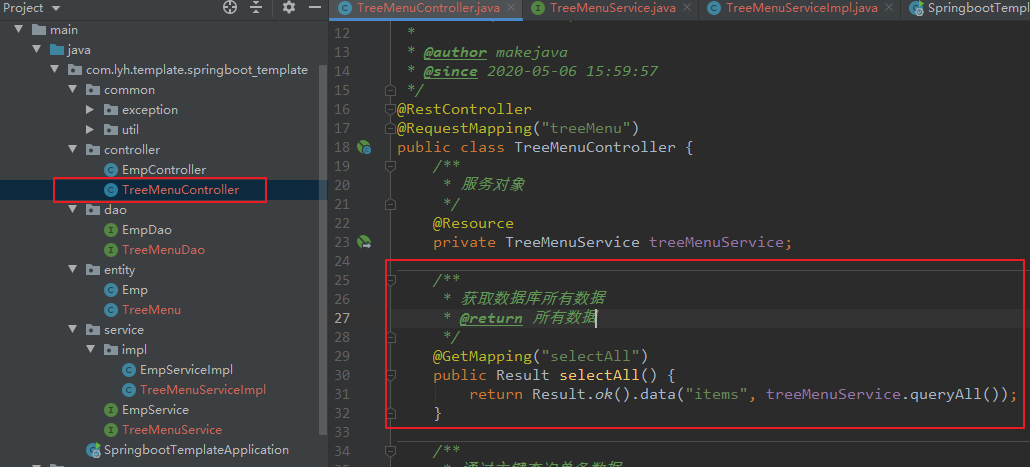
Step3: modify the controller and call the method.
/**
 * Get all data in the database
 * @return All data
 */
@GetMapping("selectAll")
public Result selectAll() {
    return Result.ok().data("items", treeMenuService.queryAll());
}
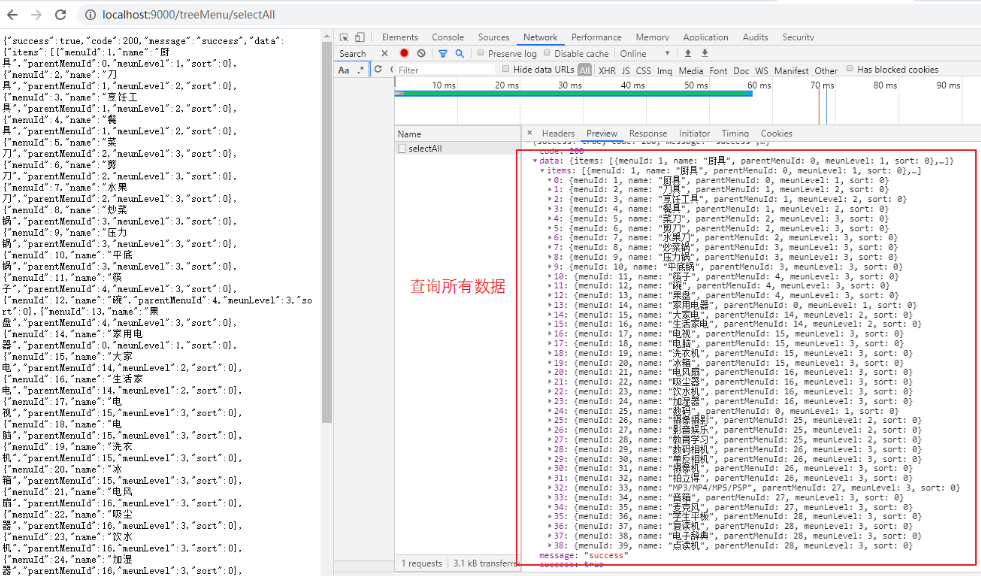
Step 4: start the service, access. Open the console, and you can see the returned json data.
(3) Process the query data and return the json data in tree form.
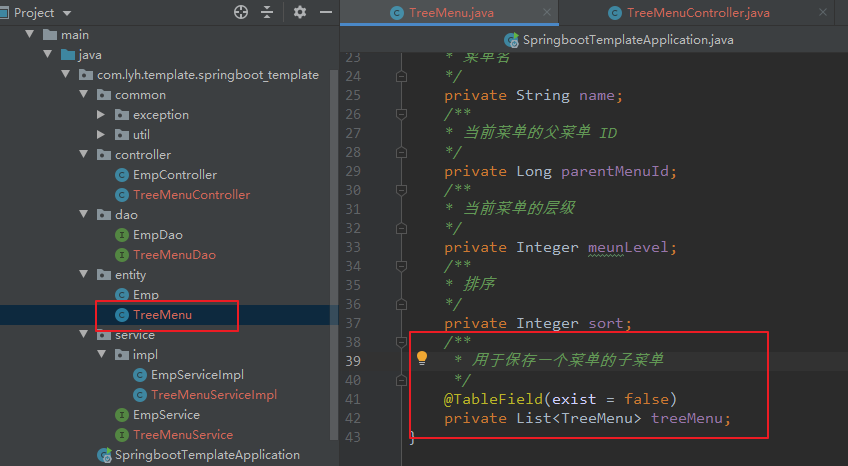
Step 1: for the menu entity class, add an entity class attribute to save its submenu data.
/**
 * Submenu for saving a menu
 */
@TableField(exist = false)
private List<TreeMenu> treeMenu;
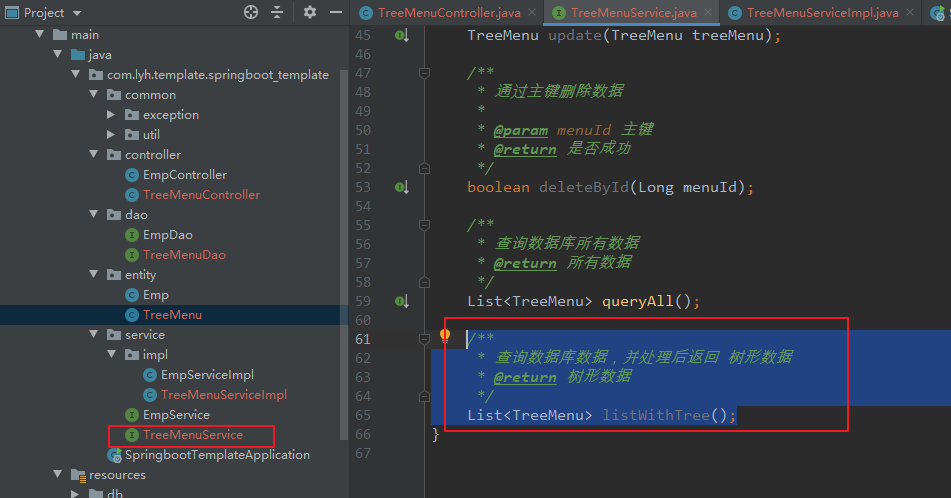
Step 2: add a method in the service to query all data and return the tree json.
/**
 * Query database data and return tree data after processing
 * @return Tree data
 */
List<TreeMenu> listWithTree();
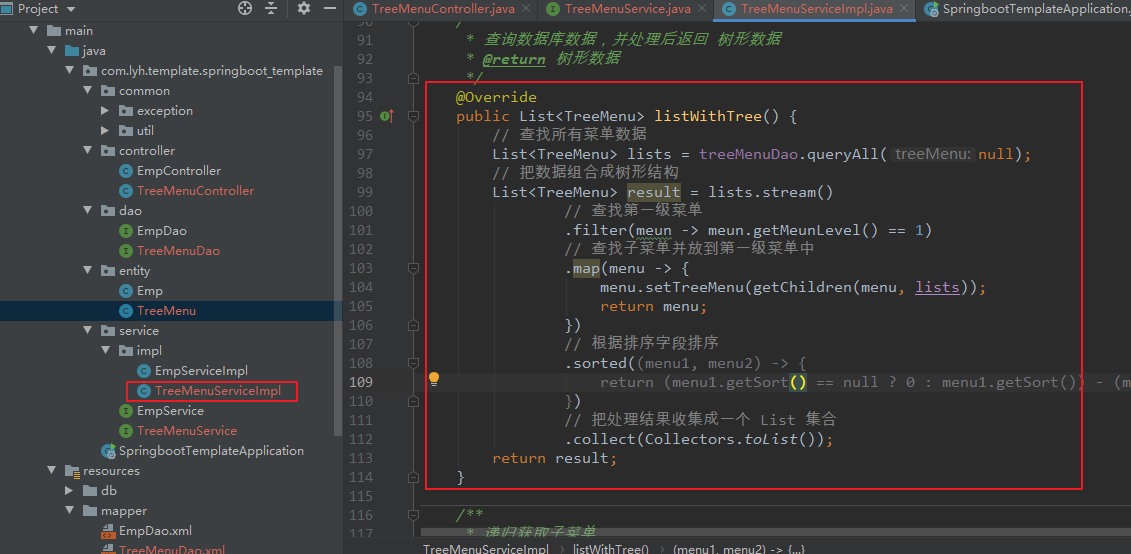
Step 3: override this method in the implementation class of service.
/**
 * Query database data and return tree data after processing
 * @return Tree data
 */
@Override
public List<TreeMenu> listWithTree() {
    // Find all menu data
    List<TreeMenu> lists = treeMenuDao.queryAll(null);
    // Combine data into a tree structure
    List<TreeMenu> result = lists.stream()
            // Find first level menu
            .filter(meun -> meun.getMeunLevel() == 1)
            // Find the submenu and put it in the first level menu
            .map(menu -> {
                menu.setTreeMenu(getChildren(menu, lists));
                return menu;
            })
            // Sort by sort field
            .sorted((menu1, menu2) -> {
                return (menu1.getSort() == null ? 0 : menu1.getSort()) - (menu2.getSort() == null ? 0 : menu2.getSort());
            })
            // Gather the processing results into one List aggregate
            .collect(Collectors.toList());
    return result;
}

/**
 * Recursively get submenu
 * @param root Current menu
 * @param all Total data
 * @return Submenu
 */
public List<TreeMenu> getChildren(TreeMenu root, List<TreeMenu> all) {
    List<TreeMenu> children = all.stream()
            // According to parent menu ID Find current menu ID,To find the submenu of the current menu
            .filter(menu -> menu.getParentMenuId() == root.getMenuId())
            // Recursively find submenus of submenus
            .map((menu) -> {
                menu.setTreeMenu(getChildren(menu, all));
                return menu;
            })
            // Sort by sort field
            .sorted((menu1, menu2) -> {
                return (menu1.getSort() == null ? 0 : menu1.getSort()) - (menu2.getSort() == null ? 0 : menu2.getSort());
            })
            // Gather the processing results into one List aggregate
            .collect(Collectors.toList());
    return children;
}
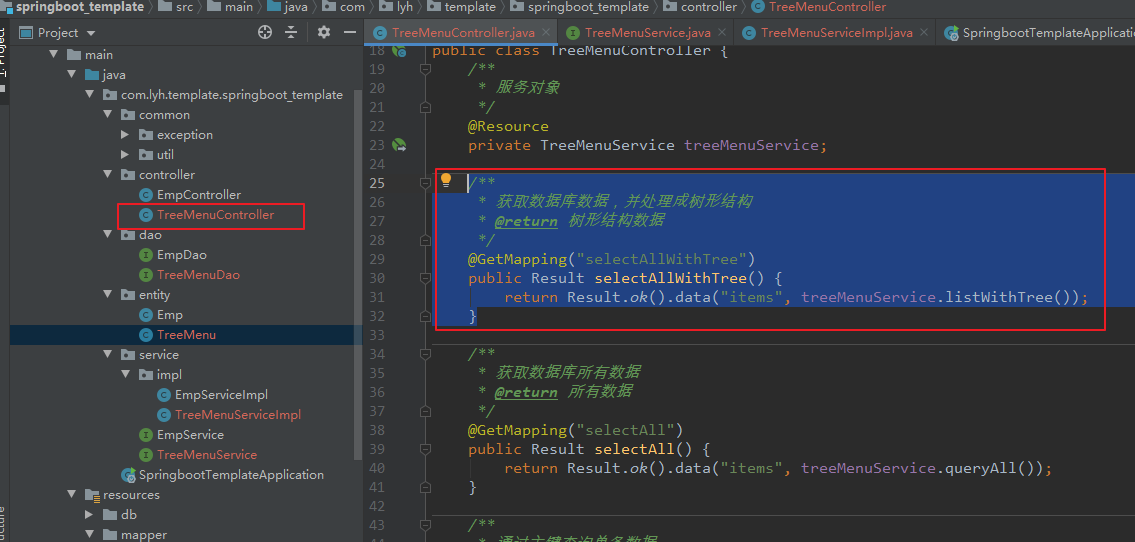
Step4: call this method in controller.
/**
 * Acquire database data and process it into tree structure
 * @return Tree structure data
 */
@GetMapping("selectAllWithTree")
public Result selectAllWithTree() {
    return Result.ok().data("items", treeMenuService.listWithTree());
}
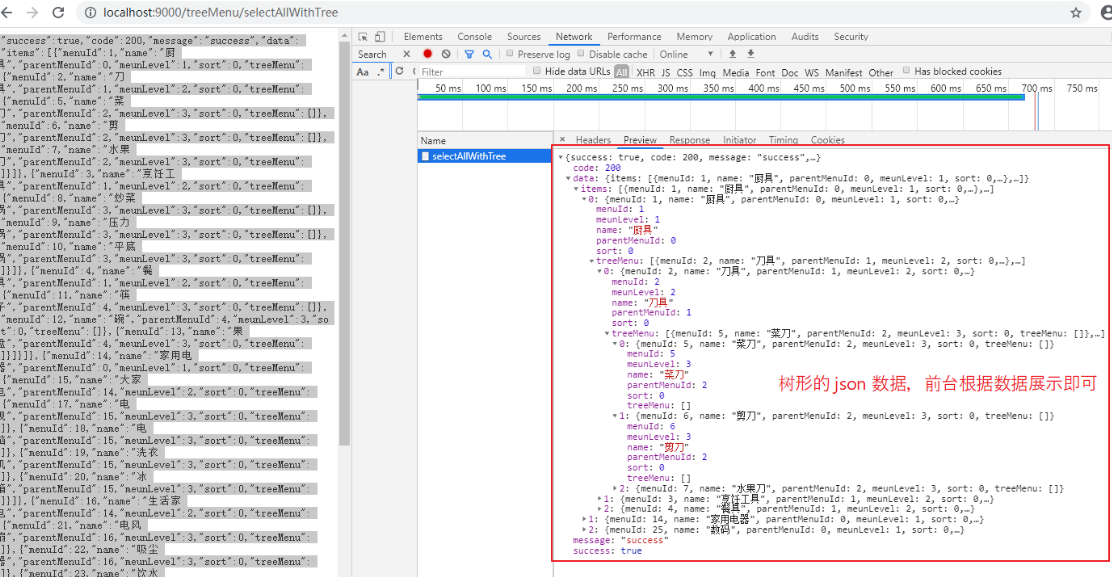
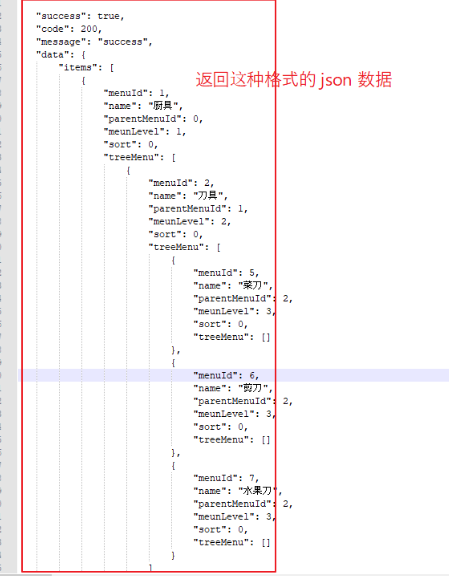
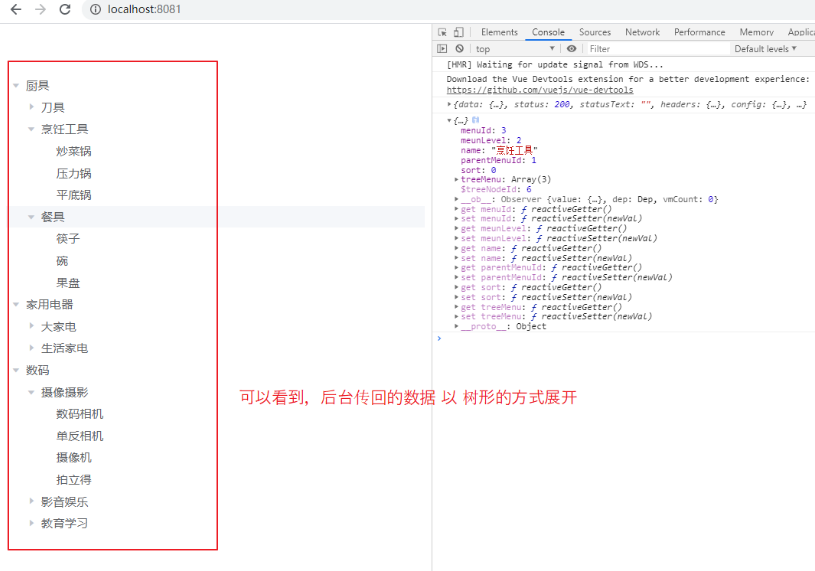
Step 5: start the service, access. Open the console, and you can see the returned tree json data.
2, Vue + ElementUI display tree data
1. Introduction
The previous use of background processing returned the json data of tree structure. Now you need to display the json data in a certain way.
Use vue-cli 3.0 to create a Vue project.
Use element UI to display as a page.
Use Axios to send requests to the background and return data.
2. Building a basic development environment
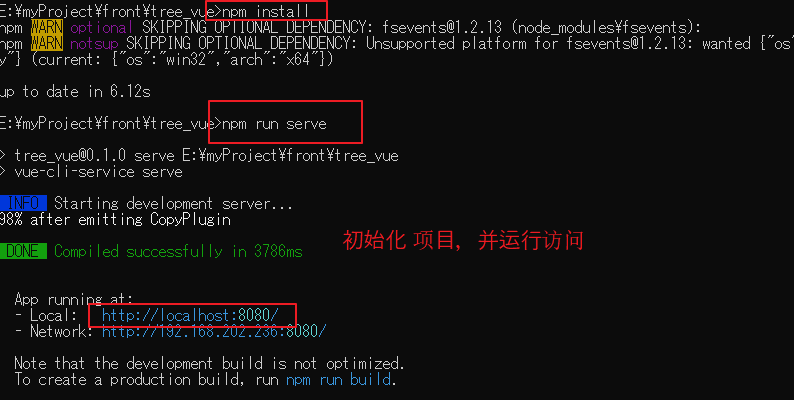
(1) Use vue cli (graphical interface) to create a vue project.
Reference address:
https://www.cnblogs.com/l-y-h/p/11241503.html
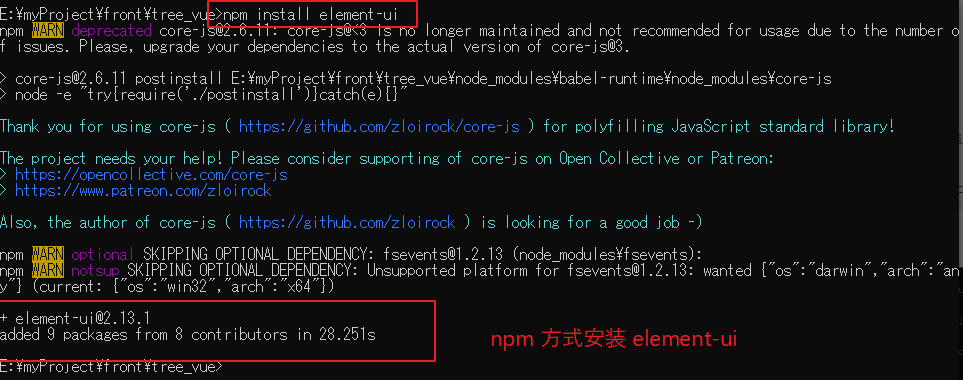
(2) Add element UI dependency
[Official website:]
    https://element.eleme.cn/#/zh-CN

[Document:]
    https://element.eleme.cn/#/zh-CN/component/installation

[Installation mode 1:( npm Installation)
    npm install element-ui

[Installation mode 2:( CDN Method introduction)
    <!-- Bring in styles -->
    <link rel="stylesheet" href="https://unpkg.com/element-ui/lib/theme-chalk/index.css">
    <!-- Import component library -->
    <script src="https://unpkg.com/element-ui/lib/index.js"></script>
npm installation is used here.
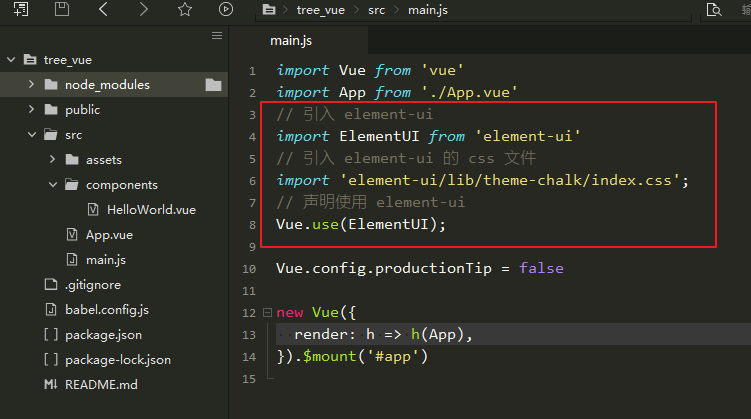
(3) Introduce element UI into the vue project.
Introduce the complete element UI in main.js.
[main.js]

import Vue from 'vue'
import App from './App.vue'
// Introduce element-ui
import ElementUI from 'element-ui'
// Introduce element-ui Of css file
import 'element-ui/lib/theme-chalk/index.css';
// Declaration use element-ui
Vue.use(ElementUI);

Vue.config.productionTip = false

new Vue({
  render: h => h(App),
}).$mount('#app')
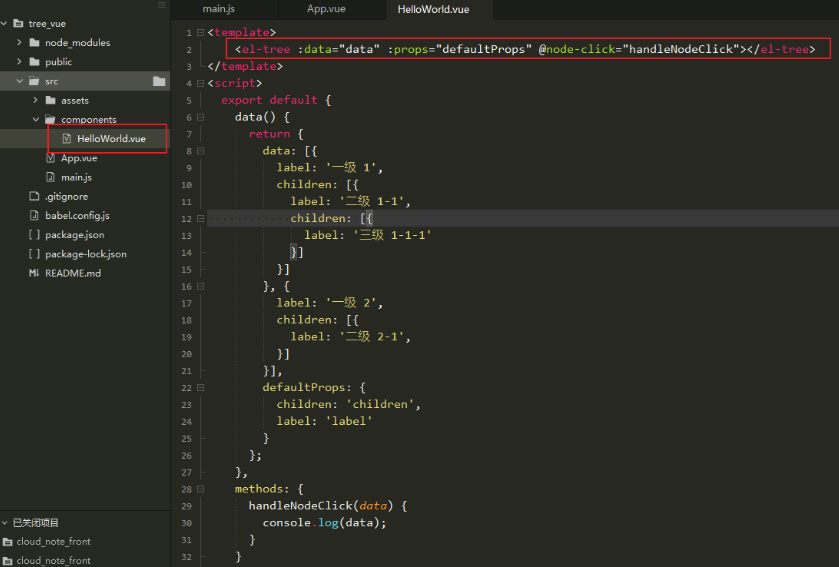
(4) Introduce a tree control.
Select a template directly from the official website and modify it.
As follows, copy the basic template into the HelloWorld.vue component and modify it.
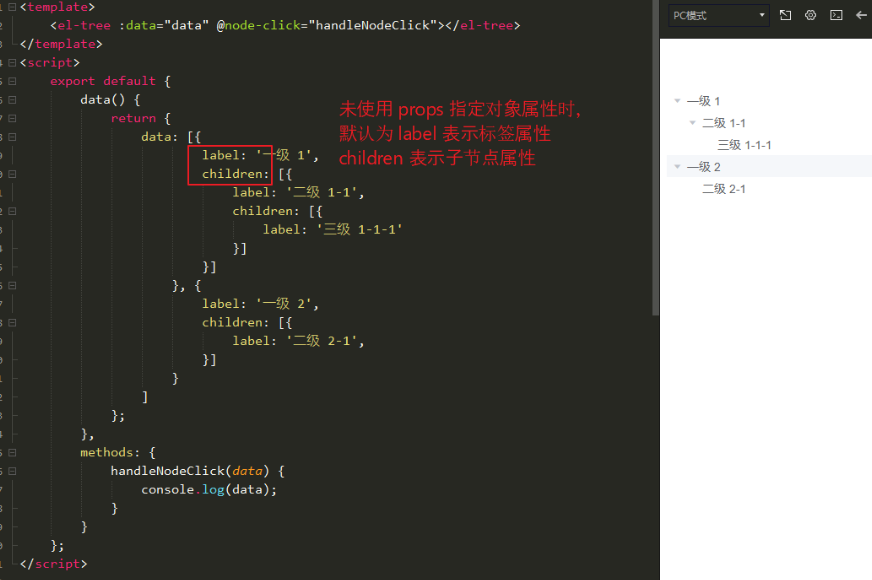
[Tree Tree control:]
    https://element.eleme.cn/#/zh-CN/component/tree

[HelloWorld.vue]
<template>
    <el-tree :data="data" :props="defaultProps" @node-click="handleNodeClick"></el-tree>
</template>
<script>
  export default {
    data() {
      return {
        data: [{
          label: 'Level 1',
          children: [{
            label: 'Level 2 1-1',
            children: [{
              label: 'Level 3 1-1-1'
            }]
          }]
        }, {
          label: 'Level 1 2',
          children: [{
            label: 'Level 2-1',
          }]
        }],
        defaultProps: {
          children: 'children',
          label: 'label'
        }
      };
    },
    methods: {
      handleNodeClick(data) {
        console.log(data);
      }
    }
  };
</script>
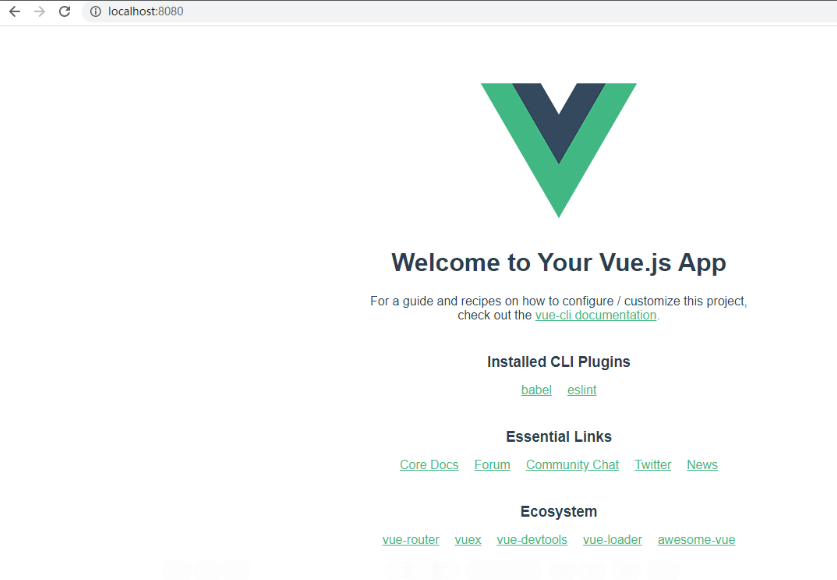
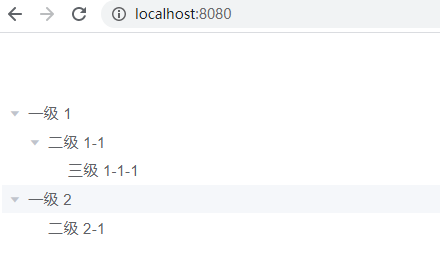
Run the project and check the effect as follows.
3. Using Axios to send a request to the backend to get json data
(1) vue project add Axios.
[Reference address:]
    https://www.cnblogs.com/l-y-h/p/11656129.html#_label1

[npm Installation:]
    npm install axios
(2) Use Axios to send requests.
[Introduce Axios]
    import axios from 'axios';

[HelloWorld.vue]
<template>
    <el-tree :data="data" :props="defaultProps" @node-click="handleNodeClick"></el-tree>
</template>
<script>
    import axios from 'axios';
    export default {
        data() {
            return {
                data: [],
                defaultProps: {
                    children: 'treeMenu',
                    label: 'name'
                }
            };
        },
        methods: {
            handleNodeClick(data) {
                console.log(data);
            }
        },
        created() {
            axios.get(`http://localhost:9000/treeMenu/selectAllWithTree`)
            .then(response => {
                console.log(response);
                this.data = response.data.data.items;
            })
            .catch(error => {
                console.log(error);
            });
        }
    };
</script>

(3) Solve cross domain problems.
Back end solution:
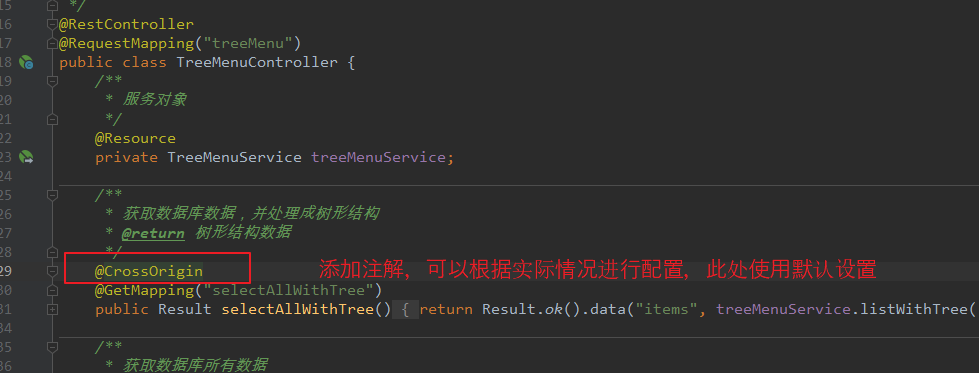
You can use the @ CrossOrigin annotation to add the annotation to the method.
@CrossOrigin
@GetMapping("selectAllWithTree")
public Result selectAllWithTree() {
    return Result.ok().data("items", treeMenuService.listWithTree());
}
Front end solution:
[Reference address:]
    https://www.cnblogs.com/l-y-h/p/11815452.html
Here, I use the back-end solution to add the @ CrossOrigin annotation.
4. Common attribute analysis of element UI
(1) Analysis of common properties of tree control
[property:]
Data array type, used to save the data of the tree.
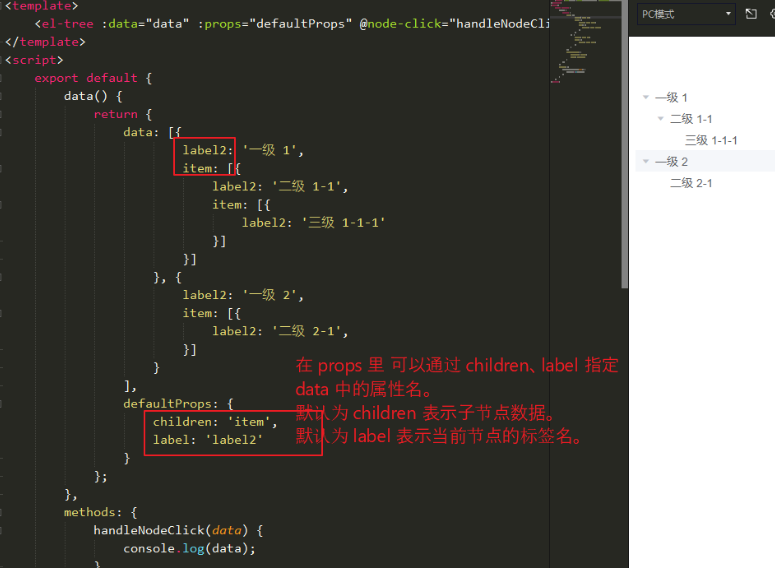
Props object type, which defines configuration options.
Note:
props can be used to specify the attribute tag name in data (it is used to specify the attribute name, not the attribute value).
Common properties:
Label specifies the attribute name of the label attribute in the node object.
children specifies the attribute name of the child object attribute of the node object.
Islaf is used to specify the attribute name of the leaf node in the node object, which only takes effect when lazy = true.
Disabled specifies whether the attribute name of the node is disabled in the node object.
[Properties:]
    node-key             String Type that represents a unique tree node.
    load                 Function Type, only lazy = true It is used to load the subtree data.
    lazy                 boolean Type, default is false,Whether the child node is lazy to load.
    show-checkbox        boolean Type, default is false,Expand the check box (whether the node can be selected).

[Example:]
<template>
    <el-tree :props="props" :load="loadNode" lazy show-checkbox></el-tree>
</template>
<script>
    export default {
        data() {
            return {
                props: {
                    // Appoint data Middle attribute name
                    label: 'name',
                    isLeaf: 'leaf'
                },
            };
        },
        methods: {
            loadNode(node, resolve) {
                // Initial load node data
                if (node.level === 0) {
                    return resolve([{
                        name: 'region'
                    },{
                        name: "region2"
                    }]);
                }
                // After clicking the first level node, the delay operation will be triggered to return to the child node
                if (node.level === 1) {
                    setTimeout(() => {
                        const data = [{
                            name: 'leaf'
                        }, {
                            name: 'zone',
                            disabled: true,
                            leaf: true
                        }];

                        resolve(data);
                    }, 500);
                }
                // After clicking the second level node, no node returns. Return null.
                if (node.level > 1) {
                    return resolve([]);
                }
            }
        }
    };
</script>

Of course, there are other attributes, such as the ability to customize tree node data, and the ability to drag and drop.
It's not enough here. Please refer to the official documents for details.
Only the code for obtaining all data is shown here. You can improve the operations of adding nodes, deleting nodes, deleting nodes in batches, dragging nodes, etc. according to the project situation.