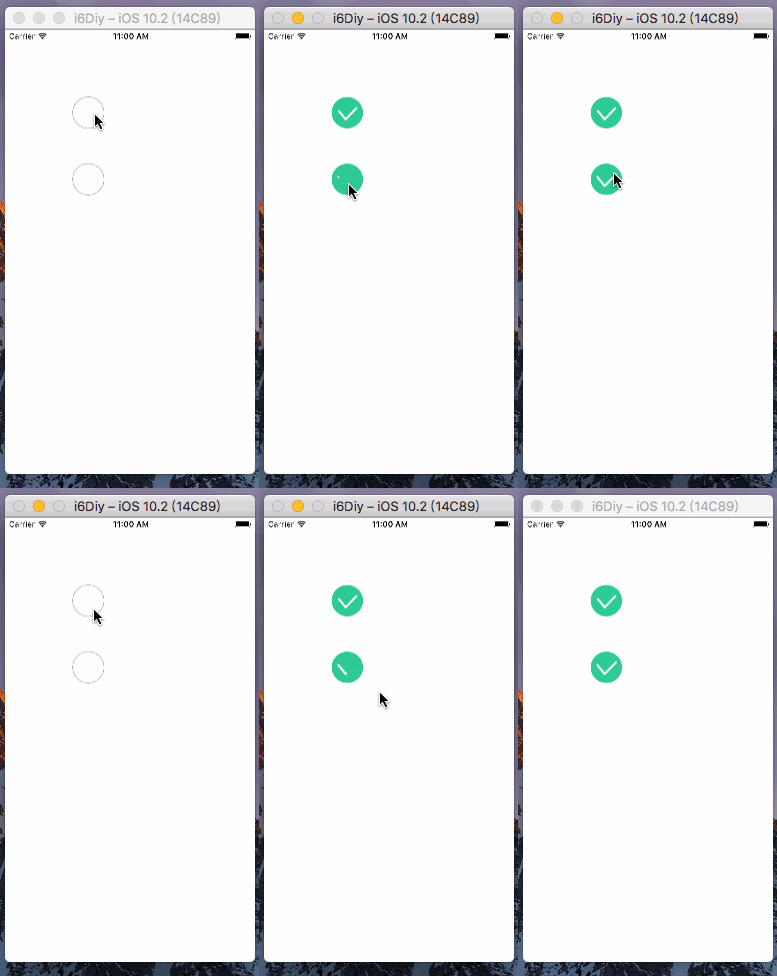
demand
Instead of switching pictures, the control clicks to show the selected effect, and then clicks to cancel the selection. The effect is as follows (static + animation), demo download address is at the end of the article.

Ideas for Realization
User-defined UIView, draw Rect:(CGRect) rect method, no animation effect using UIBezierPath drawing patterns, animation effect using UIBezierPath, CAShapeLayer, CABasic Animation drawing and adding animation.
Non-animated
The main technical points lie in the drawing of background and tick. The code is as follows.
        /** Fill in the background */
        CGPoint center = CGPointMake(rect.size.width*0.5,rect.size.height*0.5);
        UIBezierPath *path = [UIBezierPath bezierPathWithArcCenter:center radius:(rect.size.width*0.5 - rect.size.width*0.03) startAngle:0 endAngle:M_PI*2 clockwise:YES];
        //Setting colors
        [self.backColor set];
        // Fill: Must be a complete closed path, which will be automatically closed by default
        [path fill];

        /** Drawing ticks */
        UIBezierPath *path1 = [UIBezierPath bezierPath];
        path1.lineWidth = rect.size.width*0.06;
        // Setting the Starting Point
        [path1 moveToPoint:CGPointMake(rect.size.width*0.23, rect.size.height*0.43)];
        // Add a line to a point
        [path1 addLineToPoint:CGPointMake(rect.size.width*0.45, rect.size.height*0.7)];
        [path1 addLineToPoint:CGPointMake(rect.size.width*0.79, rect.size.height*0.35)];
        //Setting colors
        [self.tickColor set];
        // Drawing Path
        [path1 stroke];
Drawing a gray circle without selection is similar to drawing a tick. First set the route, then stroke.
        CGPoint center = CGPointMake(rect.size.width*0.5,rect.size.height*0.5);
        UIBezierPath *path = [UIBezierPath bezierPathWithArcCenter:center radius:(rect.size.width*0.5 - rect.size.width*0.03) startAngle:0 endAngle:M_PI*2 clockwise:YES];
        [[UIColor lightGrayColor] set];
        [path stroke];
Animated
The main reason is that the drawing of ticks is different. Like this kind of animation, the general idea is the following four steps.
1. Setting the route by Bethel route;
2. Create the layer CAShape Layer so that the route of the layer equals the route of the Bethel line.
3. Use CABasic Animation to add animation to the layer.
4. Add the layer to the view to show it.
Code
        /** Drawing ticks */
        //1. Setting up Routes
        UIBezierPath *path1 = [UIBezierPath bezierPath];
        path1.lineWidth = rect.size.width*0.06;
        [path1 moveToPoint:CGPointMake(rect.size.width*0.23, rect.size.height*0.43)];
        [path1 addLineToPoint:CGPointMake(rect.size.width*0.45, rect.size.height*0.7)];
        [path1 addLineToPoint:CGPointMake(rect.size.width*0.79, rect.size.height*0.35)];
        //2. Create CAShapeLayer
        CAShapeLayer *shape=[CAShapeLayer layer];
        self.shape = shape;//Remove records for redrawing
        shape.path = path1.CGPath;
        shape.lineWidth = path1.lineWidth;
        shape.fillColor = [UIColor clearColor].CGColor;
        shape.strokeColor = self.tickColor.CGColor;
        shape.lineCap = kCALineCapRound;//The cap (the end of the line) is rounded.
        shape.lineJoin = kCALineJoinRound;//The connection of the wire is rounded.
        //3. Add animation to CAShapeLayer
        CABasicAnimation *checkAnimation = [CABasicAnimation animationWithKeyPath:@"strokeEnd"];
        checkAnimation.duration = 0.5;
        checkAnimation.fromValue = @(0.0f);
        checkAnimation.toValue = @(1.0f);
        [shape addAnimation:checkAnimation forKey:nil];
        //4. Add CAShapeLayer to the layer of your view
        [self.layer addSublayer:shape];
Remarks
1. All methods of drawing graphics should be written in drawRect method, because the timing of drawing graphics in this method is the best from the point of view of code or performance. When switching state is needed, the method of [self setNeedsDisplay] is called to redraw, and drawRect judges which pattern to draw according to some parameters defined by itself.
2. demo download address: https://github.com/YYProgrammer/YYTickViewDemo