Preface: content tips of this article
Create a Spring Boot based web project on Idea. When the client browser accesses the web service resources with get, put, post, etc., the server can make correct results.
Install Postman software and test your web with Postman.
1, Create a Spring Boot based web project on IDEA
The specific steps of establishing the project are shown in:
Generate a Spring Boot project
2, Code
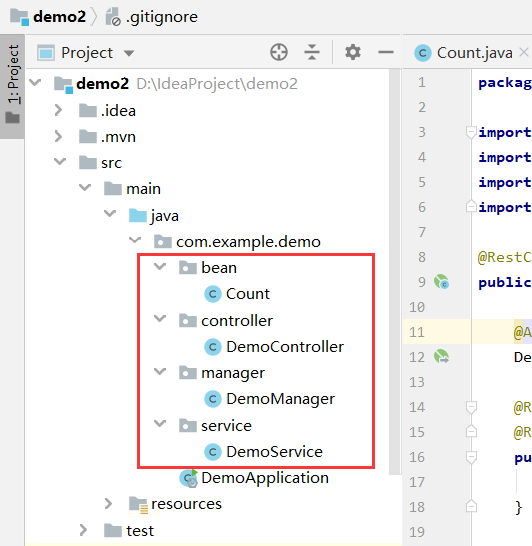
1. Construction package
The function of the demonstration is to provide a counter function, which can initialize the counter, modify the counter and query the current value of the counter. Instead of using the database, a singleton class is directly used to simulate. The project structure is as follows:
src - main - java - com.example.demo, create a new package name bean, controller, manage and service;
Create new java files: Count, DemoController, DemoManage and DemoService
2. Specific code
Count:
package com.example.demo.bean;

public class Count {
    private int count;

    public int getCount() {
        return count;
    }

    public void setCount(int count) {
        this.count = count;
    }
}
DemoController:
package com.example.demo.controller;

import com.example.demo.bean.Count;
import org.springframework.beans.factory.annotation.Autowired;
import org.springframework.web.bind.annotation.*;
import com.example.demo.service.DemoService;

@RestController
public class DemoController {

    @Autowired
    DemoService demoService;

    @RequestMapping(value = "/me/count", method = RequestMethod.PUT)
    @ResponseBody
    public void initCount(@RequestBody Count count){
        demoService.initCount(count);
    }

    @RequestMapping(value = "/me/count", method = RequestMethod.POST)
    @ResponseBody
    public void modifyCount(@RequestBody Count count){
        demoService.addCount(count);
    }

    @RequestMapping(value = "/me/count", method = RequestMethod.GET)
    @ResponseBody
    public  Count getCount()
    {
        return demoService.getCount();
    }
}
DemoManage:
package com.example.demo.manager;


public class DemoManager {
    private int count = 0;
    private static DemoManager instance = new DemoManager();
    private DemoManager(){}
    public static DemoManager getInstance(){
        return instance;
    }
    public synchronized void addCount(int i){
        count = count + i;
    }
    public synchronized  void minusCount(int i){
        count = count -i;
    }
    public int getCount(){
        return count;
    }
    public void initCount(int i){
        count = i;
    }
}
DemoService:
package com.example.demo.service;

import com.example.demo.manager.DemoManager;
import com.example.demo.bean.Count;
import org.springframework.stereotype.Service;

@Service
public class DemoService {
    public void addCount(Count count){
        if (count != null){
            DemoManager.getInstance().addCount(count.getCount());
        }
    }
    public void minusCount(Count count){
        if (count != null) {
            DemoManager.getInstance().minusCount(count.getCount());
        }
    }
    public Count getCount()
    {
        Count count = new Count();
        count.setCount(DemoManager.getInstance().getCount());
        return count;
    }
    public void initCount(Count count){
        if (count != null) {
            DemoManager.getInstance().initCount(count.getCount());
        }
    }
}
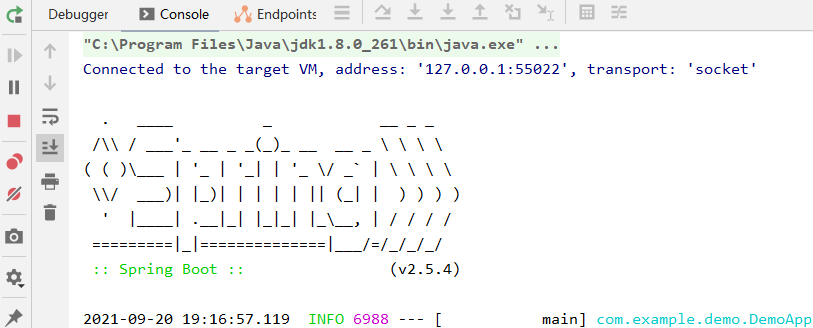
3, Operation results
4, Postman test restful interface
1. What is Postman
Postman is a plug-in tool for Chrome. It is a common interface testing tool that can send almost all types of HTTP requests. Postman is applicable to different operating systems, including Postman Mac, Windows X32, Windows X64 and Linux. It also supports postman browser extension, postman chrome application, etc.
2. Test
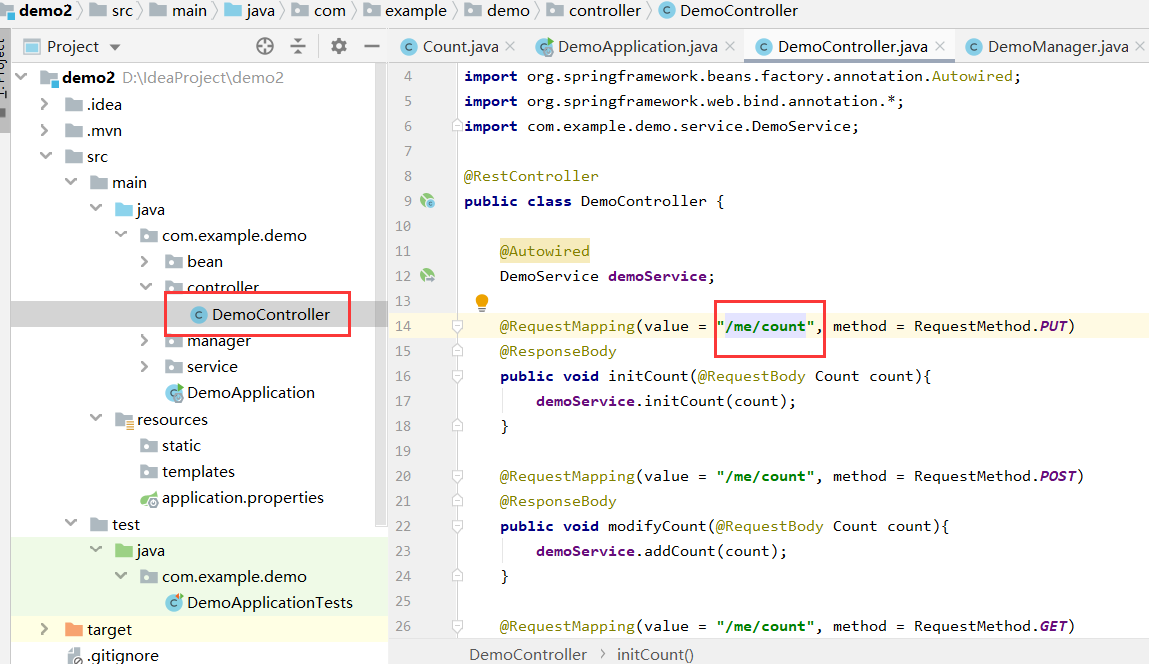
1) Confirm web address
The default link port number is 8080;
URL: http://localhost:8080/me/count
Confirm the address in DemoController:
2) Test with get, put and post
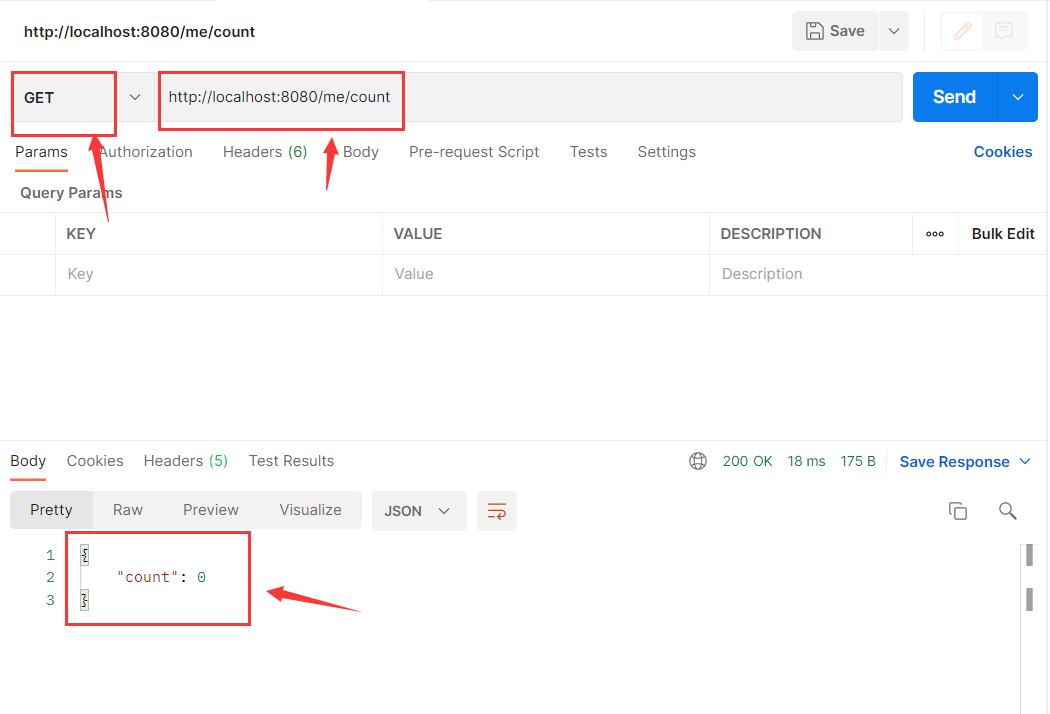
Open postman and enter the web address. Test with get, put and post respectively:
The URL s are: / me/count, except PUT, POST and GET. PUT is used for initialization, POST is used for modification (here modification is cumulative), and GET is used for query.
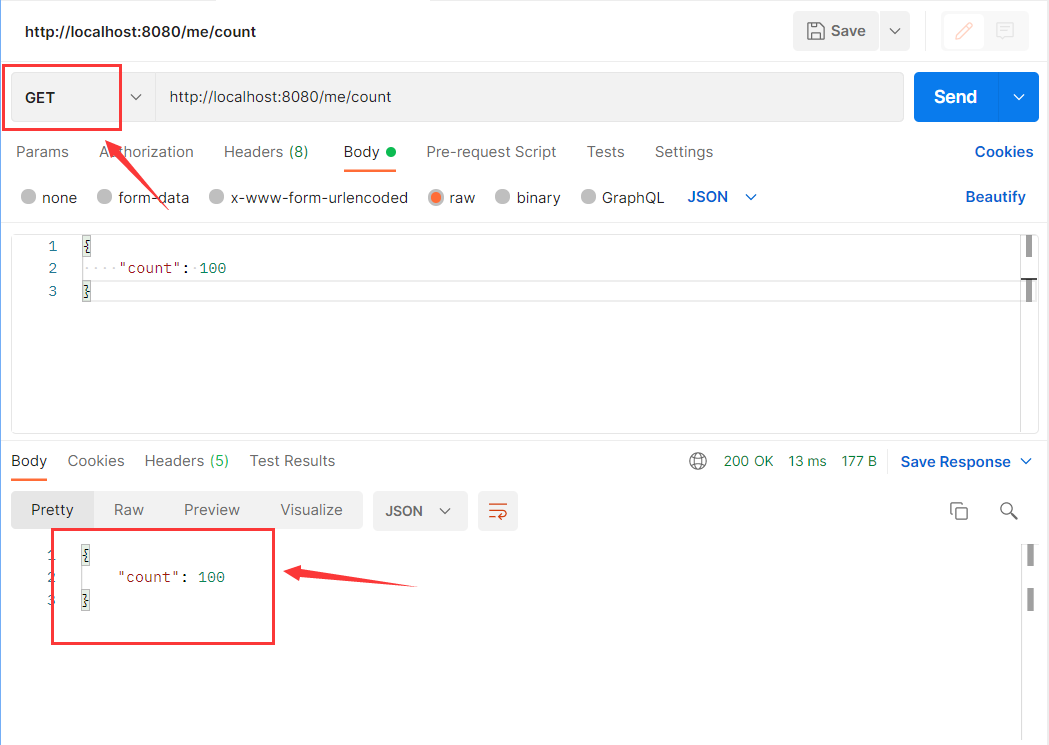
① Test the get interface and get the default parameter 0:
②
-
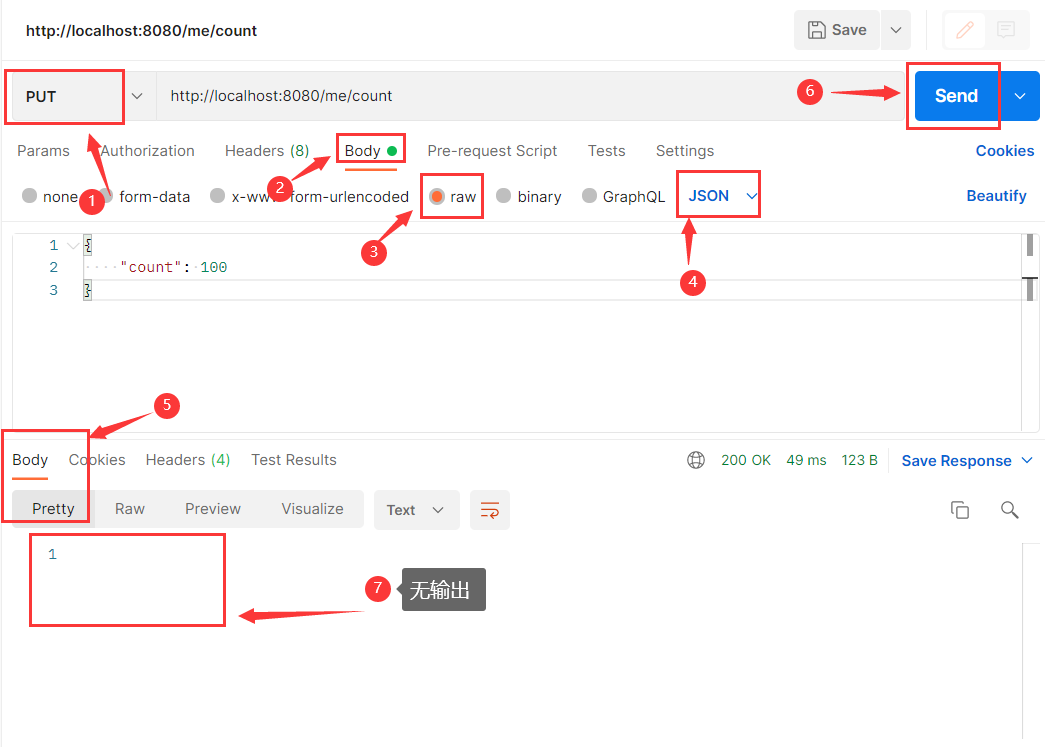
Test the put interface, select body - raw - json below, and enter the following code:
{
"count": 100
}
No output, as shown in the figure:
-
Then get the result, and the result changes
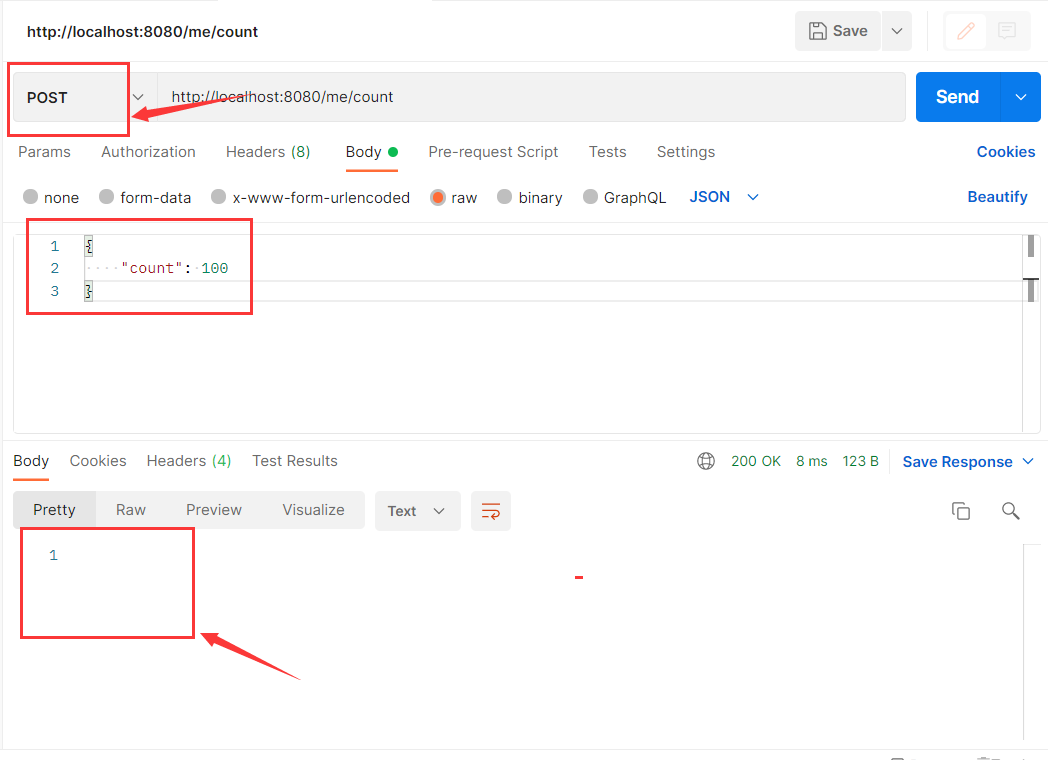
③
- Test the post interface, and the body code remains unchanged:
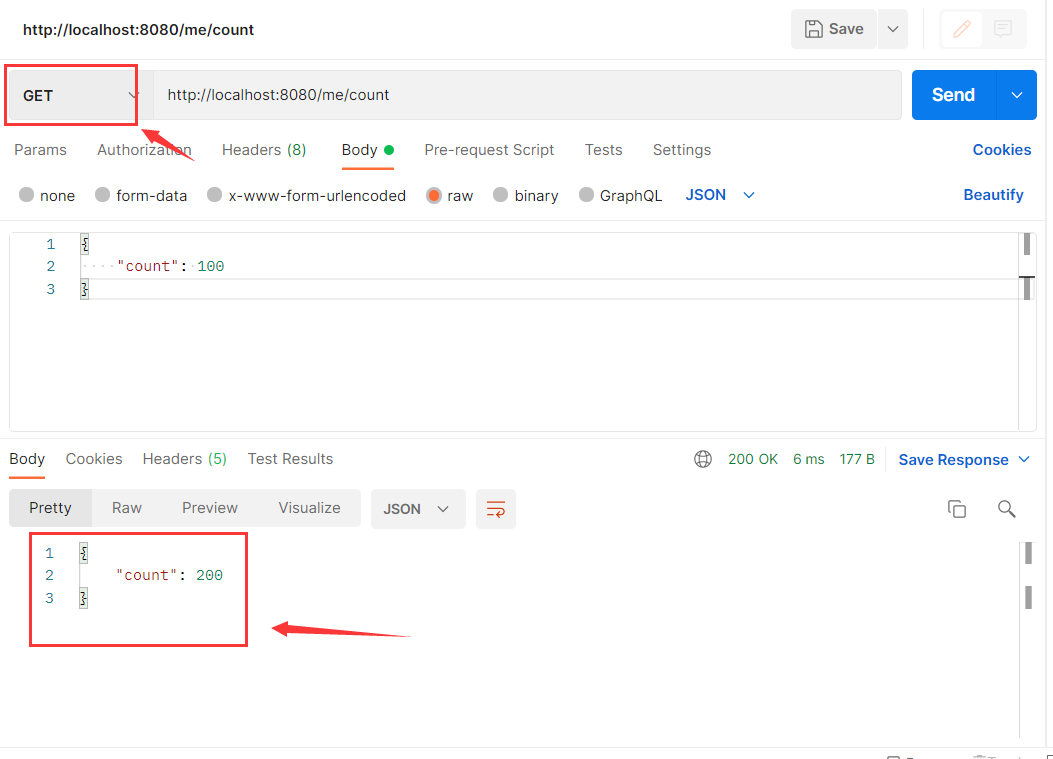
- Then call get, and the result becomes 200 (accumulation: 100 + 100):
A little summary
Postman test allows us to intuitively understand whether the program can respond correctly;
The Postman test interface is very convenient and is a good test tool.