Independent key control LED light out
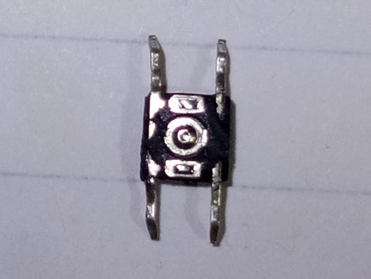
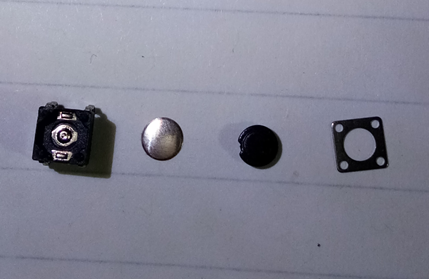
First let's look at the structure of the mechanical switch. As shown in the figure, there are switch keys and spring spring spring blades. When the switch is pressed, it touches the two unconnected shrapnels under the switch in Fig. 1. When the switch is pressed, it touches and the current conducts.
Next, the use of keys
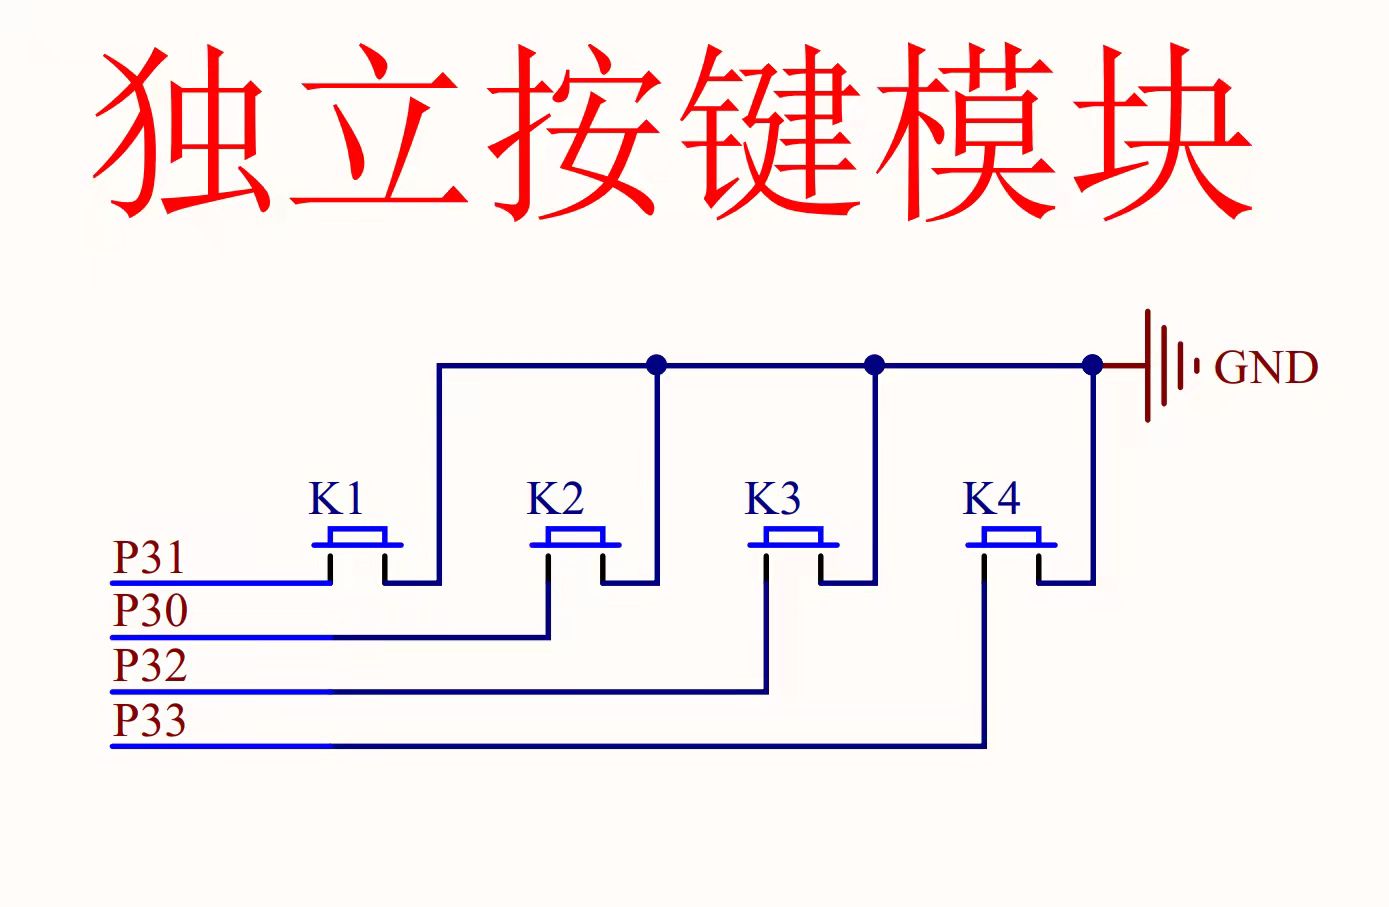
As you can see from the diagram, the K1 switch is linked to port P31 of the register, and the power frequency of P31 is turned off by default at high (low) frequency. When the P31 interface is at low power frequency, the key-controlled LED lights up, code shown in the figure
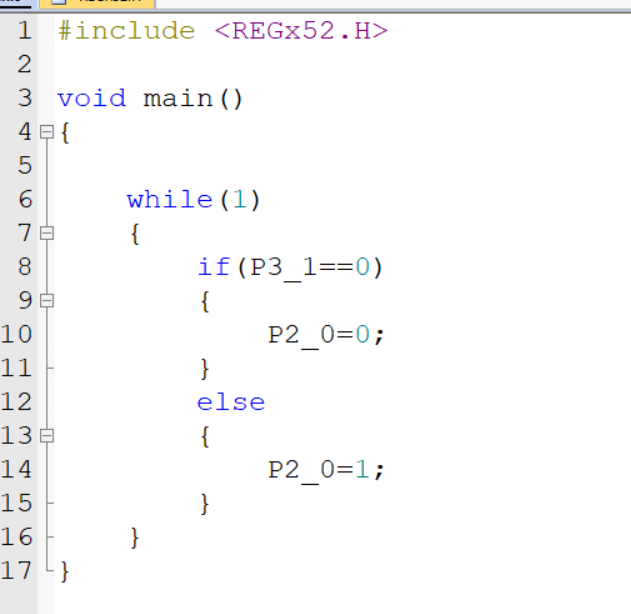
This is a simple code to control the light-up code of the LED. Next, the jitter of the keys is described.
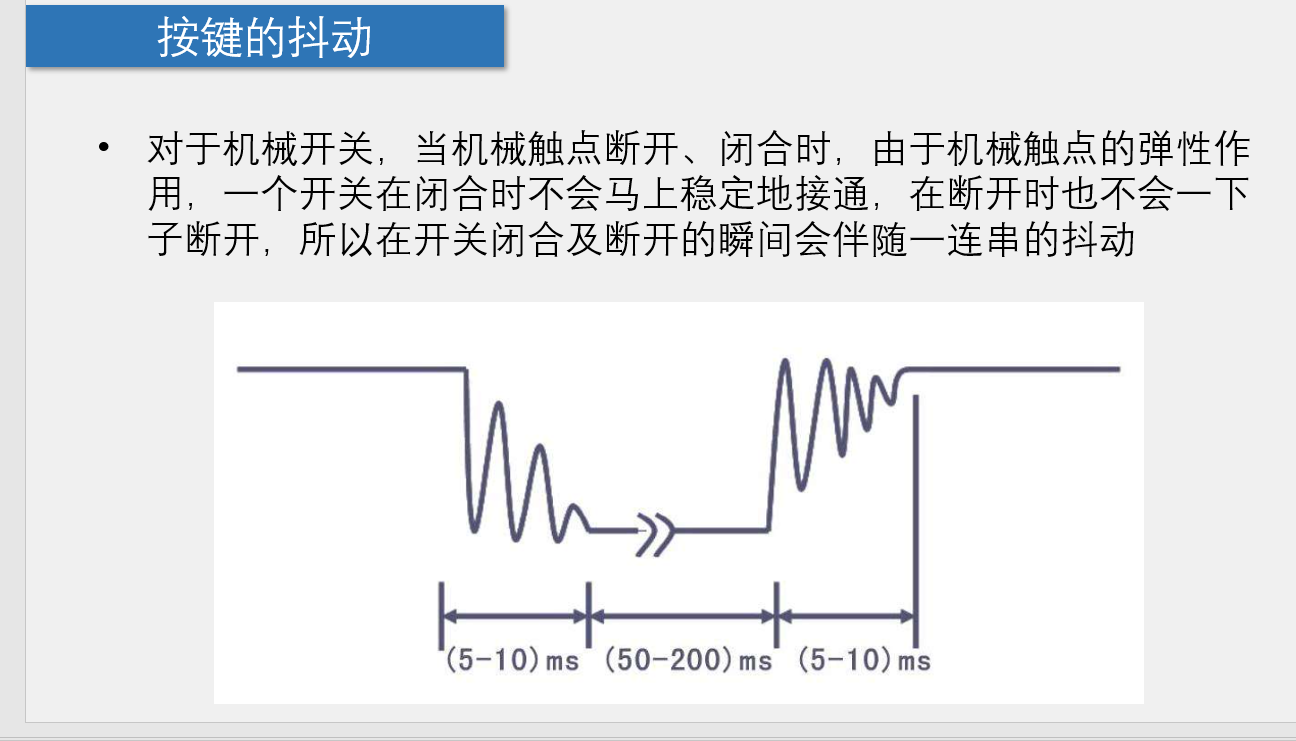
Simply put, when the switch is pressed, it will not end working immediately because of the elasticity of the shrapnel.
There are two solutions to this situation: 1. Hardware dithering, plus a circuit, filtering. 2. Eliminate the jitter by software, delay how many milliseconds, then the jitter will be over.
Following are the steps for soft de-shaking:
1. First let's define a delay function
#include <REGX52.H>

void Delay(unsigned int xms)//xms cannot exceed 65535 because unsigned is within this range
{
	unsigned char i, j;
	while(xms)
	{
		i = 2;
		j = 239;
		do
		{
			while (--j);
		} while (--i);
		xms--;
	}
}
This is a delayed function that we customize. Just enter parameters directly into Delay () when called (time to delay), because unsigned ranges from 0 to 65535, so the delay cannot exceed 65535 Ms.
2. Next, write the main function
void main()
{
    while(1)
    {
        if(P3_1==0)//If the K1 key is pressed
        {
            Delay(20);//Press Delay 20ms
            while(P3_1==0);//Detection of loose hands
            Delay(20);//Release Hand Delay 20ms
            P2_0=~ P2_0;//Bitwise Reverse turns the status of the LED into the opposite
        }
    }
}
Let's explain what this code does. It is when we press the key (not yet released) that it goes out, and it will light up when we release the hand. When it's on, the opposite is true, so we can use a separate key to control when an LED is on or off.
Next, the use of separate keys to control the shift of the LED is described.
First, the function of this program is to control a single LED light-up by pressing a separate key. For example, press once, the first LED lights up, then press the second LED to light up, and the first LED goes out. That's what the program does. Here's how to write it.
We know that the LED lights are controlled by the high and low frequencies of the P2 port. We just need to switch the low frequencies to the next LED position in turn. Here's a picture to understand
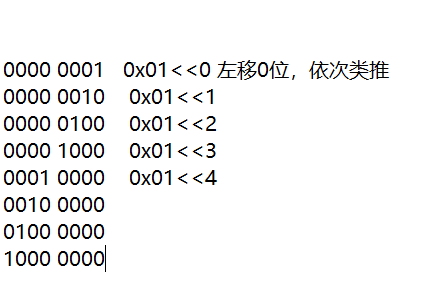
This is the frequency of each LED when our small LED lights turn on in turn. This expression is to use the bitwise right or left shift in C (< or >>) where we use hexadecimal representation, that is, 0x01.
Code on!!
void main()
{
	unsigned char LEDNum=0;//Here we define a char-type variable to control the units to move left or right
	P2=~0x01;//What this means is that our initial little light goes on in the first place
	while(1)
	{
		if(P3_1==0)
		{
			Delay(20);
			while(P3_1==0);
			Delay(20);//It's all a pressing process here, again

			LEDNum++;This is the number of digits to control left or right shift
			if(LEDNum>=8)//Determine if the LED Num is greater than 7, greater than that will cause the LED Num to revert back to 0
				LEDNum=0;
			P2=~(0x01<<LEDNum);//Finally, change the frequency of our P2 port by moving left or right the last way
		}


	}
}
This allows us to control the individual movement of a small LED light state with one key.
If you want to control the free movement of the LED state, add this code below
if(P3_0==0)//This code goes below the last one
		{
			Delay(20);
			while(P3_0==0);
			Delay(20);//Simple dithering

			if(LEDNum==0)//Here we judge that if the LED Num reaches 0, it will be changed back to 7 (the upper limit we define is 7) to prevent offset
				LEDNum=7;
			else
				LEDNum--;//Then subtract, as opposed to the previous code
			P2=~(0x01<<LEDNum);
In this way, we can control the left and right movement of the LED small light by independent keys.
#include <REGX52.H>

void Delay(unsigned int xms)//xms cannot exceed 65535 because unsigned is within this range
{
	unsigned char i, j;
	while(xms)
	{
		i = 2;
		j = 239;
		do
		{
			while (--j);
		} while (--i);
		xms--;
	}
}

void main()
{
	unsigned char LEDNum=0;
	P2=~0x01;
	while(1)
	{
		if(P3_1==0)
		{
			Delay(20);
			while(P3_1==0);
			Delay(20);

			LEDNum++;
			if(LEDNum>=8)
				LEDNum=0;
			P2=~(0x01<<LEDNum);
		}

		if(P3_0==0)
		{
			Delay(20);
			while(P3_0==0);
			Delay(20);

			if(LEDNum==0)
				LEDNum=7;
			else
				LEDNum--;
			P2=~(0x01<<LEDNum);
		}
	}
}
This is the complete code snippet.