In the last issue, we learned about the use of ViewAnimator and ViewSwitcher components. Have you mastered them? In this installment, we will learn about the two sub-components of ViewSwitcher, ImageSwitcher and TextSwitcher.

ImageSwitcher
ImageSwitcher and ImageSwitcher inherit ViewSwitcher, so they have the same characteristics as ViewSwitcher: animation effects can be used when switching View components. ImageSwitcher inherits ViewSwitcher and rewrites the showNext() and showPrevious() methods of ViewSwitcher, so ImageSwitcher is simpler to use.
ImageSwitcher can be used in only two steps.
-
Provide a ViewFactory for the ImageSwitcher, and the View component generated by the ViewFactory must be an ImageView.
-
When you need to switch pictures, just call the setImageDrawable(Drawable drawable), setImageResource(int resid) and setImageURI(Uri uri) methods of ImageSwitcher to replace pictures.
Next, a simple sample program is used to learn about the use of ImageSwitcher.
Continue to use the advanced dviewsample module of the WidgetSample project, first prepare five pictures in the drawable directory, and then create the imageswitcher_layout.xml file in the app/main/res/layout/directory, and fill it with the following code fragments:
<?xml version="1.0" encoding="utf-8"?>
<RelativeLayout xmlns:android="http://schemas.android.com/apk/res/android"
                android:layout_width="match_parent"
                android:layout_height="match_parent">

    <ImageSwitcher
        android:id="@+id/switcher"
        android:layout_width="fill_parent"
        android:layout_height="fill_parent"
        android:layout_alignParentLeft="true"
        android:layout_alignParentTop="true"
        android:inAnimation="@android:anim/slide_in_left"
        android:outAnimation="@android:anim/slide_out_right"/>
</RelativeLayout>
The bold character code in the interface layout file above defines an ImageSwitcher and specifies the animation effect when switching pictures through android: in Animation and android: out Animation.
One of the most important things about the use of ImageSwitcher is the need to specify a ViewFactory for it, that is, to define how it displays the content. The general practice is to implement the ViewFactory interface in this class of ImageSwitcher and override the corresponding makeView method. New ImageSwitcherActivity.java file, load the new layout file above, the specific code is as follows:
package com.jinyu.cqkxzsxy.android.advancedviewsample;

import android.os.Bundle;
import android.support.v7.app.AppCompatActivity;
import android.view.View;
import android.view.ViewGroup;
import android.view.animation.AnimationUtils;
import android.widget.ImageSwitcher;
import android.widget.ImageView;
import android.widget.ViewSwitcher;

/**
 * @Founder Xinji
 * @Describe Android Zero Foundation Introduction to Proficiency Series. Welcome to ShareExpert
 */
public class ImageSwitcherActivity extends AppCompatActivity implements ViewSwitcher.ViewFactory {
    private ImageSwitcher mImageSwitcher = null;
    private int[] mImageIds = {
            R.drawable.image_01, R.drawable.image_02, R.drawable.image_03,
            R.drawable.image_04, R.drawable.image_05
    };
    private int mIndex = 0;

    @Override
    protected void onCreate(Bundle savedInstanceState) {
        super.onCreate(savedInstanceState);
        setContentView(R.layout.imageswitcher_layout);

        // Getting Interface Components
        mImageSwitcher = (ImageSwitcher) findViewById(R.id.switcher);

        // Specify a ViewFactory for others, which defines how it displays content.
        // Implement the ViewFactory interface and override the corresponding makeView method.
        mImageSwitcher.setFactory(this);
        // Add animation effects
        mImageSwitcher.setInAnimation(AnimationUtils.loadAnimation(this,
                android.R.anim.fade_in));
        mImageSwitcher.setOutAnimation(AnimationUtils.loadAnimation(this,
                android.R.anim.fade_out));

        // Binding listener events for ImageSwitcher
        mImageSwitcher.setOnClickListener(new View.OnClickListener() {
            @Override
            public void onClick(View view) {
                mIndex ++;
                if(mIndex >= mImageIds.length){
                    mIndex = 0;
                }
                mImageSwitcher.setImageResource(mImageIds[mIndex]);
            }
        });

        mImageSwitcher.setImageResource(mImageIds[0]);
    }

    @Override
    public View makeView() {
        ImageView imageView = new ImageView(this);
        imageView.setBackgroundColor(0xFF000000);
        // Setting Filling Mode
        imageView.setScaleType(ImageView.ScaleType.FIT_XY);
        imageView.setLayoutParams(new ImageSwitcher.LayoutParams(
                ViewGroup.LayoutParams.MATCH_PARENT, ViewGroup.LayoutParams.MATCH_PARENT));
        return imageView;
    }
}
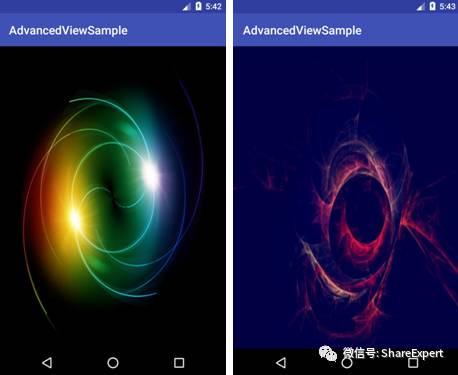
Run the program and click on Image Switcher to see the effect of image switching in the interface shown below.

TextSwitcher
TextSwitcher inherits ViewSwitcher, so it has the same characteristics as ViewSwitcher: animation effects can be used when switching View components. Similar to Image Switcher, using TextSwitcher also requires setting up a ViewFactory. Unlike Image Switcher, the makeView() method of the ViewFactory required by TextSwitcher must return a TextView component.
TextSwitcher and TextView have similar functions. They can be used to display text content. The difference is that TextSwitcher has a more dazzling effect. It can specify the animation effect when text is switched.
Next, a simple sample program is used to learn how to use TextSwitcher.
Continue to use the advanced dviewsample module of the WidgetSample project to create a textwitcher_layout.xml file in the app/main/res/layout/directory and fill it with the following code fragments:
<?xml version="1.0" encoding="utf-8" ?>
<LinearLayout xmlns:android="http://schemas.android.com/apk/res/android"
              android:layout_width="match_parent"
              android:layout_height="match_parent" >
    <!-- Define a TextSwitcher,And specify the animation effect when text switching -->
    <TextSwitcher
        android:id="@+id/textSwitcher"
        android:layout_width="match_parent"
        android:layout_height="wrap_content"
        android:inAnimation="@android:anim/slide_in_left"
        android:outAnimation="@android:anim/slide_out_right" />
</LinearLayout>
The above interface layout file defines a TextSwitcher and specifies the animation effect when text is switched.
Next, Activity just sets up ViewFactory for TextSwitcher, and the TextSwitcher will work properly. New TextSwitcherActivity.java file, load the new layout file above, the specific code is as follows:
package com.jinyu.cqkxzsxy.android.advancedviewsample;

import android.graphics.Color;
import android.os.Bundle;
import android.support.v7.app.AppCompatActivity;
import android.view.View;
import android.widget.TextSwitcher;
import android.widget.TextView;
import android.widget.ViewSwitcher;

/**
 * @Founder Xinji
 * @Describe Android Zero Foundation Introduction to Proficiency Series. Welcome to ShareExpert
 */
public class TextSwitcherActivity extends AppCompatActivity {
    private TextSwitcher mTextSwitcher = null;
    private String[] mContents = {
            "Hello", "HelloWorld", "Good!!!", "TextSwitcher", "Can you?"
    };
    private int mIndex = 0;

    @Override
    protected void onCreate(Bundle savedInstanceState) {
        super.onCreate(savedInstanceState);
        setContentView(R.layout.textwitcher_layout);

        mTextSwitcher = (TextSwitcher) findViewById(R.id.textSwitcher);
        mTextSwitcher.setFactory(new ViewSwitcher.ViewFactory() {
            @Override
            public View makeView() {
                TextView tv = new TextView(TextSwitcherActivity.this);
                tv.setTextSize(40);
                tv.setTextColor(Color.MAGENTA);
                return tv;
            }
        });

        mTextSwitcher.setOnClickListener(new View.OnClickListener() {
            @Override
            public void onClick(View view) {
                mTextSwitcher.setText(mContents[mIndex++ % mContents.length]);
            }
        });

        mTextSwitcher.setText(mContents[0]);
    }
}
The bold code above overrides the makeView() method of ViewFactory, which returns a TextView so that the TextSwitcher works properly. When the program wants to switch the TextSwitcher to display text, it can modify the text by calling the setText() method of TextSwitcher.
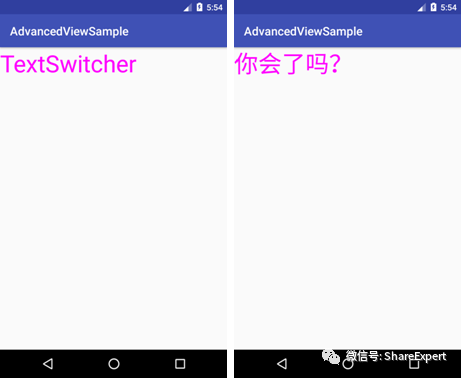
Running the program, clicking TextSwitcher will switch the displayed text, and animation will appear, as shown in the following figure.

At this point, I've learned about the ImageSwitcher and TextSwitcher components, and if there's anything unclear, I'd recommend that you go back and do more exercises.
Let's stop here today. If you have any questions, please leave a message and discuss it together. Welcome to join Android Zero Basic Technology to discuss Wechat Group and grow up together! _________.
Copyright of this article is owned by Share Expert. If you need to reproduce this article, please contact the authorized author.
Summary and share:
Android Zero Foundation Introduction Section 1: Android's Past and Present Life
Android Zero Foundation Introduction Section 2: Android System Architecture and Application Components
Android Zero Foundation Introduction Section 3: Let's talk about Android development environment.
Android Zero Foundation Introduction Section 4: Correctly install and configure JDK, Gao Fu Shuai develops the first move
Android Zero Foundation Introduction Section 5: Use ADT Bundle to Meet Goddess Easily
Android Zero Foundation Introduction Section 6: Configuration optimization SDK Manager, official dating goddess
Android Zero Foundation Introduction Section 7: Find Android Simulator and Start a Sweet Journey
Android Zero Foundation Introduction Section 8: Hello World, the starting point of my first trip
Android Zero Foundation Introduction Section 9: Android applications can be developed without knowing the code
Android Zero Foundation Introduction Section 10: Developing IDE upgrades finally ushered in Android Studio
Android Zero Foundation Introduction Section 11: Simple steps to take you flying and run the Android Studio project
Android Zero Foundation Introduction Section 12: Familiar with Android Studio interface, start to pretend to sell.
Android Zero Foundation Introduction Section 13: Android Studio Configuration Optimization to Build Development Tools
Android Zero Foundation Introduction Section 14: Using High Speed Genymotion to Enter the Rocket Age
Android Zero Foundation Introduction Section 15: Master the structure of Android Studio project and set sail
Android Zero Foundation Introduction Section 16: Overview of Android User Interface Development
Android Zero Foundation Introduction Section 17: TextView TextBox
Android Zero Foundation Introduction Section 18: Input box EditText
Android Zero Foundation Introduction Section 19: Button Button
Android Zero Foundation Introduction Section 20: Checkbox CheckBox and radio button Radio Button
Android Zero Foundation Introduction Section 21: Switch components Toggle Button and Swich
Android Zero Foundation Introduction Section 22: Image View
Android Zero Foundation Introduction Section 23: Image Button and Zoom Button
Android Zero Foundation Introduction Section 24: Custom View is easy to use to create your own controls
Android Zero Foundation Introduction Section 25: Simple and most commonly used Linear Layout linear layout
Android Zero Foundation Introduction Section 26: Two alignments, layout_gravity and gravity, are quite different
Android Zero Foundation Introduction Section 27: Correct use of padding and margin
Android Zero Foundation Introduction Section 28: Easily grasp Relative Layout relative layout
Android Zero Foundation Introduction Section 29: Make Good Use of TableLayout Table Layout
Android Zero Foundation Introduction Section 30: Two Minutes to Master FrameLayout Frame Layout Layout Layout
Android Zero Foundation Introduction Section 31: Absolute Layout Absolute Layout Absolute Layout
Android Zero Foundation Introduction Section 32: New GridLayout Grid Layout
Android Zero Foundation Introduction Section 33: Overview of Android Event Processing
Android Zero Foundation Introduction Section 34: Monitoring-based event handling in Android
Android Zero Foundation Introduction Section 35: Callback-based event handling in Android
Android Zero Foundation Introduction Section 36: Processing of Android System Events
Android Zero Foundation Introduction Section 37: First Understanding ListView
Android Zero Foundation Introduction Section 38: First Understanding of Adapter
Android Zero Foundation Introduction Section 39: ListActivity and custom list items
Android Zero Foundation Introduction Section 40: Custom Array Adapter
Android Zero Foundation Introduction Section 41: Using SimpleAdapter
Android Zero Foundation Introduction Section 42: Customize BaseAdapter
Android Zero Foundation Introduction Section 43: ListView optimization and use at the beginning and end of the list
Android Zero Foundation Introduction Section 44: ListView Data Dynamic Update
Android Zero Foundation Introduction Section 45: GridView
Android Zero Foundation Introduction Section 46: List Options Box Spinner
Android Zero Foundation Introduction Section 47: AutoComplete TextView
Android Zero Foundation Introduction Section 48: Foldable List Expandable ListView
Android Zero Foundation Introduction Section 49: AdapterView Flipper Picture Rotation
Android Zero Foundation Introduction Section 50: StackView Card Stack
Android Zero Foundation Introduction Section 51: Progress Bar
Android Zero Foundation Introduction Section 52: Custom ProgressBar Cool Progress Bar
Android Zero Foundation Introduction Section 53: Drag bar SeekBar and star rating bar Rating Bar
Android Zero Foundation Introduction Section 54: Viewswitch component ViewSwitcher

