In the last section, we talked about how to install MySql service under CentOS 7.0. If you don't see the welcome page, you can add my personal tweet: LiTaO 514148204.
Attach a section address: http://www.cnblogs.com/riverdubu/p/6426852.html
On php-fpm
nginx itself can not handle PHP, it is only a web server, when it receives a request, if it is a PHP request, it is sent to the PHP interpreter for processing, and the result is returned to the client.
Nginx usually sends the request to the fastcgi management process, and the fascgi management process chooses the cgi sub-process processing result and returns it to nginx.
PHP-FPM is a PHP FastCGI manager and is only used for PHP.
PHP has talked about php-fpm writing to the core of PHP source code since 5.3.3. So no additional downloads are needed.
Get the PHP download address
Why choose version 5.6.30, because learning is not research? Admittedly, 7.0 adds a lot of new features of PHP, and there are some improvements in its performance. If it is studied, it can be tossed around. I'll talk about version 7.0 later and how to switch between different versions of PHP.
Open php's official website: http://php.net/, and view a list of PHP versions
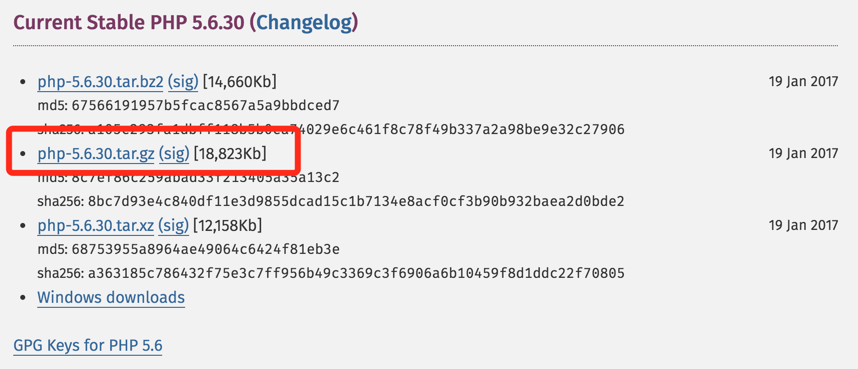
Right-click, copy the link address, log in to the remote host and download the software (I chose the Australia host mirror to download)
# wget http://au1.php.net/get/php-5.6.30.tar.gz/from/this/mirror
Downloaded is a mirror file, changed to the file name we need
#mv mirror php-5.6.30.tar.gz
#tar zxvf php-5.6.30.tar.gz
#cd php-5.6.30
configuration setup
To enter the directory, we need to configure the installation directory to / usr/local/php / at installation time.
#./configure --prefix=/usr/local/php --with-curl --with-freetype-dir --with-gd --with-gettext --with-iconv-dir --with-kerberos --with-libdir=lib64 --with-libxml-dir --with-MySQL --with-mysqli --with-openssl --with-pcre-regex --with-pdo-mysql --with-pdo-sqlite --with-pear --with-png-dir --with-xmlrpc --with-xsl --with-zlib --enable-fpm --enable-bcmath --enable-libxml --enable-inline-optimization --enable-gd-native-ttf --enable-mbregex --enable-mbstring --enable-opcache --enable-pcntl --enable-shmop --enable-soap --enable-sockets --enable-sysvsem --enable-xml --enable-zip
The following errors may be reported during configuration
Error 1:
xml2-config not found. Please check your libxml2 installation.
Solution
Install libxml2 related components
#yum install libxml2
#yum install libxml2-devel -y
Error 2:
Please reinstall the libcurl distribution -
    easy.h should be in <curl-dir>/include/curl/
Install curl-related components
#yum install curl curl-devel
Error 3:
configure: error: png.h not found.
Install libpng-related components
#yum install libpng
#yum install libpng-devel
Error 4:
freetype-config not found.
Install freetype related components
#yum install freetype-devel
Error 5:
xslt-config not found. Please reinstall the libxslt >= 1.1.0 distribution
Install libxslt-related components
#yum install libxslt-devel
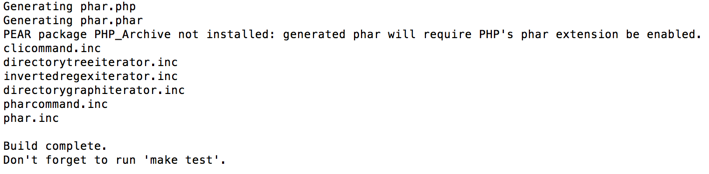
Okay, when we see the following sentence, it means that your php has been configured.

Next, we just need to compile and install to complete the installation of php.
#make && make install
See this sentence, indicating that the installation is complete!
To be on the safe side, let's make a test to see if it's really successful.
Configuration correlation
php.ini configuration
The first thing we need to configure is the php.ini file.
The installation directory has two files: php.ini-development and php.ini-production.
Online version of php.ini-production
Use of php.ini-development development version
We chose development for configuration
# cp php.ini-development /usr/local/php/lib/php.ini
php-fpm configuration
Copy php-fpm configuration file
#cp -R ./sapi/fpm/php-fpm.conf /usr/local/php/etc/php-fpm.conf
Copy Enabled Files
#cp -R ./sapi/fpm/php-fpm /etc/init.d/php-fpm
start-up
#/etc/init.d/php-fpm
Check whether php started successfully
#ps aux | grep php

Seeing this shows that your php has been launched successfully!
Restart and Close
#kill -9 Process number
#/etc/init.d/php-fpm
Configure Nginx to support PHP
Enter the nginx home directory, / usr/local/nginx;
#cd /usr/local/nginx
Enter the configuration directory
#cd conf
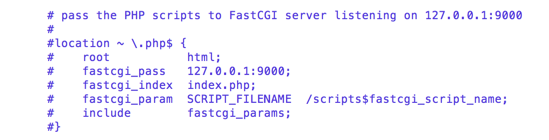
Nginx supports PHP and needs to modify nginx.conf
#vim nginx.conf
Let Nginx support PHP instead of the following code, in the server code segment.
After modification, the code changes to / usr/www. The red part is our host directory. We need to modify fastcgi_param SCRIPT_FILENAME to point to the corresponding directory.
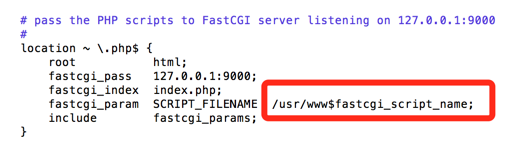
Set the home directory to / usr/www.
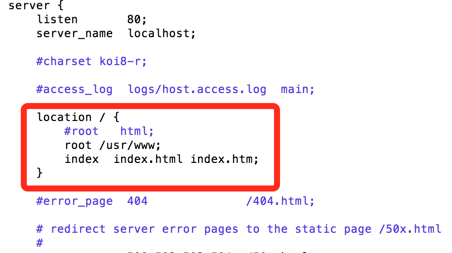
Remark the root line and add a new line: root/usr/www.
Save Exit.
As explained in chapter Nginx, we restart the Nginx service.
#/etc/init.d/nginx restart
If you do not configure the Nginx service as we did in Nginx, you can restart the Nginx service as follows
# /usr/local/nginx/sbin/nginx -s reload
Successful restart! Next, we add a new file in the / usr/www directory.
#vim /usr/www/phpinfo.php
Insert the following
<?php
phpinfo();
?>
Open http://remote ip/phpinfo.php in the browser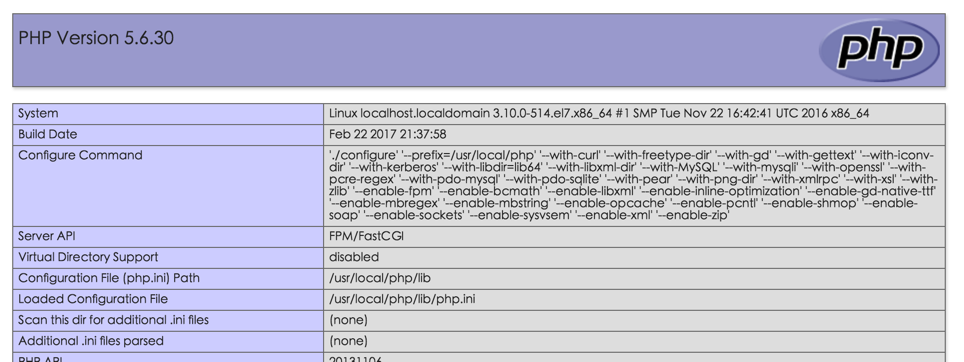
See this page, congratulations, your PHP has been installed and configured. You can see all the php-dependent components on this page. In the next section, I will explain this page in detail. If you have any questions about this section, you are welcome to talk with me in the comments section. Any comments will be answered. C