Installation of Anaconda(3-2021.05)+Tensorflow(2.6) in Win10 environment
In the process of learning machine learning, many Python libraries will be used, such as tensorflow and pandas. It is very inconvenient to install them alone. Therefore, in most cases, people will install Anaconda first.
1. Install Anaconda3 version
You can find the latest version [Anaconda] on the official website( Anaconda | Individual Edition)
The download speed of installation package on Anaconda's official website is extremely slow. Domestic partners are not recommended to try.
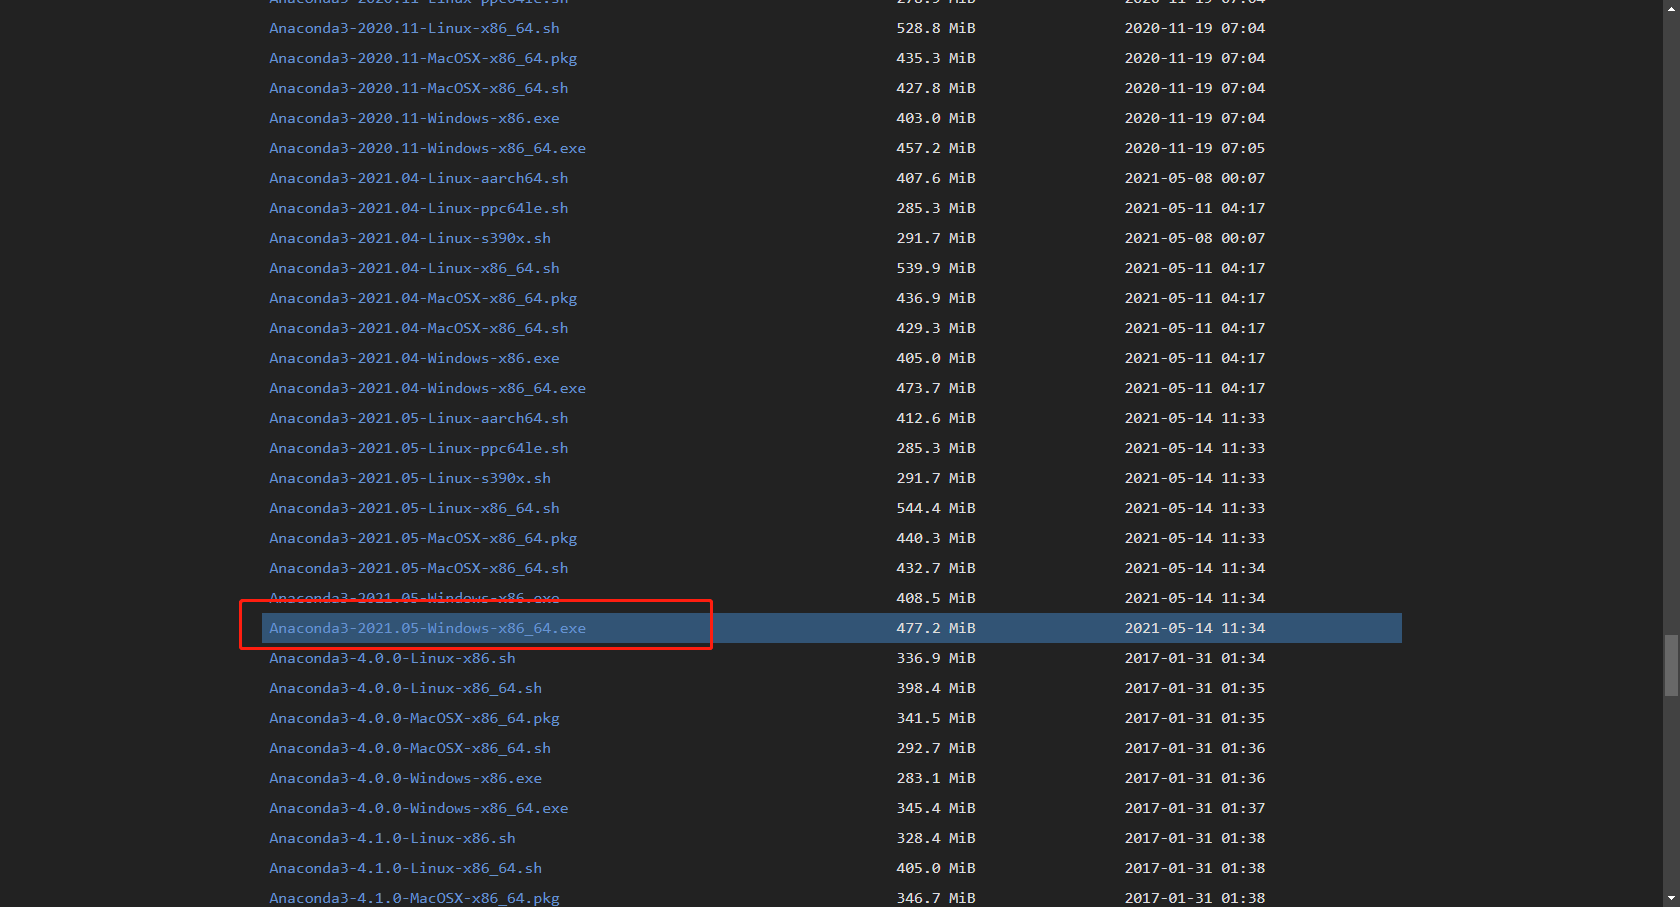
We can use the open source software mirror station of Tsinghua University: Open source software mirror station of Tsinghua University , please select your own system to download.
I choose the 86 bit installation package for Windows system
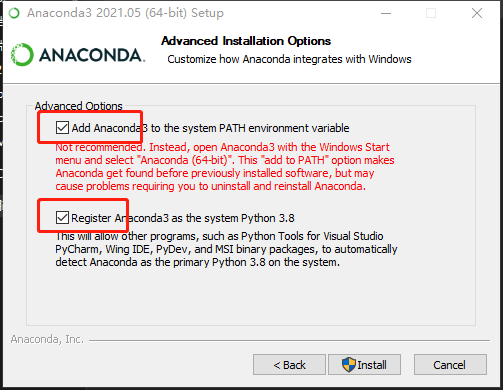
Note: when installing anaconda, you must add the environment variable to the windows environment. If it is not checked, you must add it manually after installation.
The installation process is slow, just wait patiently.
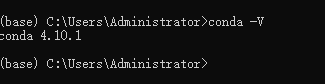
After installation, run the start menu - > anaconda3 - > Anaconda prompt and type the command in the terminal
conda -V
2. Install tensorFlow
TensorFlow has two versions: cpu and gpu. The gpu version needs the support of NVIDIA graphics card and downloads CUDA and cuDNN. For beginners, we can use the cpu Version (here, we only introduce the installation of cpu version)
1. Open start menu - > anaconda3 - > Anaconda Prompt, and open Anaconda Prompt console;
2. First select the Tsinghua software warehouse image to install TensorFlow, so that the update will be faster
conda config --add channels https://mirrors.tuna.tsinghua.edu.cn/anaconda/pkgs/free/

conda config --set show_channel_urls yes

# pip configuring domestic sources
pip config set global.index-url https://mirrors.ustc.edu.cn/pypi/web/simple
# query
pip config list
3. Create a python 3.8 environment with Anaconda3. The environment name is tensorflow
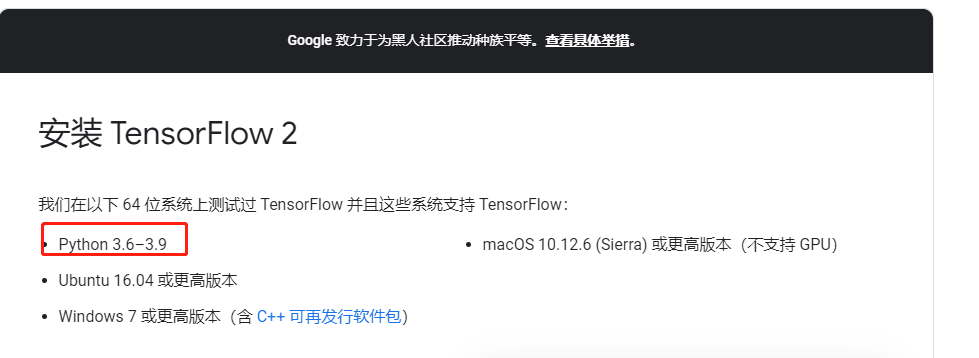
Can be installed from [tensorflow]( TensorFlow (google.cn) )Check the current supported python version of tensorflow
typing
conda create -n tensorflow python=3.8
Type y when the procedure is given
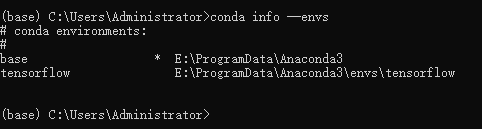
After the tensorflow environment is created, type
conda info --envs
It can be found that in addition to the base environment, we can also see the environment just created named tensorflow
4. Install TensorFlow of cpu version
In the previous step, we just created a python environment called tensorflow. In this step, we configured tensorflow into this environment
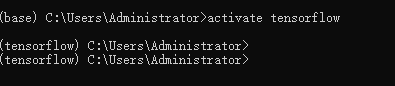
Start the tensorflow environment in Anaconda Prompt:
typing
activate tensorflow
It is used to activate the environment we created called tensorflow and configure it in this environment
Download and install TensorFlow of cpu version officially
typing
#Do not specify the version and automatically download the latest version
pip install tensorflow-cpu

#Specify the version (it is recommended to install the required version)
pip install tensorflow-cpu==2.5
Later replacement version
# uninstall
pip uninstall tensorflow-cpu
pip uninstall keras

pip install tensorflow-cpu==2.5
pip install keras==2.4.3
Wait patiently for download and installation.
At this point, if we want to exit the tensorflow environment
conda deactivate
5. Test TensorFlow of cpu version
Open Anaconda Prompt console (if you did not close Anaconda Prompt in the previous step, you can continue to operate)
typing
activate tensorflowpython
To start tensorflow and enter the python environment
Note that when switching to the tensorflow environment, the front of the command line changes to (tensorflow), which indicates that we have successfully started the tensorflow environment. After entering python, the front changes to > > >, which means that we have entered the python environment of tensorflow (and the python 3.8 environment)

typing
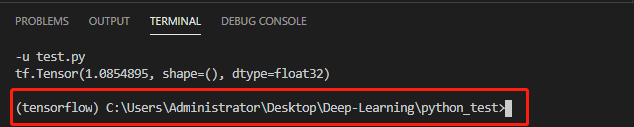
import tensorflow as tf
You can see that there are no errors, the execution is successful, and the installation of this tensorflow cpu version is completed.
Retype
tf.__version__
Check whether the version number is returned normally

3. Install PyTorch
The installation steps are the same as in the previous section;
Create virtual environment
conda create -n pytorch python=3.8activate pytorch
Install CPU version
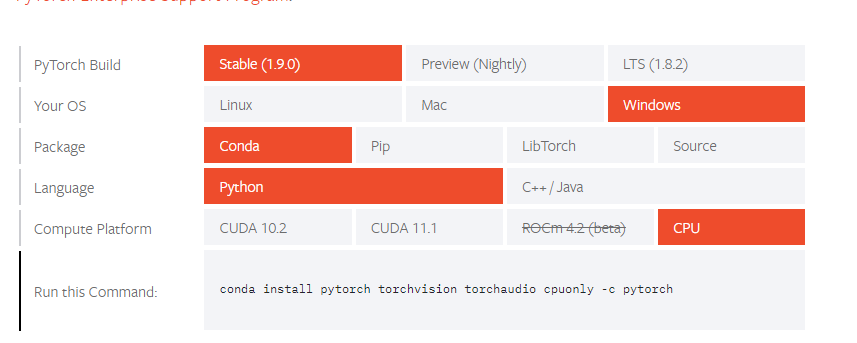
conda install pytorch torchvision torchaudio cpuonly -c pytorch
Verify installation
activate pytorchpython
Enter import torch. If no error is reported after entering, it will succeed
4. Configure Python development environment with vscode
Installing tools in tensorflow virtual environment
# Flake8-Python Static code checking tool# yapf-python Code formatting tool pip install flake8pip install yapf# Install Jupiter notebook to facilitate running and debugging PIP install Jupiter notebook
vscode installation plug-ins: Python, Code Runner, Jupiter
It is recommended to put the configuration in the project (because different projects use different python environments, the configuration may be different)
Add the following configuration in setting.json
"python.linting.flake8Enabled": true, "python.linting.flake8Args": [ "--max-line-length=248", "--ignore=F401, E271, E402, E303, E302", //Ignore the alarm number and determine according to your needs], "python. Linking. Enabled": true, "python. Linking. Pylintenabled": false, "python. Condapath": "E: \ \ programdata \ \ anaconda3", "python. Pythonpath": "E: \ \ programdata \ \ anaconda3 \ \ envs \ \ tensorflow \ \ python. Exe", "[Python]: {editor. Defaultformatter": "Ms python. Python"}, "python.formatting.provider": "autopep8", "jupyter.experiments.optOutFrom": ["NativeNotebookEditor"], "Code runner. Runinterminal": true, / / run "code runner. Filedirectoryascwd" on the terminal: true, / / the default directory of the terminal is the directory of the running file "code runner. Savefilebeforerun": true, "code runner. Executormap":{ // Adding the - u (unbuffered) parameter will force its standard output to be printed directly to the screen "python":"python -u $fileName"} without caching, just like the standard error,
Customize the following command terminals in the project, enter the corresponding python environment when starting, and write xxx... Code workspace as follows:
"settings": { "terminal.integrated.shell.windows": "C:\\Windows\\System32\\cmd.exe", "terminal.integrated.shellArgs.windows": [ "/K", "E:\\ProgramData\\Anaconda3\\Scripts\\activate.bat", "E:\\ProgramData\\Anaconda3\\envs\\tensorflow", ], }
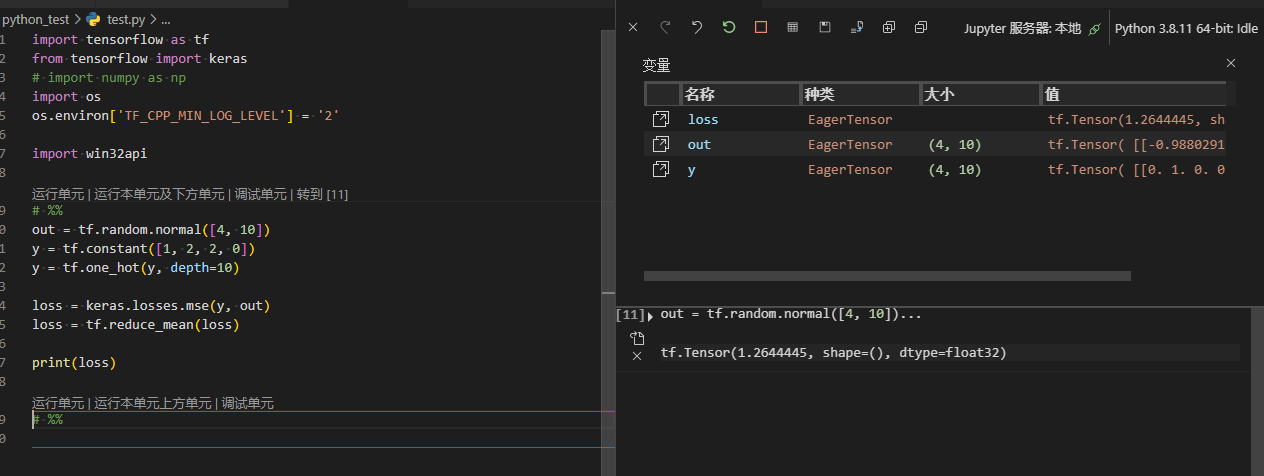
The usage effect of jupyter is as follows:
jupyter encountered an error that failed to connect to the kernel:
pip uninstall pywin32pip install pywin32==225