This article still uses xftp to upload gz files, and then operates on xShell. If you do not install these two files, please refer to the previous blog.
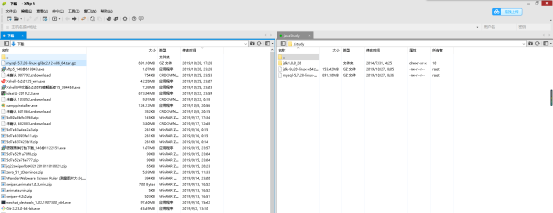
1. Upload the downloaded file to the corresponding location with xftp.
2. Unzip the file: tar-zvxf-mysql-5.7.28-linux-glibc2.12-x86_.tar.gz
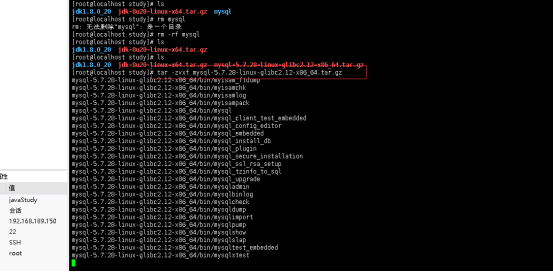
3. Create mysql folder under / usr/local folder
mkdir /usr/local/mysql
4. Move the extracted mysql file to / usr/local/mysql:
mv mysql-5.7.28-linux-glibc2.12-x86_64/* /usr/local/mysql
5. Add mysql user group and mysql user for centos (- s / bin/false) parameter to specify that mysql user only owns ownership, but does not have login permission), and the codes at both ends are executed respectively. You can view mysql permissions through LL (lowercase L)
groupadd mysql

useradd -r -g mysql -s /bin/false mysql
6. Enter the folder / usr/local/mysql:
cd /usr/local/mysql
7. View MySQL's search path for the configuration file. The left is the priority:
./bin/mysql --help | grep 'Default options' -A 1
8. Create profile:
rm -rf /etc/my.cnf
touch /etc/my.cnf
9. Edit my.cnf file:
vi /etc/my.cnf
10. Press i to start editing the file; add in / etc/my.cnf:
[mysqld]
port=3306
datadir=/var/lib/mysql/data
socket=/var/lib/mysql/data/mysql.sock
user=root
max_connections=151
symbolic-links=0
# Set ignore case
lower_case_table_names = 1
# Specified encoding
character-set-server=utf8
collation-server=utf8_general_ci
#Specify the socket communication file path when the client connects to mysql
[client]
socket=/var/lib/mysql/data/mysql.sock
11. Copy the mysql startup script to the resource directory so that mysql can be started anywhere
cp ./support-files/mysql.server /etc/rc.d/init.d/mysql
12. Add mysqld service control script execution permission
chmod +x /etc/rc.d/init.d/mysql
13. Add mysql service to system service
chkconfig --add mysql
14. Check whether mysql service has taken effect
chkconfig --list mysql
15. Create the folder specified by mysql:
mkdir /var/lib/mysql/
mkdir /var/lib/mysql/data
16. Change the owner and group of the file through chown, - R processes all files in the specified directory and its subdirectories:
chown -R mysql:mysql /var/lib/mysql/
17. Install mysql
mysqld --user=root --basedir=/usr/local/mysql --datadir=/var/lib/mysql/data --initialize
After the installation is successful, you need to pay attention to the last line: ා wq.os6? < WWK is the random password of mysql
2019-10-27T01:28:32.711916Z 1 [Note] A temporary password is generated for root@localhost: #WQ.os6?<wwk
18. Start mysql:
service mysql start
19. Configure environment variables:
vi /etc/profile

//Add at the end:
export PATH=$PATH:/usr/local/mysql/bin
20. Refresh the file of environment variable:
source /etc/profile
21. Change the login password: enter the password and enter:
mysql> alter user 'root'@'localhost' identified by 'Password you want to change';
mysql> flush privileges;
mysql> quit;
22. Restart mysql:
service mysql restart
23. Configure remote access and firewall port settings for remote access:
 firewall-cmd --zone=public --add-port=3306/tcp --permanent
 firewall-cmd --reload
24. After configuration, you can view the open remote ports:
firewall-cmd --list-port
25. Set permissions to allow remote connection to the database:
update mysql.user set user.Host='%' where user.User='root';Refresh permission:
flush privileges;
26. Test whether IP can be used for remote link (my linux IP is 192.168.189.150):
./bin mysql -u root -p -h192.168.189.150
If you enter a password, you can connect to mysql. That is to say, you have successfully installed mysql on centos!!!