Background environment
[root@node1 log]# cat /etc/redhat-release
CentOS Linux release 7.3.1611 (Core) II. Installation steps
1. Add mysql group and mysql user to set up the owner and group of mysql installation directory file.
#Users and user groups are automatically created here.
[root@node1 opt]# useradd mysql
2. Upload files and decompress them. Set up groups and users that mysql belongs to.
#Upload to the virtual machine after downloading
[root@node1 opt]# ls
mysql-5.7.20-linux-glibc2.12-x86_64.tar.gz

#Unzip to / usr/local / directory
[root@node1 opt]# tar -xf mysql-5.7.20-linux-glibc2.12-x86_64.tar.gz -C /usr/local/

#Create Soft Connections, Set Users and Groups
[root@node1 local]# ln -s mysql-5.7.20-linux-glibc2.12-x86_64/ mysql
[root@node1 local]# chown -R mysql:mysql mysql*
[root@node1 local]# chmod -R 755 mysql*
3. Modify the configuration/etc/my.cnf configuration file
[root@node1 opt]# vim /etc/my.cnf
[mysqld]
#Where to store initialized mysql data
datadir=/usr/local/mysql/data
socket=/usr/local/mysql/data/mysql.sock
user=mysql
assorted security risks
symbolic-links=0

[mysqld_safe]
log-error=/var/log/mysqld.log
#The location of the process file after starting mysql
pid-file=/usr/local/mysql/data/node1.pid
4.mysql initialization
Mysql 5.7 is different from previous versions, and this command is used in many materials:. / scripts/mysql_install_db user=mysql, while the instructions of mysql_install_db in MySQL 5.7.2 are in the bin directory and are initialized with the mysqld initialize command on the official website. 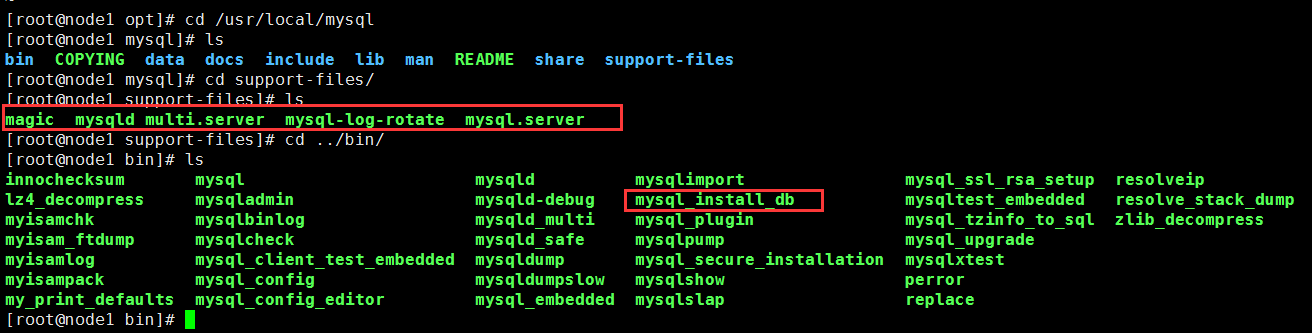
# Initialization due to in/etc/my.cnf The content of the configuration file has been modified, and it's better to add it here.--datadir This parameter, otherwise it will be wrong.
[root@node1 mysql]# ./bin/mysqld --initialize --user=mysql --datadir=/usr/local/mysql/data
After execution, there will be an initialization password, which is really different from the previous version. This password should be remembered, which will be used later. 
5. Start mysql
[root@node1 support-files]# cp mysql.server /etc/init.d/
#Start / etc/init.d/mysql.server start
[root@node1 opt]# service mysql.server start
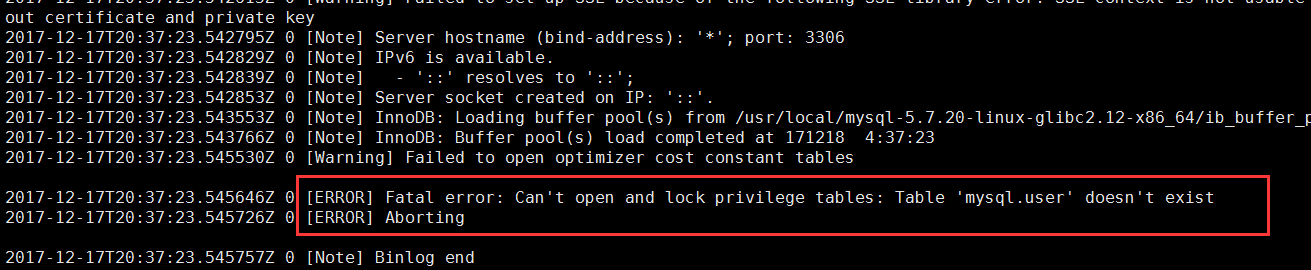
Starting MySQL. SUCCESS! Errors are reported when mysql is started successfully: 
Now that we're talking about the file / tmp/mysql.sock, let's take a look at it. We set up the directory / usr/local/mysql/data, and in this directory we sent the file.
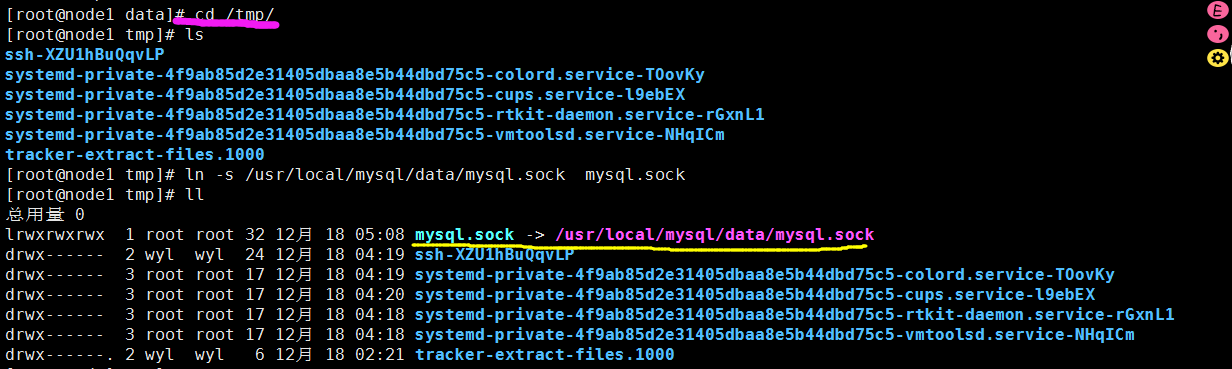
#Set up a soft connection to connect mysql.sock to / tmp
[root@node1 tmp]# ln -s /usr/local/mysql/data/mysql.sock  mysql.sock
Enter the MySQL instructions again. (Remember to configure the environment variables in / etc/profile, remember source, or you will execute the MySQL instructions under the bin directory of mysql.) The password here is the password mentioned above. After entering, we can reset a simple password. 
Note that you can't enter mysql-uroot-plF&d*FCN%1li directly here, otherwise you will report an error.
3. Some problems needed in the installation process:
1,ERROR 2002 (HY000): Can't connect to local MySQL server through socket '/tmp/mysql.sock' (2)
Solutions:
If mysql.sock is specified in a directory other than / tmp, you need to add [client] to my.cnf and specify the socket location.
Otherwise, there will be an error when you log in to mysql: ERROR 2002 (HY000): Can't connect to local MySQL server through socket'/ tmp/mysql.sock'(2)
It should be that the sock file in the tmp directory will be found by default.
2. The log will be created and empowered according to the configuration in my.cnf mentioned above, so if something goes wrong, it can only be executed manually. 
3. The error report in the following figure is caused by incorrect road during initialization. If we strictly follow the steps mentioned above, the following situation will not occur.