I. What is Nginx
Nginx is a high performance http server / reverse proxy server and e-mail (IMAP/POP3) proxy server. Developed by Igor Sysoev, a Russian programmer, the official test nginx can support 50,000 concurrent links (Taobao Jingdong level), and the consumption of cpu, memory and other resources is very low, running very stable. Open source, free.
First Understanding of Nginx (1): Installation of nginx
II. Application scenarios of Nginx
1. http server
Nginx is an http service that can provide http services independently. Can be a static web server.
2. Virtual Host
It can realize virtual multiple websites on one server. For example, the virtual host used by personal websites.
3. Reverse proxy, load balancing
When the number of visits to the website reaches a certain level, when a single server can not satisfy the user's request, it is necessary to use a cluster of servers to use nginx as a reverse proxy. Moreover, multiple servers can share the load equally, and they will not idle one server because of the high load downtime of one server.
Forward proxy: For example, the university's Internet client uses the account password to access the internet. This is your computer accessing the Internet through that proxy server. 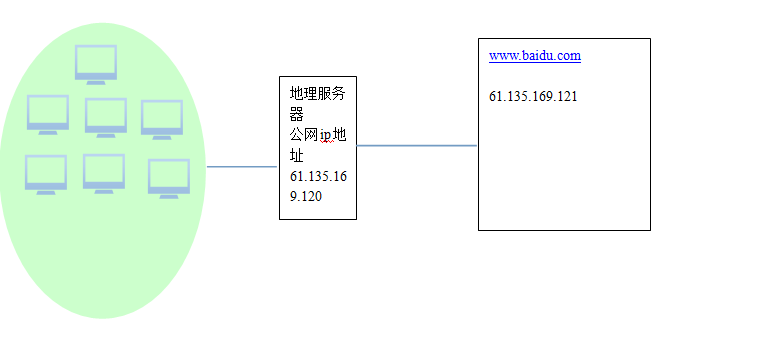
Reverse proxy: Visit the website, which server serves the customer, which is decided by the reverse proxy. 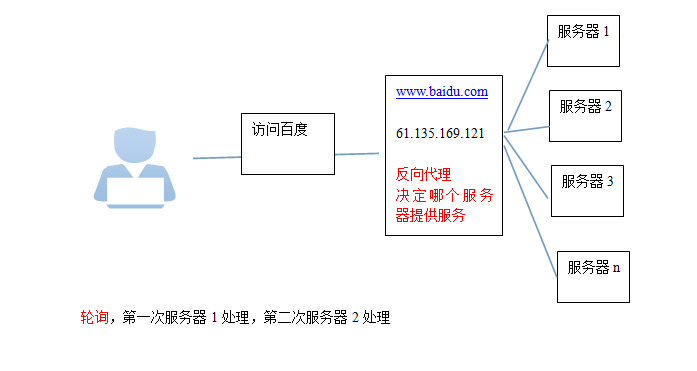
3. Implementation of Virtual Machine by Nginx
It can run multiple websites in the same service, and the websites do not interfere with each other.
The same server may have an ip, and the website needs to use 80 ports. The domain names of websites are different.
There are three ways to distinguish different websites, so there are three ways to implement virtual machines in Ngxin:
1, ip distinction
2. Port Differentiation
3. Domain Name Differentiation
1. IP partitioning virtual host
You need a server to bind multiple ip addresses
Step 1: Add an ip
Method 1: (temporary)
Use standard network configuration tools (such as ifconfig and route commands) to add lP aliases:
Current ip configuration: 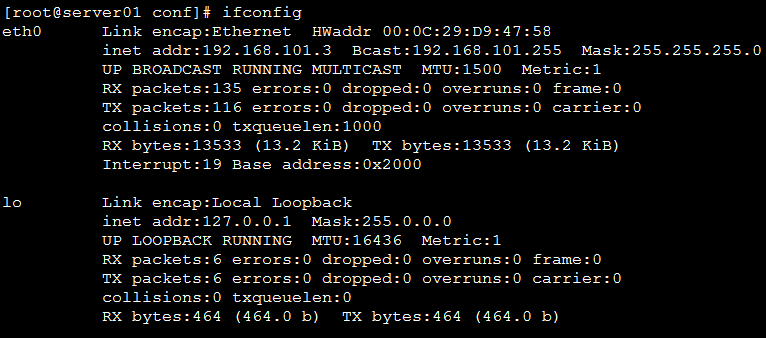
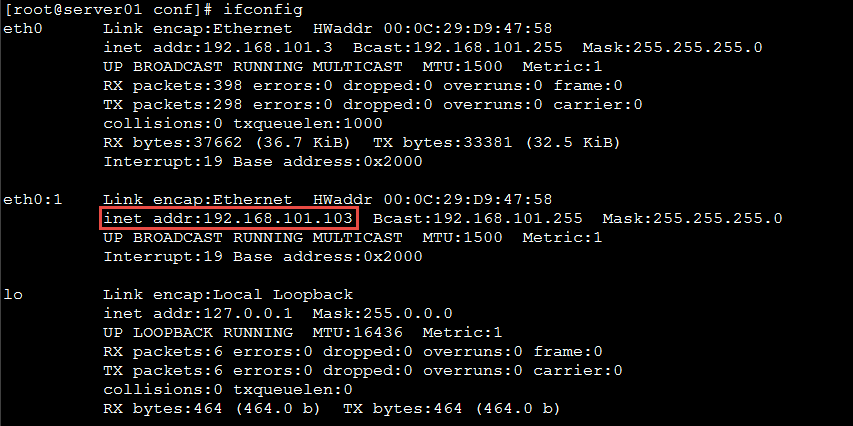
Bind an ip to eth0 network card: 192.168.101.103
/sbin/ifconfig eth0:1 192.168.101.103 broadcast 192.168.101.255 netmask 255.255.255.0 up
/sbin/route add -host 192.168.101.103 dev eth0:1
Method 2: (Permanent)
1. Copy the file / etc/sysconfig/network-scripts/ifcfg-eth0 and name it ifcfg-eth0:1
Modify the contents:
DEVICE=eth0:1
IPADDR=192.168.25.103
Other items need not be modified
2. Restart the system
Step 2: nginx.conf configuration
server {
        listen       80;
        server_name  192.168.25.141;

        #charset koi8-r;

        #access_log  logs/host.access.log  main;

        location / {
            root   html-141;
            index  index.html index.htm;
        }


    }

    server {
        listen       80;
        server_name  192.168.25.100;

        #charset koi8-r;

        #access_log  logs/host.access.log  main;

        location / {
            root   html-100;
            index  index.html index.htm;
        }


    }
server: a virtual host
listen: port
server_name: address of virtual host
Location: the location of the virtual host
Root: The root directory of the virtual host
Step 3: Reload the configuration file
./nginx -s reload
2. Port partitioning virtual host
Modify configuration files
server {
        listen       81;
        server_name  192.168.25.141;

        #charset koi8-r;

        #access_log  logs/host.access.log  main;

        location / {
            root   html-81;
            index  index.html index.htm;
        }


    }
    server {
        listen       82;
        server_name  192.168.25.141;

        #charset koi8-r;

        #access_log  logs/host.access.log  main;

        location / {
            root   html-82;
            index  index.html index.htm;
        }


    }
2. Domain Name Division Virtual Host
Domain name partitioning is the most useful way to configure virtual hosts
A domain name can only bind to an ip address, and an ip address can be bound to multiple domain names.
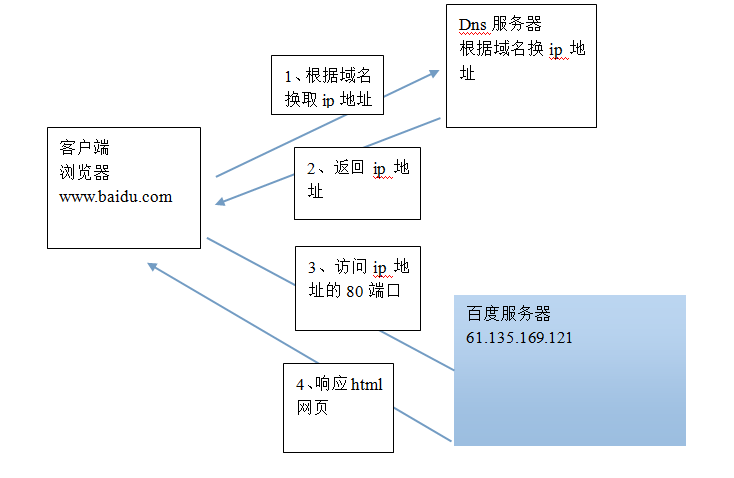
Domain name access can be achieved by modifying the host file of windows
Step 1: Modify the host file:
The first method: (using client tools) 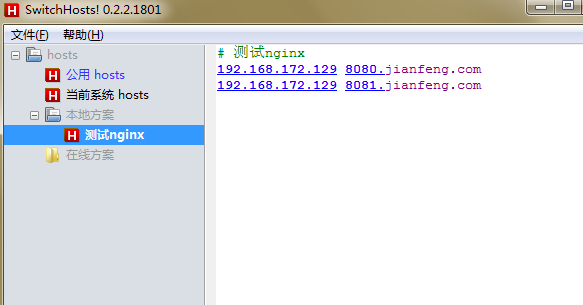
The second method:
Modify the window s hosts file directly: (C: Windows System32 drivers etc)
Step 2: Modify the configuration file
server {
        listen       80;
        server_name  www.itheima.com;

        #charset koi8-r;

        #access_log  logs/host.access.log  main;

        location / {
            root   html-www;
            index  index.html index.htm;
        }


    }

    server {
        listen       80;
        server_name  hehe.itheima.com;

        #charset koi8-r;

        #access_log  logs/host.access.log  main;

        location / {
            root   html-hehe;
            index  index.html index.htm;
        }


    }
Step 3: Overload the configuration file