Reprinted from: http://www.jianshu.com/p/45d994d04a25
1. Analyse the page structure, clarify the requirements and functions
The game has three interfaces: the start interface, the game interface and the end interface.
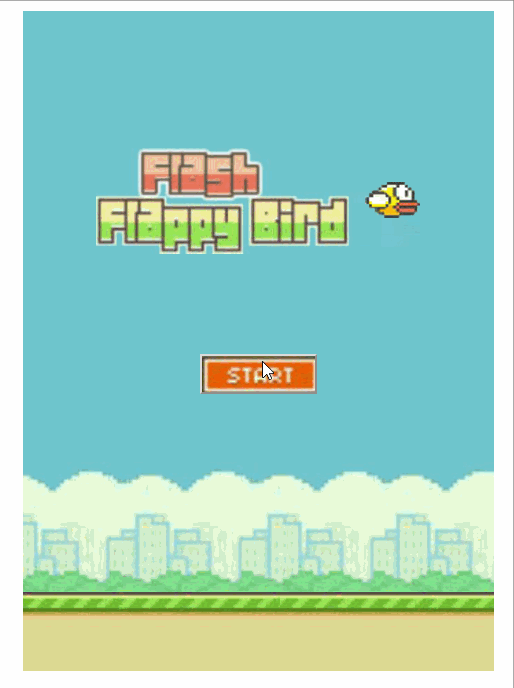
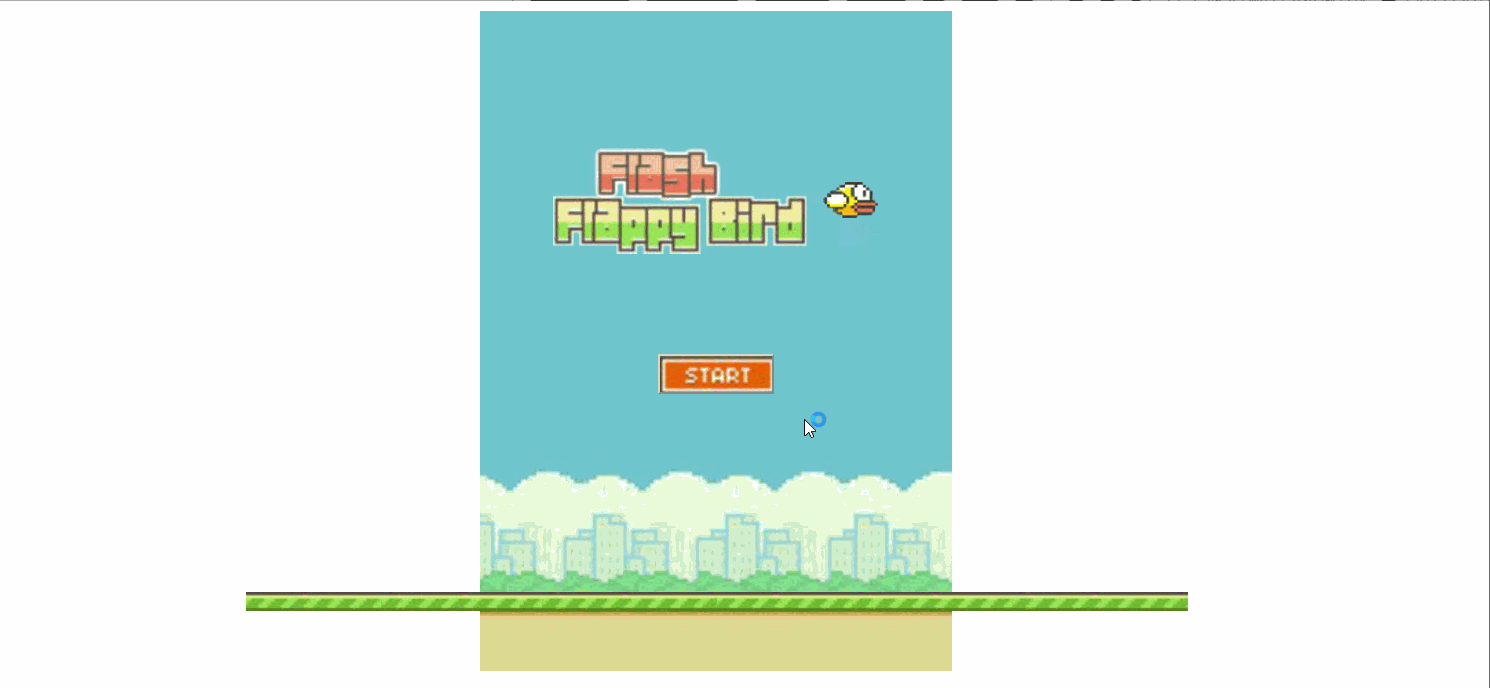
1.1 Beginning Interface
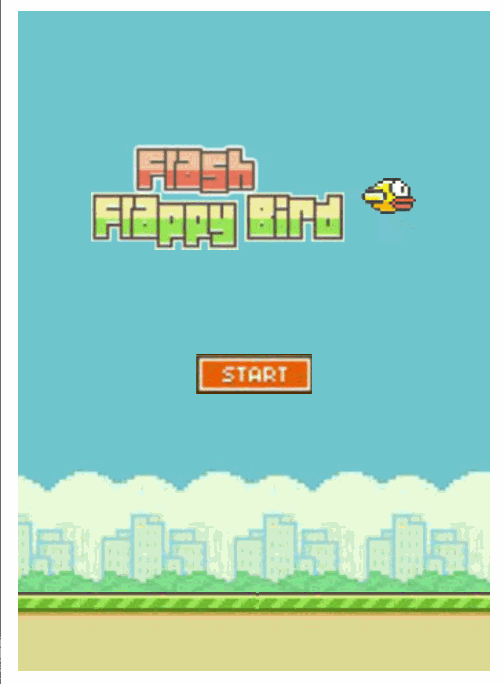
- The Background of Game
- Up and down moving game titles and winged birds
- start button, Click to enter the game interface
- A moving ground.
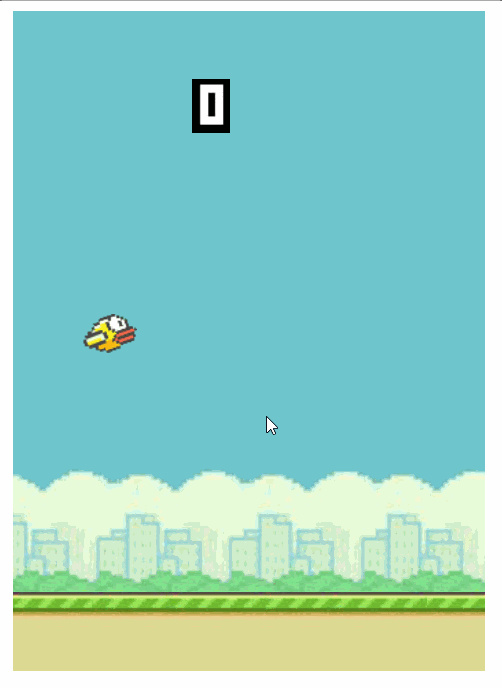
1.2 Game Interface
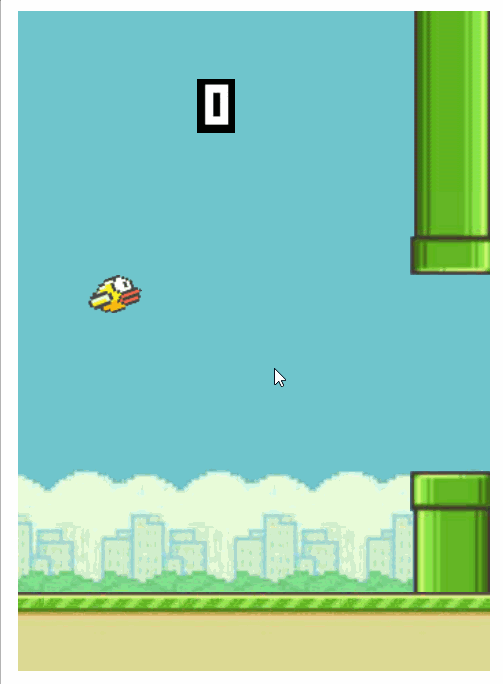
- Scorer showing the number of obstacles crossed
- The moving obstacles are the upper and lower pipelines respectively.
- Clicking on the game interface, the bird flies up and then falls under gravity.
- When the bird collides with the pipe, the end interface pops up and the bird lands on the ground.
1.3 End Interface
- Game over prompt panel
- OK button
2. Developing the Start Interface
Considering the moving effect of grassland, we add two grasslands to the page.
2.1 HTML
<!DOCTYPE html>
<html>
    <head>
        <meta charset="utf-8" />
        <title>Fly Bird</title>
        <link rel="stylesheet" type="text/css" href="css/index.css"/>
    </head>
    <body>
        <div id="wrapBg">  <!--Game background-->
            <div id="headTitle"> <!--Start heading-->
                <img id="headBird" src="img/bird0.png" alt="Little bird" /> <!--Birds in the title-->
            </div>
            <button id="startBtn" ></button> <!--Start button-->
            <div id="grassLand1"></div> <!--Grassland 1-->
            <div id="grassLand2"></div> <!--Grassland 2-->
        </div>
    </body>
</html>
2.2 CSS
#wrapBg{/*Game background*/
    width: 343px;height: 480px;
    margin: 0 auto;
    background-image:url(../img/bg.jpg);
    position: relative;
    top: 100px;
    overflow: hidden;
}
#headTitle{/*Start heading*/
    width: 236px;height: 77px;
    background-image: url(../img/head.jpg);
    position: absolute; left: 53px; top: 100px;
}
#headBird{/*Start with the bird in the title*/
    float:right;
    margin-top: 25px;
}
#startBtn{/*Start button*/
    width: 85px;height: 29px;
    padding: 0;margin: 0;
    background-image: url(../img/start.jpg);
    position: absolute;left: 129px;top: 250px;
}
#grassLand1{/*Grassland 1*/
    height: 14px;width: 343px;
    background-image: url(../img/banner.jpg);
    position: absolute;top: 423px;
}
#grassLand2{/*Grassland 2*/
    height: 14px;width: 343px;
    background-image: url(../img/banner.jpg);
    position: absolute;top: 423px;left: 343px;
}
Page effect of commenting out overflow:hidden in wrapBg
2.3 JS
The effect of bird's agitation requires the principle of frame-by-frame animation.
Frame-by-Frame animation is a common form of animation. Its principle is to decompose animation actions in "continuous key frames". That is, to draw different content Frame By Frame in each frame of the time axis so that it can be continuously played into animation.


2.3.1 Beginning with Title Swing
        var jsHeadTitle = document.getElementById("headTitle");// Get title
        var jsHeadBird = document.getElementById("headBird"); // Get Title Birds

        var Y = 3;//Range of Title Oscillation
        var index = 0;
        var imgArr = ["img/bird0.png","img/bird1.png"]
        //Put the bird image path into an array and make the bird's wings swing using the principle of frame-by-frame animation.
        var headWaveTimer = setInterval(headWave,200); //Set the timer that swings the title up and down
        function headWave() {
            Y *= -1;
            jsHeadTitle.style.top = jsHeadTitle.offsetTop + Y + "px";
            jsHeadBird.src = imgArr[index++];
            if (index == 2) {
                index = 0;
            }
        }
2.3.2 Moving grassland
        var jsGrassLand1 = document.getElementById("grassLand1"); //Grassland acquisition 1
        var jsGrassLand2 = document.getElementById("grassLand2"); //Grassland acquisition 2

        var landTimer = setInterval(landRun,30); //A timer that moves the grass.
        function landRun() {
            if (jsGrassLand1.offsetLeft <= -343) {
                jsGrassLand1.style.left = "343px";
            }
            if (jsGrassLand2.offsetLeft <= -343) {
                jsGrassLand2.style.left = "343px";
            }
            jsGrassLand1.style.left = jsGrassLand1.offsetLeft - 3 + "px";
            jsGrassLand2.style.left = jsGrassLand2.offsetLeft - 3 + "px";
        }
2.3.3 Start button
        var jsStartBtn = document.getElementById("startBtn");
        jsStartBtn.onclick = function() { //Add a click event handler for the start key
            jsHeadTitle.style.display = "none"; //Hidden title
            clearInterval(headWaveTimer); //Turn off the timer that swings the title
            jsStartBtn.style.display = "none"; //Hidden key
            //Functions to be added
            //Click the Start button to enter the game interface
        }
The effect after completion (overflow:hidden in wrapBg is commented out)

Next we develop the Game Interface.
3. Development of Game Interface
There are three elements in the game interface, namely "bird", "obstacle" and "scorer". We create the corresponding objects in turn.
3.1 little birds
First, create the bird's object, bird.js file.
var bird = {
    flyTimer:null,//Bird Flying Timer
    wingTimer:null,//Bird Wing Swing Timer

    div:document.createElement("div"),
    showBird:function(parentObj) {
        this.div.style.width = "40px";
        this.div.style.height = "28px";
        this.div.style.backgroundImage = "url(img/bird0.png)";
        this.div.style.backgroundRepeat = "no-repeat";
        this.div.style.position = "absolute";
        this.div.style.left = "50px";
        this.div.style.top = "200px";
        this.div.style.zIndex = "1";

        parentObj.appendChild(this.div);  //Insert Bird DIV into the Game Interface
    },

    fallSpeed: 0, //Bird's Falling Speed
    flyBird: function(){ //Function of Controlling Bird's Flying and Falling
        bird.flyTimer = setInterval(fly,40);
        function fly() {
            bird.div.style.top = bird.div.offsetTop + bird.fallSpeed++ + "px";
            if (bird.div.offsetTop < 0) {
                bird.fallSpeed = 2; //This is used to control birds not to fly out of the interface.
            }
            if (bird.div.offsetTop >= 395) {
                bird.fallSpeed = 0;
                clearInterval(bird.flyTimer); //Once on the ground, clear the timer
                clearInterval(bird.wingTimer); //Clearing Wing Swing Timer
            }
            if (bird.fallSpeed > 12) {
                bird.fallSpeed = 12;  //The maximum falling speed of the bird is controlled at 12.
            }
        }
    },

    wingWave: function() { //The Function of Controlling Bird's Flapping Wings
        var up = ["url(img/up_bird0.png)", "url(img/up_bird1.png)"];
        var down = ["url(img/down_bird0.png)", "url(img/down_bird1.png)"];
        var i = 0, j = 0;
        bird.wingTimer = setInterval(wing,120);//Frame-by-frame animation, birds flare their wings
        function wing() {
            if (bird.fallSpeed > 0) {
                bird.div.style.backgroundImage = down[i++];
                if (i==2) {i = 0}
            }if (bird.fallSpeed < 0) {
                bird.div.style.backgroundImage = up[j++];
                if (j==2) {j = 0}
            }
        }
    },
};
Next, when you click the start button, load the bird. (Add on top of the previous code)
jsStartBtn.onclick = function() { //Add a click event handler for the start key
    jsHeadTitle.style.display = "none"; //Hidden title
    clearInterval(headWaveTimer); //Turn off the timer that swings the title
    jsStartBtn.style.display = "none"; //Hidden key
    bird.showBird(jsWrapBg); //Insert the bird into the interface
    bird.flyBird(); //Controlling the Flying and Falling of Birds
    bird.wingWave(); //Frame-by-frame animation, birds flare their wings
    jsWrapBg.onclick = function(){
        bird.fallSpeed = -8;
    };
    //Functions to be added
    //Click the Start button to enter the game interface
}
The effect of adding birds
3.2 Obstacles (Upper and Lower Pipelines)
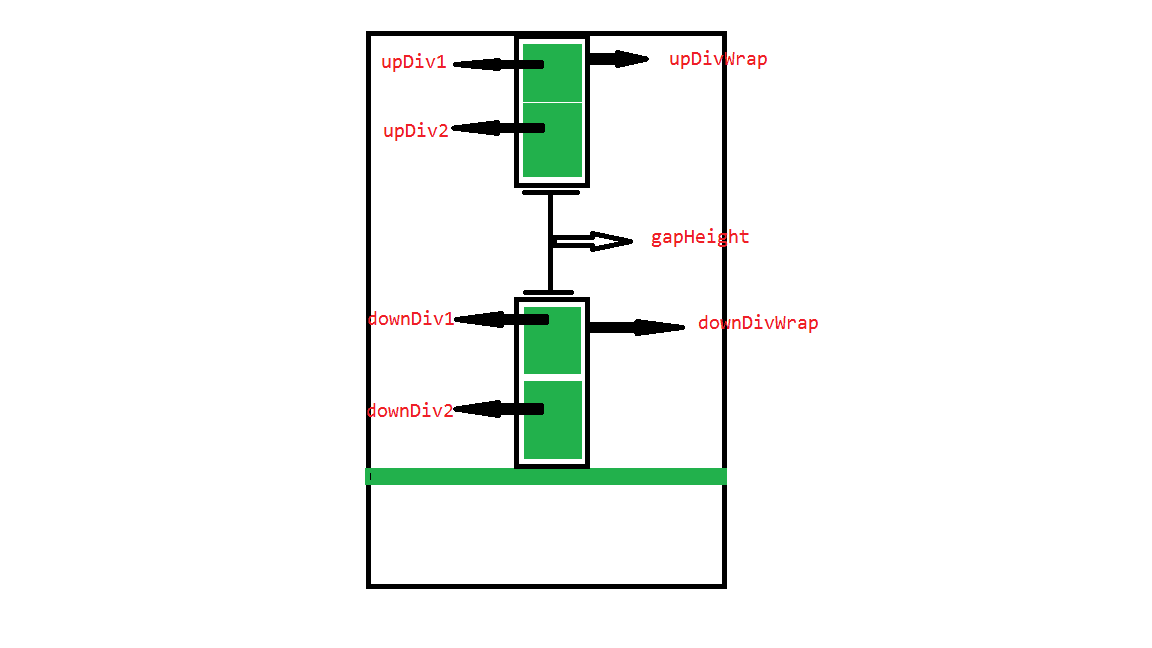
Obstacles can be divided into upper and lower pipelines, as shown in the schematic diagram, so that the shape of obstacles can be changed by randomly setting the height of DownDiv2 and gapHeight.
block.js
function Block() {
    this.upDivWrap = null;
    this.downDivWrap = null;
    this.downHeight = baseObj.randomNum(0,150);//Random generation of numbers between 0 and 150 to control the height of the pipeline
    this.gapHeight = baseObj.randomNum(150,160);// The width of the gap in the middle of the pipe can be adjusted to control the difficulty of the game.
    this.upHeight = 312 - this.downHeight - this.gapHeight;

    // Method for generating Div
    this.createDiv = function(url, height, positionType, left, top) {
        var newDiv = document.createElement("div");
        newDiv.style.width = "62px";
        newDiv.style.height = height;
        newDiv.style.position = positionType;
        newDiv.style.left = left;
        newDiv.style.top = top;
        newDiv.style.backgroundImage = url;  //"url(/img/0.jpg)"
        return newDiv;
    };

    this.createBlock = function() {
        var upDiv1 = this.createDiv("url(img/up_mod.png)", this.upHeight + "px");
        var upDiv2 = this.createDiv("url(img/up_pipe.png)", "60px");
        this.upDivWrap = this.createDiv(null, null, "absolute", "450px");
        this.upDivWrap.appendChild(upDiv1);
        this.upDivWrap.appendChild(upDiv2);//Generate upper pipe

        var downDiv1 = this.createDiv("url(img/down_pipe.png)", "60px");
        var downDiv2 = this.createDiv("url(img/down_mod.png)", this.downHeight +"px");
        this.downDivWrap = this.createDiv(null, null, "absolute", "450px", 363 - this.downHeight + "px");
        this.downDivWrap.appendChild(downDiv1);
        this.downDivWrap.appendChild(downDiv2); //Generate the pipes below

        jsWrapBg.appendChild(this.upDivWrap);
        jsWrapBg.appendChild(this.downDivWrap);
    };

    this.moveBlock = function() { //Method of Controlling Pipeline Mobility
        this.upDivWrap.style.left = this.upDivWrap.offsetLeft - 3 + "px";
        this.downDivWrap.style.left = this.downDivWrap.offsetLeft - 3 + "px";
    };
}
The common object file, baseObj.js, is used to provide collision detection for random numbers and two rectangular div s
var baseObj = {
    //random number
    randomNum: function(min, max) {
        return parseInt(Math.random() * (max - min + 1) + min);
    },

    //Collision detection between two rectangular elements
    rectangleCrashExamine: function (obj1, obj2) {
            var obj1Left = obj1.offsetLeft;
            var obj1Width = obj1.offsetLeft + obj1.offsetWidth;
            var obj1Top = obj1.offsetTop;
            var obj1Height = obj1.offsetTop + obj1.offsetHeight;

            var obj2Left = obj2.offsetLeft;
            var obj2Width = obj2.offsetLeft + obj2.offsetWidth;
            var obj2Top = obj2.offsetTop;
            var obj2Height = obj2.offsetTop + obj2.offsetHeight;

            if (!(obj1Left > obj2Width || obj1Width < obj2Left || obj1Top > obj2Height || obj1Height < obj2Top)) {
                return true;
            }
            return false;
    },
};
My idea is to create a block when the start button clicks, store the block in the array blocksArr, check the length of the array in the landTimer timer method landRun, and move all the blocks in the array if the array is not empty.
Check the distance that the last block in the array leaves, reach a certain distance, and add a new block to the array.
Check the first block in the array. Once it reaches a certain position, remove downDivWrap and upDivWrap from the structure, and delete the block in the array.
        var blocksArr = [];
        var blockDistance = baseObj.randomNum(130,250);
        var landTimer = setInterval(landRun,30); //A timer that moves the grass.
        function landRun() {
            if (jsGrassLand1.offsetLeft <= -343) {
                jsGrassLand1.style.left = "343px";
            }
            if (jsGrassLand2.offsetLeft <= -343) {
                jsGrassLand2.style.left = "343px";
            }
            jsGrassLand1.style.left = jsGrassLand1.offsetLeft - 3 + "px";
            jsGrassLand2.style.left = jsGrassLand2.offsetLeft - 3 + "px";

            if (blocksArr.length) {
                for (var i = 0; i < blocksArr.length; i++) {
                    blocksArr[i].moveBlock();
                    var x =baseObj.rectangleCrashExamine(blocksArr[i].downDivWrap, bird.div);
                    var y = baseObj.rectangleCrashExamine(blocksArr[i].upDivWrap, bird.div);
                    var z = bird.div.offsetTop >= 390;
                    if (x || y || z) {
                        window.clearInterval(landTimer);//Clear the landTimer timer
                        bird.fallSpeed = 0; //Bird fall
                        jsWrapBg.onclick = null; //Eliminate click events

                    }
                }
                if (blocksArr[blocksArr.length - 1].downDivWrap.offsetLeft < (450 - blockDistance)) {
                        blockDistance = baseObj.randomNum(130,250);
                        var newBlock = new Block();
                        newBlock.createBlock();
                        blocksArr.push(newBlock);
                }

                if (blocksArr[0].downDivWrap.offsetLeft < -50) {
                        jsWrapBg.removeChild(blocksArr[0].downDivWrap);
                        jsWrapBg.removeChild(blocksArr[0].upDivWrap);
                        blocksArr.shift(blocksArr[0]);
                }
            }
        }
Current game effects
3.3 Scorer
The scorer in the game is relatively good to achieve, we will achieve the largest three-digit scorer bar.
html
        <div id="score">
            <div id="num1"></div>
            <div id="num2"></div>
            <div id="num3"></div>
        </div>
css styles
#score{
    position:absolute;
    left: 130px;
    top:50px;
    z-index: 1;
}

#score div{
    height: 39px;
    width: 28px;
    float: left;
    background-image: url(../img/0.jpg);
    display: none;
}
js
        var jsScore = document.getElementById("score");
        var jsNum1 = document.getElementById("num1");
        var jsNum2 = document.getElementById("num2");
        var jsNum3 = document.getElementById("num3");
        var score = 0;
To realize counter function, the most important thing is how to judge the number of water pipes passing through, we judge by the position of water pipes. Bird's positioning left is 50px and the water pipe's width is 62px. When the water pipe crosses the bird, the water pipe's offset Left is - 12px. Whenever a pipe reaches this location, score ++;
Add an event handler to the start button
jsNum1.style.display = "block";// After the click starts, let the counter display. if (blocksArr[0].downDivWrap.offsetLeft == -12) {
score++;//Integral panel
if (score < 10) {
jsNum1.style.backgroundImage = "url(img/" + score + ".jpg)";
} else if (score < 100) {
jsNum2.style.display = "block";
jsNum1.style.backgroundImage = "url(img/" + parseInt(score/10) + ".jpg)";
jsNum2.style.backgroundImage = "url(img/" + score%10 + ".jpg)";
} else if (score < 1000) {
jsNum3.style.display = "block";
jsNum1.style.backgroundImage = "url(img/" + parseInt(score/100) + ".jpg)";
jsNum2.style.backgroundImage = "url(img/" + parseInt(score/10)%10 + ".jpg)";
jsNum3.style.backgroundImage = "url(img/" + score%10 + ".jpg)";
}
console.log(score);
}At present, the counter function is completed.

4. Development of End Interface
When a bird collides with a pipe or with the ground, hide the scorer and pop up the end panel.
The end interface includes the "end panel" and the "ok" button, where you need to add click events for the "ok" button.
            <div id="gameOver">
                <img src="img/game_over.jpg" alt="game over" />
                <img src="img/message.jpg" alt="message" />
                <img id="ok" src="img/ok.jpg" alt="ok" />
</div>#gameOver{
position: absolute;
top: 100px;
text-align: center;
display: none;
z-index: 1;
}Add events to the OK button
        jsOkBtn.onclick = function() {
            window.location.href = "index.html"; //Refresh
        }
Final effect
Interested friends, you can download the code, and then add sound effects. OK, end.