Welcome to my personal home page for sample code for this article
Preface
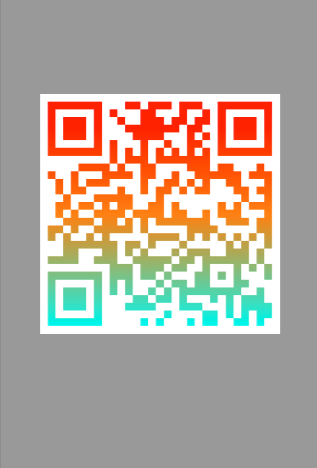
There is a requirement in the work that the black-and-white two-dimensional code which has been generated by the server is transformed into a gradient two-dimensional code. The specific effect is as follows.
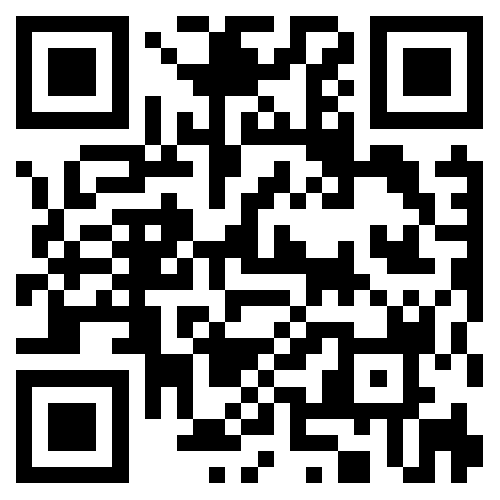
This article will introduce how to use Mask of CALayer to realize the effect of gradient two-dimensional code. Here are the two-dimensional code pictures we need to deal with.
principle
Apple describes the MASK of CALLayer as such, and the masked Layer is displayed only in the opaque part of the Mask. So our basic idea is to make the white part of the two-dimensional code completely transparent and the black part opaque, and then treat the processed image as a ask of gradient Layer. The black part will show the corresponding part of the gradient Layer, and the white part will show the color of the Layer behind the gradient Layer.
Processing the original two-dimensional code picture
We convert the original two-dimensional code image into the image needed for the mask. First, we extract the image data and format it into ARGB format pixel data. The concrete method is to generate a CGContext in ARGB space and draw the original two-dimensional code picture on it. Then the pixel data will be in the imageData.
let bitsPerComponent = 8
let bytesPerPixel = 4
let width:Int = Int(image.size.width)
let height:Int = Int(image.size.height)
let imageData = UnsafeMutableRawPointer.allocate(bytes: Int(width * height * bytesPerPixel), alignedTo: 8)

// The original black-and-white two-dimensional code picture is drawn on the picture with ARGB pixel format, and the drawn pixel data is in image data.
let colorSpace = CGColorSpaceCreateDeviceRGB()
let imageContext = CGContext.init(data: imageData, width: Int(image.size.width), height: Int(image.size.height), bitsPerComponent: bitsPerComponent, bytesPerRow: width * bytesPerPixel, space: colorSpace, bitmapInfo: CGImageAlphaInfo.premultipliedFirst.rawValue )
UIGraphicsPushContext(imageContext!)
imageContext?.translateBy(x: 0, y: CGFloat(height))
imageContext?.scaleBy(x: 1, y: -1)
image.draw(in: CGRect.init(x: 0, y: 0, width: width, height: height))
UIGraphicsPopContext()
Next, we will make the white part of the two-dimensional code completely transparent and the black part opaque. We traverse all the pixels and set the Alpha value of the pixel according to the Reed value of the pixel. If R is greater than 100, we think it's white, so we set Alpha to 0, transparent. If R is less than 100, we think it's black, so set Alpha to 255, opaque.
// Modify the value of Alpha channel according to the value of R channel of each pixel. When Red is greater than 100, set Alpha to 0 and vice versa to 255.
for row in 0..<height {
    for col in 0..<width {
        let offset = row * width * bytesPerPixel + col * bytesPerPixel
        let r = imageData.load(fromByteOffset: offset + 1, as: UInt8.self)
        let alpha:UInt8 = r > 100 ? 0 : 255
        imageData.storeBytes(of: alpha, toByteOffset: offset, as: UInt8.self)
    }
}
Set Matte
Finally, we create Gradient Layer, and then set the processed two-dimensional code image as a mask to Gradient Layer.
lazy var gradientLayer: CAGradientLayer = {
    let layer = CAGradientLayer.init()
    layer.colors = [UIColor.red.cgColor, UIColor.orange.cgColor, UIColor.cyan.cgColor]
    self.layer.addSublayer(layer)
    layer.frame = self.bounds
    return layer
}()

// Setting up black-and-white two-dimensional code picture
func setQRCodeImage(qrcodeImage: UIImage) {
    let imageMask = genQRCodeImageMask(grayScaleQRCodeImage: qrcodeImage)
    maskLayer.contents = imageMask
    maskLayer.frame = self.bounds
    self.gradientLayer.mask = maskLayer
}
summary
We mainly use the masking characteristic of CALayer to complete the effect of Gradient Two-Dimensional Code. Relevant knowledge of CoreGraphics and UIKit is involved. Of course, we have other ways to achieve this effect, such as OpenGL ES or Metal. In another article, I will show you how to use Metal to achieve the effect of gradient two-dimensional code.
supplement
For the convenience of students who are not Swift, I added OC version to the example. Interested students can click on the link at the top of the article to get the example to get new examples. The OC version involves files such as ColorfulQRCodeOCVerView.h and ColorfulQRCodeOCVerView.m.