0. Preface
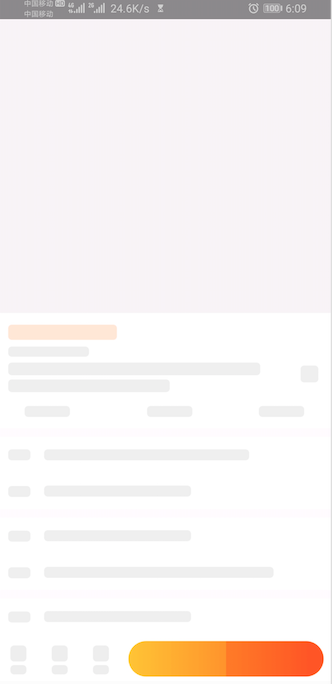
When you use Taobao, you will encounter this effect as shown in the following figure. It will only show some skeleton maps, and then show the real page data after the data is loaded. Compared with Chrysanthemum Diagram, this implementation can better enhance the user's experience. This effect is called Skeleton Screen Loading, which is called skeleton screen in Chinese.
1. Implementation of Skeleton Screen
There are two ways to achieve the current mainstream skeleton screen effect:
-
Skeleton screen effect is achieved by replacing View or Adapter. For reference ShimmerRecyclerView,Skeleton and spruce-android.
-
Customize a View to wrap the View in the layout. When loading data, draw the skeleton according to the View. Otherwise, the normal UI will be displayed. Skeleton Android.
Among these open source libraries, I prefer today's Skeleton open source libraries, and summarize the following advantages and disadvantages:
Advantage:
- The code scheme is implemented and used in a simple way. The effect is achieved by replacing View and Adpter, and constructed by using Builder design pattern.
- Code coupling is not high. There is no complex design pattern, which makes the code structure clear.
- The effect of skeleton screen is relatively flexible. It can achieve skeleton screen effect for the whole layout, and it can also achieve skeleton screen effect for a single View.
Disadvantages:
- You need to write a separate set of xml layouts for each skeleton screen effect.
- Using removeView and addView to replace the original layout view has certain risk.
- It is necessary to know clearly the View type of the bind, and there is a certain type conversion problem.
- Dependent on shimmerlayout third-party libraries
2. Skeleton's Interpretation
I. Skeleton's Way of Use
Display skeleton screen effect:
View rootView = findViewById(R.id.rootView);
skeletonScreen = Skeleton.bind(rootView)
           .load(R.layout.activity_view_skeleton)//Skeleton Screen UI
           .duration(1000)//Animation time in milliseconds
           .shimmer(true)//Whether to turn on animation or not
           .color(R.color.shimmer_color)//shimmer's color
           .angle(30)//shimmer's Inclination Angle
           .show();
Close the skeleton screen and display the original View:
skeletonScreen.hide()
Technological process:
1. Select the target view that needs to be replaced
2. Binding skeleton effect xml to target view
3. Add some effect attributes, such as: animation time, whether to open display animation, animation color, etc.
4. The effect of closing the skeleton screen properly
2. Skeleton Source Code Implementation
Skeleton provides two binding methods, ordinary View and RecyclerView, and returns the corresponding Builder, respectively.
public class Skeleton {
    public static RecyclerViewSkeletonScreen.Builder bind(RecyclerView recyclerView) {
        return new RecyclerViewSkeletonScreen.Builder(recyclerView);
    }
    public static ViewSkeletonScreen.Builder bind(View view) {
        return new ViewSkeletonScreen.Builder(view);
    }
}
Let's first look at how to bind to ordinary View, pass in the target View in the construction method, and set the default color for the shimmer animation effect. In the Builder, we can see the settings of various related parameters.
public Builder(View view) {
	this.mView = view;
	this.mShimmerColor = ContextCompat.getColor(mView.getContext(), R.color.shimmer_color);
  }
Next to the show step, the main implementation is still implemented by ViewSkeleton Screen.
 public ViewSkeletonScreen show() {
     ViewSkeletonScreen skeletonScreen = new ViewSkeletonScreen(this);
     skeletonScreen.show();
     return skeletonScreen;
 }
Both ViewSkeleton Screen and binding Recycler View Skeleton Screen implement Skeleton Screen interface. Skeleton Screen has two interface methods:
void show();
void hide();
For ViewSkeleton Screen. show () to enter the source code, here appears a more important class ViewReplacer, and then parse later, through the show source code clearly know the logic:
1. Generating Skeleton Effect View
2. Replace the target View with the generated View.
The View phase of skeleton effect generation is mainly through LayoutInflater to load the incoming mSkeleton ResID.
 @Override
 public void show() {
        View skeletonLoadingView = generateSkeletonLoadingView();
        if (skeletonLoadingView != null) {
            mViewReplacer.replace(skeletonLoadingView);
        }
    }
Next, I will focus on the ViewReplacer class, whose construction method is passed into the target View.
   public ViewReplacer(View sourceView) {
        mSourceView = sourceView;
        mSourceViewLayoutParams = mSourceView.getLayoutParams();
        mCurrentView = mSourceView;
        mSourceViewId = mSourceView.getId();
    }
There are two important methods: replace() and restore(), which are the final implementation of Skeleton Screen's show() and hide(). First, look at the replace() method. There are two overloaded methods, which are passed into the targetViewResID or targetView respectively. Finally, they will go to replace(View targetView).
Its main logic is:
1. Determine whether the replaced View and Skeleton Screen Effect View are the same View
2. Target View that remove falls into the parent layout
3. Add Skeleton Screen Effect View to the parent layout of the target View
 public void replace(int targetViewResID) {
        if (mTargetViewResID == targetViewResID) {
            return;
        }
        if (init()) {
            mTargetViewResID = targetViewResID;
            replace(LayoutInflater.from(mSourceView.getContext()).inflate(mTargetViewResID, mSourceParentView, false));
        }
    }

    public void replace(View targetView) {
        if (mCurrentView == targetView) {
            return;
        }
        if (targetView.getParent() != null) {
            ((ViewGroup) targetView.getParent()).removeView(targetView);
        }
        if (init()) {
            mTargetView = targetView;
            mSourceParentView.removeView(mCurrentView);
            mTargetView.setId(mSourceViewId);
            mSourceParentView.addView(mTargetView, mSourceViewIndexInParent, mSourceViewLayoutParams);
            mCurrentView = mTargetView;
        }
    }
In executing the parent layout added to the target View, there is an init method that does two main things:
1. Get the parent View of the target View
2. Find the location index of the target View in the parent View and pave the way for adding skeleton screen View to the parent View later.
   private boolean init() {
        if (mSourceParentView == null) {
            mSourceParentView = (ViewGroup) mSourceView.getParent();
            if (mSourceParentView == null) {
                Log.e(TAG, "the source view have not attach to any view");
                return false;
            }
            int count = mSourceParentView.getChildCount();
            for (int index = 0; index < count; index++) {
                if (mSourceView == mSourceParentView.getChildAt(index)) {
                    mSourceViewIndexInParent = index;
                    break;
                }
            }
        }
        return true;
    }
So far, the skeleton screen effect implementation process of ordinary View has been completely combed. What about RecyclerView? In fact, the logic of implementation of the two is similar, there are two main differences:
- In the Builder of RecyclerViewSkeleton Screen, there is an adapter() method more than ViewSkeleton Screen, which is passed into the Adapter of the target RecyclerView.
- Replace the adapter of the target RecyclerView with the adapter of the skeleton screen effect at show time. Back to the original Adadapter when hide
3. Summary
- Skeleton's principle is to replace the Adadapter of the Target View and Recycler View.
- The two most important concerns in the use of Skeleton are the timing of show() and hide().
- For the skeleton screen effect of the entire page, I recommend adding a full-screen empty View to the layout to cover the original content.
- Pay attention to hide() in some exceptional cases, otherwise the whole page will be in a "fake death" state.
Reference resources:
https://juejin.im/post/5c789a4ce51d457c042d3b31