DNS
Domain name resolution refers to the domain name to the IP of the website space, so that people can easily access the website through the registered domain name. IP address is the digital address that identifies the site on the network. In order to facilitate memory, domain name is used instead of IP address to identify the site address. Domain name resolution is the process of domain name to IP address conversion. The domain name analysis is done by DNS server.
1. Installing dns server
[root@localhost ~]# yum -y install bind*
2. Modifying configuration files
In/etc/named.conf:
 listen-on port 53 { any; };
  allow-query     { any; };
Then create the parse:
vim /etc/named.rfc1912.zones
zone "web1.com" IN {
    type master;
    file "data/web1.com.zone";
        };
Create the web1.com.zone file in / var/named/data / as follows
$TTL 3H
@       IN SOA  web1.com. root (
                                        20180928 ; serial
                                        1D      ; refresh
                                        1H      ; retry
                                        1W      ; expire
                                        3H )    ; minimum
        IN   NS            @
        IN   A          192.168.159.130
www     IN   A          192.168.159.130
3. Start the name service:
systemctl start named

ps -ef | grep named
 Display successful startup
4 test
[root@localhost ~]# nslookup
> web1.com
Server:         192.168.159.130
Address:        192.168.159.130#53

Name:   web1.com
Address: 192.168.159.130
5.dns slave domain settings
 vim /etc/named.rfc1912.zones
zone "web1.com" IN {
    type slave;
    file "slaves/web1.com.zone";
    masters { 192.168.159.130;};
};
After restarting the service:
[root@localhost ~]# nslookup
> web1.com
Server:         192.168.159.131
Address:        192.168.159.131#53

Name:   web1.com
Address: 192.168.159.130
HTTP
1 Install HTTP Service
yum -y install httpd
2. Editing configuration files to create two virtual hosts
vim /etc/httpd/conf/httpd.conf
<VirtualHost 192.168.159.130:80>
       ServerAdmin webmaster@dummy-host.example.com
       DocumentRoot /var/www/html/host1/
       ServerName 192.168.159.130
       ErrorLog logs/dummy-host.example.com-error_log
       CustomLog logs/dummy-host.example.com-access_log common

</VirtualHost>
<VirtualHost 192.168.159.129:80>
       ServerAdmin webmaster@dummy-host.example.com
       ServerAdmin webmaster@dummy-host.example.com
       DocumentRoot /var/www/html/host1/
       ServerName 192.168.159.130
       ErrorLog logs/dummy-host.example.com-error_log
       CustomLog logs/dummy-host.example.com-access_log common
</VirtualHost>
3. Add an address
ip addr add 192.168.159.129 dev ens33
4 Editing Home Page Files
[root@localhost conf]# cat /var/www/html/vhost1/index.html
Abed, I see a silver light
[root@localhost conf]# cat /var/www/html/host1/index.html
Sunshine incense stove produces purple smoke
5 Successful Visit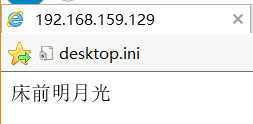

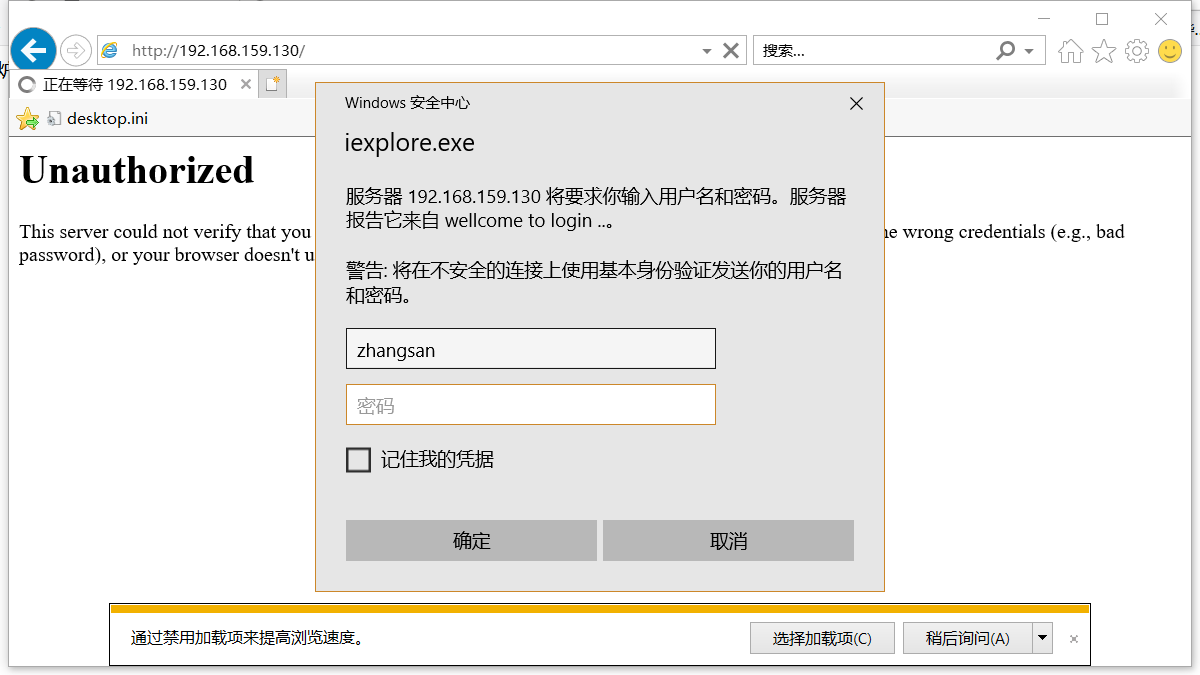
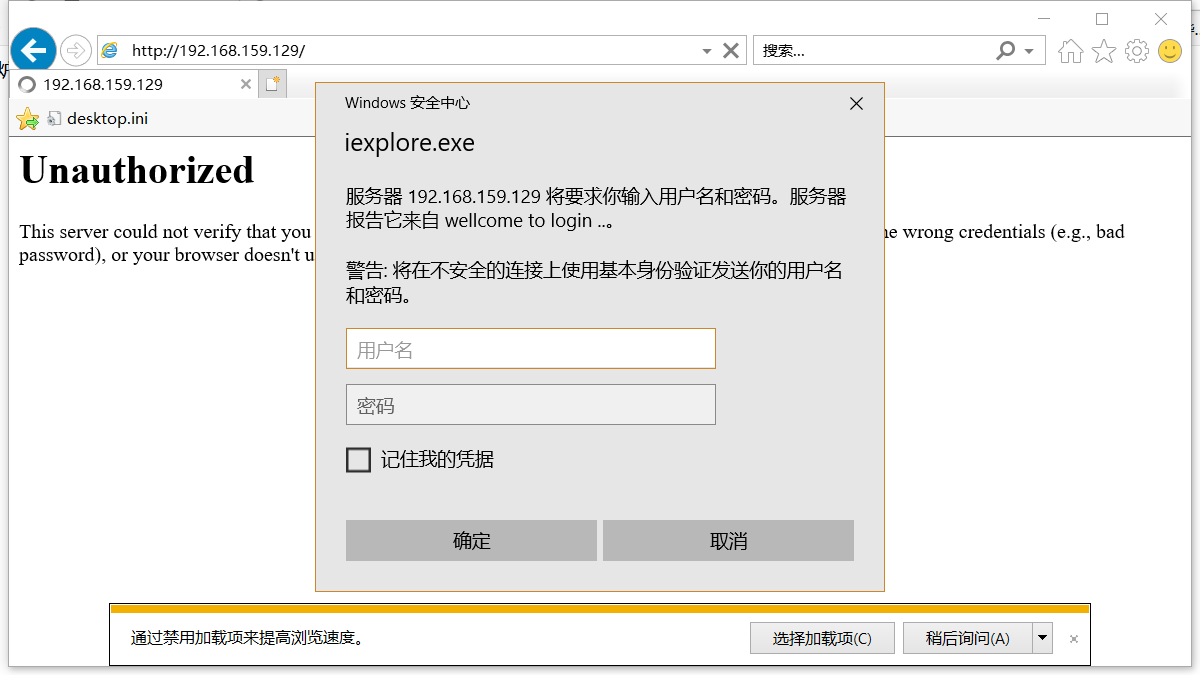
6 Configuration Access Control
Insert the following in the appropriate place.
<Directory "/var/www/html/vhost1">
        options None
        AllowOverRide AuthConfig
        AuthType Basic
        AuthName "wellcome to login .."
        AuthBasicProvider file
        AuthUserFile /etc/httpd/conf/.htpwd
        Require user zhangsan lisi
    </Directory>
         <Directory "/var/www/html/host1">
        options None
        AllowOverRide AuthConfig
        AuthType Basic
        AuthName "wellcome to login .."
        AuthBasicProvider file
        AuthUserFile /etc/httpd/conf/.htpwd
        Require user zhangsan lisi
    </Directory>
Create user passwords
  htpasswd -c -m /etc/httpd/conf/.htpwd zhangsan
    htpasswd -m /etc/httpd/conf/.htpwd  lisi
   htpasswd -m /etc/httpd/conf/.htpwd  wangwu
7 Access Control