Easycode is a plug-in of idea, which can generate entity,controller,service,dao,mapper directly to the data table. It is simple and powerful without any coding.
1. Installation (EasyCode)
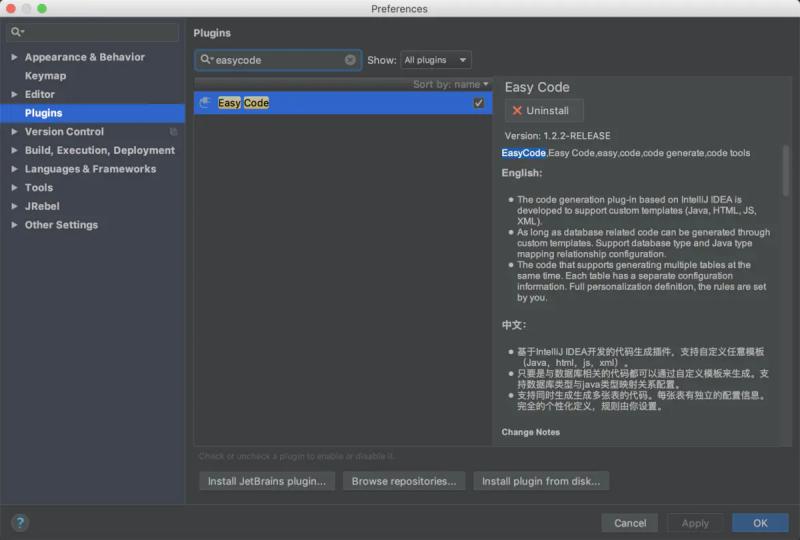
My words here are already loaded.
I suggest you install a plug-in called Lombok. Lombok can automatically generate constructor, getter/setter, equals, hashcode and toString methods for properties during compilation through annotation. The magic is that there are no getter and setter methods in the source code, but there are getter and setter methods in the bytecode file generated by compilation.
2. Establish database
-- ----------------------------
-- Table structure for user
-- ----------------------------
DROP TABLE IF EXISTS `user`;
CREATE TABLE `user` (
  `id` int(11) NOT NULL,
  `username` varchar(20) DEFAULT NULL,
  `sex` varchar(6) DEFAULT NULL,
  `birthday` date DEFAULT NULL,
  `address` varchar(20) DEFAULT NULL,
  `password` varchar(20) DEFAULT NULL,
  PRIMARY KEY (`id`)
) ENGINE=InnoDB DEFAULT CHARSET=utf8;
SET FOREIGN_KEY_CHECKS = 1;
3. Configuring connection database in IDEA
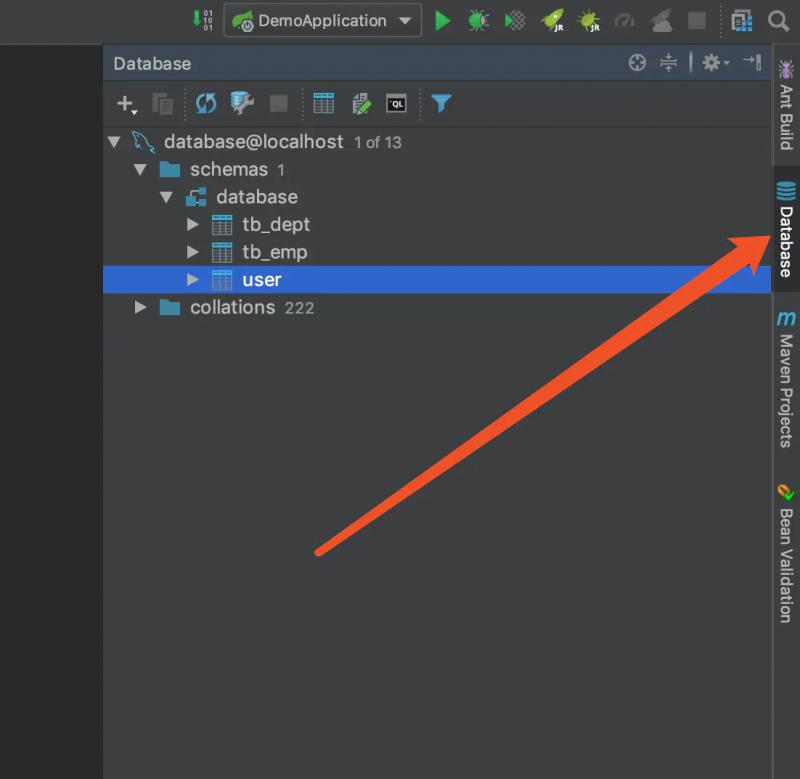
Before this, create a new spring boot project, which should be relatively simple. After building the spring boot project, find the Database as shown in the figure below
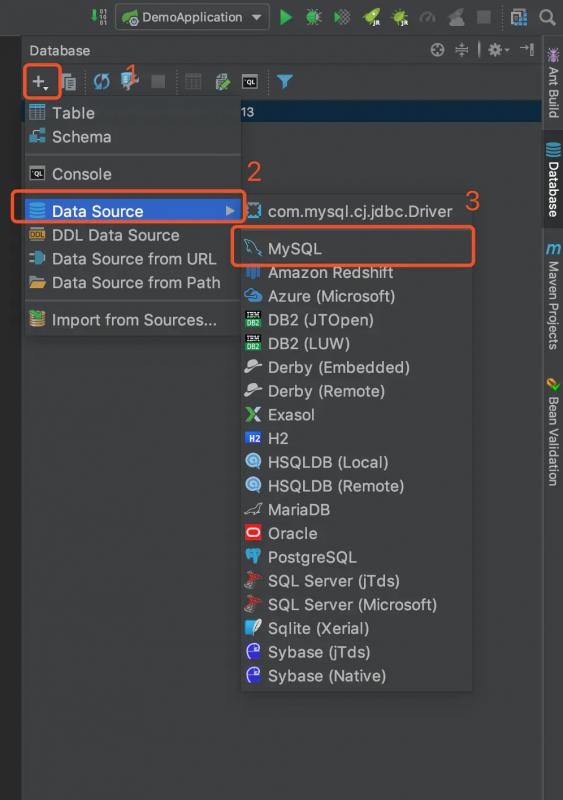
Operate as shown in the figure below:
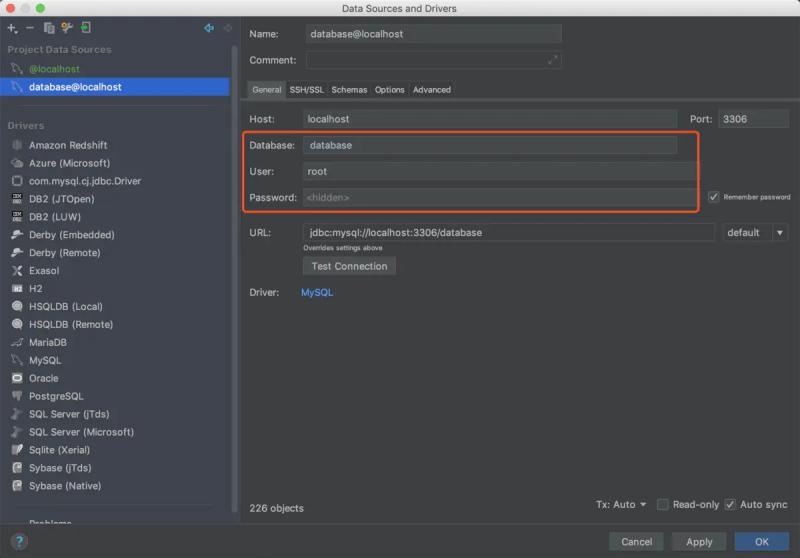
Then fill in the database name, user name, password. Click OK. In this way, the IDEA connection to the database is finished.
4. Start generating code
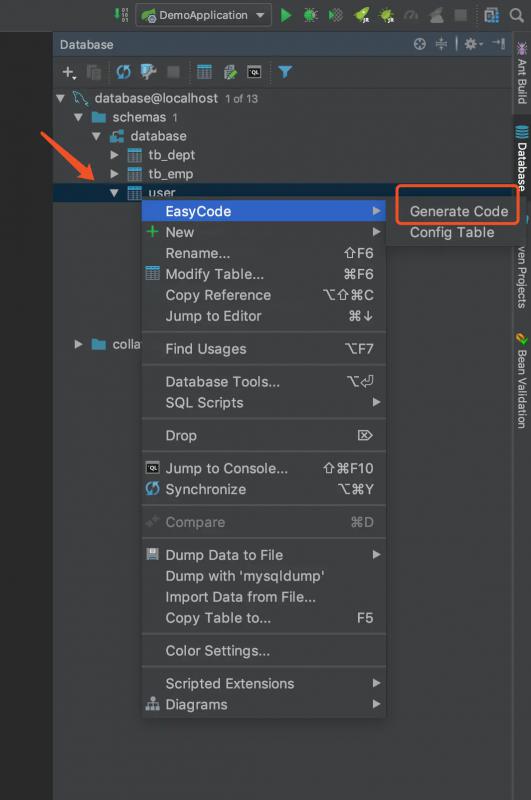
Find the table you want to generate in this one, then right-click it, and the section as shown below will appear.
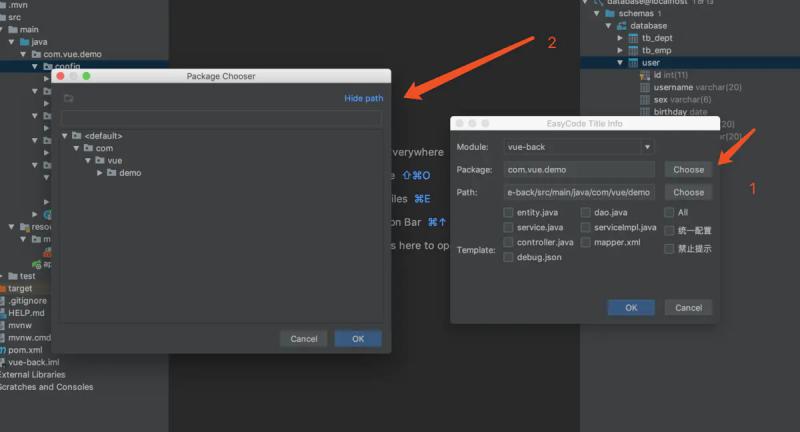
Click the location shown in 1, choose which folder you want to put the generated code in, and then click OK.
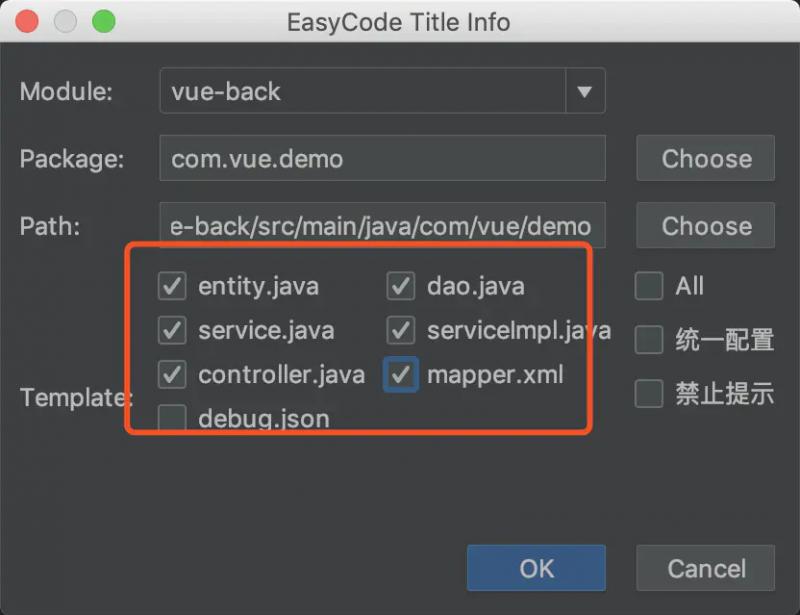
Check the code you need to generate and click OK.
In this way, the code is generated, as shown in the following figure:
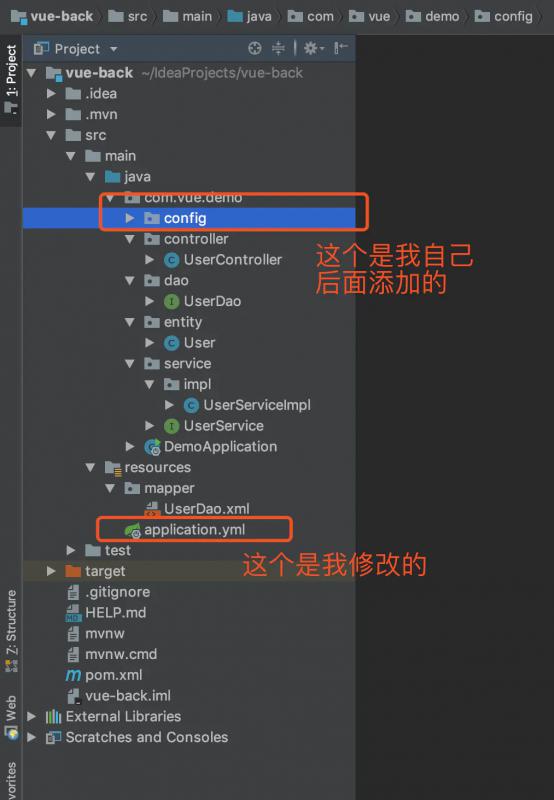
5,pom.xml
 <dependency>
            <groupId>org.springframework.boot</groupId>
            <artifactId>spring-boot-starter</artifactId>
        </dependency>

        <dependency>
            <groupId>org.springframework.boot</groupId>
            <artifactId>spring-boot-starter-web</artifactId>
        </dependency>

        <dependency>
            <groupId>org.projectlombok</groupId>
            <artifactId>lombok</artifactId>
            <optional>true</optional>
        </dependency>

        <!--Thermal deployment-->
        <dependency>
            <groupId>org.springframework.boot</groupId>
            <artifactId>spring-boot-devtools</artifactId>
            <optional>true</optional> <!-- This needs to be true Hot deployment is effective -->
        </dependency>

        <!--mybatis-->
        <dependency>
            <groupId>org.mybatis.spring.boot</groupId>
            <artifactId>mybatis-spring-boot-starter</artifactId>
            <version>1.3.2</version>
        </dependency>

        <!-- mysql -->
        <dependency>
            <groupId>mysql</groupId>
            <artifactId>mysql-connector-java</artifactId>
            <version>5.1.47</version>
        </dependency>

        <!--Alibaba connection pool-->
        <dependency>
            <groupId>com.alibaba</groupId>
            <artifactId>druid</artifactId>
            <version>1.0.9</version>
        </dependency>
6,Application.yml
server:
  port: 8089
spring:
  datasource:
    url: jdbc:mysql://127.0.0.1:3306/database?useUnicode=true&characterEncoding=UTF-8
    username: root
    password: 123456
    type: com.alibaba.druid.pool.DruidDataSource
    driver-class-name: com.mysql.jdbc.Driver

mybatis:
  mapper-locations: classpath:/mapper/*Dao.xml
  typeAliasesPackage: com.vue.demo.entity
7. Launch project
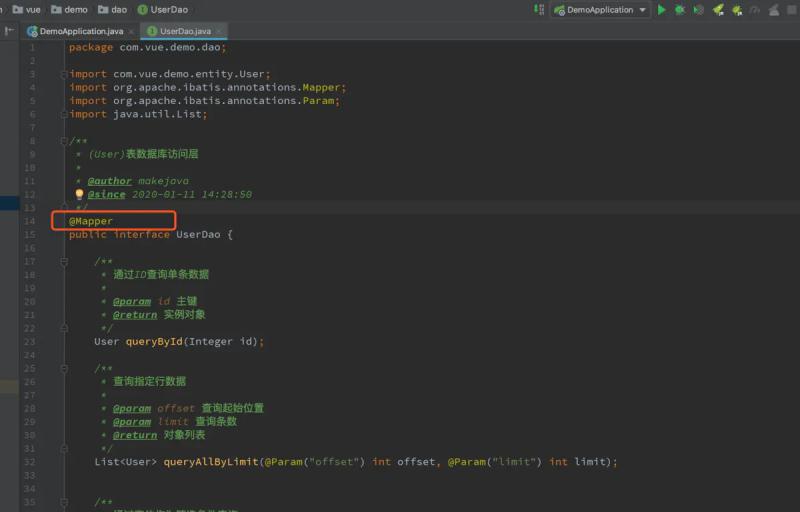
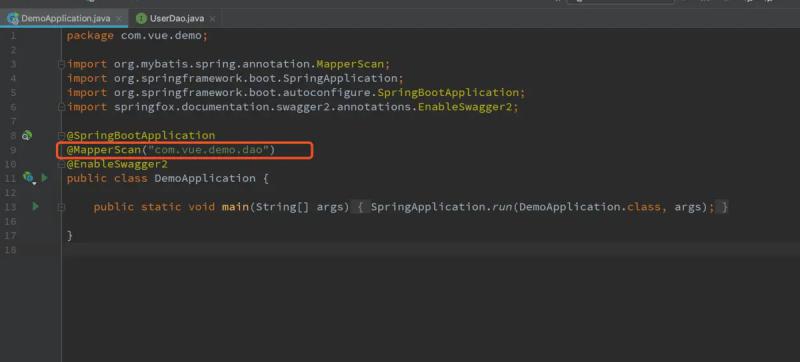
Before we start the project, we need to modify two places.
Add @ mapper annotation to dao layer
Add the @ MapperScan("com.vue.demo.dao") annotation to the startup class.
Startup project

Test it.


By HeloWxl Links: https://www.jianshu.com/p/e4192d7c6844