In this article, I'll take you to HTML Helper. [PS: Last article --> ____________ 5. What Area s are in ASP.NET MVC]
HTML Helpers are used to create HTML tags and then HTML controls. HTML Helper is just a way to return HTML strings. There are three HTML Helpers in ASP.NET MVC:
1. Inline HTML Helper (inline HTML Helper): Created mainly by using the @helper tag in Razor grammar. Inline HTML Helper can only be reused in the same view. If you want to be able to use it in all views, there are ways to solve it. It will be introduced later.
2. Built-In-HTML Helpers (built-in HTML Helpers): This type of HTML Helper is an extension of the HtmlHelper class, further divided into three categories:
2.1 Standard HTML Helper: Used to create the most commonly used HTML tags.
2.2 Strongly Typed HTML Helpers: This is HTML generated by attributes of the Model class, using Lambda expressions to generate HTML.
2.3 Templated HTML Helpers: The HTML generated by this helper depends on the properties of the Model class.
3. Custom HTML Helpers: You can create custom helper methods by using the HtmlHelper extension method or by using static methods in the tool class.
1. Let's first look at inline HTML Helper.
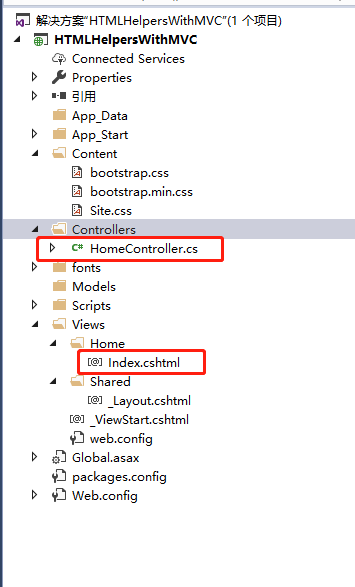
Create the project HTML HelpersWithMVC, create a new Home Controller and Index View at the same time:
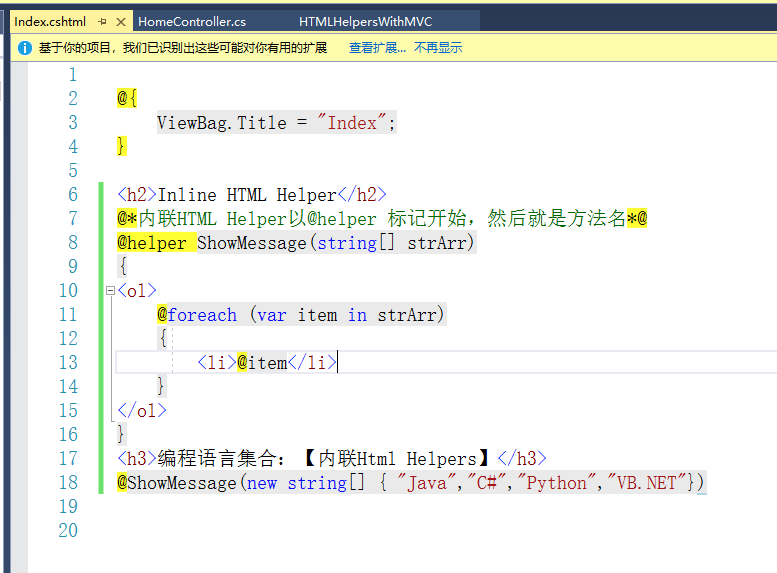
View page:
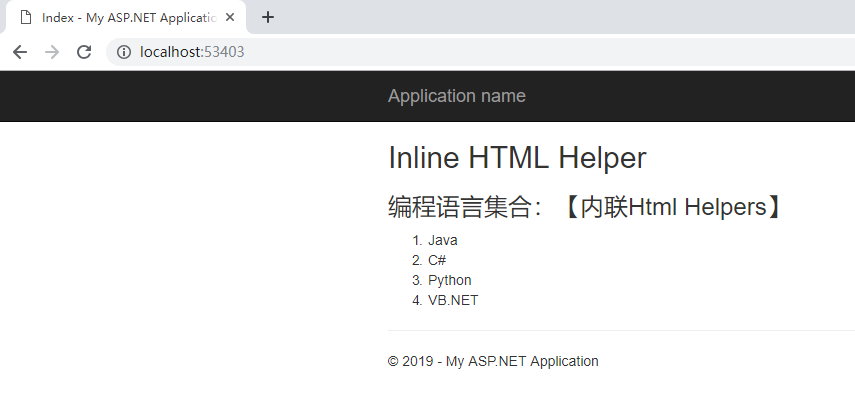
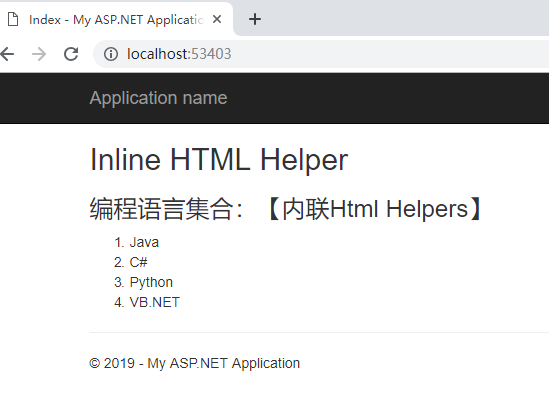
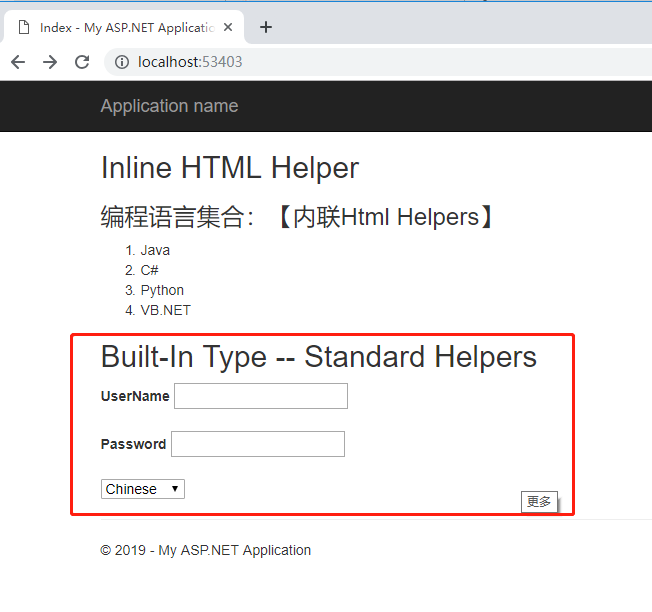
Run it: [rendering]
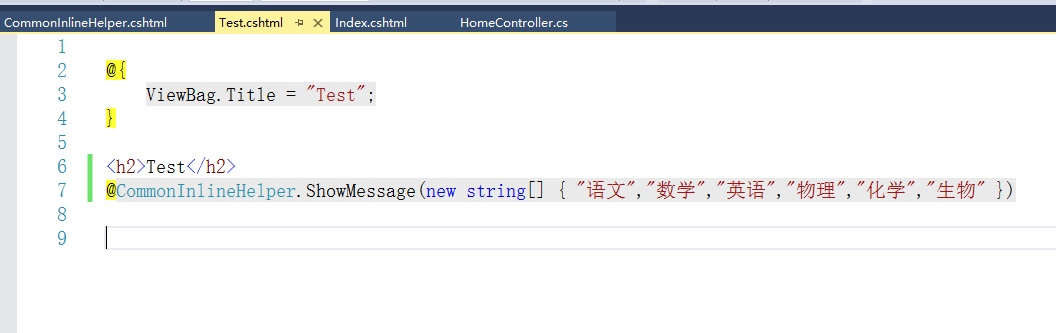
Now what if I have a Test page that also displays this? Let's just write on the Test page.
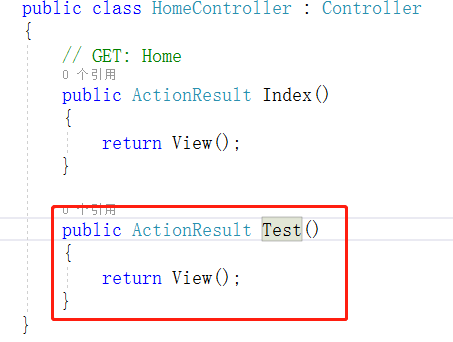
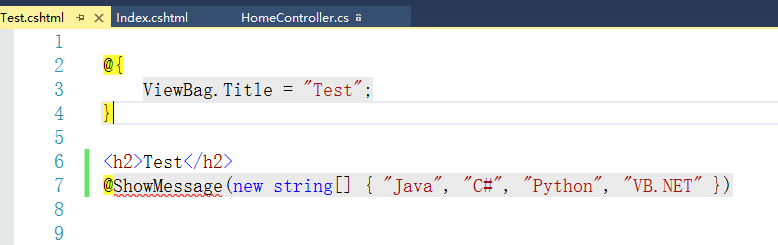
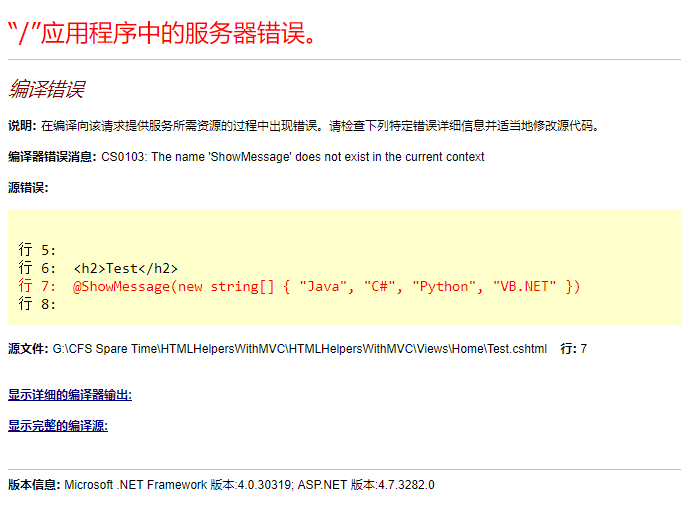
Look, the report is wrong. The inline method can only be used on the declared view page. Oh, what can we do? We can do this:
Right-click the project to create an App_Code folder:
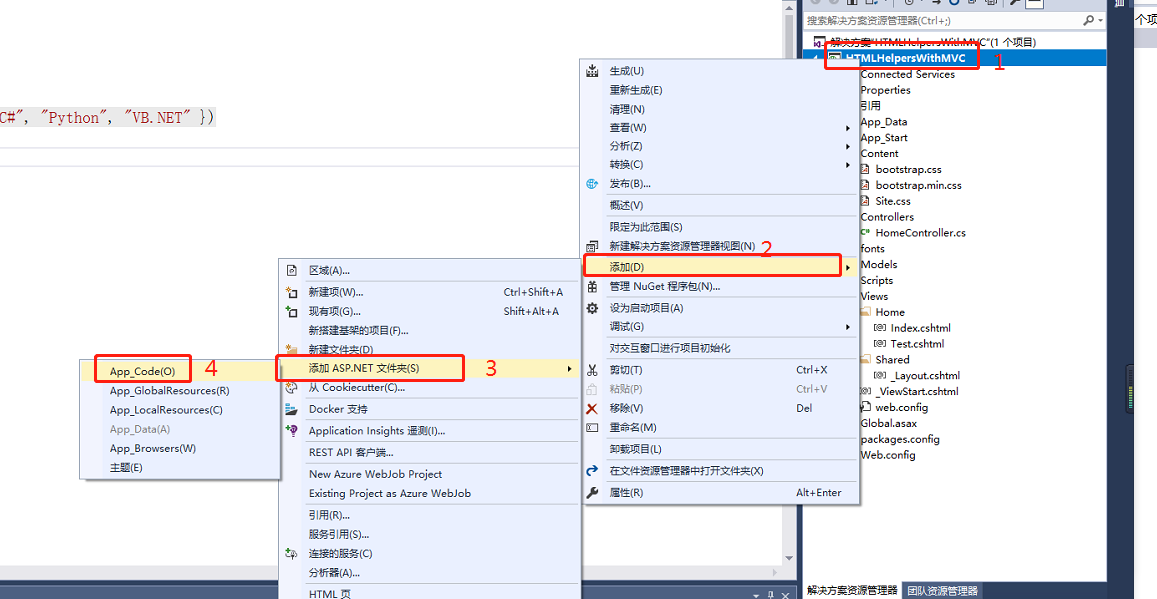
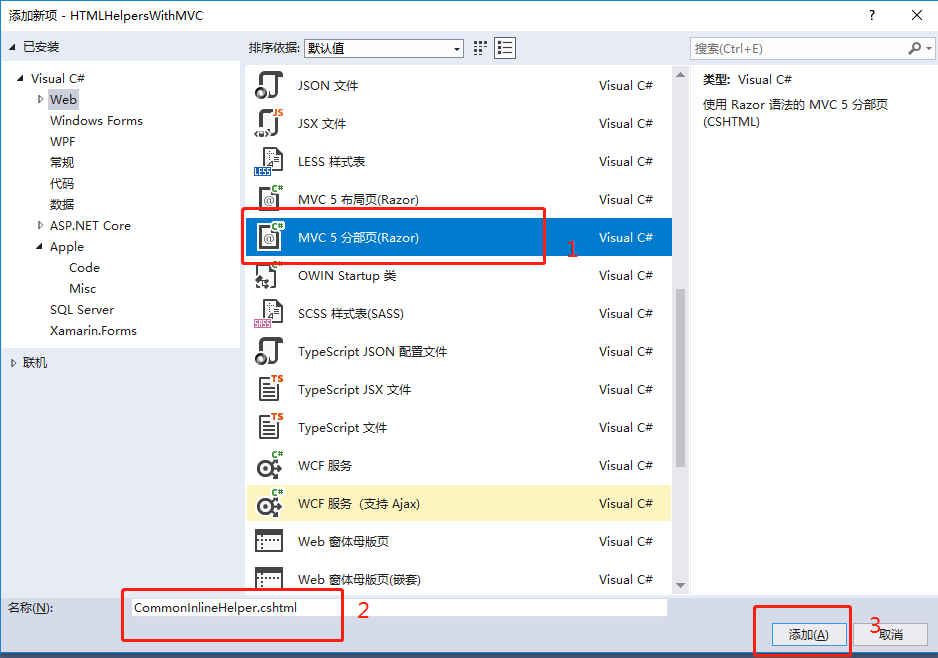
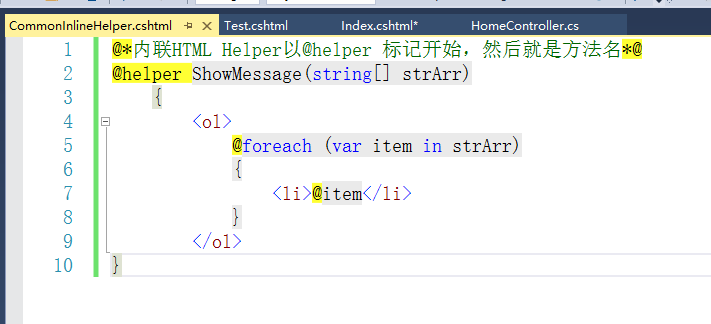
Under the App_Code folder, create a distributed view:
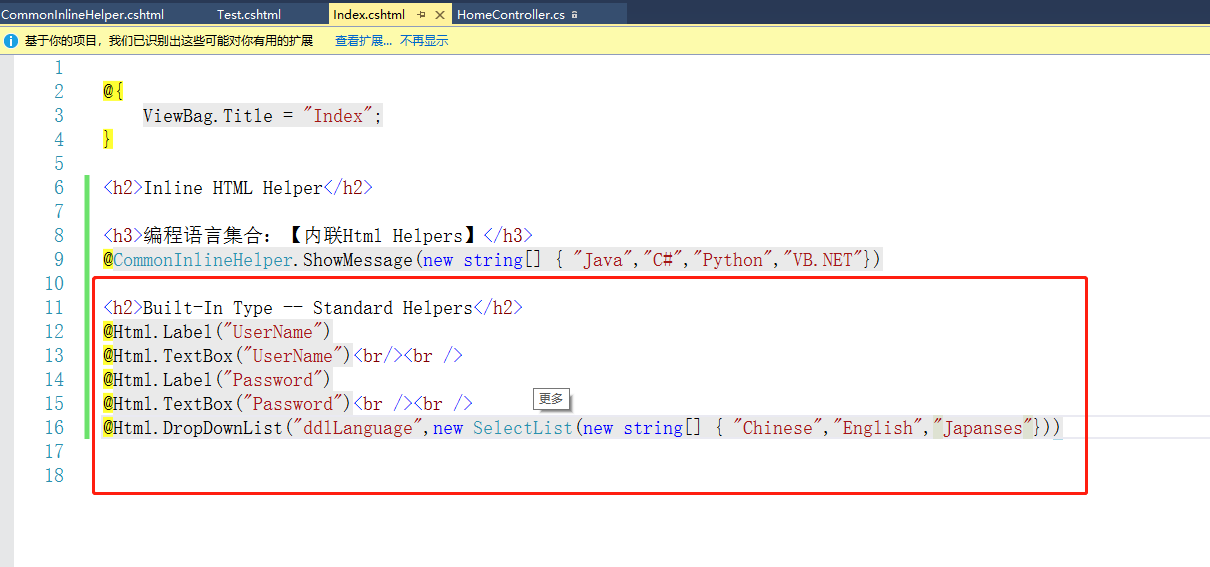
Then, get all the inline Html Helper method declarations just on the Index page of the Home Controller:
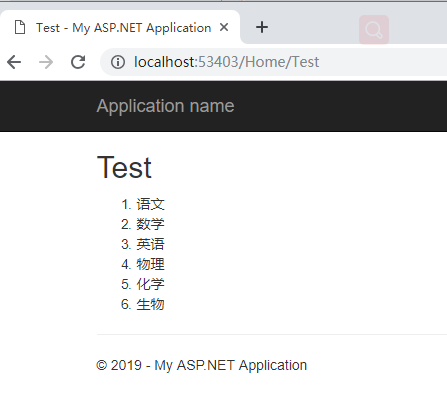
Then run the project: Look:
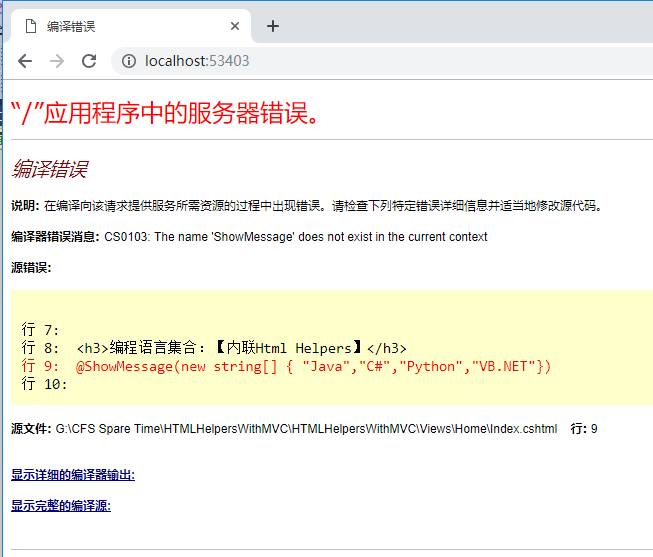
What's wrong or wrong? Now the Index page is wrong too. What's wrong???
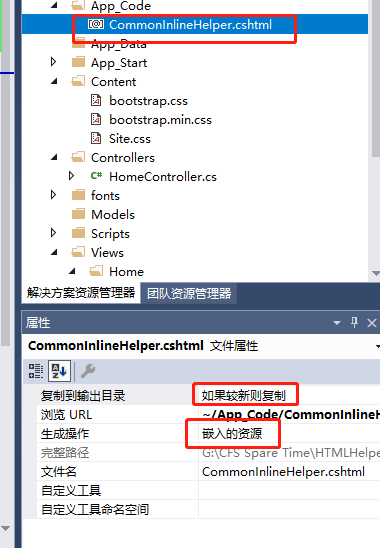
Let's change this: change the view page under the App_Code folder, the attributes to the embedded resources, and copy if it's newer
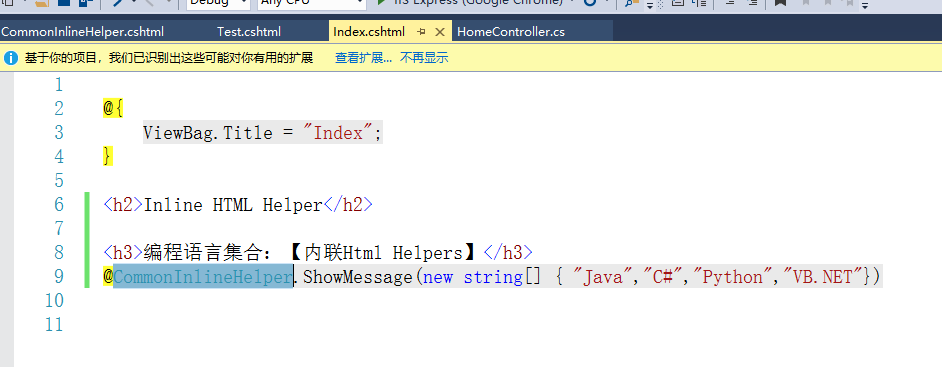
Then the view page is modified as follows:
Then run to see the effect of the two pages:
Look at this implementation, you can implement Inline HTML Helpers on multiple pages.
2.1 Now let's look at the standard HTML Helpers in the built-in HTML Helpers.
The operation results are as follows:
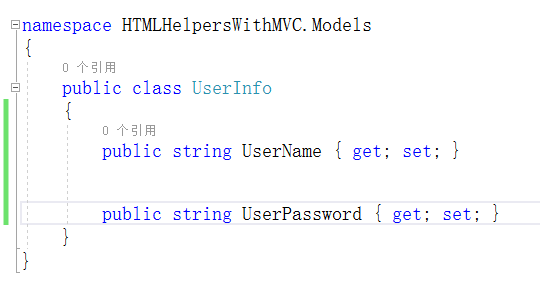
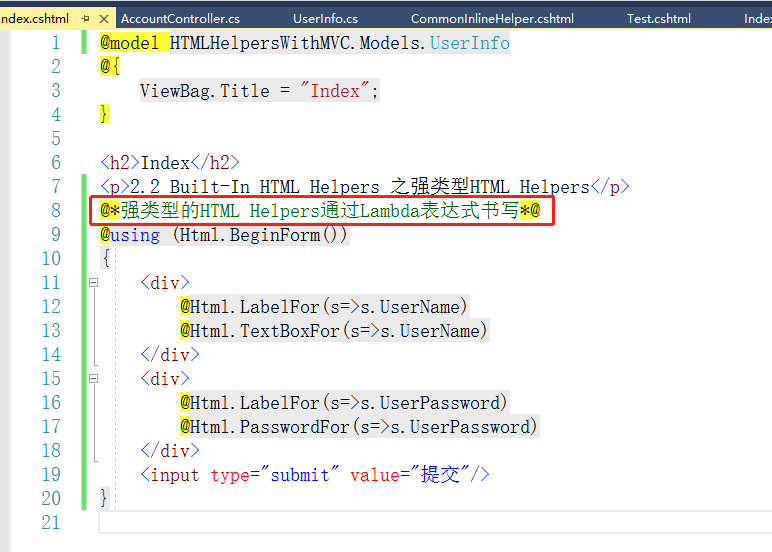
2.2 Now start learning the strong type of HTML Helpers built in Built-In HTML Helpers:
Create a UserInfo class under the Models folder
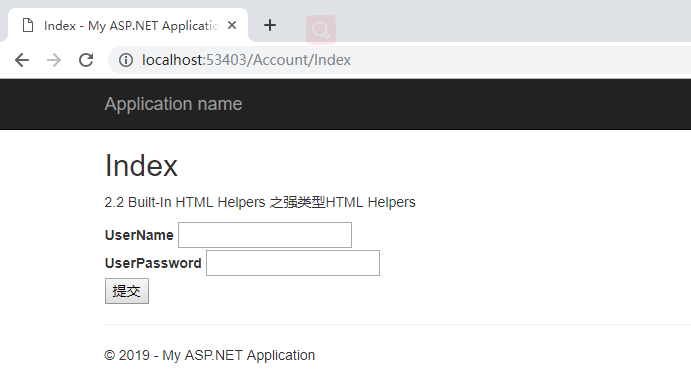
To demonstrate this strong type, I create a new controller Account and create an Index view:
Running procedures:
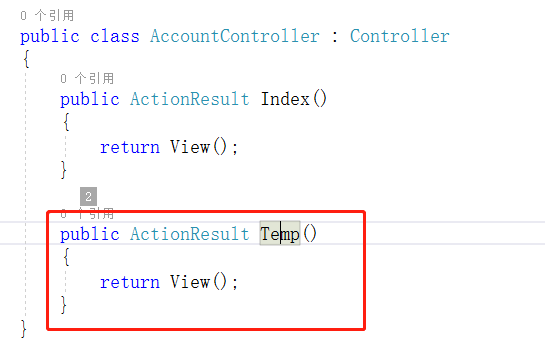
2.3 Now look at how templated HTML Helpers do:
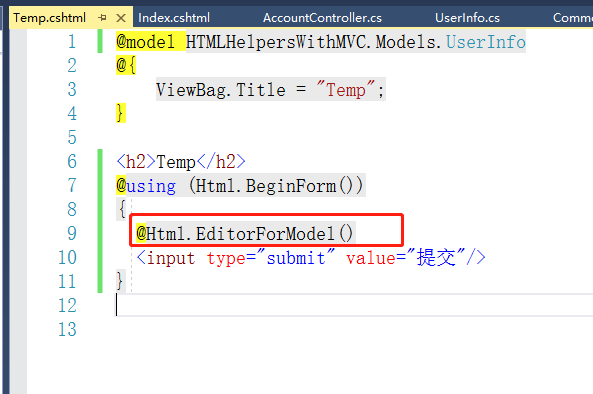
In the Account controller, we add a Temp method: and create a Temp view:
Run to Temp page:
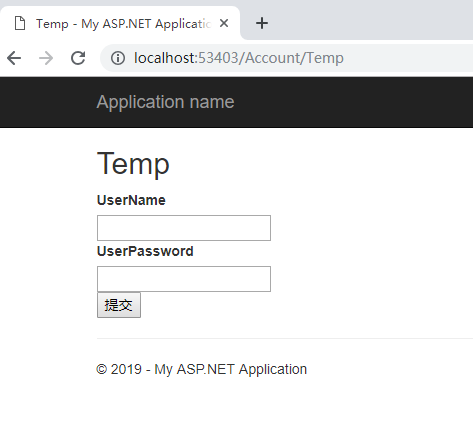
It was found that @Html.EditorForModel() automatically created controls for us.
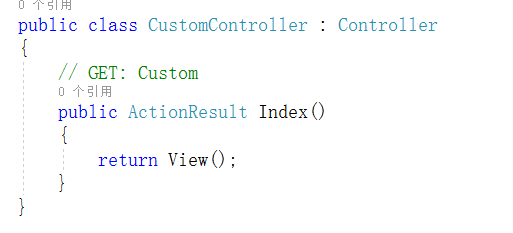
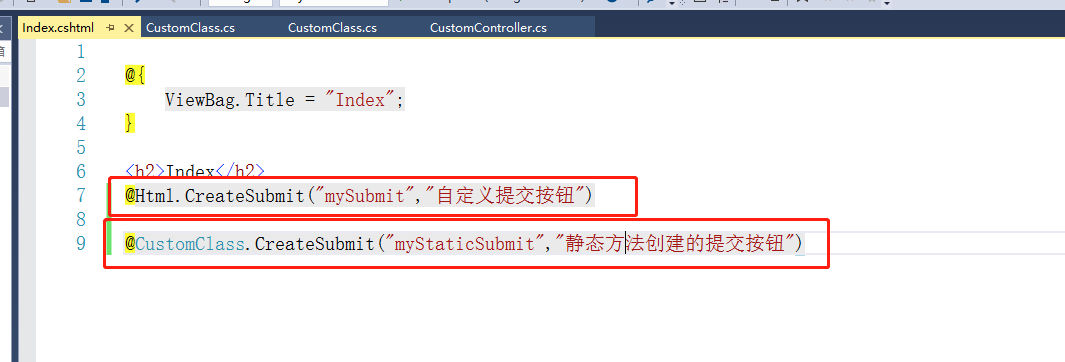
3. Finally, let's see how to create custom HTML Helpers
Create a Custom Controller:
Create a CustomClass:
using System;
using System.Collections.Generic;
using System.Linq;
using System.Web;
using System.Web.Mvc;

namespace HTMLHelpersWithMVC.Common
{
    public static class CustomClass
    {
        /// <summary>
        /// Extended Method Implementation--Create the submit button
        /// </summary>
        /// <param name="helper">Extended class object</param>
        /// <param name="name">Button name</param>
        /// <param name="value">Button value</param>
        /// <returns></returns>
        public static MvcHtmlString CreateSubmit(this HtmlHelper helper, string name, string value)
        {
            var btn = "<input type='submit' name='"+name+"' value='"+value+"'/>";
            return new MvcHtmlString(btn);
        }
        /// <summary>
        /// Static Class Implementation--Create the submit button
        /// </summary>
        /// <param name="name">Button name</param>
        /// <param name="value">Button value</param>
        /// <returns></returns>
        public static MvcHtmlString CreateSubmit(string name, string value)
        {
            var btn = "<input type='submit' name='" + name + "' value='" + value + "'/>";
            return new MvcHtmlString(btn);
        }

    }
}

Note that this CustomClass class must be created in the root directory of the program to be clicked out in the view.
Correct:
using System;
using System.Collections.Generic;
using System.Linq;
using System.Web;
using System.Web.Mvc;

namespace HTMLHelpersWithMVC
{
    public static class CustomClass
    {
        /// <summary>
        /// Extended Method Implementation--Create the submit button
        /// </summary>
        /// <param name="helper">Extended class object</param>
        /// <param name="name">Button name</param>
        /// <param name="value">Button value</param>
        /// <returns></returns>
        public static MvcHtmlString CreateSubmit(this HtmlHelper helper, string name, string value)
        {
            string btn = "<input type='submit' name='" + name + "' value='" + value + "'/>";
            return new MvcHtmlString(btn);
        }
        /// <summary>
        /// Static Class Implementation--Create the submit button
        /// </summary>
        /// <param name="name">Button name</param>
        /// <param name="value">Button value</param>
        /// <returns></returns>
        public static MvcHtmlString CreateSubmit(string name, string value)
        {
            string btn = "<input type='submit' name='" + name + "' value='" + value + "'/>";
            return new MvcHtmlString(btn);
        }

    }
}
In the Index view of Custom Controller:
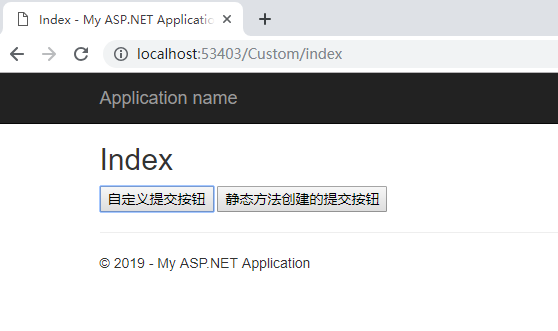
Running procedures:

OK, so far this article is finished. ASP.NET MVC HTML Helpers, have you learned?