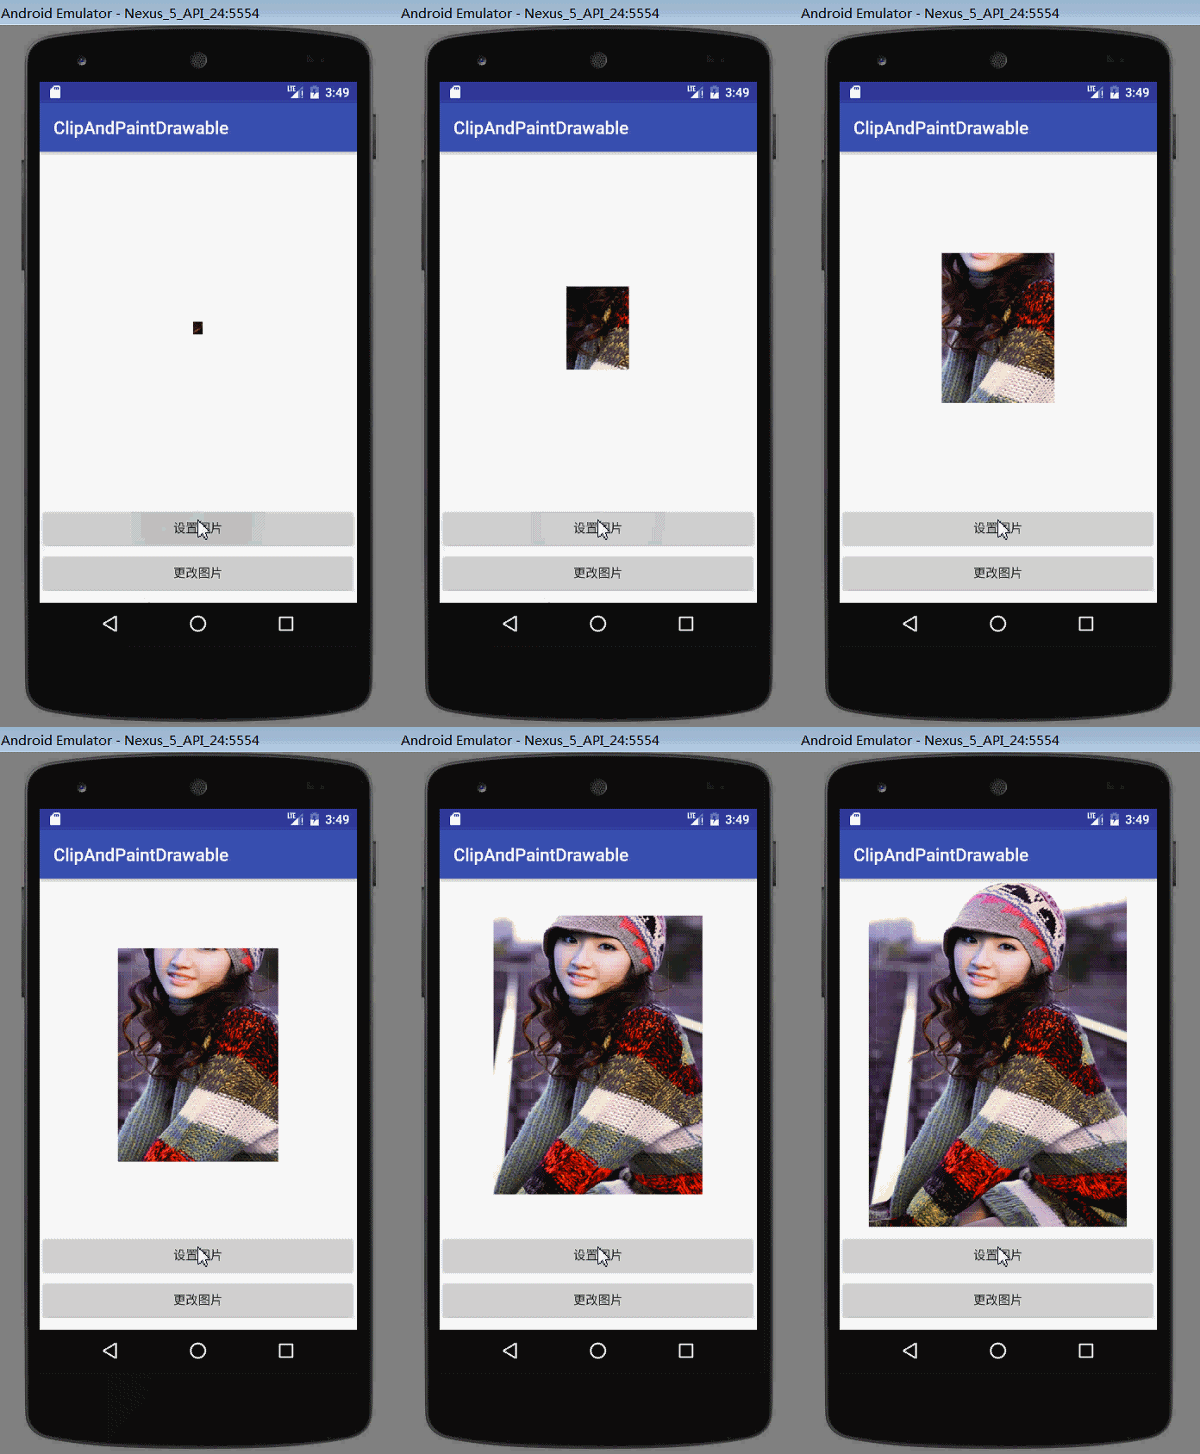
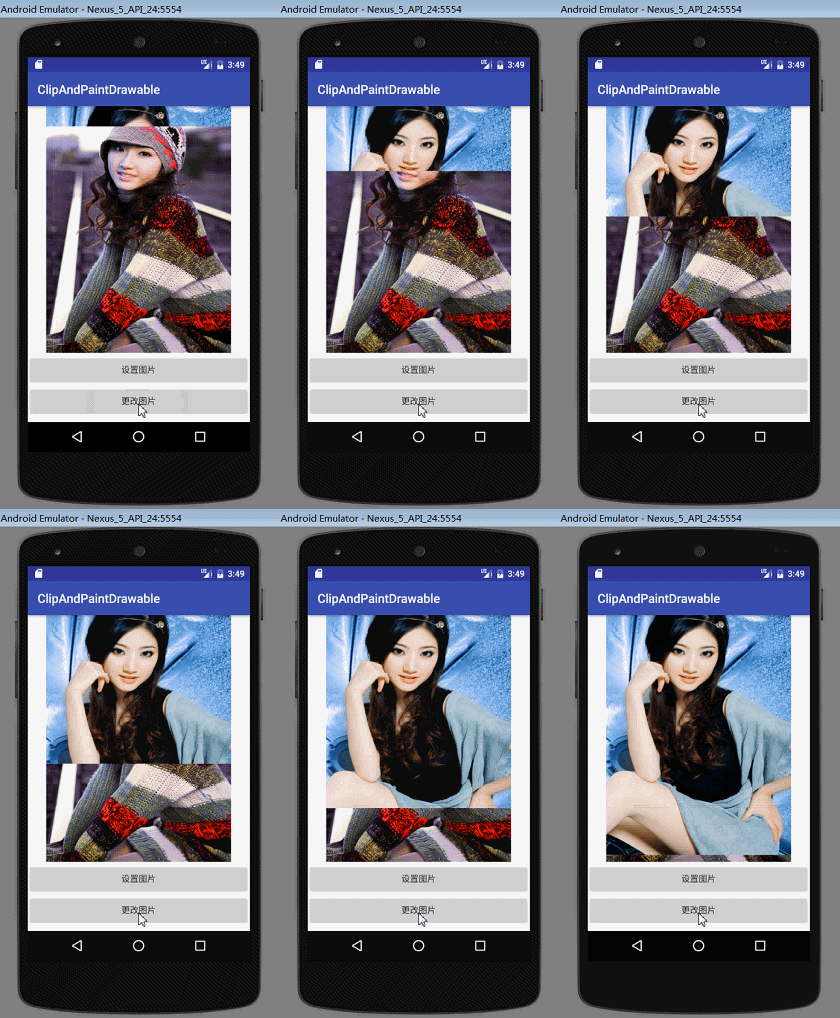
With Paint Drawable, this article is the fourth blog of Drawable. ClipDrawable has a very practical method, which is setLevel (), through which you can set the part size of drawable display. If you set it to 0, it will not display at all. Setting it to 10000 is the full display. Does it feel a little like ProgressBar? In fact, you can use it to implement your own progressBar, but it's not introduced in this blog.
Let's see the effect first.


Take a look at the main layout file (it's not really good to see):
<?xml version="1.0" encoding="utf-8"?>
<RelativeLayout xmlns:android="http://schemas.android.com/apk/res/android"
    xmlns:tools="http://schemas.android.com/tools"
    android:id="@+id/activity_main"
    android:layout_width="match_parent"
    android:layout_height="match_parent"
    tools:context="com.example.clipandpaintdrawable.MainActivity">
    <ImageView
        android:layout_centerHorizontal="true"
        android:id="@+id/iv"
        android:layout_width="300dp"
        android:layout_height="400dp"
        android:padding="0dp"
        android:src="@drawable/clip_drawable"
        android:scaleType="fitXY"/>
    <Button
        android:gravity="center"
        android:id="@+id/btn"
        android:layout_width="match_parent"
        android:layout_height="wrap_content"
        android:layout_below="@id/iv"
        android:layout_marginTop="3dp"
        android:onClick="changeImageView"
        android:text="@string/set_image" />

    <Button
        android:gravity="center"
        android:layout_width="match_parent"
        android:layout_height="wrap_content"
        android:layout_below="@id/btn"
        android:layout_marginTop="3dp"
        android:onClick="changeImage"
        android:text="@string/change_image" />


</RelativeLayout>
Look at the drawable file again:
<?xml version="1.0" encoding="utf-8"?>
<clip xmlns:android="http://schemas.android.com/apk/res/android"
    android:gravity="center_horizontal|center_vertical"
    android:clipOrientation="horizontal|vertical"
    android:drawable="@drawable/first">

</clip>
Next comes the activity file:
package com.example.clipandpaintdrawable;

import android.graphics.drawable.ClipDrawable;
import android.net.Uri;
import android.os.CountDownTimer;
import android.os.Handler;
import android.os.Message;
import android.support.v7.app.AppCompatActivity;
import android.os.Bundle;
import android.view.Gravity;
import android.view.View;
import android.widget.ImageView;

import com.google.android.gms.appindexing.Action;
import com.google.android.gms.appindexing.AppIndex;
import com.google.android.gms.appindexing.Thing;
import com.google.android.gms.common.api.GoogleApiClient;

public class MainActivity extends AppCompatActivity {

    private static final int CHANGE_LEVEL = 99;
    private ImageView iv;
    private ClipDrawable mClipDrawable;
    private boolean isExpand = false;

    @Override
    protected void onCreate(Bundle savedInstanceState) {
        super.onCreate(savedInstanceState);
        setContentView(R.layout.activity_main);
        iv = (ImageView) findViewById(R.id.iv);
        mClipDrawable = (ClipDrawable) iv.getDrawable();
        mClipDrawable.setLevel(10);
    }

    public void changeImageView(View view) {
        if (!isExpand) {
            isExpand = true;
            final Handler mHandler = new Handler() {
                @Override
                public void handleMessage(Message msg) {
                    super.handleMessage(msg);
                    if (msg.what == CHANGE_LEVEL) {
                        int level = mClipDrawable.getLevel() + 50;
                        if (level >= 10000) {
                            level = 10000;
                        }
                        mClipDrawable.setLevel(level);
                    }
                }
            };
            final CountDownTimer timer = new CountDownTimer(Integer.MAX_VALUE, 10) {
                @Override
                public void onTick(long millisUntilFinished) {

                    if (mClipDrawable.getLevel() >= 10000) {
                        this.onFinish();
                    } else {
                        mHandler.sendEmptyMessage(99);
                    }

                }

                @Override
                public void onFinish() {
                    isExpand = false;
                }
            };
            timer.start();
        }
    }

    public void changeImage(View view) {
        if (iv.getDrawable() != null) {
            iv.setBackground(iv.getDrawable());
        }
        final ClipDrawable imageDrawable = new ClipDrawable(getResources().getDrawable(R.drawable.second), Gravity.TOP | Gravity.START, ClipDrawable.VERTICAL);
        iv.setImageDrawable(imageDrawable);
        imageDrawable.setLevel(10);
        if (!isExpand) {
            isExpand = true;
            final Handler mHandler = new Handler() {
                @Override
                public void handleMessage(Message msg) {
                    super.handleMessage(msg);
                    if (msg.what == CHANGE_LEVEL) {
                        int level = imageDrawable.getLevel() + 50;
                        if (level >= 10000) {
                            level = 10000;
                        }
                        imageDrawable.setLevel(level);
                    }
                }
            };
            final CountDownTimer timer = new CountDownTimer(Integer.MAX_VALUE, 10) {
                @Override
                public void onTick(long millisUntilFinished) {

                    if (imageDrawable.getLevel() >= 10000) {
                        this.onFinish();
                    } else {
                        mHandler.sendEmptyMessage(99);
                    }

                }

                @Override
                public void onFinish() {
                    isExpand = false;
                }
            };
            timer.start();
        }
    }

}
java file writing is redundant, don't spray me!!
With a little explanation, there are three attributes in the clip tag: drawable, gravity and clipOrientation.
Draable certainly represents the drawable resources to be loaded, gravity represents the location that drawable first displays when it is not fully displayed, and clipOrientation represents the direction of continuous cropping display. Specific use can be provided according to the code I try, so that the feeling is deeper!!
When using ImageView, if you handle image switching as I do, make sure to set the scaleType attribute, otherwise the background will always be a little larger than the picture displayed (it is estimated that the desktop is not set to fill mode), so switching back is very awkward.
The image switch in this article is to choose to spread from the center to the surroundings. In fact, you can choose other ways, such as from left to right, from top to bottom, and so on. By the way, you can also choose from the surroundings to the center. This is just the opposite of what we are doing now. Set the picture to be displayed as the background, then reduce the level of the image in the image view until 0, and then set the drawable in the background to the image to be displayed in the image view.
Of course, it can also be operated through the prospects, not to mention in detail, want to play with a small partner can try it in the code!!!
Well, there's so much to say about ClipDrawable. If you want to see more about the basic usage of drawable, you can pay attention to my blog. I'll keep updating it!!!
Next, I will introduce Level List Drawable and Picture Drawable, hoping to help you a little!!!
Below is my personal public number. If you can, please help me pay attention to it. This will be my greatest encouragement. Thank you!!! 