Basic configuration of React project and solution of common pit
1, Create React project
# Global scaffold installation
npm install create-react-app -g --save

# Create React project
create-react-app my-app
2, Implement the loading of Less file
1. Expose profile
# Expose the project's profile
npm run eject
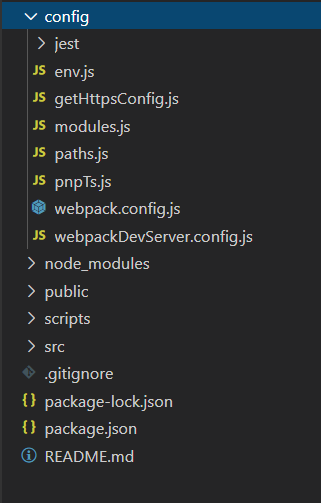
- Directory structure after profile exposure
2. Install plug-ins
# Install the less and less loader plug-ins
npm install less less-loader --save
4. Modify profile
- Modify the file of config/webpack.config.js
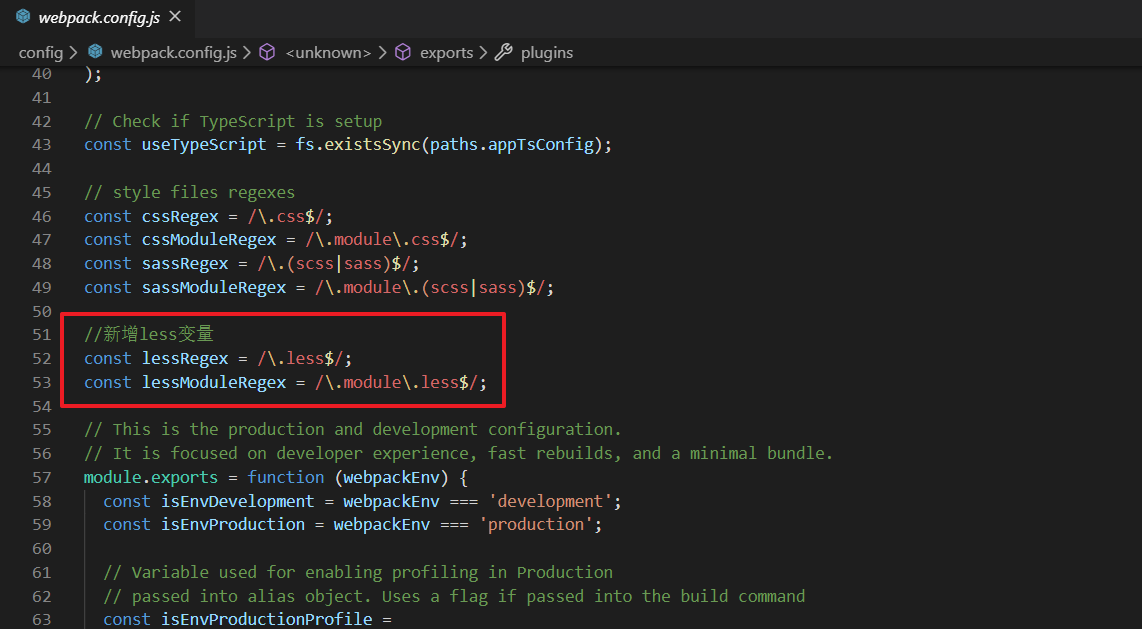
// style files regexes
const cssRegex = /\.css$/;
const cssModuleRegex = /\.module\.css$/;
const sassRegex = /\.(scss|sass)$/;
const sassModuleRegex = /\.module\.(scss|sass)$/;

// New less variable
const lessRegex = /\.less$/;
const lessModuleRegex = /\.module\.less$/;
As shown in the picture:
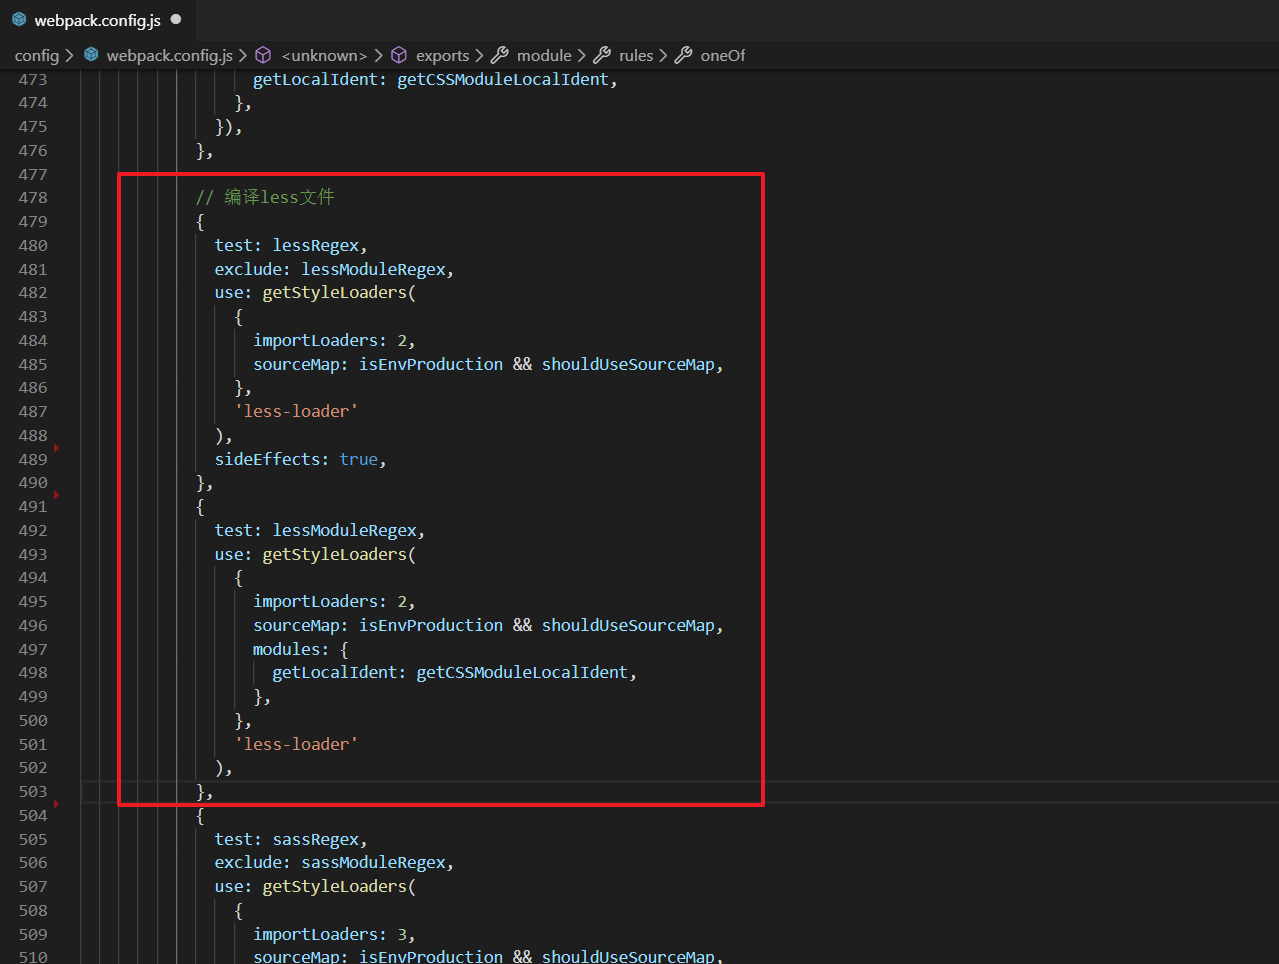
Add the following code between cssModuleRegex and sassModuleRegex:
// Compiling less files
{
   test: lessRegex,
   exclude: lessModuleRegex,
   use: getStyleLoaders(
     {
        importLoaders: 2,
        sourceMap: isEnvProduction && shouldUseSourceMap,
     },
     'less-loader'
  ),
  sideEffects: true,
},
{
   test: lessModuleRegex,
   use: getStyleLoaders(
     {
       importLoaders: 2,
       sourceMap: isEnvProduction && shouldUseSourceMap,
       modules: {
          getLocalIdent: getCSSModuleLocalIdent,
       },
     },
    'less-loader'
   ),
},
As shown in the picture:
- OK to load less file normally
3, Implement on-demand loading of AntdUI components
1. Install plug-ins
# Install plug-ins loaded on demand
npm install -g babel-plugin-import --save
2. Modify profile
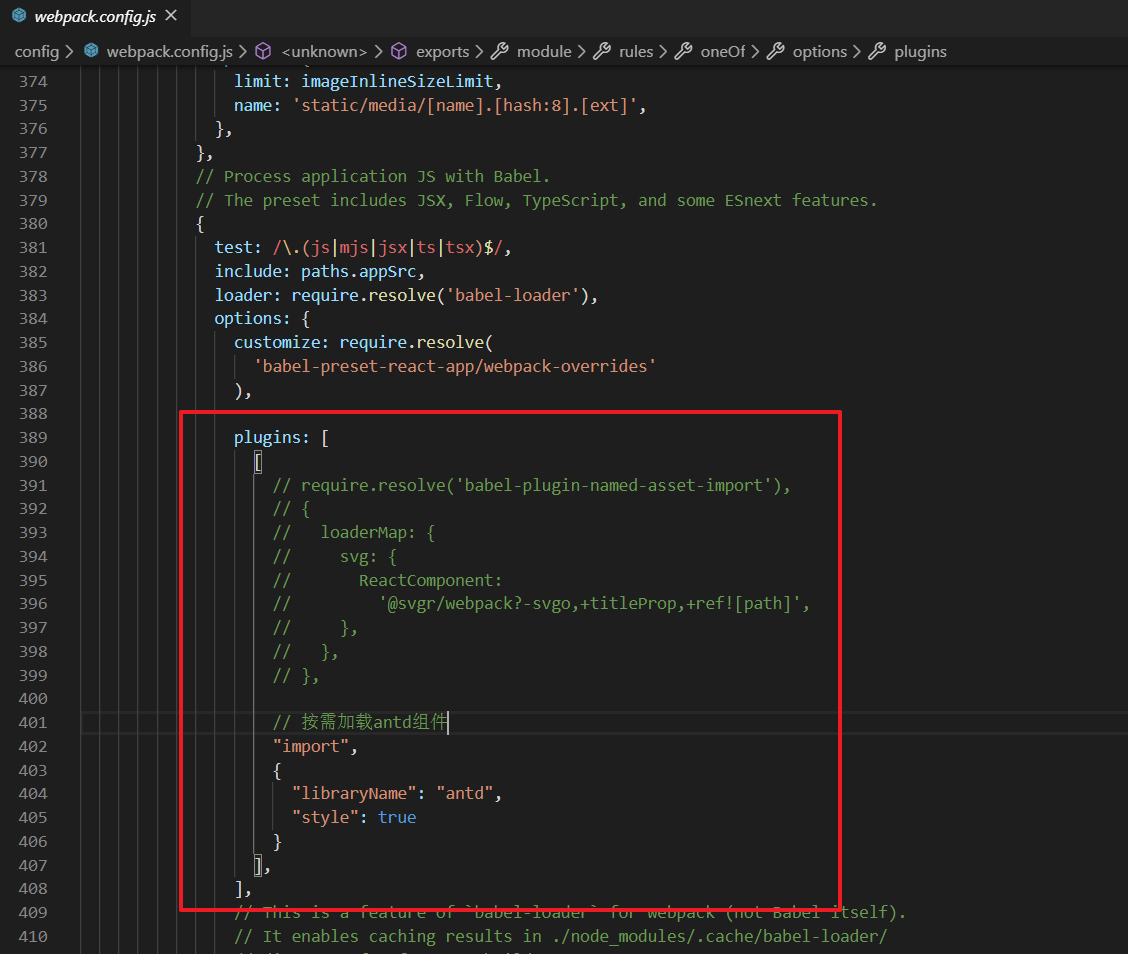
- Modify the file of config/webpack.config.js
plugins: [
   [
	// Load the antd component on demand
    "import",
     {
        "libraryName": "antd",
        "style": true
   	 }
   ]
],
As shown in the picture:
- OK has implemented loading the antd component on demand
4, Configure the AntdUI theme
1. Modify profile
- Modify the file of config/webpack.config.js and add the following
if (preProcessor) {
      let loader = {
        loader: require.resolve(preProcessor),
        options: {
          sourceMap: shouldUseSourceMap
        }
      };
      // Custom antd theme
      if (preProcessor === 'less-loader') {
        loader.options.modifyVars = {
          "@primary-color": "#40A9FF"
        };
        loader.options.javascriptEnabled = true;
      }
   loaders.push(loader);
}
As shown in the picture:
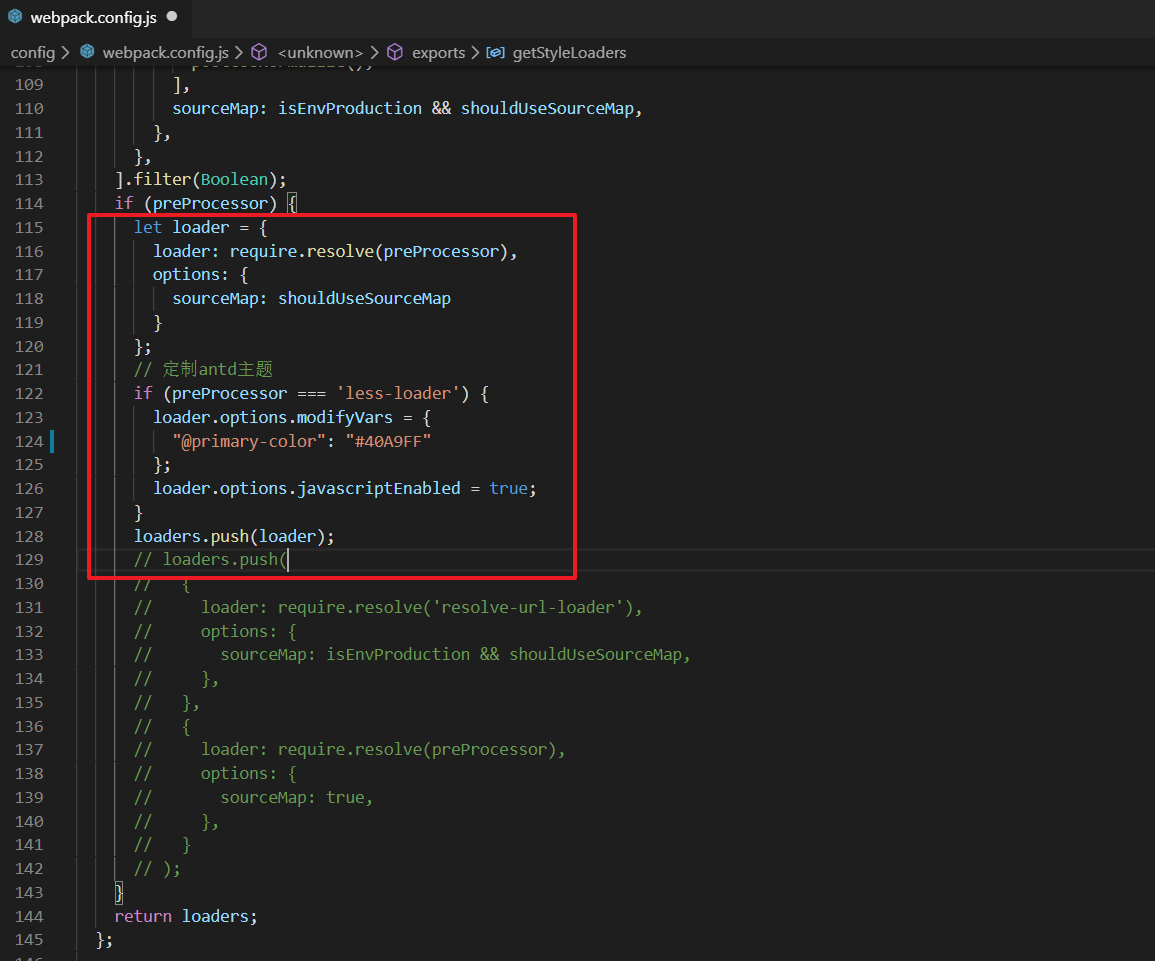
- The theme will take effect after the OK restart
5, Local request cross domain - set up proxy
1. Download plug-ins
# Install HTTP proxy middleware package
npm install http-proxy-middleware --save
2. New setupProxy.js file
- Create a file named setupProxy.js in the src root of the project
The configuration is as follows:
let proxy = require('http-proxy-middleware');

// Local agent
module.exports = function(app) {
  app.use(
      '/mock',
      proxy.createProxyMiddleware(
        {
          target: 'http://yapi.demo.qunar.com/mock/80992/react-antd',
          changeOrigin: true,
          pathRewrite: {
            '^/mock': '/'
          }
      })
  );
  app.use(
      '/api',
      proxy.createProxyMiddleware(
        {
          target: 'https://quicklyweb.cn',
          changeOrigin: true,
          pathRewrite: {
            '^/api': '/'
          }
      })
  );
};
- Note: the file name must be setupProxy.js because only in this way can the project be loaded automatically when it is started!
- At this point, when you access / mock / * * or / api / *, you can implement the proxy function (only local proxy, online environment proxy is invalid)
6, Back end solves cross domain problem of request
When the local agent is implemented, the cross domain problem of the front-end request back-end interface can be solved when the local agent is developing, but when it is deployed to the server, the local agent will not take effect, so the cross domain problem needs to be solved by the back-end!
Common ways for back end to solve cross domain problems
1. Java filter for filtering
- Allow cross domain access of the whole project, and set the filter
@WebFilter("/*")
public class SimpleCORSFilter implements Filter{

    @Override
    public void doFilter(ServletRequest req, ServletResponse res,
            FilterChain chain) throws IOException, ServletException {
            HttpServletResponse response = (HttpServletResponse) res;
            response.setHeader("Access-Control-Allow-Origin", "*");
            response.setHeader("Access-Control-Allow-Methods", "POST, GET, OPTIONS, DELETE");
            response.setHeader("Access-Control-Max-Age", "3600");
            response.setHeader("Access-Control-Allow-Headers", "x-requested-with");
            chain.doFilter(req, res);

    }
}
- Allows a single method to span domains, which can be set as follows
response.setHeader("Access-Control-Allow-Origin", "*");
response.setHeader("Access-Control-Allow-Methods", "POST, GET, OPTIONS, DELETE");
response.setHeader("Access-Control-Max-Age", "3600");
response.setHeader("Access-Control-Allow-Headers", "x-requested-with");
2. Java backend configuration homologous Cors (recommended)
- Cross domain requests on SpringBoot2.0 can be configured with the following code to perfectly solve your front and back cross domain requests
import org.springframework.context.annotation.Bean;
import org.springframework.context.annotation.Configuration;
import org.springframework.web.cors.CorsConfiguration;
import org.springframework.web.cors.UrlBasedCorsConfigurationSource;
import org.springframework.web.filter.CorsFilter;
/**
 * Implement basic cross domain requests
 * @author Lu Sheng Liu
 */
@Configuration
public class CorsConfig {
    @Bean
    public CorsFilter corsFilter() {
        final UrlBasedCorsConfigurationSource urlBasedCorsConfigurationSource = new UrlBasedCorsConfigurationSource();
        final CorsConfiguration corsConfiguration = new CorsConfiguration();
        /*Allow requests with validation information*/
        corsConfiguration.setAllowCredentials(true);
        /*Allowed client domain name*/
        corsConfiguration.addAllowedOrigin("*");
        /*Client request headers that allow server access*/
        corsConfiguration.addAllowedHeader("*");
        /*Allowed access method name, GET POST, etc*/
        corsConfiguration.addAllowedMethod("*");
        urlBasedCorsConfigurationSource.registerCorsConfiguration("/**", corsConfiguration);
        return new CorsFilter(urlBasedCorsConfigurationSource);
    }
}
3. Using the spring cloud gateway
Zuul, also known as routing center, is used to access all api interfaces and maintain services.
Spring Cloud Zuul integrates with Spring Cloud Eureka to realize the automatic maintenance of service instances. Therefore, when using the service routing configuration, we do not need to specify the specific service instance address in the way of traditional routing configuration. We only need to use Ant mode configuration file parameters
4. Using nginx for forwarding
- Suppose that there are two websites that want to access each other's interfaces in http://a.com:81/A. If you want to visit http://b.com:81/B, then configure it as follows! Then you can visit www.my.com/B by visiting www.my.com/A
server {
        listen       80;
        server_name  www.my.com;
        location /A {
            proxy_pass  http://a.com:81/A;
            index  index.html index.htm;
        }
        location /B {
            proxy_pass  http://b.com:81/B;
            index  index.html index.htm;
        }
    }
All of the above methods can solve cross domain problems, but the homologous Cors method is recommended
7, After the React project is deployed, a 404 error is reported on the refresh page
When developing the React project locally, it is OK to load the route (BrowserRouter) and refresh the page locally. However, after packing the React project, it will be thrown to the Tomcat server. Although it can be accessed normally and can jump the route within the page normally, when clicking and brushing the new page, there will be 404 page not found!
1. 404 reasons
The reason why you can jump from the home page to other routing addresses in the browser is that this is self rendered by the front end. We defined the corresponding routes in react router. Instead of refreshing the page access background, the script changed the location dynamically in JS.
When we refresh, the browser first accesses the background address, then loads the React code in the returned page, and finally executes it in the browser; that is to say, if we refresh the times 404, it is because we do not provide the returned HTML content for this route in the background, let alone execute the React router.
2. Solutions (two)
- Use HashRouter as the route of React, so no matter how you refresh the page, all requests will be located to the index.html page, and will not visit the background, so there will be no 404 error!
- In the tomcat server's config/web.xml file, add the following configuration, make it 404, then jump to the index.html page, and the rest will be jump path by react router.
<web-app>
    <error-page>
        <error-code>404</error-code>
        <location>/index.html</location>
    </error-page>
</web-app>