Common Web Cluster Schedulers
At present, the common Web cluster scheduler is divided into software and hardware. Software usually uses open source LVS, Haproxy, Nginx. Hardware usually uses F5 more. Many people also use some domestic products, such as pike, green league, and so on.
Haproxy application analysis
LVS has a strong anti-load capability in enterprise applications, but it has some shortcomings
LVS does not support regular processing and cannot achieve static-dynamic separation
 For large websites, LVS implementation configuration is complex and maintenance costs are relatively high
Haproxy is a software that provides high availability, load balancing, and proxy based on TCP and HTTP applications
Especially for Web sites with very heavy loads
 Running on current hardware can support tens of thousands of concurrent connection connection requests
Principle of Haproxy Scheduling Algorithm
Haproxy supports a variety of scheduling algorithms, the three most commonly used are:
●RR (Round Robin)
RR algorithm is one of the simplest and most commonly used algorithms, namely polling scheduling

Understanding Examples
   There are three nodes A, B, C, the first user access will be assigned to node A, the second will use
 User access is assigned to node B, and third user access is assigned to the node
   The fourth user access continues to be assigned to Node A, polling allocated access requests for load balancing
●LC (Least Connections)
LC algorithm is the minimum number of connections algorithm, which dynamically assigns front-end requests based on the number of connections to the nodes in the back-end

Understanding Examples
   There are three nodes A, B, C, and the number of connections for each node is A:4, B:5, C:6, if there is a
 A user connection request is assigned to A and the number of connections changes to A:5, B:5, C:6
   The second user request will continue to be assigned to A, with the number of connections changing to A:6, B:5, C:6; new requests will be assigned to B, with each new request assigned to the client with the smallest number of connections
   Since the number of connections A, B, C is released dynamically in the real world, it is difficult to see the situation of -like number of connections.
Therefore, this algorithm has a great improvement over rr algorithm and is currently used in more - kinds of algorithms
●SH (Source Hashing)
SH is a source-based access scheduling algorithm that is used for some Session s logged on the server side
 Scenarios for cluster scheduling based on source IP, cookies, etc.

Understanding Examples
  There are three nodes A, B, C. The first user's first access is assigned to A, and the second user's first access is assigned to A.
The second visit was assigned to B
  The first user will continue to be assigned to A on the second visit, and the second user will continue on the second visit
 It will be assigned to B and the first user access will be assigned to A as long as the load balancing scheduler does not restart.
Both second user visits are assigned to B for cluster scheduling
  The benefit of this scheduling algorithm is session maintenance, but some IP accesses can cause load imbalances when they are very large
 Large number of visits to some nodes affects business use
Haproxy Profile Details
Haproxy profiles are usually divided into three sections
Global: for global configuration
 defaults: Default Configuration
 listen: Configure for application components
Globals configuration parameters
# log 127.0.0.1 local0: Configure logging, configure logging, ocal0 is day
 Log device, stored in system log by default
 < log 127.0.0.1 local1 notice: notice s are usually 24 levels of log level
 maxconn4096: Maximum number of connections
 < uid 99: user uid
 gid 99: User gid
defaults Configuration Item Configuration Default Parameters, -will normally be inherited by the application component if it should
With no special declaration in the component, default configuration parameter settings will be installed
# log global: Define logs as log definitions in the global configuration
 mode http: mode is http
 option httplog: Logging in http log format
 retries 3: Check node servers failing three consecutive times and consider nodes unavailable
 maxconn 2000: Maximum number of connections
 contimeout 5000: Connection timeout
 clitimeout 50000: Client timeout
 # srtimeout 50000: Server timeout
listen configuration items are typically used to configure application module parameters
Listen appli4-backup 0.0.0:10004: Define one-appli4-backup
 application
 Option httpchk/index.html: Check the server's index.html file
 option persist: Force requests to be sent to down loaded servers
 ) Balance roundrobin: Load Balance Scheduling algorithm uses polling algorithm
 < server inst1 192.168.114.56:80 check inter 2000 fall3: Defined in
 Line Node
server inst2 192. 168.114.56:81 check inter 2000 fall 3 backup
 : Define backup nodes
Haproxy Log Management
Haproxy's log is output to syslog by default, in production
Environments are generally defined separately
Defined method steps
●modify Haproxy Options in the configuration file for log configuration, add configuration:
p log /dev/log local0 info
. log /dev/log local0 notice
●modify rsyslog To configure,take Haproxy Related configurations are defined independently to
haproxy.conf,And put it in etclrsyslog.d lower
●Save the configuration file and restart rsyslog Service, Complete rsyslog To configure
Visit the Haproxy cluster test page and test log information
Haproxy optimization parameters
As the load on the enterprise website increases, haproxy parameter optimization is important
maxconn: Maximum number of connections, adjusted to the actual application, recommended
10 240
 Daemon: Daemon mode, Haproxy can be started using non-daemon mode
 Active, recommended daemon mode to start
 # nbproc: Number of load balanced concurrent processes, recommended to be in phase with current server CPU cores
 Equal to or twice as large
 Ortries: Number of retries, mainly for checking cluster nodes if there are many and
 High volume, set to 2 or 3 times
 option http-server-close: Actively turn off the HTTP request option, recommended in the production ring
 Use this option in
 timeout http-keep-alive: long connection timeout, set long connection timeout
 Can be set to 10s
 timeout http-request: http request timeout, recommended to set to 5
 ~ 10s, increase http connection release speed
 timeout client: client timeout, slow node response if too much access
 You can set this time a little shorter, it is recommended to set it to about 1 minute
Case Demonstration
Experimentation Requirements
1. One Haproxy dispatch server, two Nginx servers, and one windows7 as the client;
2.The three servers are 64-bit systems of CentOS 7.3;
3. All host network cards are set to host-only mode, binding static addresses;
4. Clients can access two node servers by accessing the dispatch server without having to access the real server address.

| Host Role | IP Address |
|---|---|
| Haproxy Server | 192.168.100.210 |
| Nginx Server 1 | 192.168.100.201 |
| Nginx Server 2 | 192.168.100.202 |
| windows7 client | 192.168.100.50 |
Step 1: Set up a Haproxy dispatch server
1. Install compilation tools using yum
[root@haproxy ~]# yum install bzip2-devel pcre-devel gcc gcc-c++ make -y
2. Modify network card to host-only mode and bind static address
[root@haproxy ~]# vim /etc/sysconfig/network-scripts/ifcfg-ens33
#Replace dhcp with static
BOOTPROTO=static

#Append IP AddressSubnet MaskGateway to Last Line
IPADDR=192.168.100.210
NETMASK=255.255.255.0
GATEWAY=192.168.100.1

[root@haproxy ~]# service network restart
Restarting network (via systemctl):                        [  Determine  ]
3. Share and mount haproxy source packages remotely to the local server
[root@haproxy ~]# smbclient -L /192.168.100.1
    Sharename       Type      Comment
    ---------       ----      -------
    haproxy         Disk
    LNMP            Disk
4. Unzip the haproxy source package and compile it
[root@haproxy ~]# cd /mnt

#Unzip the haproxy source package to the.opt directory
[root@haproxy mnt]# tar zxvf haproxy-1.5.19.tar.gz -C /opt
[root@haproxy mnt]# cd /opt
[root@haproxy opt]# ls
haproxy-1.5.19  rh

#Switch to haproxy directory
[root@haproxy opt]# cd haproxy-1.5.19/

#View System Version Number 3100
[root@haproxy haproxy-1.5.19]# uname -a
Linux haproxy 3.10.0-693.el7.x86_64 #1 SMP Tue Aug 22 21:09:27 UTC 2017 x86_64 x86_64 x86_64 GNU/Linux

#Compile haproxy
[root@haproxy haproxy-1.5.19]# make TARGET=linux3100

#Compile Installation
[root@haproxy haproxy-1.5.19]# make install
5. Modify the haproxy.cfg configuration file and start the service
#Create haproxy file directory
[root@haproxy haproxy-1.5.19]# mkdir /etc/haproxy

#Copy template file to haproxy directory
[root@haproxy haproxy-1.5.19]# cp examples/haproxy.cfg /etc/haproxy/

#Modify haproxy.cfg file
[root@haproxy haproxy-1.5.19]# vim /etc/haproxy/haproxy.cfg
#Annotate chroot and redispatch entries to prevent startup failures
global
        log 127.0.0.1   local0
        log 127.0.0.1   local1 notice
        #log loghost    local0 info
        maxconn 4096
        #chroot /usr/share/haproxy
        uid 99
        gid 99
        daemon
        #debug
        #quiet

defaults
        log     global
        mode    http
        option  httplog
        option  dontlognull
        retries 3
        #redispatch
        maxconn 2000
        contimeout      5000
        clitimeout      50000
        srvtimeout      50000

#Delete all listen entries and add one
listen webcluster 0.0.0.0:80
       option httpchk GET /test.html
       balance roundrobin
       server inst1 192.168.100.201:80 check inter 2000 fall 3
       server inst2 192.168.100.202:80 check inter 2000 fall 3

#Copy haproxy startup script into system startup process
[root@haproxy haproxy-1.5.19]# cp examples/haproxy.init /etc/init.d/haproxy

#Grant script execution privileges
[root@haproxy haproxy-1.5.19]# chmod +x /etc/init.d/haproxy

#Add script to service management entry
[root@haproxy haproxy-1.5.19]# chkconfig --add haproxy

#Create script command soft links
[root@haproxy haproxy-1.5.19]# ln -s /usr/local/sbin/haproxy /usr/sbin/haproxy

#Start Services
[root@haproxy haproxy-1.5.19]# service haproxy start
Starting haproxy (via systemctl):                          [  Determine  ]

#Turn off firewalls and security features
[root@Haproxy haproxy-1.5.19]# systemctl stop firewalld.service
[root@Haproxy haproxy-1.5.19]# setenforce 0
Step 2: Set up a Nginx server
1. Both Nginx servers need to install compilation tools using yum
[root@haproxy ~]# yum install zlib-devel pcre-devel gcc gcc-c++ make -y
2. Modify network card to host-only mode and bind static address
[root@nginx1 ~]# vim /etc/sysconfig/network-scripts/ifcfg-ens33
#Replace dhcp with static
BOOTPROTO=static

#Append IP AddressSubnet MaskGateway to Last Line
IPADDR=192.168.100.201
NETMASK=255.255.255.0
GATEWAY=192.168.100.1

[root@nginx1 ~]# service network restart
Restarting network (via systemctl):                        [  Determine  ]

[root@nginx2 ~]# vim /etc/sysconfig/network-scripts/ifcfg-ens33
#Replace dhcp with static
BOOTPROTO=static

#Append IP AddressSubnet MaskGateway to Last Line
IPADDR=192.168.100.202
NETMASK=255.255.255.0
GATEWAY=192.168.100.1

[root@nginx2 ~]# service network restart
Restarting network (via systemctl):                        [  Determine  ]
3. Remote sharing mounts Nginx source packages to local servers
[root@nginx1 ~]# mount.cifs //192.168.100.1/LNMP /mnt
Password for root@//192.168.100.1/LNMP:
4. Unzip the source package and create an administrative user
[root@nginx1 ~]# cd /mnt

#Unzip the Nginx source package into the / opt directory
root@nginx1 mnt]# tar zxvf nginx-1.12.0.tar.gz -C /opt

#Create a Nginx administrative user
root@nginx1 mnt]# cd /opt
[root@nginx1 opt]# useradd -M -s /sbin/nologin nginx
5. Configure Nginx
[root@nginx1 opt]# cd nginx-1.12.0/
[root@nginx1 nginx-1.12.0]# ./configure --prefix=/usr/local/nginx --user=nginx --group=nginx
6. Compile and Install
[root@nginx1 nginx-1.12.0]# make && make install
7. Create Test Page
[root@nginx1 nginx-1.12.0]# cd /usr/local/nginx/html/
[root@nginx1 html]# echo "this is kgc web" >test.html

[root@nginx2 nginx-1.12.0]# cd /usr/local/nginx/html/
[root@nginx2 html]# echo "this is accp web" >test.html
8. Create a Nginx command soft link to the system
[root@nginx1 html]# ln -s /usr/local/nginx/sbin/nginx /usr/local/sbin/
9. Turn off firewalls and security features and start services
[root@nginx1 html]# systemctl stop firewalld.service
[root@nginx1 html]# setenforce 0
[root@nginx1 html]# nginx
10. Use the client to access the web page and enter 192.168.100.210/test/html in the browser to access it
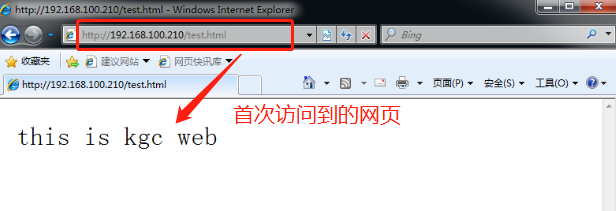

This demonstrates that using Haproxy to build a Web cluster uses polling mechanism
Configure haproxy log
#Restart haproxy service
[root@haproxy etc]# service haproxy restart
Restarting haproxy (via systemctl):                        [  Determine  ]

#Establish
[root@haproxy haproxy-1.5.19]# touch /etc/rsyslog.d/haproxy.conf
[root@haproxy haproxy-1.5.19]# vim /etc/rsyslog.d/haproxy.conf

#Define haproxy information log
if ($programname == 'haproxy' and $syslogseverity-text == 'info')
then -/var/log/haproxy/haproxy-info.log
&~

#Define haproxy notification log
if ($programname == 'haproxy' and $syslogseverity-text == 'notice')
then -/var/log/haproxy/haproxy-notice.log
&~

#Restart Log Service
[root@haproxy etc]# systemctl restart rsyslog.service

#Switch to Log Directory to view haproxy log files
[root@haproxy etc]# cd /var/log/haproxy/
[root@haproxy haproxy]# ls
haproxy-info.log

#view log file
[root@haproxy haproxy]# cat haproxy-info.log
Nov 30 16: 53: 30 Haproxy haproxy[119165]: 192.168.100.50: 49191 [ 30/Nov/2019:16: 53: 30.100
webcluster. webcluster/inst2 168/0/1/0/169 200 252 - - --- 1/1/0/1/0 0/0 "GET /test.h
tml HTTP/1.1"
Nov 30 16: 53:42 Haproxy haproxy[119165]: 192.168.100.50: 49191[ 30/Nov/2019: 16:53: 42.290 :
webcluster. webcluster/inst1 159/0/0/0/159 200 253 - - ---- 1/1/0/1/0 0/0 "GET /test.h
tml HTTP/1.1 "