Custom UIView Drawing 1px Border Stroke
I am also a beginner. I spent half a day researching how to make 1px rectangular boxes with rounded corners. I also checked for half a day. Finally, I came out and shared it with the beginners.
Recommended tutorials Stanford University and iOS 10 swift tutorials, can be downloaded directly in iTunes U, domestic downloads, the need for agents will be fast, otherwise very slow each video in about 1.2G 90 minutes.( https://itunes.apple.com/cn/course/developing-ios-10-apps-with-swift/id1198467120)
This is a special system.
1. Principle pt and px
The original size of the Apple phone is 375 x 667, which is also the screen size of the original cell phone. Later, all mobile phones are scaled to this original value.
For example, the iPhone 6/7 screen is 750 x 1334, which is exactly twice the length and width of the iPhone 6/7 and 6/7 Plus.
In the UI, we use pt (point is point) as a unit, to get the current mobile phone 1pt is how many px with the following method
- 1pt = 1px (before the 5S of the iPhone)
- 1pt = 2px ( iPhone 6/7 )
- 1pt = 3px ( iPhone 6/7 Plus )
let screenScale = UIScreen.main.scale
// As mentioned above, the value on the 6/7 of the iPhone is 2.0.
Knowing this, we can calculate the distance that 1px occupies on the screen, that is
let 1pxWidth = 1 / UIScreen.main.scale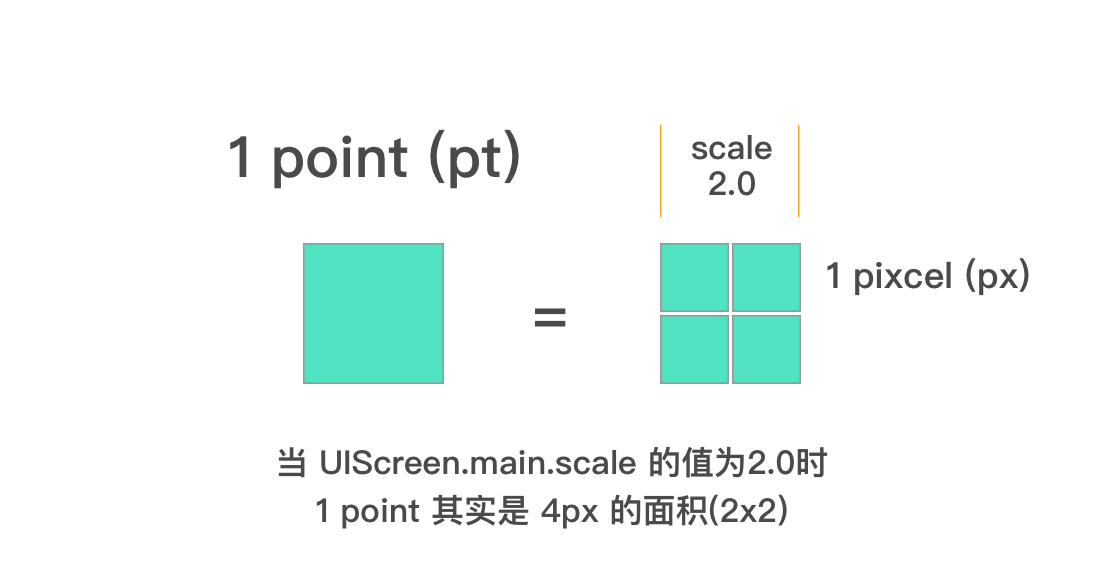
2. Customize UIView Rounded Rectangle + Stroke Edge
Below is the basic knowledge, do not know can be Baidu Search other tutorials, here is only about 1px, I only comment on some places.
Let's assume that you already know how to draw things by yourself.
// Because we want to make a `UIView'that can be used in `StoryBoard'.`
var radius: CGFloat = 10 // fillet
var lineWidth: CGFloat = 1 // Stroke Width
var lineColor: UIColor = UIColor.orange // stroke color
var fillColor: UIColor = UIColor.white // fill color
let contentRect = self.bounds //Draw the "panel" size of a rounded rectangle
let path = UIBezierPath(roundedRect: contentRect, cornerRadius: radius) //Create rounded rectangular paths
path.lineWidth = lineWidth //Setting the edge color
lineColor.setStroke() //Setting the edge color
fillColor.setFill() //Setting Fill Colors
path.fill() //Fill
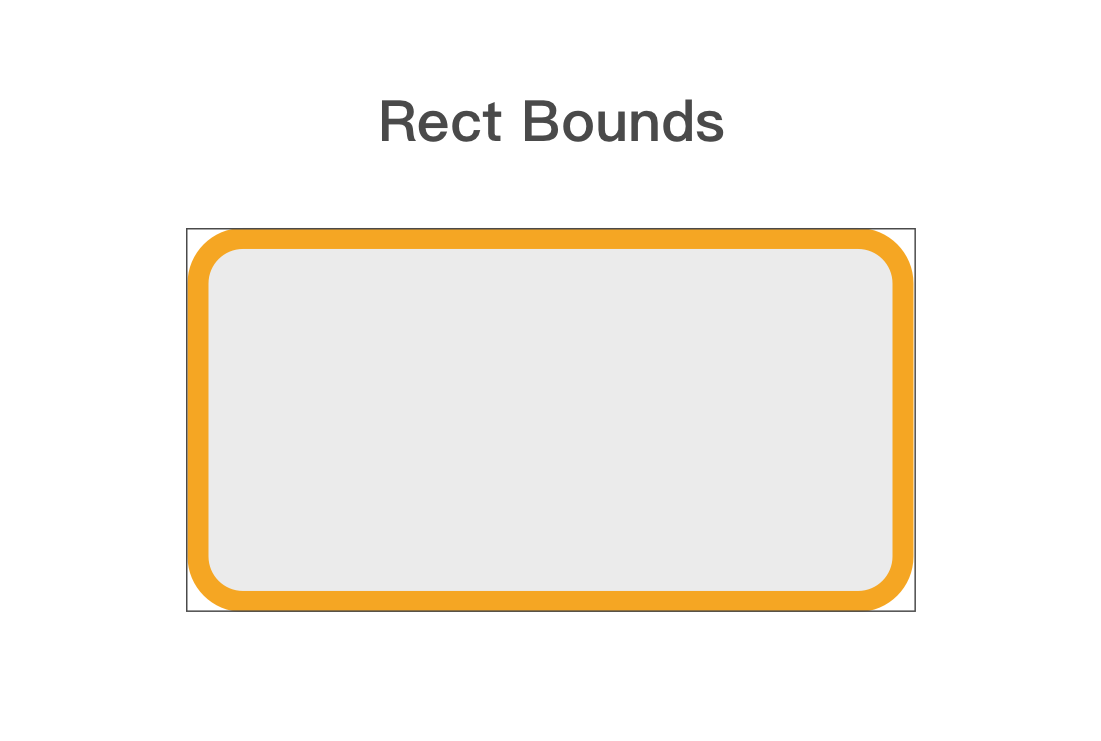
path.stroke() //StrokeThe result is this. Have you found any problems? Let's continue to look at the following.
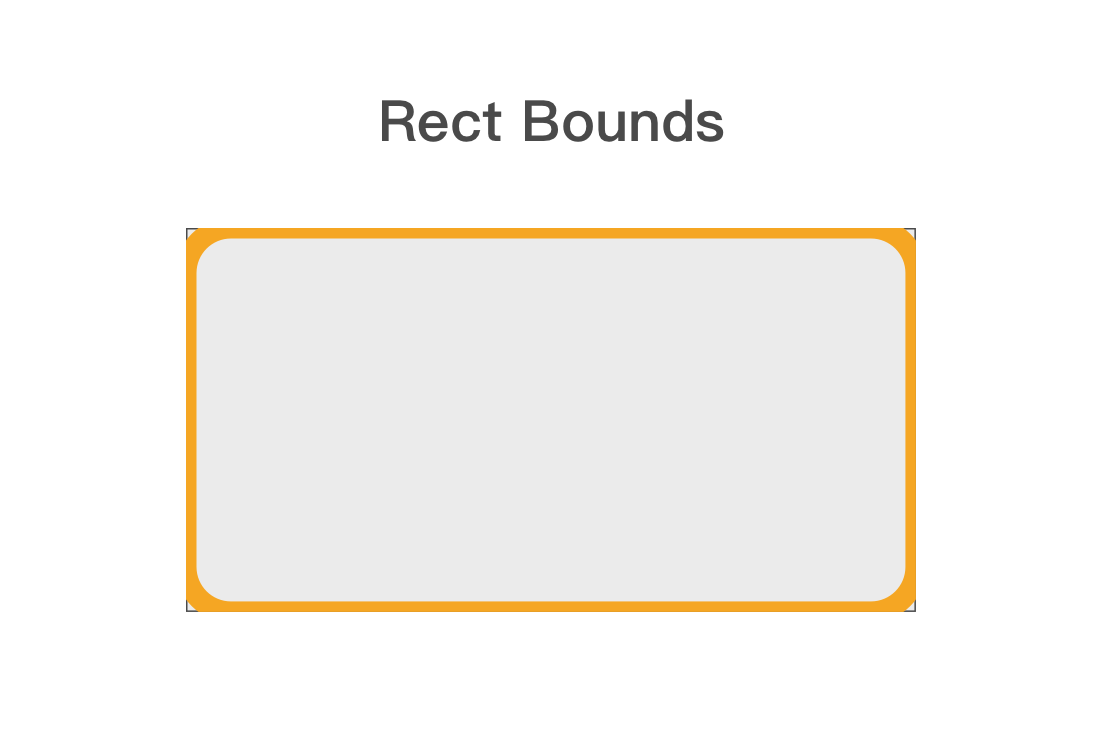
3. Solving the Problem of Edge Drawing
In fact, the code is all right, but when it is stroking, it will center on the path to both sides, as shown in the figure: the black line is Bounds, it will only show what is in the Bounds. So the edge was cut off from the outside problem.
So how to solve it?
Answer: When drawing, the drawing boundary of defining rounded rectangle is smaller than the current Bounds.
let contentRect = self.bounds
let path = UIBezierPath(roundedRect: contentRect, cornerRadius: radius)
// That is to say, the parameter roundedRect defined in this method is smaller.
// Fortunately, there is a way in CGRect to migrate insetBy(dx: CGFloat, dy: CGFloat)
// Left and right contraction dx size, up and down contraction dy size
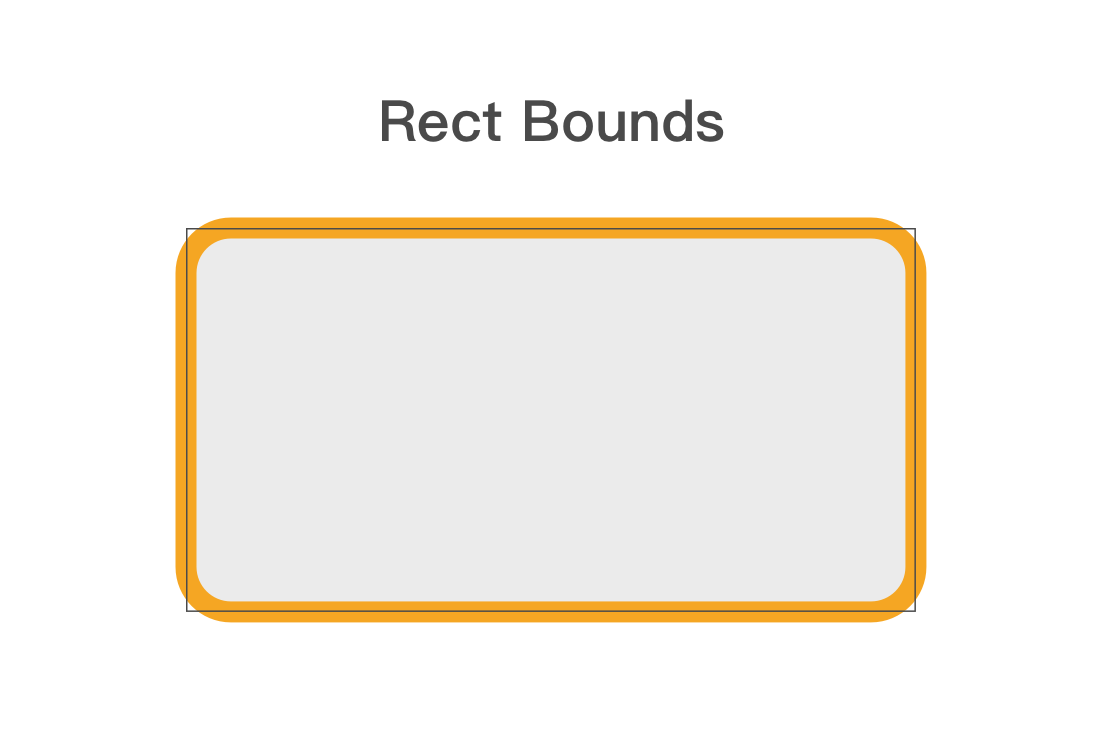
let contentRect = self.bounds.insetBy(dx: lineWidth/2, dy: lineWidth/2)
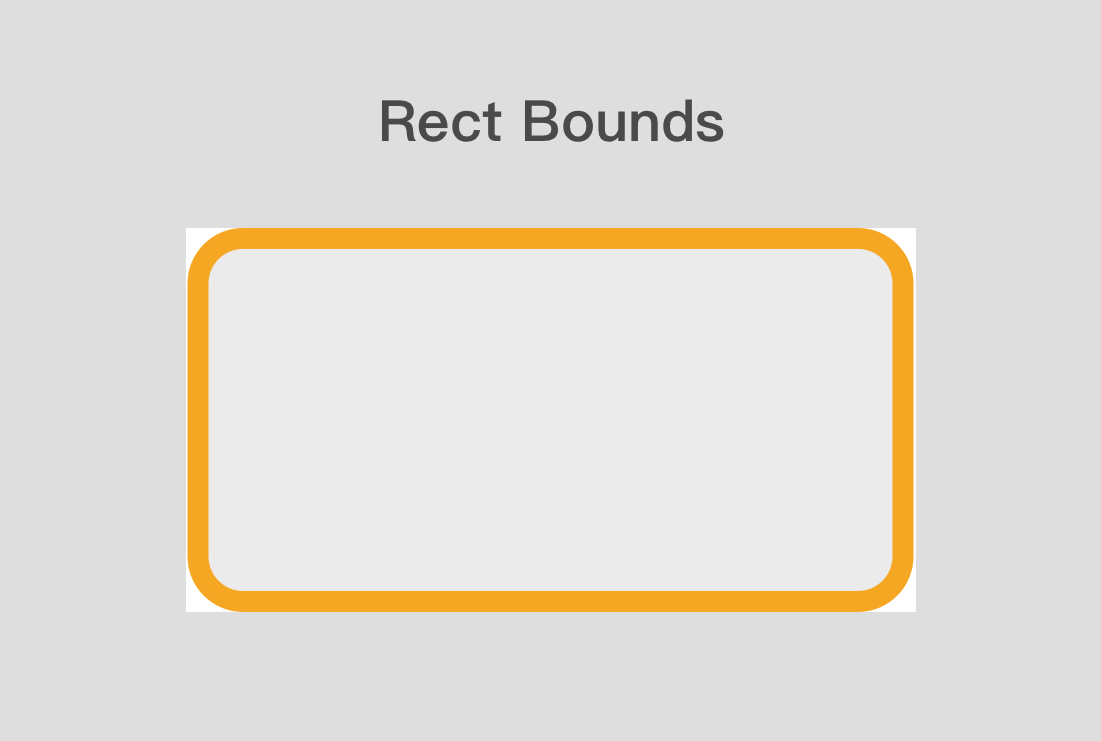
// As above, shrink half the size of the edge inward so that the edge is normal while occupying two Bounds.Now it's like this: (The black edge is just to mark the Bounds, that's not there, don't care)
4. Background issues
Is it okay to feel that? In fact, there are still some problems, which will be found in the use.
The problem is as follows:
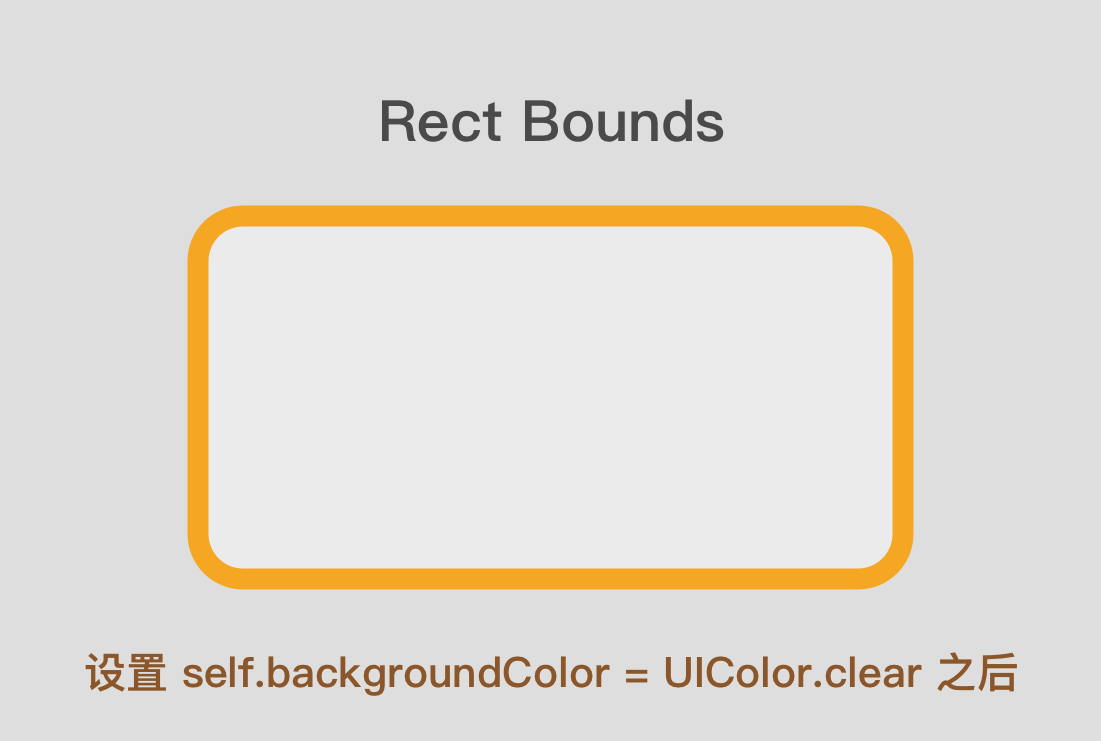
If you use this custom UIView in a non-pure white background, you will see the following
We set up our fill and edge colors, so why are the corners still white?
In fact, we also need to set up a place where the initial background color is transparent, and then draw something on it.
That's UIColor.clear // transparent color.
This needs to be written in the init() method
Let's start with a few points: Because we are a custom UIView, we need to rewrite init(frame: CGRect) and init(coder: NSCoder) methods, and our background settings are written in these two methods.
override init(frame: CGRect) {
    super.init(frame: frame)
    self.backgroundColor = UIColor.clear    // Setting Background Transparency
}

required init?(coder: NSCoder) {      // Note that this init method is required and is an Optional value
    super.init(coder: coder)
    self.backgroundColor = UIColor.clear    // Setting Background Transparency
}
Then we get the results we need.
Summary: Complete code
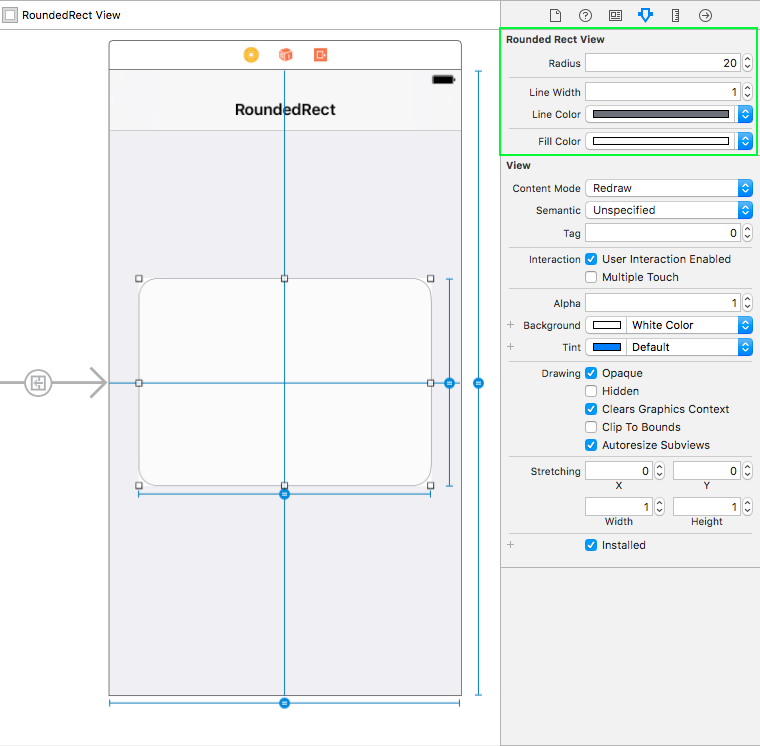
Having said so much, I hope you have your own ideas. Now you can nest this UIView in StoryBoard to get the results you want.
Let's also say that the code can now set parameters in StoryBoard. If you don't understand, Baidu@IBDesinable
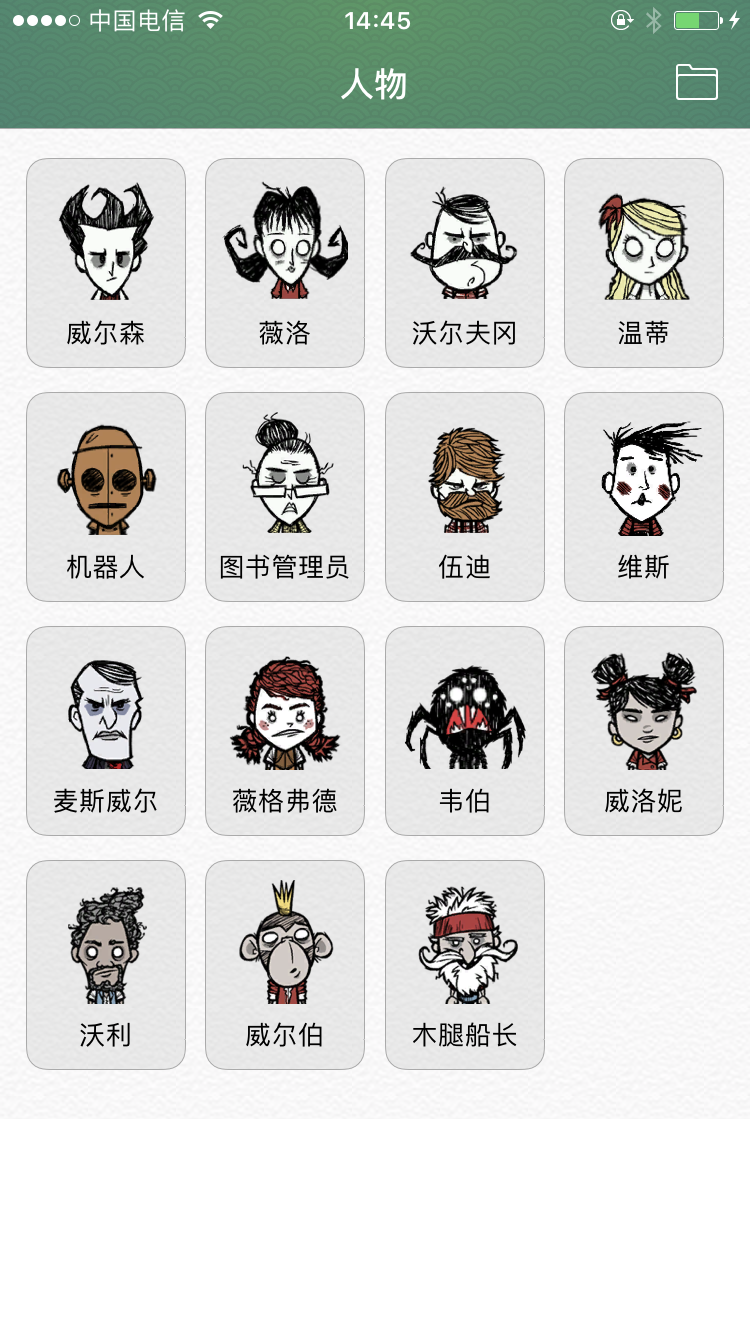
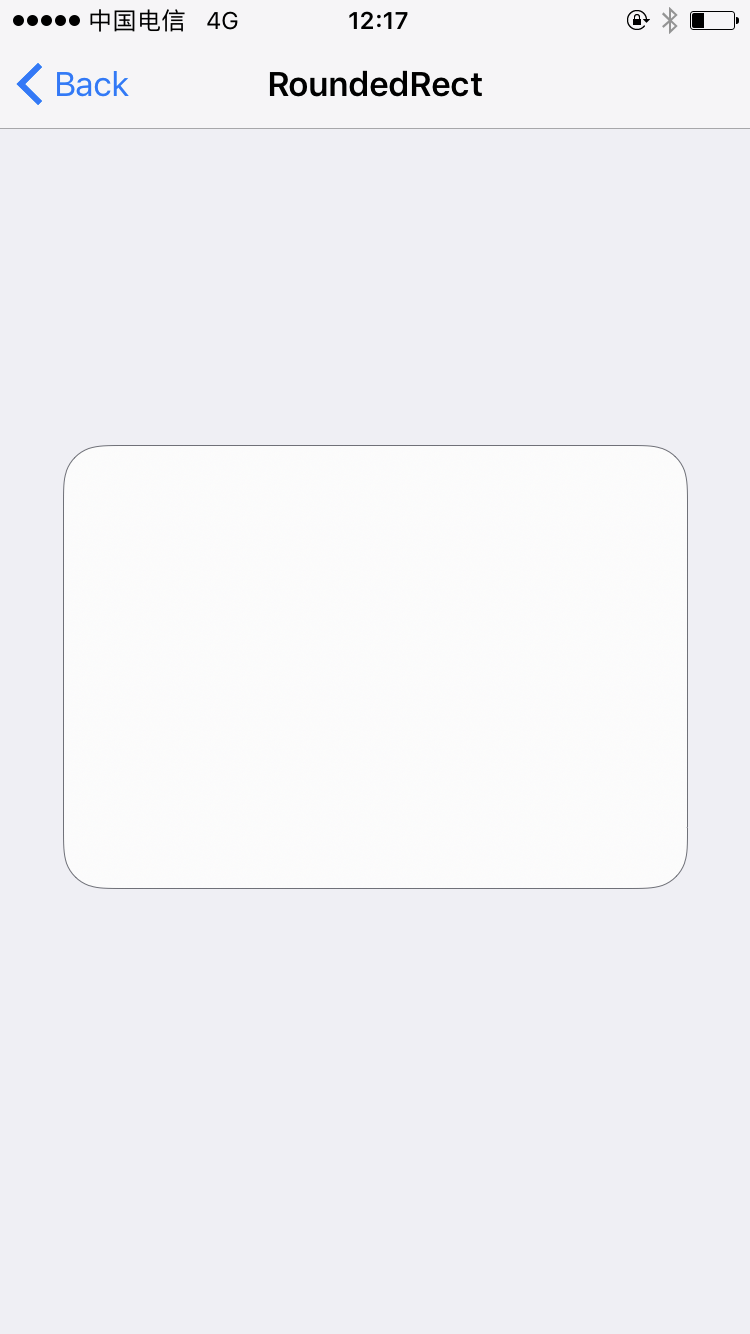
The effect is shown in the figure.
import UIKit

@IBDesignable // Let theUIView Can be displayed in StoryBoard in
class RoundedRectView: UIView {

    // MARK: - Setting parameters
    @IBInspectable // This keyword allows the parameter to be displayed StoryBoard On the right side of the settings panel
    var radius: CGFloat = 10 { didSet{ setNeedsDisplay() } }

    @IBInspectable
    var lineWidth: CGFloat = 1 / UIScreen.main.scale { //The initial value is also set to 1px
        didSet{
            lineWidth = lineWidth / UIScreen.main.scale
            setNeedsDisplay() // If we want to call Draw() Use this method when you use it!!! Can't call directly draw()Method!!!
        }
    }

    @IBInspectable
    var lineColor: UIColor = UIColor.lightGray { didSet{ setNeedsDisplay() } }

    @IBInspectable
    var fillColor: UIColor = UIColor.white { didSet{ setNeedsDisplay() } }


    //MARK: - Draw()

    override func draw(_ rect: CGRect) {
        let contentRect = self.bounds.insetBy(dx: lineWidth/2, dy: lineWidth/2)
        let path = UIBezierPath(roundedRect: contentRect, cornerRadius: radius)
        path.lineWidth = lineWidth
        lineColor.setStroke()
        fillColor.setFill()
        path.fill()
        path.stroke()
    }

    override init(frame: CGRect) {
        super.init(frame: frame)
        self.backgroundColor = UIColor.clear
    }

    required init?(coder: NSCoder) {
        super.init(coder: coder)
        self.backgroundColor = UIColor.clear
    }
}
Usage effect drawing: 1px edge drawing
Other uses