In this article, we will make the final layout and function implementation of the task group page. Here, most of the functions of hook have been realized, and we have a good understanding of addition, deletion, modification and query.
First look at knowledge points
- Add / delete task group function
- Route jump
1, Page layout
This part has been written several times. It's a quick decision
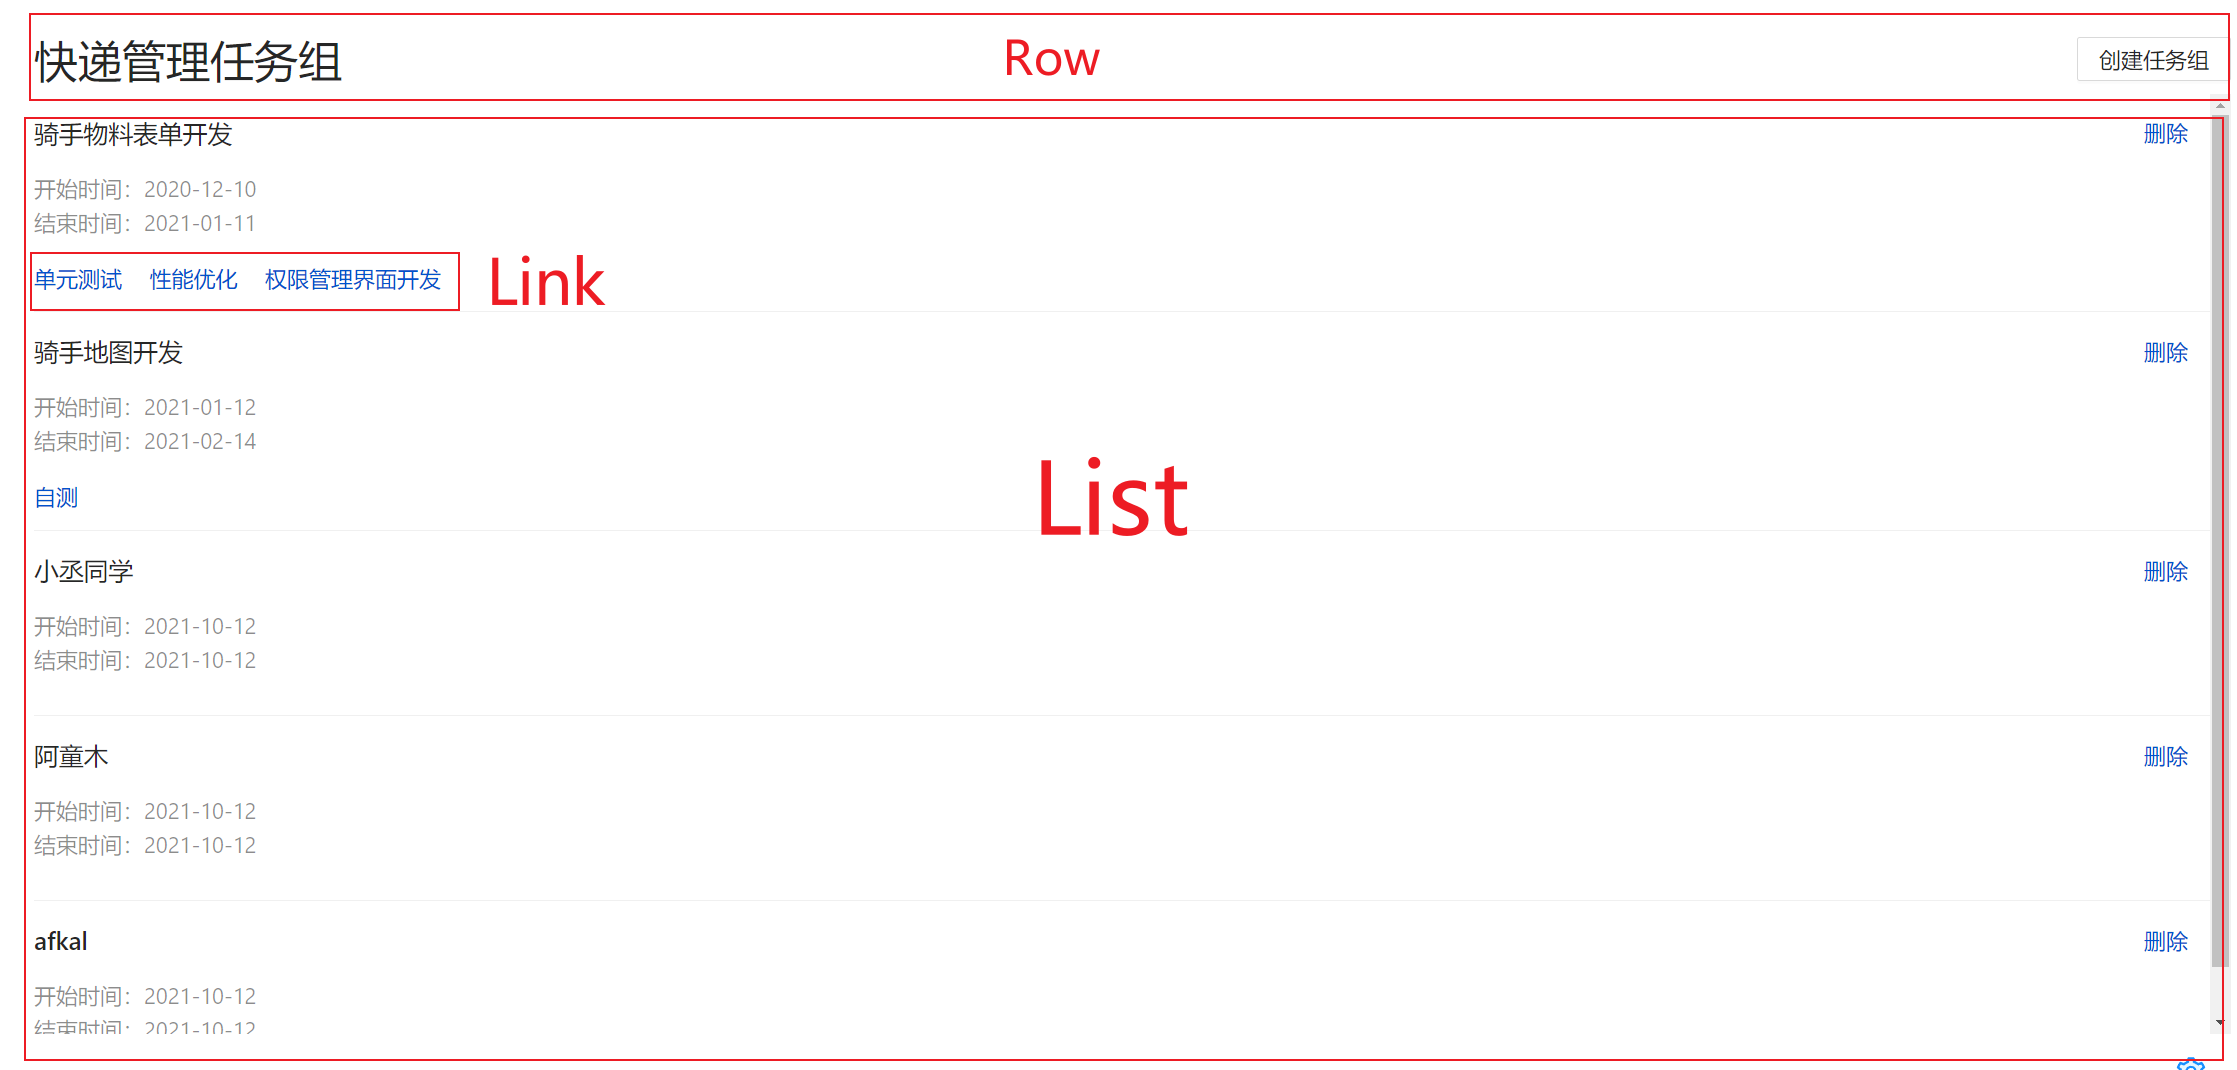
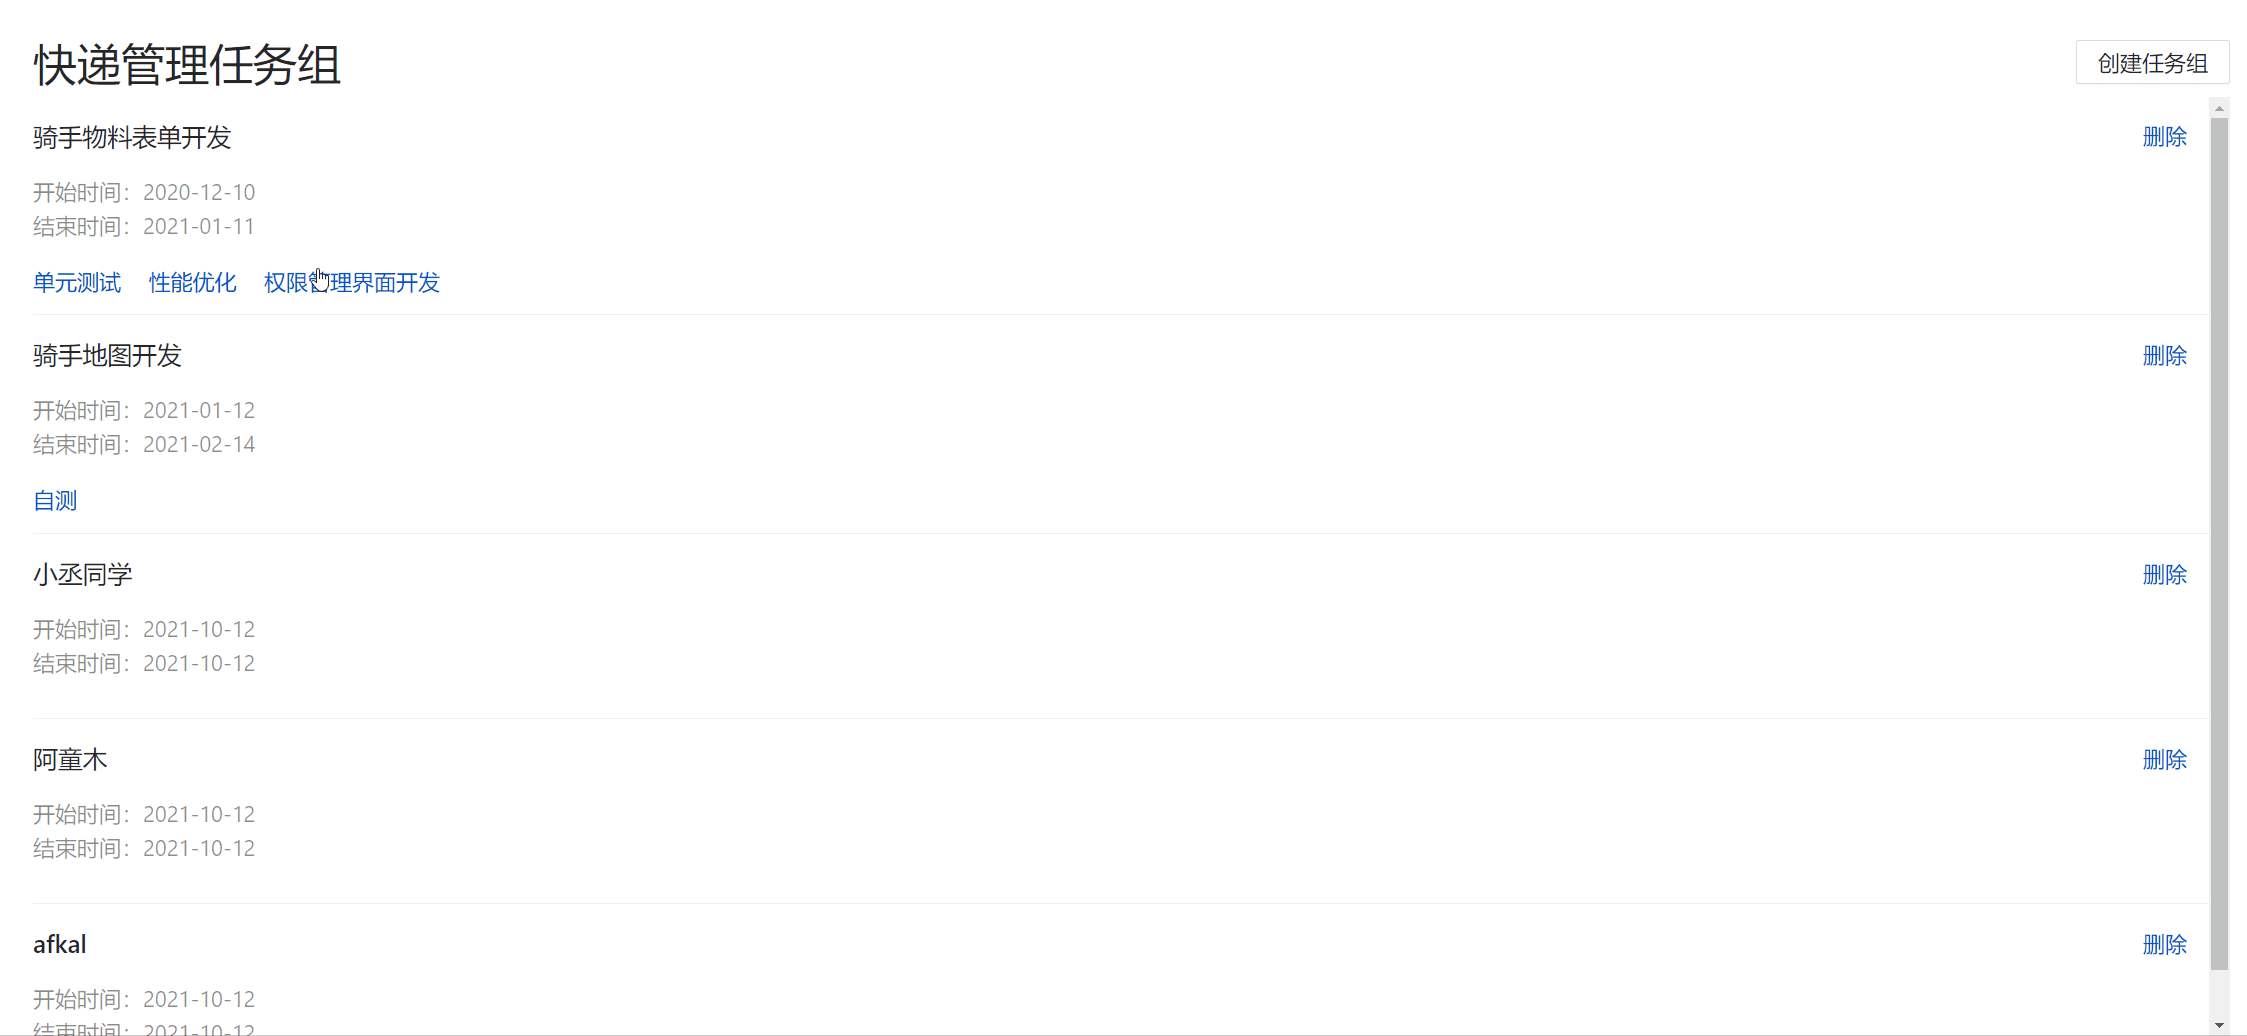
1. Brief introduction to layout
Here, we use the List component in antd. The left and right sides of the top are self encapsulated Row components, which are arranged on both sides. The Link component used in the Link jump part realizes rendering by traversing the data
2. Data acquisition
Here, we need to get our task data. Here, we need to write a custom hook to get data: useEpics, which is the same as other hooks to get data
We receive a param data object and send the request through useQuery
Again, its second parameter is an asynchronous event. The first parameter is a tuple. When the dependency param changes, it will resend the request to update the epics data content in the cache
export const useEpics = (param?: Partial<Epic>) => {
    const client = useHttp()
    return useQuery<Epic[]>(['epics', param], () => client('epics', { data: param }))
}
We use it in epic/index.ts to obtain task group data epics and tasks data for jump links
// Information about tasks
const { data: epics } = useEpics(useEpicSearchParams())
// Get task list in task group
const { data: tasks } = useTasks({ projectId: currentProject?.id })
In this way, we can obtain the data
Next, let's look at how to use these two data in the component
For epics, as the main content we need to render, we need to render it through List.Item
In the List component, we can pass in our data source dataSource and traverse the epics data through the renderItem attribute
<List dataSource={epics} renderItem={epic => <List.Item></List.Item> />In this way, our epic is that each task data can obtain the required data through object value
Here we mainly mention the rendering of time
The data format returned to us by the back end is timestamp. We need to convert it into this format for easy reading
Here, we use a dayjs library to determine the output time format of YYYY-MM-DD through the format method. We only need to pass in its time
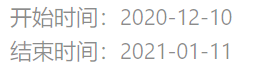
<div>Start time:{dayjs(epic.start).format("YYYY-MM-DD")}</div>
<div>End time:{dayjs(epic.end).format("YYYY-MM-DD")}</div>
2, Add / delete task group function
First, let's implement the function of deleting task groups
1. Delete task group
The implementation idea is as follows
- Click Delete to pop up a prompt box
- confirm deletion
- Call the interface to delete the cache
code implementation
When we click delete, we call the confirmDeleteEpic function to confirm the deletion
This function encapsulates a Modal.config component
// Prompt box when deleting
const confirmDeleteEpic = (epic: Epic) => {
    Modal.confirm({
        title: `Are you sure you want to delete the project group ${epic.name}Are you?`,
        content: 'Click OK to delete',
        okText: 'determine',
        onOk() {
            // Call delete on confirmation
            deleteEpic({ id: epic.id })
        }
    })
}
When we click confirm, we will formally call the deletion interface deleteEpic and pass in the task group id we deleted to delete it
Let's see how to implement this deleteEpic
First, we still need to encapsulate a useDeleteEpic hook to process the deletion request. Here, useMutation is used to process it, pass in the current id and configure the deleted config object
I have a further understanding of useMutation here. It can receive two parameters. The first parameter is the asynchronous request we pass in, and the second parameter is used to configure how config handles the data in the cache
// Delete Board
export const useDeleteEpic = (queryKey: QueryKey) => {
    const client = useHttp()
    return useMutation(
        // I have no problem here. There is a problem with the video
        // Direct (id:number)
        ({ id }: { id: number }) => client(`epics/${id}`, {
            method: "DELETE",
        }),
        useDeleteConfig(queryKey)
    )
}
In this way, our deletion function is realized
2. Add task group function
Realization idea
- Write a create epic page
- Write new task group information
- Submit creation request
code implementation
First, we need to create a create epic file in the epic folder directory to write the create task page
The advantage of this is that the complex parts can be separated, so that the amount of code in the main file is reduced and the readability is better
For the new task group page, we also use the Drawer component to implement it
It is worth noting that we must add forceRender={true} component, otherwise an error will be reported when the page is loaded for the first time
In the drawing component, we also use the Form component. When the Form is submitted, we automatically call the onFinish method to process the addition request
const onFinish = async (values: any) => {
    // It is not enough to pass only one value. You need to pass in the projectid
    await addEpic({ ...values, projectId })
    props.onClose()
}
Here we use a combination of async and await. We will close the window after the interface returns the result. However, because we use optimistic update, the window will be closed as long as it is written to the cache
At the same time, in order to make the Form empty automatically when the window is closed, we use useEffect to implement it, and write visible in the dependency to listen for changes
useEffect(() => {
    form.resetFields()
}, [form, props.visible])
In this way, our creation function is also realized. Finally, let's talk about the route jump in the task group item
3, Route jump
When we click the following task, we need to jump to the editing window of the corresponding task on the Kanban page. Let's take a look at the effect picture
In fact, as long as our routing address is configured, there will be no problem
Let's see how to configure the jump routing address
Specify to the corresponding editingTaskId page, and the window will pop up. This is the advantage of using url for state management
to={`/projects/${currentProject?.id}/kanban?editingTaskId=${task.id}`}So how do we bind the corresponding task to the corresponding task group?
Here, we use filter to implement. When the epicId under task is consistent with the id under epic, it indicates that it is under this task group, and we can traverse the rendering
{
    tasks?.filter(task => task.epicId === epic.id)
        .map(task => <Link
            style={{ marginRight: '20px' }}
            key={task.id}
            // Link to Kanban page
            to={`/projects/${currentProject?.id}/kanban?editingTaskId=${task.id}`}>
            {task.name}
        </Link>)
}
Note: when using map, you must pay attention to the uniqueness of key~
📌 summary
- Can skillfully realize the addition and deletion function
- Recognize the benefits of url state management
- Using the appropriate array method can help us realize the function very well